
How to Do Product Photography: The Bulk Production Guide

Ryan Bennett • October 6, 2026
Learn how to do product photography with a complete workflow from planning to AI batch processing. Use Bulk Image Generation to scale your product visuals.
A product page can have a polished layout, persuasive copy, and carefully tested pricing, yet still leave shoppers uncertain if the images fail to show the item clearly. That uncertainty usually appears during production: one clean studio image exists, but the catalog also needs detail views, scale references, lifestyle scenes, marketplace crops, social assets, and seasonal variations.
The practical answer to how to do product photography isn't chasing one perfect frame. It's building a reliable system that captures accurate source material, preserves consistency, and turns a small set of approved photographs into a useful library of ecommerce assets.
Understanding the Modern Product Photography Workflow
A small retailer often starts with a familiar routine. One product arrives, someone clears a table near a window, a few photos are taken, and an editor spends the afternoon removing backgrounds and correcting mismatched colors. The process works for a handful of products. It becomes a bottleneck as soon as the catalog grows or a campaign needs several visual formats at once.
The first shift is to stop treating every image as an isolated creative project. Product photography is a production pipeline with distinct stages:
- Define the visual specification. Decide which views every product needs, what background and framing will remain consistent, and which images can use a lifestyle treatment.
- Capture reliable source material. Photograph the actual item with controlled light, stable framing, and accurate color.
- Organize the source files. Match every image to the correct SKU, variant, finish, and included component.
- Create approved variations. Use editing and AI-assisted tools for backgrounds, crops, settings, and campaign adaptations.
- Review the output. Check the product identity, proportions, color, edges, and metadata before publication.
Baymard Institute's product-page research found that 56% of users' first actions after arriving on a product page involve exploring product images. Its research identifies seven useful image categories: standard views, in-scale images, detail views, feature explanations, lifestyle or context images, user-generated images, and alternate views. Baymard's product-page usability research makes the operational point clear: one attractive hero shot can't carry all the information shoppers need.
Production rule: Photograph the product once with enough technical accuracy that every later variation still has a trustworthy source.
A repeatable system also makes the work more accessible to beginners. You don't need a traditional academic route to build practical photography skills, and this guide to becoming a product photographer without A Levels offers useful context for people entering the field through hands-on learning.
The scalable workflow is hybrid, not fully synthetic. Real photography establishes what the item looks like. Digital processing then expands that foundation without forcing a photographer to rebuild the set for every platform or campaign. For a useful definition of the discipline and its ecommerce role, see what product photography involves.
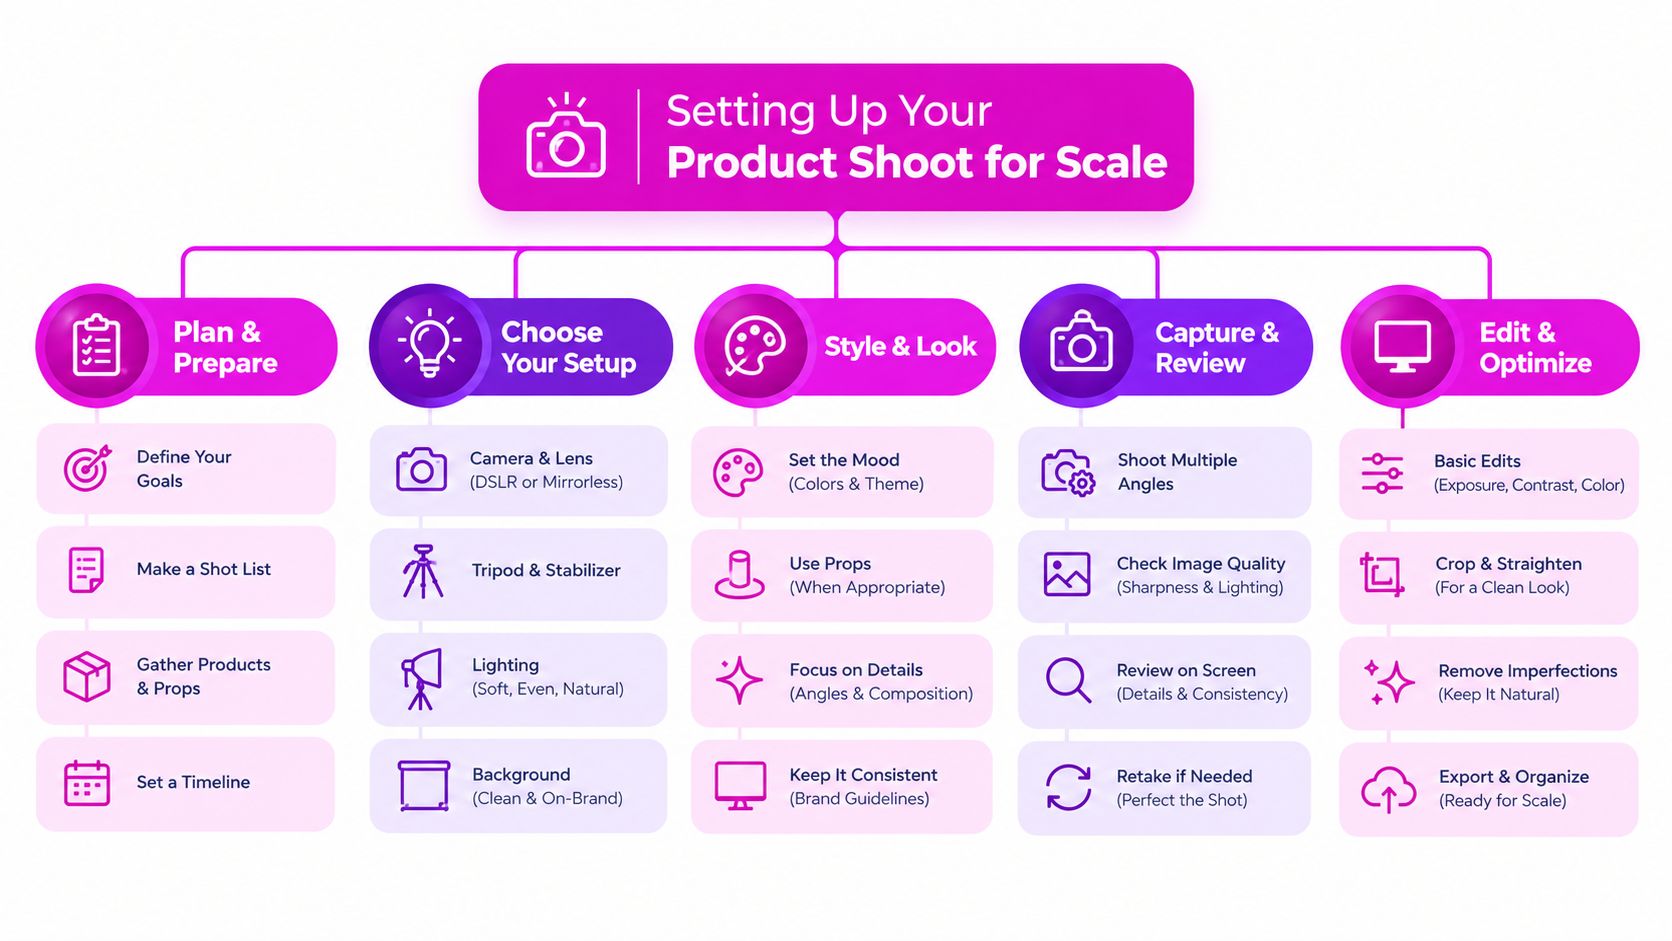
Setting Up Your Product Shoot for Scale
A scalable shoot begins before the camera is switched on. Every uncontrolled variable becomes a correction later, and corrections become expensive when the same mistake appears across a full product range.
Start by choosing a fixed shooting position. Mark the tripod legs, product placement, light stands, and background edges so another operator can reproduce the setup. Use a neutral sweep or background for core catalog views. Lifestyle images can have more atmosphere, but your foundational images should make the item easy to inspect and compare.
Build a repeatable capture station
Use a sturdy tripod and keep the camera height, distance, and angle consistent. Product photography benefits from stability because consistent framing makes batch cropping and alignment far easier. A remote release or self-timer reduces camera movement, especially during close-up work.
Lock the camera controls instead of relying on automatic decisions. Set exposure, ISO, aperture, and white balance manually. Auto white balance can shift between frames, particularly when the product or background changes position. A neutral gray reference photographed during setup gives you a reliable basis for color correction.
Lighting should be treated as geometry. Use a large, diffused key light positioned approximately 45 degrees from the product, then control contrast with fill or a reflector. Separate the product from the background when its edges need clearer definition. For cosmetics, clothing, food, paint, leather, and other color-critical products, continuous light rated CRI 95 or higher is the safer choice. Sources below CRI 80 can introduce color shifts that require substantial correction. These lighting and color-management recommendations are detailed in this product photography lighting guide.
Capture information, not decoration
Before shooting, list the visual evidence a shopper needs:
- Construction: Include seams, fasteners, controls, joins, and moving parts.
- Material: Photograph texture, grain, finish, translucency, and surface reflectivity.
- Scale: Plan a recognizable reference or dedicated in-scale view when size isn't obvious.
- Contents: Show accessories, packaging components, attachments, and pieces included in the purchase.
- Variants: Keep color, finish, and model differences clearly separated in the file system.
Baymard's research found that 42% of users try to understand product size through product-page imagery, while 28% of sites provide no in-scale image. The study's findings on in-scale product images support a straightforward workflow: measure the object, select an appropriate reference where useful, preserve accurate proportions, and photograph enough viewpoints to support comparison.
Mastering Lighting and Camera Settings
Lighting choices should follow the product's surface, not a photographer's preferred style. A matte ceramic item, a polished metal object, and a translucent bottle each reveal different problems under the same light. The right setup is the one that makes the product's important characteristics legible while remaining easy to reproduce.
A large diffused source is the dependable starting point for most catalog work. It creates broad highlights and softer shadows, which are easier to control during background removal and batch editing. Add a white reflector when shadows hide useful detail. Use black cards or flags near reflective products when you need to shape the reflections instead of just adding brightness.
Choose the setup by product type
| Product situation | Practical setup | Main trade-off |
|---|---|---|
| Matte packaging or ceramics | Large diffused key with controlled fill | Soft light can reduce edge separation, so adjust the background or add a subtle rim |
| Reflective metal or glass | Broad sources, flags, and carefully placed cards | The room becomes part of the reflection, so setup time increases |
| Fabric and textured goods | Directional but softened light | Too much diffusion can flatten texture |
| Lifestyle scenes | Key light plus controlled ambient or practical light | The scene gains context but becomes harder to standardize |
| Small detailed products | Tripod, manual focus, and focus stacking where needed | More frames and alignment checks are required |
The choice between continuous light and strobes is practical. Continuous fixtures let you see reflections and shadow placement before capture, which helps during product positioning. Strobes can provide strong, repeatable exposure, but they require more care during setup because the final light isn't visible in the same way. For a changing team or a repeatable catalog, visibility and consistency often matter more than maximum output.

Lock the camera and solve depth of field
Use a tripod for alignment, then select the aperture according to the product's depth. A wide aperture may isolate a detail attractively, but it can leave the front or rear of a product soft. A smaller aperture keeps more of the object sharp, although excessive stopping down can introduce diffraction softness.
Small three-dimensional products such as jewelry often need focus stacking. Secure the camera, fix the item with removable putty, use a remote release or self-timer, and lock the exposure, ISO, aperture, and white balance. A practical starting point is ISO 100–200 and f/5.6–f/8, followed by manual focus from the nearest visible detail to the farthest. Jewelry-scale subjects commonly require approximately 15–30 frames, according to this focus-stacking workflow for jewelry and small products.
Leave the composition 5–10% wider than the intended crop so alignment and edge cleanup don't remove important pixels. Watch for subject movement, camera movement, exposure changes, and gaps between focus zones. These errors are harder to repair than they are to prevent.
For a deeper comparison of soft, controlled setups and reflective-product solutions, use this resource on lighting for product photography.
Leveraging Bulk Image Generation for Efficiency
Once the source photographs are approved, the production problem changes. The camera is no longer the slowest part. Background cleanup, resizing, variant preparation, campaign styling, and file organization consume the schedule.
Start with a small, controlled source set. Upload the approved front, rear, detail, and scale views rather than every experimental frame. Give each file a clear name that includes the product identifier and view. Separate actual product attributes from creative instructions. “Keep the blue leather finish and original proportions” is a product constraint. “Place the item in a warm editorial setting” is a styling instruction. Mixing the two makes review more difficult.
Turn one source set into planned variations
A batch workflow works best when each output has a job. Create a specification before generating anything:
- Catalog views: Neutral background, accurate edges, consistent framing.
- Marketplace assets: Crops and dimensions suited to the destination.
- Social variations: Stronger context, seasonal settings, or alternate compositions.
- Campaign concepts: Approved environments that support the brand without changing the product.
- Detail assets: Close views that preserve texture, controls, labels, and construction.
AI-assisted editing is useful for background replacement, resizing, controlled lighting correction, and creating contextual scenes from an approved product reference. It isn't a substitute for documenting the item. If a tool changes the shape, color, texture, dimensions, features, or use context, the output needs a human review against the original.
The efficiency comes from applying one controlled treatment across many assets, not from generating endless alternatives. Set a reference image, define the background behavior, specify the crop logic, and reject outputs that introduce unsupported details. A batch editor can then handle repetitive adjustments while a photographer or merchandiser makes the decisions that affect accuracy.

Review in batches, not one image at a time
Create a contact sheet or review grid for each product family. Look for repeated failures: inconsistent shadows, incorrect handles, missing accessories, warped logos, changed fasteners, or backgrounds that compete with the item. Batch review reveals patterns that are easy to miss when opening files individually.
The guide to generating 100 AI images at once is useful for understanding the mechanics of high-volume creation. The important production principle is approval control. Generate broadly only after the source image and visual rules are stable, then keep a final human checkpoint before publication.
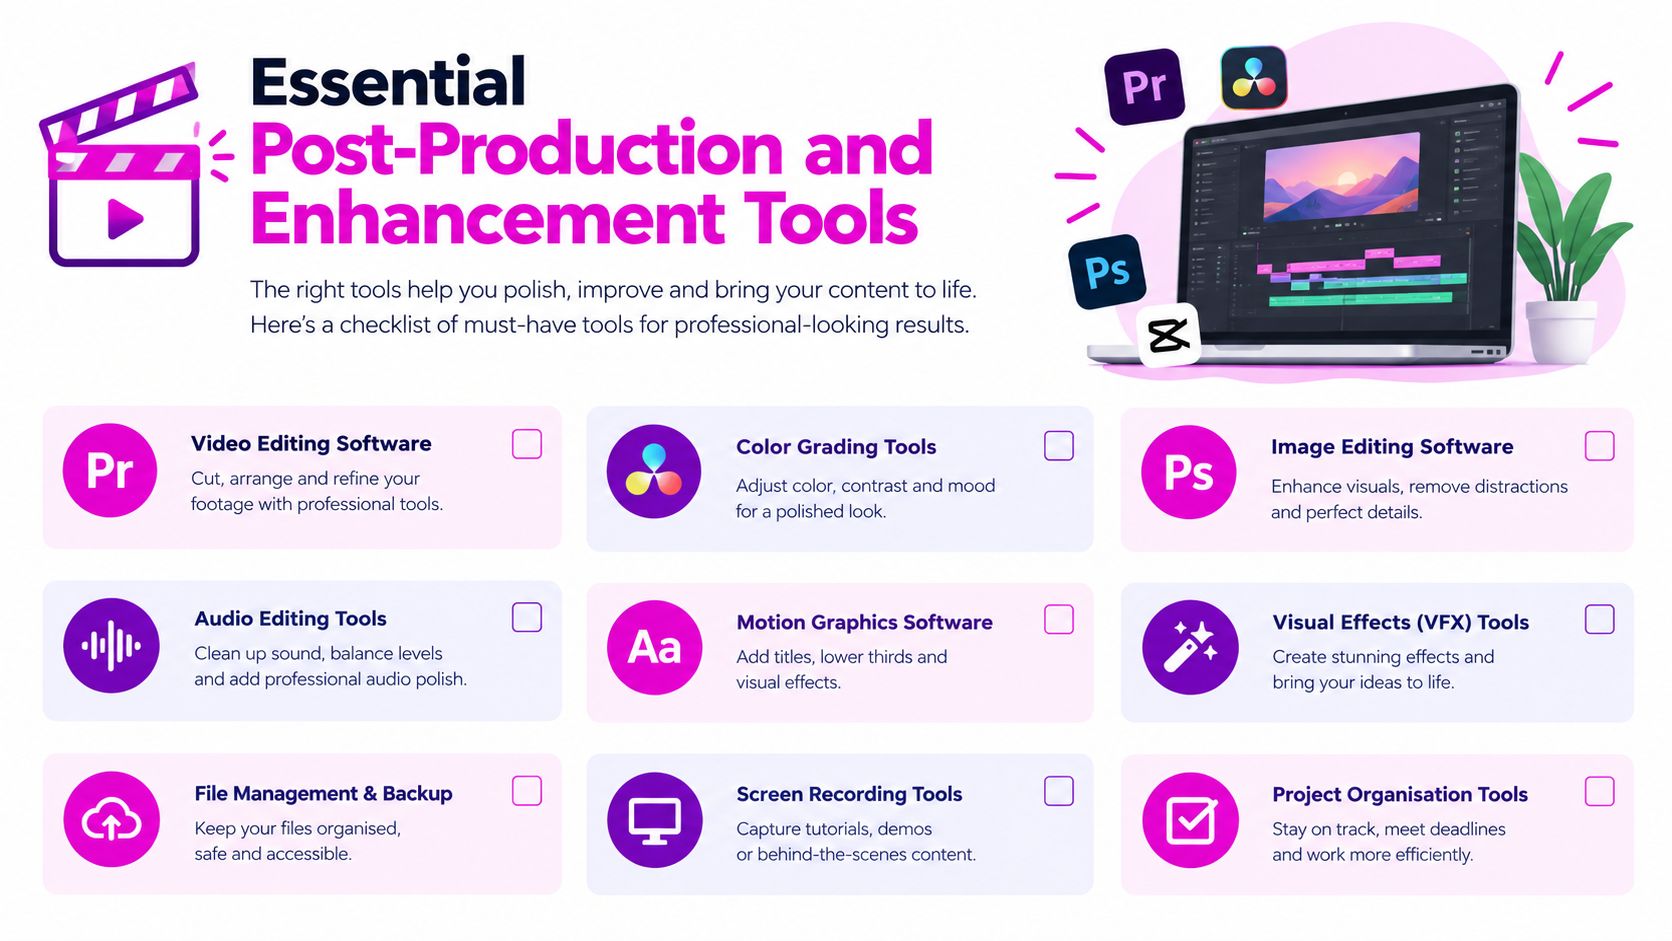
Essential Post-Production and Enhancement Tools
Post-production should correct capture limitations and prepare assets for their destination. It shouldn't redesign the product in the background. The most reliable teams separate global adjustments from product-specific retouching, then apply the global treatment consistently across the catalog.
Remove distractions without removing evidence
Background removal is valuable for clean product pages, but edge quality matters more than speed alone. Inspect hair-like fibers, transparent packaging, reflective borders, and thin straps at full size. A rough mask can make an otherwise accurate photograph look artificial.
Color correction should begin with the locked capture settings and gray reference from the shoot. Apply a consistent base correction, then check the result against the physical product or an approved color reference. Don't use saturation to make a dull source file look more exciting if the change alters the item's actual appearance.
Cropping and resizing should preserve the product's proportions. Keep a master file with enough resolution for later use, then create destination-specific derivatives. A social crop may emphasize the hero angle, while a product-page image needs room for the complete item and useful negative space.
Build a quality-control pass
Use a short checklist before files enter the publishing system:
- Identity: Confirm the image matches the correct SKU, variant, and finish.
- Geometry: Check that the product hasn't been stretched, narrowed, or warped.
- Color: Compare critical colors, labels, finishes, and materials with the source.
- Edges: Inspect cutouts around transparent, reflective, or finely detailed areas.
- Content: Confirm that every accessory shown is included with the purchase.
- Metadata: Add descriptive filenames, accurate alt text, and the appropriate longer description where needed.
Accessibility belongs in this same workflow. An accessibility index covering 2,543 retail websites and 85,966 pages found that retail sites averaged 14 inaccessible images per page, while related reporting found 38% of images had faulty or missing alternative text. The retail accessibility findings from AudioEye show why image production and image metadata should not be separated.
Generate concise alt text, longer sensory descriptions when the image carries substantial information, color and material details, scale information, and captions for meaningful lifestyle scenes. Have a person review claims about dimensions, finish, included accessories, and color. Decorative alt text shouldn't repeat the product title, and batch validation should run again after resizing or background replacement.
Building Trust with Authentic Product Imagery
AI can make a product scene look polished while making the product itself less reliable. That distinction matters. Background cleanup, resizing, and controlled lighting correction generally support the source photograph. Changing the product's color, texture, dimensions, features, or usage context can create an image that sells an item the customer won't receive.
The common advice to “make it look real” isn't a governance policy. A production team needs a line between enhancement and invention, plus a review process that catches changes before publication.
Treat disclosure as part of the asset brief
US research found that consumers identified real images 49% of the time and AI images 52% of the time, which is roughly chance-level recognition. Only 9% correctly identified at least 70% of the images tested. These findings from the real versus AI images study mean that visual realism can't be used as evidence of authenticity.
A separate 2025 survey found that 84% of consumers considered disclosure important, nearly 40% said they would trust a brand less when AI imagery was used without disclosure, and only 14% were very likely to buy a product shown with AI images. The same evidence points to a nuanced trade-off. Disclosure can reduce perceived authenticity in some advertising contexts, but hiding AI use creates its own trust risk.
Use precise labels rather than a vague blanket statement. For example, identify when a scene is AI-generated while making clear that the product reference is an actual photograph. Keep at least one real-product image prominent on the listing when generated imagery is used for context. Marketplace and advertising rules may differ, so record the treatment for each channel.
Trust check: If the generated image changes what a reasonable shopper would expect to receive, it isn't an enhancement. It's a product claim that needs correction.
Descriptions must support the same standard. Accurate image metadata should reinforce, not contradict, the photograph. For practical guidance on writing product descriptions that sell and rank, connect visual claims with the written details customers use to evaluate the purchase.
The strongest workflow combines real capture, controlled enhancement, clear disclosure, and human approval. That approach may produce fewer immediately usable images than unrestricted generation, but the assets are more defensible, easier to update, and less likely to create a mismatch between the listing and the delivered product.
Bulk Image Generation helps turn approved product photographs into batch-created variations, including background treatments, resizing, enhancement, and campaign-ready formats. Use it alongside a controlled capture and review process, then visit Bulk Image Generation to build a scalable image workflow without giving up product accuracy.