
Mastering Images for T Shirt Design

Aarav Mehta • November 16, 2025
A practical guide to finding, creating, and using high-quality images for t shirt design. Learn AI prompting, licensing, and print preparation.
Creating images for t-shirt designs that actually sell is more than just coming up with a cool idea. It's really about getting the technical details right from the very beginning. Your success hinges on understanding things like resolution, file types, and color modes before you even open your design software.
Honestly, nailing these fundamentals is what separates a blurry, amateur-looking print from a crisp, professional-grade t-shirt that people are excited to wear.
The Blueprint for Print-Ready T-Shirt Graphics
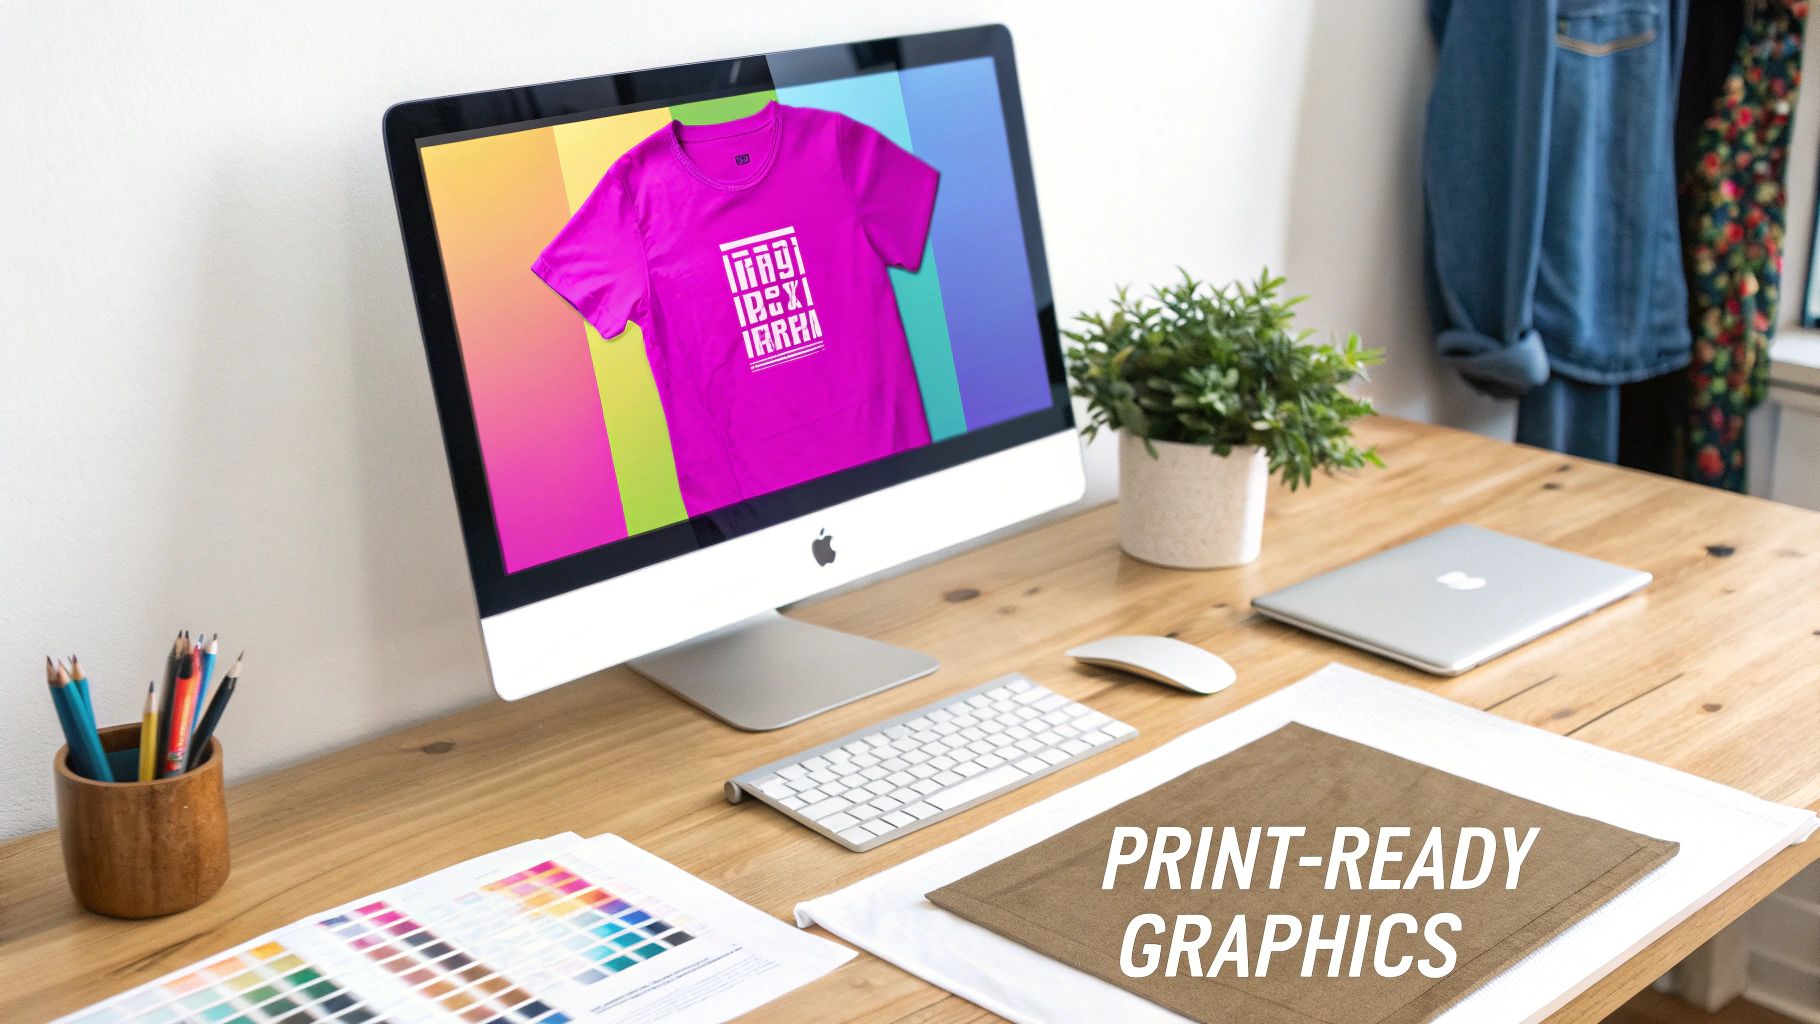
Before you get lost in complex software, let's talk about what makes an image look fantastic on fabric. The single biggest hurdle I see new designers face is pixelation—that dreaded blocky, blurry effect that ruins an otherwise great design. This almost always happens when the image resolution is too low for the final print size.
To avoid this, you have to work with high-resolution files from the start. The industry standard is 300 DPI (dots per inch) at the final size you want it printed. This ensures every edge is sharp and all the details pop, whether it’s a tiny pocket logo or a massive graphic covering the whole chest.
This demand for quality is a big deal. The global custom T-shirt printing market is expected to jump from around $8.17 billion in 2024 to $9 billion in 2025, largely because people want unique, high-quality clothes.
Raster vs. Vector Graphics
You'll hear the terms "raster" and "vector" thrown around a lot, and understanding the difference is a game-changer.
- Raster images (like JPEGs and PNGs) are made up of tiny squares called pixels. They’re fantastic for detailed, photographic designs but will look terrible if you try to make them bigger. They lose quality fast.
- Vector images (like SVGs and AI files) are built from mathematical paths and curves. This means you can scale them to the size of a billboard with zero quality loss, which makes them perfect for logos and text-based graphics.
Most professionals lean towards vectors for their clean lines and flexibility. That said, many print-on-demand services work beautifully with high-resolution transparent PNG files, which are raster-based. Just make sure it's big enough!
Color Models and How They Affect Your Shirt
Another critical piece of the puzzle is color. Your computer screen displays color using the RGB (Red, Green, Blue) model, which is based on light. Printers, on the other hand, use the CMYK (Cyan, Magenta, Yellow, Black) model, which is based on ink.
Because of this difference, colors can look a bit different on the final shirt than they do on your monitor. If you can, always design in CMYK mode from the start. If not, just be aware that some colors might shift slightly during printing.
Finally, don't forget the shirt itself. The color and even the texture of the fabric can completely change how your design looks. It's not just about the digital file; physical factors play a huge role. For example, if you're venturing into embroidery, something like choosing the right stabilizer for t-shirt embroidery becomes absolutely essential, especially for stretchy fabrics.
Sourcing Images Legally for Commercial Use
Just grabbing a cool image from a Google search is the fastest way to get a cease-and-desist letter. If you're serious about building a real t-shirt business, you have to get comfortable with the legal side of things. That means navigating the often-confusing world of image licensing.
Think of an image license as a contract. It spells out exactly what you can and can't do with someone else's creative work. Ignoring those rules isn't just a bad look—it's a direct path to legal trouble. The key is knowing what to look for before you ever hit download.
Decoding Common License Types
You're going to run into a few different license types, and for selling merchandise, the details are everything. Not all "free" or "licensed" images are cleared for commercial products like t-shirts.
- Royalty-Free: This is the one you'll see most often. You pay a one-time fee to use the image multiple times without paying royalties for every sale. But here's the catch: you have to check if it allows for "merchandise" or "print-on-demand" use. Standard licenses often forbid this.
- Extended License: This is usually what you actually need for t-shirts. It's an upgrade to a Royalty-Free license that grants the right to use the image on items you plan to sell. It costs more, but it's the cost of doing business legally.
- Creative Commons (CC): This is a whole family of licenses, and some do allow commercial use. You have to pay close attention to the specific rules—like whether you need to give credit to the creator or if you're allowed to modify the image.
Here's a quick look at the Creative Commons licenses. The icons give you a fast visual cue for what's allowed.
For t-shirts, you'll want to avoid any license with the "NonCommercial (NC)" restriction.
Spotting Red Flags in Agreements
When you're reading a license agreement, keep an eye out for specific keywords. Look for terms like "print run limits," which might cap you at 500 sales, or clauses that explicitly forbid "resale" or "merchandise."
A classic mistake is grabbing an image from a big stock site like Adobe Stock or Vexels and assuming the standard license covers you for merchandise. Always dig into the fine print or use search filters to find images with commercial or extended licenses specifically for physical products.
Honestly, this is why creating your own original artwork is often the safest bet. If you need a solid alternative to digging through stock photo sites, you can explore an AI stock image generator. These tools can create completely unique, commercially safe visuals from the ground up.
By getting a handle on these legal basics, you can build your business on a solid foundation and sleep a lot better at night.
Using AI Tools to Generate T-Shirt Images
AI image generators have totally changed the game for t-shirt design, but there's a real art to getting from a cool idea to a graphic that actually works on a shirt. Just typing in "a cool wolf shirt" is a recipe for disaster. You'll probably get a beautiful, detailed, rectangular image that looks awful once it's printed.
The secret? It’s all in the prompt.
Forget those generic requests. To get print-ready results from tools like Midjourney or DALL-E 3, you have to start thinking like a screen printer. Your job is to guide the AI, telling it to create an isolated subject on a clean background that's easy to remove.
Crafting Precise Prompts for Apparel
The best prompts are layered with specific keywords that control the style, composition, and even the final format. The whole point is to leave nothing to chance and force the AI to spit out something that works as a standalone graphic, not a full-blown scene.
To get the most out of your AI tool, you need to master the different parts of a prompt that actually matter for t-shirt graphics. Think of it as building a recipe for the perfect image.
Below is a quick breakdown of the key components I always include in my prompts for apparel design. Getting these right is the difference between a usable graphic and a wasted credit.
Effective AI Prompt Components for T-Shirt Designs
| Component | Purpose | Example Keyword |
|---|---|---|
| Subject | Clearly defines the main focus of the image. Be specific. | a fierce grizzly bear roaring |
| Style | Dictates the overall artistic look. Crucial for print. | vector graphic, screenprint style |
| Composition | Controls the background and subject placement. | isolated on a white background |
| Detail Modifiers | Adds specific artistic touches and details. | bold outlines, simple color palette |
Putting these pieces together is like giving a detailed brief to a human designer. The more specific you are, the less room there is for the AI to go off the rails. Vague prompts are a fast track to unusable, overly complex images.
Think of it like giving instructions to a human designer. The more specific your brief, the less room there is for misinterpretation. Vague prompts lead to unusable, overly complex images.
This new way of designing is making a huge impact. The global market for graphic-designed T-shirts is expected to hit around $4.1 billion in 2025. While the space is crowded, using AI this way gives smaller brands a serious edge.
Real-World Prompt Examples
Let's see this in action. Say you're whipping up a design for a coffee brand.
- Weak Prompt:
A coffee cup - Strong Prompt:
Vector graphic of a steaming coffee mug, cartoon mascot style, bold lines, isolated on a white background, screenprint design
Or maybe you're going for something with a retro vibe:
- Weak Prompt:
A cassette tape - Strong Prompt:
Retro 80s cassette tape, flat vector illustration, vibrant neon colors, simple design, isolated on white, t-shirt graphic
This example from DALL-E 3 perfectly illustrates how a well-crafted prompt can produce multiple, distinct styles for the same idea.
See how each image is a self-contained graphic ready for a shirt? That’s a direct result of the stylistic instructions in the prompt. If you ever get stuck trying to find the right keywords, a dedicated tool can be a lifesaver. You can check out our guide on the best ways to use a free AI image prompt generator to get some structured ideas.
Iteration and Refinement
Don't expect perfection on the first try. Your first batch of images is just the starting point.
Use the output to refine your idea. Maybe the colors are a bit off, or the character’s expression isn't quite right. Use what you've learned to tweak your prompt and try again. For example, if you like the cassette tape but want it to look more worn, you could add: "Now add a distressed, cracked texture to the previous image." This back-and-forth is how you turn a generic AI image into a unique piece of art.
One last thing: always, always check the commercial use policies of whatever AI tool you're using. These terms change all the time, so it's on you to make sure you have the rights to sell the images you create. It’s a simple step that protects your business and ensures you’re using these incredible tools the right way.
Preparing Your Final Image File for Print
A brilliant concept can easily fall flat if the final file isn't technically perfect for printing. This is the last mile, and frankly, it's where I see a lot of great t-shirt design ideas completely fall apart. A blurry, poorly colored, or rejected print often comes down to skipping these critical final steps.
Let's walk through exactly what you need to do to get a flawless, production-ready file that printers will love.
The whole process, from that first spark of an idea to the final refined asset, follows a clear path. This visual breaks down how a prompt becomes an image and, most importantly, how that image gets polished for the real world.
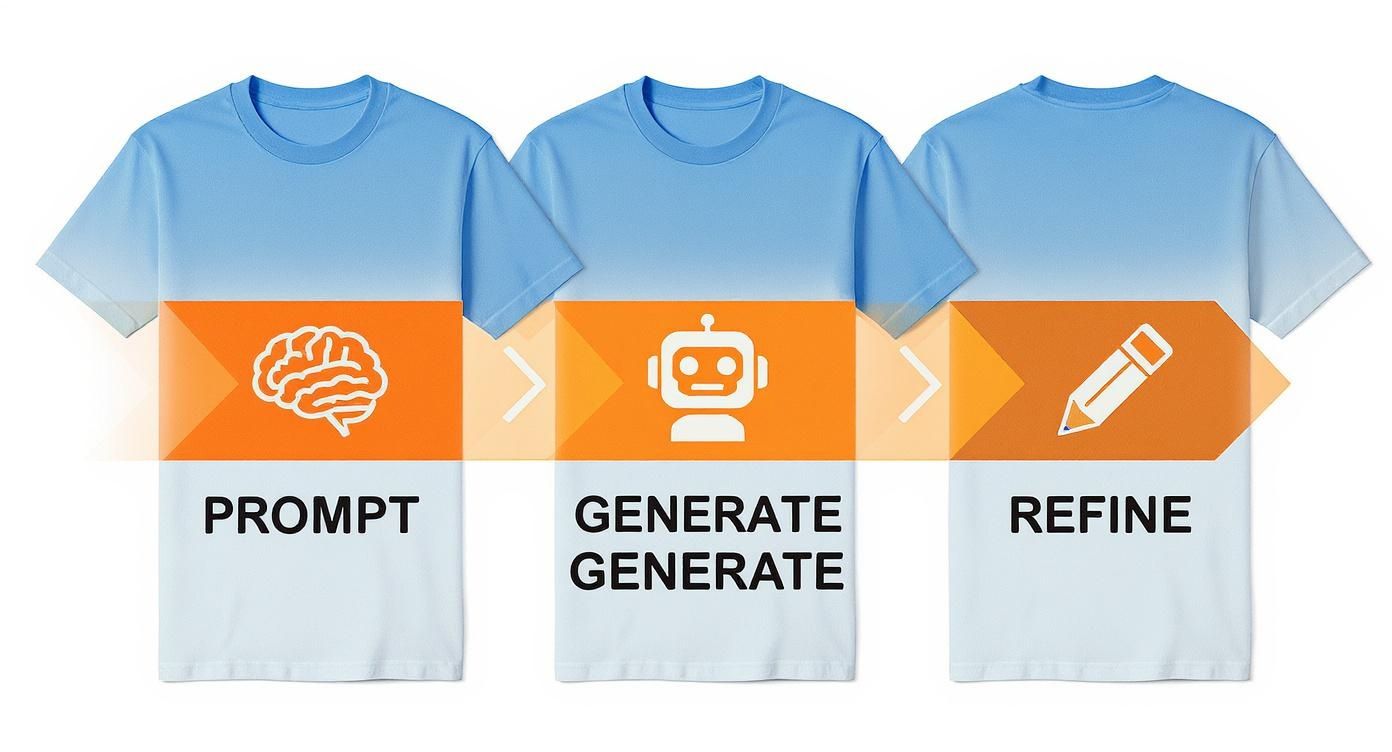
As you can see, hitting "generate" is just the beginning. The real magic happens in the refinement stage, where you turn a cool AI graphic into a professional, printable product.
From Raw Generation to Print Perfection
AI generators almost always spit out images with a solid white or colored background. For t-shirt printing—especially Direct-to-Garment (DTG)—you absolutely need a transparent background. This is non-negotiable. It ensures only your design gets printed, not a giant, awkward-looking box around it.
Tools like Adobe Photoshop or even free alternatives like Photopea have fantastic background removal features. You can try the "Remove Background" quick action for simple designs, but for anything with detail, I'd recommend getting hands-on with the Pen Tool for clean, sharp edges. Trust me, a sloppy removal job with stray pixels will absolutely show up on the final shirt.
Your end goal is almost always a transparent PNG file. This format is the industry standard for DTG designs because it supports transparency and is universally accepted by print-on-demand providers and local print shops alike.
Upscaling and Vectorizing for Quality
So, what happens if your AI-generated image is too small? This is a super common problem. Just stretching it in your editor is a recipe for a pixelated disaster.
This is where AI upscaling tools like Gigapixel AI are a lifesaver. They intelligently add detail to increase the image size while actually maintaining—and sometimes even enhancing—the sharpness.
For many designs, especially those with clean lines and solid colors, converting the image to a vector is the ultimate pro move. Using a feature like Adobe Illustrator’s "Image Trace" can transform your pixel-based PNG into a scalable vector graphic (like an SVG or AI file).
Why bother? This process gives you a few massive advantages:
- Infinite Scalability: You can resize the design for a tiny sleeve print or a massive full-back graphic with absolutely zero loss in quality.
- Color Separation: It makes life way easier for screen printing, where each color needs its own separate layer.
- Clean Edits: Need to tweak a color or adjust a shape? In a vector file, it’s incredibly easy and precise.
If you’re managing a whole collection of designs, a tool like a bulk image resizer can save you a ton of time by applying the same dimensions to all your files at once.
The Ultimate Pre-Print Checklist
Before you even think about hitting 'send' on that file, run through this final quality check. Getting these details right is what separates the amateurs from the pros and ensures your vision translates perfectly from the screen to the fabric.
- File Format: Is it a transparent PNG?
- Resolution: Did you set the file to 300 DPI? For print quality, there's no room for negotiation here.
- Dimensions: Does the pixel size match the print area? (A common spec for a full front print is 4500x5400 pixels).
- Color Profile: Is it set correctly for your printer? Most DTG providers actually prefer sRGB, but check their specs. Some screen printers might require CMYK.
- Clean Edges: Have you zoomed way in to check for stray pixels or fuzzy edges left over from the background removal?
To really nail the technical side, you need to get comfortable with these specs. For a much deeper dive into understanding graphic size and file types, this guide is an excellent resource. Follow these steps, and you'll transform your creative AI image into a technically sound file that's truly ready for production.
Common T-Shirt Design Mistakes to Avoid
Even the most killer AI-generated graphic can be completely ruined by a few simple, rookie mistakes. Trust me, sidestepping these common pitfalls is often the difference between a best-selling shirt and a pallet of returned inventory. These are the subtle but critical errors that trip up designers at every level, from beginners to seasoned pros.
One of the biggest culprits? Low-resolution images. A graphic might look razor-sharp on your glowing computer screen, but once it hits the fabric, it turns into a blurry, pixelated mess. Always, and I mean always, start with a high-resolution file. We're talking 300 DPI at the final print size—that’s your absolute baseline.
Ignoring Color Contrast and Fabric Texture
Another classic oversight is terrible color contrast. A dark navy blue design on a black t-shirt is a perfect example of a graphic that will pretty much disappear. It's a waste of a great idea.
Before you even think about finalizing your colors, drop your design file onto a mockup of the exact shirt color you plan to use. This one little step shows you exactly how the colors will play together in the real world.
Aim for combos that really pop:
- Light-colored designs on dark fabrics (white on black, yellow on navy).
- Dark designs on light or heathered fabrics (black on gray, forest green on beige).
- Vibrant, complementary colors that just sing when placed next to each other.
Beyond color, the texture of the shirt itself is a massive factor. A super-detailed, intricate design with delicate, thin lines might look incredible on a smooth, premium cotton tee. But take that same design and print it on a rougher, heather-blend fabric? It can quickly turn into a muddy blob. The ink bleeds just enough into the fibers to make all those fine details vanish.
Remember, fabric isn't a perfect, flat canvas like your monitor. You have to account for how the material's texture will absorb ink and impact the final look of your design.
Avoiding Technical Printing Flaws
Technical blunders are just as deadly as creative ones. Printers have physical limits, and any design that ignores them is basically destined to fail from the start. A common problem is using lines or text that are simply too thin to print correctly. In screen printing, for example, those ultra-fine lines might not hold ink, leaving you with broken or incomplete graphics.
Awkward placement is another killer. A design that looks perfectly centered on a digital template might end up sitting way too low or weirdly high on a real person's chest. Use print-on-demand mockups to see where the graphic will actually land on a human body, and check it across different sizes. What looks great on a medium might be totally off-center on a 2XL. Saving yourself this headache is non-negotiable.
T-Shirt Image FAQs: Your Questions Answered
When you're diving into t-shirt design, a few technical questions always pop up. Getting these right from the start can save you a ton of headaches and production delays down the line. Let's clear up some of the most common hurdles designers face.
Can I Use Google Images for My Designs?
In a word: no. This is one of the most common—and costly—mistakes you can make.
The overwhelming majority of images you find through a Google search are protected by copyright. Using them on a product you plan to sell is a fast track to serious legal trouble. The only safe bet is to use graphics from stock photo sites that offer a clear commercial or merchandise license.
What Is the Best File Format?
This all comes down to how your shirt is being printed.
For most modern print methods like Direct-to-Garment (DTG), a transparent PNG at 300 DPI is the undisputed champion. It’s the format nearly every print-on-demand provider wants, making it incredibly versatile.
But if you’re working with a screen printer, they’ll almost always ask for a vector file. In that world, formats like AI, EPS, or SVG are king because they can be scaled to any size without losing quality and make color separation a breeze.
Key Takeaway: Match your file format to the printing method. It’s PNG for DTG and vector for screen printing. Making this one choice correctly can prevent major production delays.
How Big Should My Image File Be?
Always design for the largest possible print area you might need. You can always scale down, but you can't scale up without losing quality.
A rock-solid standard for a full-front chest graphic is 4500x5400 pixels. At 300 DPI, that translates perfectly to a 15x18 inch print area. This size covers the requirements of most major printers, giving you maximum flexibility without ever having to worry if your design will come out looking crisp and sharp.
Ready to create stunning, print-ready t-shirt images in seconds? With Bulk Image Generation, you can generate hundreds of unique visuals with simple text prompts, and our batch editor makes removing backgrounds and resizing files effortless. Skip the tedious manual work and start designing faster today at https://bulkimagegeneration.com.