
How to Fix Blurry Pictures and Sharpen Your Images

Aarav Mehta • November 15, 2025
Tired of blurry photos? Learn how to fix blurry pictures with our guide on software tools, AI enhancers, and pro editing techniques for clear images.
Before you can fix a blurry picture, you have to figure out why it's blurry in the first place. Was your subject moving? Did the camera miss its focus? Once you know the cause, you can jump into an editor to sharpen things up or even use an AI tool for the really tough cases.
Diagnosing the Blur in Your Photos
Alright, before you even think about opening your editing software, you need to play detective with your image. This is the most important step. If you don't know why a photo is blurry, you can't choose the right way to fix it. Just throwing a generic sharpening filter on a motion-blurred shot often makes things worse—you just end up with sharper, uglier streaks instead of a clear image.
The two usual suspects are motion blur and focus blur.
- Motion blur shows up as streaks or a "ghosting" effect. This happens when your subject was moving too quickly for your shutter speed, or if your own hands weren't quite steady enough.
- Focus blur is that soft, almost dreamy haze you get when the camera locks onto the wrong part of the scene, leaving your actual subject looking fuzzy and indistinct.
Identifying the Root Cause
Take a hard look at your photo. Do the edges look smeared or dragged in one direction? That's a classic sign of motion. Or is your main subject just generally soft while, say, a random tree in the background is perfectly crisp? That's a dead giveaway for missed focus.
Taking a moment to do this simple check will save you a ton of time and frustration down the road. This little decision tree can help you quickly sort out what went wrong.
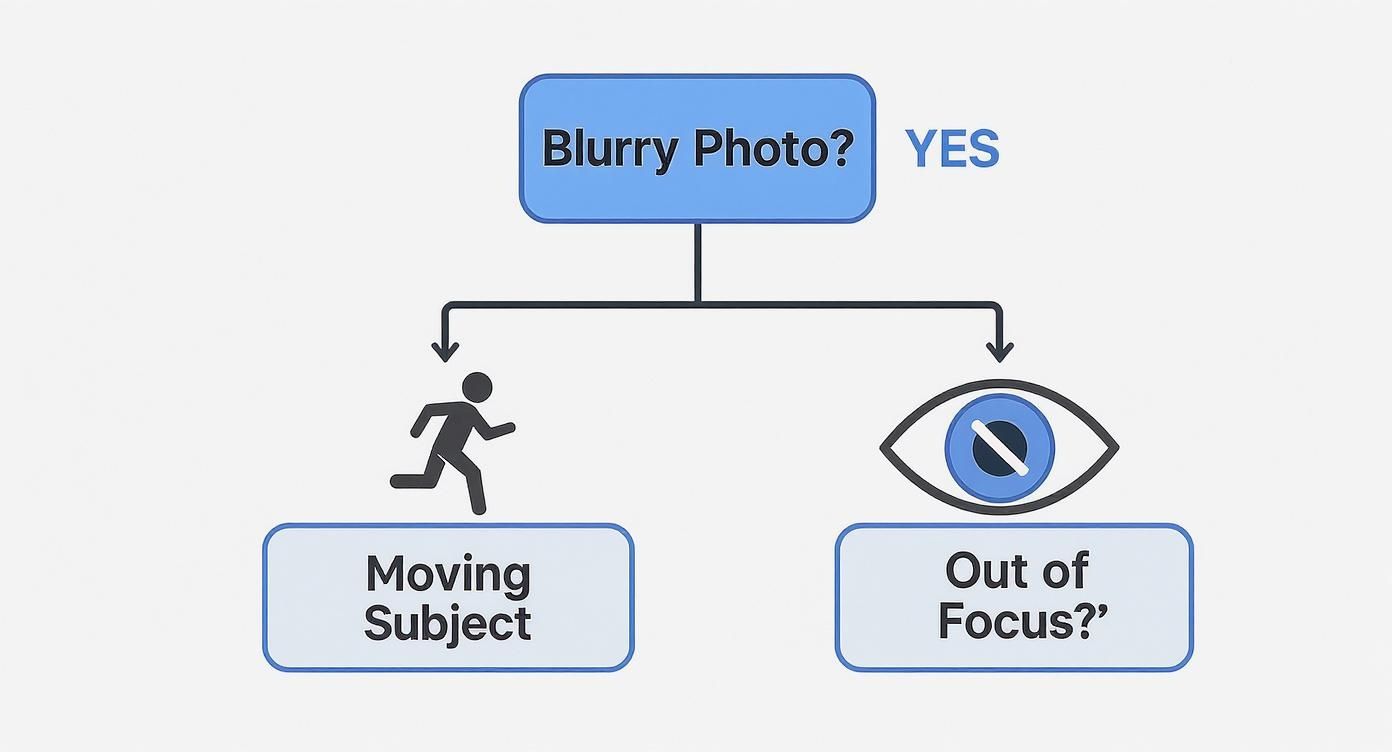
As the infographic shows, just by answering a couple of quick questions about your photo, you can nail down the type of blur you're up against.
Camera shake, which is a major source of motion blur, is such a common headache that a whole industry has sprung up to combat it. The market for optical image stabilizers (OIS) was valued at a whopping USD 12.3 billion in 2023. That number alone shows you how big of a deal blur reduction is in modern photography.
To help you get started, here's a quick way to match the problem to the solution.
Matching the Blur to the Best Solution
This table is a simple reference to help you identify what kind of blur you're dealing with and where to begin your edits.
| Type of Blur | Common Cause | Best First Step |
|---|---|---|
| Motion Blur | Subject movement or camera shake | Use an AI-powered deblurring tool designed for motion. |
| Focus Blur | Camera focused on the wrong object | Try a traditional sharpening filter (like Unsharp Mask). |
| General Softness | Low-quality lens or atmospheric haze | Apply a global clarity or texture adjustment. |
Ultimately, a quick diagnosis is the most powerful tool you have.
For real-world situations, like trying to save priceless photos from a wedding, knowing the difference is everything. If you want to go deeper on specific scenarios, you can find great expert tips for tackling blurry wedding photos that really break down the process.
Remember, figuring out the why is more than half the battle won.
When a photo is just a little soft, my first stop is almost always a traditional editing program like Adobe Photoshop or Lightroom. But here's a secret: just cranking up a generic "sharpen" slider is a rookie mistake that often makes things worse.
To get a natural, crisp look, you need a more controlled approach. It's about finesse, not force.
Mastering the Sharpening Sliders
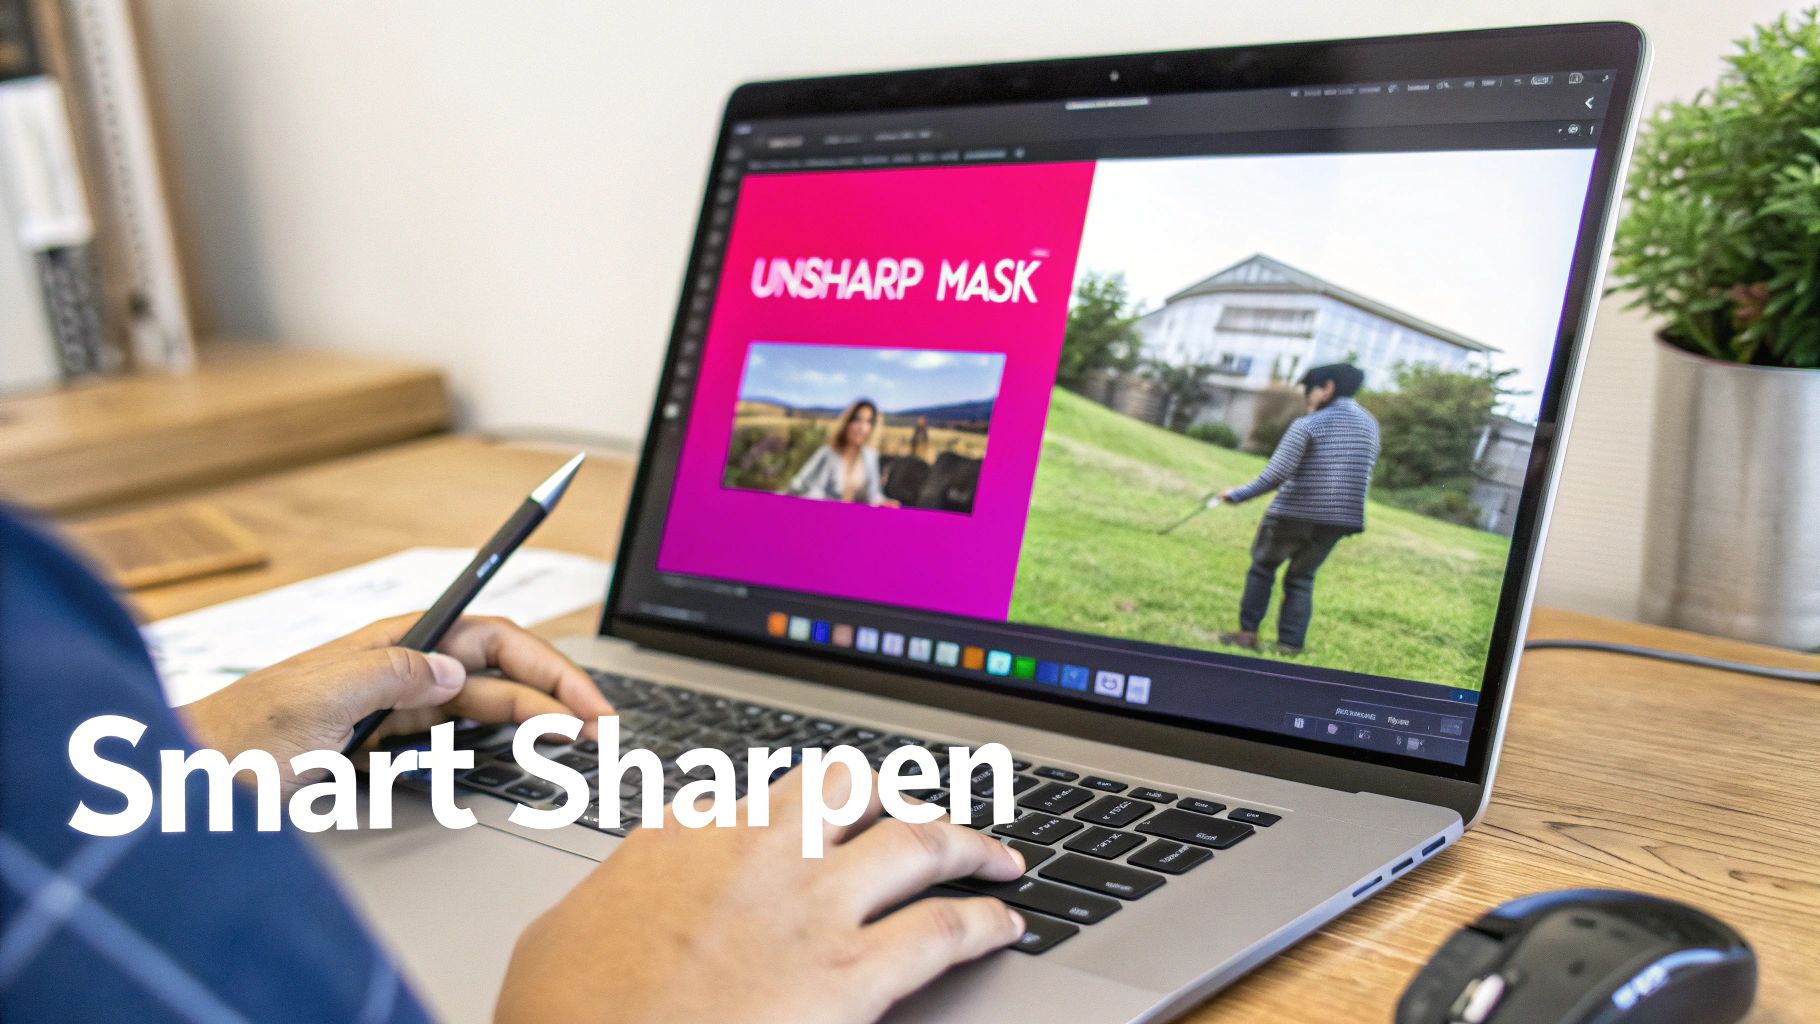
In the world of professional editing, two tools are legends for a reason: Unsharp Mask and Smart Sharpen. Their names sound backward, I know, but they work by intelligently boosting the contrast right along the edges of objects. Our eyes see this increased edge contrast as sharpness. Think of it as drawing an incredibly fine, nearly invisible line around things to make them pop.
Once you open one of these filters, you'll see a few sliders. Getting to know them is the key to fixing blurry pictures with precision.
- Amount: This is simply the overall strength of the sharpening. I usually start somewhere between 80% and 150% and adjust from there.
- Radius: This one is crucial. It controls how far out from an edge the sharpening effect spreads. For images destined for the web, a tiny radius of 0.5 to 1.5 pixels is your sweet spot. Anything more, and you risk getting those ugly, harsh halos.
- Threshold: This is the pro's secret weapon. It tells Photoshop to leave smooth areas alone. By increasing the threshold, you protect surfaces like skin or a clear blue sky from getting a nasty, grainy texture. It’s a lifesaver for portraits.
You can find these powerful filters right in the main menu, ready to bring your images back into focus.
The real magic, however, comes from applying these tools selectively. In a portrait, for instance, you want razor-sharp eyes and hair, but you absolutely do not want to sharpen the skin. This is where layer masks come in. They let you literally "paint" the sharpening effect only onto the areas that need that extra crispness.
Pro Tip: I can't stress this enough—always sharpen on a duplicate layer. This non-destructive workflow is a habit every good editor has. It means you can dial the effect up or down later, or even scrap it entirely, without ever damaging your original photo.
This method gives you total control, ensuring your final image looks sharp and professional, not like a crunchy, over-edited mess.
How AI Tools Can Rescue Severely Blurry Photos
Sometimes, traditional sharpening just doesn't cut it. We’ve all been there—you capture a once-in-a-lifetime moment, only to find it’s a blurry mess. For photos with severe motion blur or those that are just hopelessly out of focus, you need a completely different approach. This is where AI-powered photo enhancers come in, acting less like simple editors and more like digital restoration artists.
Unlike standard sharpening filters that just crank up the contrast on edges, AI tools get under the hood. They analyze the blurry image and intelligently reconstruct the details that were lost. These models have been trained on millions of pairs of clear and blurry photos, which allows them to make remarkably accurate guesses about what your subject was supposed to look like. It’s a powerful process that can bring memories you thought were gone forever back into sharp focus.
This isn't just a niche trick; it's part of a massive technological shift. The global digital image processing market was valued at USD 6.2 billion in 2023 and is projected to explode to USD 37.5 billion by 2033. That kind of growth shows just how essential these intelligent tools have become for fixing common—and not-so-common—visual problems.
The AI Photo Recovery Process
Getting started with one of these tools is usually dead simple. Here’s how it generally works:
- Upload Your Photo: Just grab the blurry image from your device and upload it to the platform.
- Let the AI Do Its Thing: The algorithm gets to work immediately, figuring out the type and severity of the blur before starting its reconstruction.
- Check Out the Result: In just a few seconds, you'll see a side-by-side comparison. The difference can be genuinely stunning, revealing faces and details that were completely unrecognizable before.
- Download Your Restored Image: Happy with what you see? Just download the newly sharpened and clarified photo.
This technology is a game-changer for old, scanned family photos where the original focus was soft or the image has degraded. It can also be a lifesaver for that perfect action shot that just didn't come out right.
For really tough cases, advanced AI upscaling technology can work wonders by intelligently adding back detail and resolution that seemed lost for good. Many tools now combine deblurring and upscaling to give you a final image that's both crisp and high-resolution.
While not every photo can be perfectly saved, AI gives you the best possible shot at recovery. And if you're interested in using similar tech to create brand-new visuals from scratch, you can see what’s possible with an advanced https://bulkimagegeneration.com/tools/image-generator.
Advanced Sharpening Techniques for Pro Results
When the standard sharpening slider just won't cut it, it's time to pull a few tricks from the professional's playbook. Advanced methods go way beyond simple adjustments, giving you precise, granular control over exactly where and how you add that final pop of clarity. Best of all, these techniques are non-destructive, meaning your original image is always kept safe and untouched.
One of the most trusted methods in the industry is High Pass sharpening in Photoshop. Instead of just cranking up edge contrast across the board, this technique actually isolates the edges themselves on a completely separate layer. You then use a blending mode—usually ‘Overlay’ or ‘Soft Light’—to apply that sharpness back onto your photo. The result? A much more natural, subtle sharpening effect that avoids those ugly, harsh halos you often get with basic tools.

This level of control is everything, because you never want to sharpen every single part of an image the same way.
Multi-Step and Output Sharpening
A true professional workflow often breaks sharpening down into multiple stages. We call this multi-step sharpening, and it’s all about applying different settings to different parts of the photo. Think about it: the fine, hard lines of a building need a totally different approach than the soft texture of someone's skin. You can get this done using layer masks, which let you selectively "paint" in the sharpening exactly where it's needed most.
Remember, the whole point of sharpening is to guide the viewer’s eye. When you selectively sharpen key features—like a person's eyes or the main subject of a landscape—you’re telling people what to look at, creating a much more impactful image.
Finally, you have to think about where your photo is going to end up. This last crucial step is called output sharpening.
- For the Web: Images on a screen need less aggressive sharpening. A smaller radius will keep them looking crisp without creating jagged, over-sharpened artifacts.
- For Print: High-resolution photos destined for print need a much stronger sharpening pass to compensate for how ink naturally spreads and softens on paper.
It's a step that’s so easy to overlook but makes a world of difference in the final product. Getting your images ready for their specific platform is just as important as the edit itself, much like using a bulk image resizer ensures they're sized perfectly every time.
The tech behind all this is only getting smarter. In fact, the computational photography market—which is all about using algorithms to fix issues like blur—is expected to rocket to USD 41.77 billion by 2032. As we've seen in our own research on the future of computational photography, intelligent software is quickly becoming the standard for anyone chasing professional-grade results.
Common Mistakes to Avoid When Sharpening Photos
Knowing how to fix blurry pictures is one thing, but knowing when to stop is the real skill. It’s incredibly easy to get a little too happy with the sharpening sliders and accidentally push a good photo into the over-edited territory. Remember, the goal is to enhance detail, not create something that looks unnatural and heavily processed.
The biggest pitfall by far is over-sharpening. We've all seen it: those harsh, bright outlines, or "halos," that appear around the edges of objects. It gives the whole picture a brittle, crunchy look that just screams "digital artifact." If you start seeing this, you've gone too far. My rule of thumb is to always check my work at 100% zoom and dial it back until the effect looks clean and subtle.
Applying Sharpening Incorrectly
Another common slip-up is slapping one sharpening setting across the entire photograph. This is a classic rookie mistake. It adds unwanted texture and digital noise to areas that should be perfectly smooth, like a clear blue sky or a person's skin.
The secret to professional-looking results is selective sharpening. I can't stress this enough. Always use layer masks or other selection tools to apply sharpening only to the parts of the image that need it—a subject’s eyes, the texture of a piece of fabric, or the fine lines of a building.
This targeted technique keeps the natural quality of your image intact while gently guiding the viewer's eye to the most important details. It’s a foundational editing skill, just like knowing the basics of AI product photography is essential for creating clean, professional visuals.
Finally, you have to be realistic. Some photos are just too blurry to be rescued, and throwing a ton of sharpening at them will only make the original flaws more obvious.
Your Questions About Fixing Blurry Pictures, Answered
You've got the techniques down, but I know specific questions always pop up when you're in the middle of an edit. Let's tackle some of the most common ones I hear to clear up any lingering confusion.
Can You Really Fix a Completely Out-of-Focus Picture?
Honestly, it depends. If you're using traditional sharpening tools, a severely out-of-focus image is probably a lost cause. Those tools can only enhance what's already there.
But this is where modern AI deblurring tools completely change the game. They don't just sharpen edges; they intelligently predict and reconstruct the details that were lost. It's not magic, and not every single photo can be saved, but AI gives you the best possible shot at rescuing a picture you thought was unusable.
What's the Best Free Software to Fix Blurry Pictures?
If you like getting your hands dirty and want manual control, GIMP is a fantastic free alternative to Photoshop. It has powerful tools like the Unsharp Mask that work great for mild blur.
For a simpler, more automated fix, many online AI photo enhancers offer free trials. These are perfect when you need to fix a seriously blurry image in seconds with just a click. The right choice really comes down to whether you want total control or a quick, powerful result.
My Two Cents: For subtle softness, GIMP is your best friend. For a blurry mess, give an AI tool's free trial a whirl. You'll be surprised what it can pull off.
Does Sharpening an Image Reduce Its Quality?
This is a great question. When done right, subtle sharpening actually improves the perceived quality by making edges look crisper.
The danger is over-sharpening. That’s when you push it too far and start seeing nasty digital artifacts like weird halos around edges and a grainy, noisy look. Over-sharpening absolutely degrades image quality.
The key is restraint. Always zoom in to 100% to check your work, and never edit your original file. Always work on a copy.
Should I Sharpen My Photo Before or After Resizing?
The standard professional workflow is a two-step process.
First, do your main "creative" sharpening on the full-resolution image. This is where you bring out all the important details. Then, once you're done editing, resize the image for its final destination—whether that's a website, an email, or a print.
After resizing, apply a final, gentle touch of "output sharpening." This last step is tailored specifically to the smaller size and ensures the photo looks perfectly crisp wherever you display it.
Ready to see what AI can do for your images? Bulk Image Generation not only lets you create incredible visuals from scratch but also offers a suite of free tools to enhance, resize, and perfect your existing photos. Ditch the tedious manual work and start creating at bulkimagegeneration.com.