
7 Product Photography Tips for Beginners

Ryan Bennett • September 29, 2026
Master product photography tips for beginners with practical lighting, composition, AI editing, and workflow advice for e-commerce and social media.
Your product may be excellent, but a listing can still feel unconvincing when the light changes from shot to shot, the background distracts from the item, or editing takes longer than the actual photo session. You don't need expensive equipment or an elaborate studio to fix that. You need a repeatable visual system that helps shoppers understand what they're seeing.
These product photography tips for beginners move from the basics of capture to a practical AI-supported workflow. You'll learn how to control light, prepare a background, keep products sharp, frame useful angles, style scenes, edit without misleading customers, and document a process you can repeat across ecommerce listings and social media.
Start simple: clarity and consistency matter more than complexity.
1. Master Lighting Fundamentals
Lighting determines whether customers can read a product's shape, material, finish, and color. A soft, controlled source usually gives beginners more useful information than a dramatic light that creates deep shadows or blown highlights. The aim isn't to make every product look glossy. It's to make the important details easy to inspect.
Start with a window, a diffusing curtain, and a white foam board. Place the product near the window, soften the incoming light if it looks harsh, and position the foam board opposite the light to bounce some brightness into shadow areas. This simple two-light approach, using a main source and a reflector, is easier to control than a complex studio setup.
Build control before complexity
Once you understand the basic arrangement, you can explore three-point lighting:
- Key light: Place the main light to one side of the product. It establishes shape and direction.
- Fill light: Use a weaker light or white board on the opposite side to soften shadows.
- Back light: Add light behind the item when you need separation from the background or more depth.
A jewelry retailer might use a narrow rim of light to reveal sparkle, while a beauty creator may prefer a ring light for consistent skincare or makeup shots. An ecommerce catalog needs a different priority, namely repeatable illumination across every listing. For more guidance on setups that work across product types, see this product photography lighting guide.
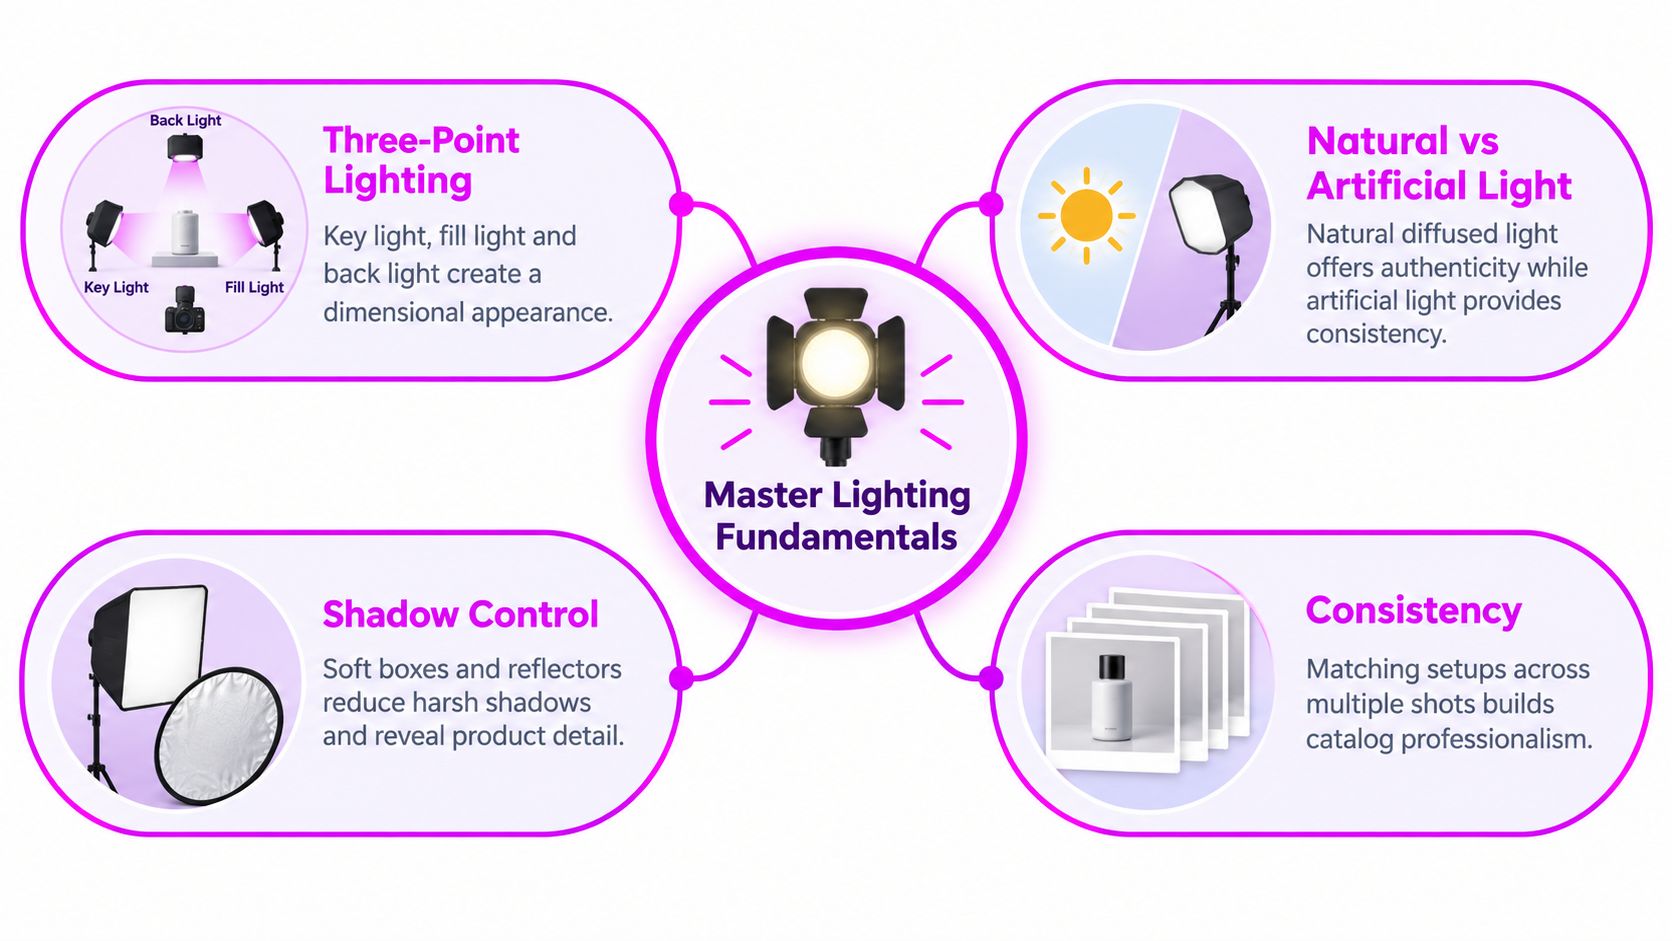
Before shooting a full catalog, make test frames with one product. Check whether labels remain readable, reflective surfaces show distracting highlights, and texture still looks natural. The same lighting logic also improves AI workflows because clear direction helps you write better image instructions and judge whether generated variations preserve believable shadows.
2. Choose and Prepare Your Background
A marketplace shopper should recognize the product before noticing the setting. Use a clean white or neutral surface when the image must show the label, shape, or finish quickly. Choose a lifestyle scene when the image needs to explain where the product belongs. The channel, product, and customer question should guide the choice.
Start with the primary product view. A skincare bottle benefits from an uncluttered frame that keeps its label readable. A camping lantern can sit in a controlled outdoor scene that shows its intended use. Wood or linen may suit a food package and suggest handmade preparation, as long as the texture stays quieter than the product.
Prepare the set in this order:
- Create a clean sweep: Curve paper or card from the tabletop into the background, or stretch fabric tightly over a stand. This removes a visible corner and reduces retouching.
- Remove distractions: Wipe dust from the product, check for wrinkles, and look for seams or uneven brightness.
- Separate the lighting: Keep background illumination apart from the product light when possible. This gives you more control over a clean white result. Follow this guide to making a background white for practical guidance on separation and light control.

Save approved background styles for repeatable work:
- Catalog neutral: A plain white or light surface for product inspection.
- Brand surface: A repeatable color, texture, or set for related products.
- Lifestyle context: A scene that communicates use, scale, or environment.
Background removal and replacement can test these options after capture or generation. Keep the product's apparent color and function unchanged. Once one credible image works, its background rules become a useful standard for AI-generated variations, product listings, and social media formats.
3. Optimize Camera Settings and Focus
A sharp product image starts before editing. Aperture controls how much of the product appears in focus, shutter speed affects motion blur, and ISO can introduce visible noise as it rises. You don't need to master every camera control at once, but you do need a stable starting point and a way to repeat it.
For many tabletop products, try an aperture around f/8 to f/11 as an initial test. This can provide more depth of field than a very wide aperture, but inspect the result rather than trusting a preset. A deep box, a long bottle, or a product angled toward the camera may still need a different position or focus approach.
Make sharpness repeatable
Mount the camera on a sturdy tripod and use focus lock after the product's key surface is sharp. A timer or remote shutter can reduce shake. Manual exposure is useful when you're photographing several items under the same lights because the brightness won't shift every time the camera meters a different label or color.
A black coffee mug on a wooden table may look simple, but its rim, handle, and front surface can sit at different distances from the lens. Review the image at full size. If the logo is soft, move the camera, change the product angle, or adjust the aperture before trying to rescue the file with sharpening.

When preparing images for social platforms, keep export dimensions and compression in mind. These Instagram photo export settings can help you preserve detail during publishing. If you're using AI-generated product images, inspect hands, edges, logos, text, and reflections before approving a batch. Technical quality still needs human review.
4. Practice Composition and Framing Techniques
A well-lit product can still confuse shoppers if the frame hides its purpose. Composition guides attention, much like a shop window directs visitors toward its main display. Begin by asking what the viewer must understand first: the overall design, the product's depth, or a detail such as a clasp, texture, finish, or control.
Use the camera grid to test placement. Rule-of-thirds positioning suits lifestyle images that need room for copy or interface elements. Centered framing usually works better for a clean catalog view. Choose the arrangement according to the shopping task, then keep that choice consistent across a product set.
Build each shoot around a small angle plan:
- Straight-on view: Shows symmetrical packaging, labels, posters, and front-facing products clearly.
- Three-quarter view: Reveals depth in boxes, appliances, footwear, and furniture.
- Detail view: Confirms texture, stitching, controls, ingredients, or construction.
- Overhead view: Organizes flat-lays, stationery, food, and grouped accessories.
Leave negative space when the image needs breathing room or supporting text. Check that props and accessories do not cover labels or other buying cues. For an Instagram carousel, use the opening frame to identify the product, then let later frames reveal angles and details. These Instagram carousel planning techniques help when one image cannot explain the whole product.
Treat the approved composition as a production standard. Record the angle, crop, subject position, and empty space, then reuse those instructions for future shoots or AI-assisted variations. Generate alternatives only after deciding which arrangement fits the channel. AI can produce options quickly, while human review confirms that each frame remains clear, credible, and faithful to the product.
5. Use Props and Styling to Tell Your Brand Story
Props should explain the product, not compete with it. A mug beside a breakfast setting suggests use. A wallet beside keys and a notebook can communicate everyday carry. A technical device beside clean geometric objects may reinforce a modern brand. In each case, the surrounding objects give the product context while leaving its important features visible.
Begin with a mood board. Collect examples of colors, surfaces, lighting, and spacing that match the identity you want customers to remember. A premium jewelry brand may use restrained materials and careful negative space, while an artisanal food brand may choose tactile surfaces and handmade serving pieces.
Style for recognition
Choose props that you can reuse. A small set of neutral boards, fabric pieces, trays, books, leaves, or cups can create variety without making every product look unrelated. Keep the color palette controlled and avoid adding an object just because the frame feels empty. Empty space can be useful.
Styling test: Remove one prop. If the product becomes easier to understand, that prop was doing more harm than good.
Think about the story in practical terms. Does the scene show scale? Does it demonstrate use? Does it reinforce a material, audience, or occasion? A fashion retailer may show a garment on a person to communicate fit, while a food seller may show serving context without implying ingredients or portions that aren't included.
AI prompts can include the same decisions you make on a physical set. Describe the surface, supporting objects, color family, light direction, camera angle, and intended mood. Then compare generated results with the actual product. The scene can change, but the item itself must remain accurate.
6. Master Post-Processing and Enhancement Without Overediting
A polished edit should make the product easier to judge, not create a different product. Correct exposure, refine contrast, clean distractions, adjust the crop, and preserve the item's real color. A customer should receive something that matches the image.
Edit in a deliberate order. Start with exposure, then adjust contrast, color, and sharpness. Brighten an underexposed file before increasing saturation, or the colors may become muddy. If the product is already sharp, heavy sharpening can make edges brittle and textures artificial.
Edit one image, then apply the logic
Select a reference image and define what “correct” means for your brand. Compare the screen image with the physical product under neutral light when possible. Check white packaging, metallic finishes, skin tones, and colored fabrics closely because subtle shifts can change expectations.
A batch editor can apply matching brightness, contrast, saturation, resizing, background removal, and enhancement settings to related files. Consistency usually serves a catalog better than dramatic effects. Follow this post-production workflow guide to organize those adjustments.
Review before-and-after views often. If the filter attracts more attention than the product, reduce its strength. If an AI tool replaces a label, changes a seam, invents an accessory, or alters the product color, reject the output.
For comparison on automated enhancement approaches, see these best AI photo editors for property. AI-assisted production becomes dependable when it follows a clear visual standard: first create a credible product image, then use that standard to guide repeatable e-commerce and social media variations. A person remains responsible for accuracy.
7. Build Consistency and Create a Shooting System
A product shoot becomes easier to scale when the setup is repeatable. Without a record, small changes in light, crop, camera height, or color can make related products look as if they belong to different catalogs.
Start with a reference frame that represents the standard you want. Record the backdrop, light positions, diffuser, reflector, camera height, lens, exposure settings, focus method, crop, and export format. A phone photo of the physical set can reveal placement details that written notes miss.
Use this five-part routine:
- Prepare the product: Clean surfaces, check labels, arrange included parts, and remove packaging marks.
- Rebuild the set: Match the backdrop, light direction, camera position, and product orientation.
- Capture the sequence: Shoot the hero view, an alternate angle, a detail, and a context frame.
- Review immediately: Check focus, reflections, color, edges, unwanted objects, and scale.
- Name and sort files: Store originals, selected images, edited files, and exports in separate folders.
The sequence works like a recipe. Each recorded step removes a guess, so a later session can reproduce the same visual result instead of relying on memory.
AI production needs the same discipline. Document the desired angle, lighting direction, background style, composition, and product description alongside camera settings. Create templates for product categories, then change one variable at a time when generating e-commerce or social media variations. This preserves a credible product image as the visual reference rather than treating AI output as a substitute for accuracy.
Bulk Image Generation can support campaign variations, but review samples before approving a large batch. Confirm that each image preserves the product identity and the established visual rules. A documented system makes improvement clearer because you can identify which single change caused a better or worse result.
Beginner Product Photography: 7-Point Comparison
| Technique | Implementation complexity | Resource requirements | Expected outcomes | Ideal use cases | Key advantages |
|---|---|---|---|---|---|
| Master Lighting Fundamentals | Medium, learning placement & balance | Studio lights or quality natural light, softboxes, reflectors, stands | Even, dimensional images with accurate detail | E‑commerce, jewelry, beauty, AI prompt refinement | Highlights texture, reduces editing, consistent look |
| Choose and Prepare Your Background | Low–Medium, selection and prep | Backdrops, stands, wrinkle‑free fabrics, background removal tools | Focused product presentation; consistent catalog look | Catalog white shots, lifestyle imagery, social posts | Increases focus/conversion; easy background swaps |
| Optimize Camera Settings and Focus | Medium–High, technical camera knowledge | Camera, lenses, tripod, knowledge of aperture/shutter/ISO | Sharp, low‑noise images with consistent exposure | High‑detail product shots, reviews, batch shoots | Ensures clarity, reduces reshoots and fixups |
| Practice Composition and Framing Techniques | Medium, artistic practice & testing | Camera grid, staging area, varied angles, simple props | Engaging, well‑balanced images that guide attention | Social media, ads, product carousels, lifestyle shots | Improves engagement; highlights key features |
| Use Props and Styling to Tell Your Brand Story | Medium, styling and curation effort | On‑brand props, mood boards, color palettes, styling kit | Contextualized, emotionally resonant product images | Brand storytelling, lifestyle campaigns, premium products | Builds brand identity; raises perceived value |
| Master Post‑Processing and Enhancement Without Overediting | Medium, software skill and restraint | Editing software, batch editor, color reference tools | Consistent, accurate images delivered efficiently | Large catalogs, marketplaces, social content prep | Batch saves time; maintains authenticity and consistency |
| Build Consistency and Create a Shooting System | High, planning, documentation, QA | Style guides, templates, documented settings, workflow tools | Scalable, repeatable production with uniform visuals | High‑volume e‑commerce, agencies, multi‑person teams | Enables scale, faster onboarding, reliable output |
Turn Seven Tips Into a Simple Workflow
Start by identifying the product and the channel. A marketplace listing usually needs a clean, informative hero image, while a social campaign may also need lifestyle framing, vertical crops, detail views, or space for text. Decide what the customer must understand before choosing the set.
Next, prepare consistent light and background conditions. Use a window with diffusion or a controlled artificial source, add a reflector to manage shadows, and remove wrinkles, dust, and distracting objects. Keep notes about the setup so you can reproduce it for the next product instead of trying to remember where every light stood.
Capture a small, purposeful group of views. Include a clear primary image, an alternate angle, a detail close-up, and a context or scale image when that information helps the buyer. Check focus at full size, then review the composition at the dimensions and crop your channel will use.
Edit with restraint. Correct exposure, contrast, and color before making stylistic decisions. Remove distractions, keep the product believable, and apply the same treatment across related images. If the final set looks inconsistent, return to the source conditions before adding stronger effects.
AI can support the parts of this workflow that benefit from variation and repetition. You might use it to explore background options, create channel-specific compositions, or generate a group of visual directions from a documented product standard. Bulk Image Generation also offers batch generation and batch editing for users who need to create variations and apply consistent adjustments. Use it as a production aid, not as a substitute for inspecting whether the product, label, proportions, shadows, and color remain accurate.
Product photography developed around the need to show products realistically and informatively. Historical advances such as color photography and portable 35mm cameras made the discipline more accessible, while earlier commercial images often relied on drawings or illustrative renderings, as described in this history of product photography. That history still offers a useful standard: make the item easy to trust and easy to understand.
The commercial value of that clarity is measurable. A 2026 industry roundup values the global ecommerce product photography market at $2.3 billion, reports that 75% of online shoppers rely on product photos when making purchase decisions, and cites research that high-quality photos can convert 94% better than low-quality photos. It also reports that high-resolution images are shared 40% more often on social media, so sharp, well-lit files can support both shopping and distribution goals. See the product photography statistics roundup for the cited figures.
Start with one product today. Photograph it under one controlled setup, document the choices, produce the essential angles, and change only one variable in your next attempt. That practice will teach you more than buying new equipment before you know which part of the image needs improvement.
Bulk Image Generation helps you create product visuals in batches and apply post-production adjustments across a consistent set. Use it to explore background, composition, and channel variations after you've defined what accurate product presentation looks like. Visit Bulk Image Generation to test a repeatable workflow for your ecommerce and social media images.