
How to make background white instantly

Aarav Mehta • November 22, 2025
Discover how to make background white with free tools, mobile apps, and Photoshop—expert tips for flawless, professional product photos.
Making a background white is surprisingly simple these days, often taking just a few clicks with the right tools. Whether you're aiming for a clean e-commerce product shot, a professional headshot, or a crisp graphic, the basic idea is the same: isolate your subject and swap out the backdrop for pure, clean white.
Why a White Background Is a Game Changer
Before we jump into the "how-to," it’s really worth understanding why a clean white background is so powerful. A crisp, white backdrop doesn't just look professional; it completely eliminates distractions. This simple change forces the viewer's eye directly onto your product or subject, making it the hero of the image.
This kind of clarity builds trust and creates a sense of consistency, whether someone is scrolling through an Amazon listing or your Instagram feed.
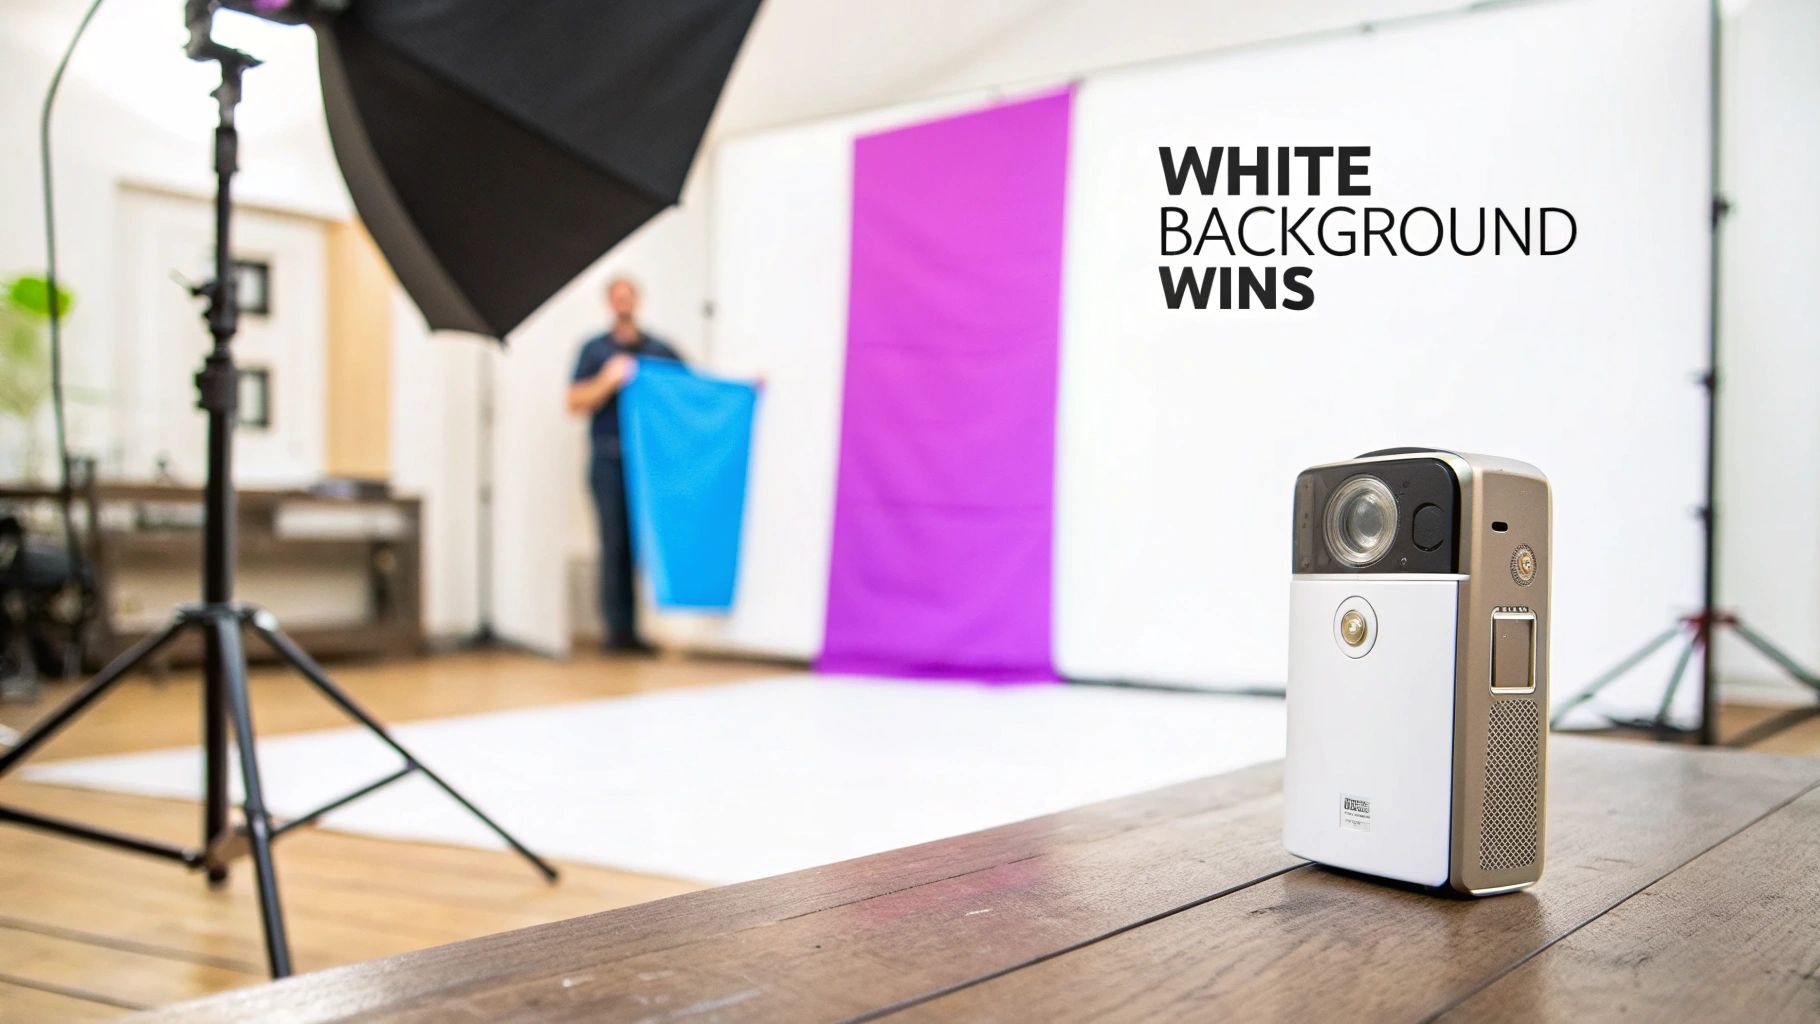
The Psychology of Simplicity
The impact of a white background is actually rooted in psychology. We universally associate it with purity, simplicity, and professionalism. In fact, research shows that 73% of people see content on a white background as more trustworthy than on colored ones, a perception that holds true across different markets around the world.
What feels like a simple edit is actually a strategic move for your business. It can:
- Increase Perceived Value: A clean, professional presentation makes products feel more premium.
- Improve Brand Consistency: It creates a cohesive, organized look across all your visual marketing materials.
- Meet Marketplace Requirements: Major platforms like Amazon and eBay actually require white backgrounds for primary product listings.
By focusing the viewer's attention solely on the subject, a white background removes all the visual noise. This lets potential customers see important details clearly and helps them make purchasing decisions faster. It turns a simple photo into a powerful sales tool.
This is especially critical in e-commerce, where high-quality visuals have a direct impact on conversion rates. And thankfully, modern tools have made achieving this look more accessible than ever. You can even check out our complete guide on AI product photography to see how technology is simplifying this process even more.
Once you understand this "why," the small task of editing a background becomes a deliberate and effective strategy.
Get Instant Results with Free Online Tools
Need a white background right now? If you don't want to mess with complicated software, free online tools are your new best friend. These web-based editors use AI to handle all the tricky parts, usually with a simple drag-and-drop. You can completely transform your photos in seconds without downloading a single thing.
The whole process is refreshingly simple. You just upload your image, the tool's AI automatically finds and isolates your main subject, and then you can pop in a clean, white background. It's a total game-changer for quick edits, social media posts, or just cleaning up a photo fast.
Most of these tools look something like this—clean, simple, and straight to the point.
That big "Upload Image" button is pretty much all you need to get started, making it incredibly easy for anyone to jump right in.
Finding the Right Tool for the Job
While most free online removers work in a similar way, they definitely aren't all created equal. Some are fantastic with simple, solid objects that have clean lines, while others are a bit more skilled at handling tricky edges like hair, fur, or semi-transparent fabrics.
Here’s what to look for:
- For simple products: If you're just editing a book, a bottle, or a coffee mug, look for a tool that’s built for speed. You don’t need a bunch of fancy features for that.
- For complex subjects: Photos with people, pets, or detailed objects might need a little extra love. Choose a tool that offers some basic refinement options, like a manual erase brush, so you can clean up any little mistakes the AI might have made.
- Check the output resolution: This is a big one. Many free tools will cap the resolution of your downloaded image. Before you get started, always double-check that the output quality is high enough for what you need, especially if it's for an e-commerce site.
The tech behind these tools has come a long way. What used to take a designer hours of painstaking work in Photoshop is now almost completely automated and available to everyone. The demand is massive—one major creative platform saw over 1.2 million downloads of 'white background' assets in a single month last year.
The biggest selling point for online tools is speed. For probably 80% of common situations—like a quick product shot for Instagram or a new profile picture—an online tool gets the job done well enough, and in a tiny fraction of the time.
To give you a better idea of what's out there, here's a quick rundown of some popular free options.
Comparing Free Online Background Remover Tools
This table breaks down a few of the go-to free tools for making a background white, focusing on what matters most when you're just starting out.
| Tool Name | Ease of Use | Best For | Key Limitation |
|---|---|---|---|
| Remove.bg | Extremely Easy | Quick, single-subject removals (people, products) | Free version offers a lower-resolution download. |
| Canva | Very Easy | Social media graphics & all-in-one editing | Background remover requires a Pro subscription. |
| PhotoRoom | Easy | E-commerce product photos with template options | Free version includes a small watermark. |
| Fotor | Easy | General photo editing with background removal | Some advanced features are behind a paywall. |
Each of these tools can get you a clean white background fast, but the best one for you really depends on what you're working on and whether you can live with limitations like watermarks or smaller image sizes.
Of course, sometimes the best edit is the one you don't have to make. For e-commerce sellers who want perfect shots from the get-go, using a product photography light box can be an amazing alternative to digital editing.
And if you'd rather create images from scratch with the perfect background already built-in, our AI-powered image generator can help you design exactly what you need from a simple text prompt.
When a quick online tool just won't cut it, it's time to bring in the big guns: Adobe Photoshop. There's a reason it's been the industry standard for decades. Photoshop gives you pixel-perfect control, which is exactly what you need for a truly flawless finish.
Yes, there’s a bit of a learning curve, but a couple of core techniques are all you really need to master making a background white.
For most images, your journey will start with Photoshop's AI-powered Select Subject tool. You can find it under the 'Select' menu, and it's your best first move. This feature scans your photo and automatically draws a selection around your main object. I've found it's surprisingly good and almost always gives me a solid starting point, saving a ton of manual work right off the bat.
Of course, AI isn't foolproof. You'll probably need to clean up the edges, especially if you’re working with something tricky like flyaway hair or a product with lots of little details. This is where non-destructive editing becomes your best friend.
Mastering Layer Masks for Precision
Instead of hitting the delete key and permanently erasing the background, pros use Layer Masks. Think of a layer mask as a flexible stencil. It lets you hide or show parts of a layer without actually destroying any of the original image. Once you have your initial selection, just click the 'Add Layer Mask' icon (it looks like a rectangle with a circle inside) at the bottom of your Layers panel.
Instantly, a mask appears. Everything you selected stays visible, and the rest is hidden. Now the real work begins. You can perfect the edges by painting directly on the mask—painting with black hides parts of the image, while painting with white brings them back. It’s an incredibly forgiving way to work, letting you tweak things until they're just right.
The real magic of a Layer Mask is its flexibility. If you accidentally erase too much of your subject, you don’t have to frantically hit 'undo' and lose all your progress. You just switch your brush color to white and paint that part right back in. Simple.
This workflow, while more hands-on than a one-click online tool, is the secret to getting professional-level results. The diagram below illustrates the much simpler, automated process that those online tools typically use.
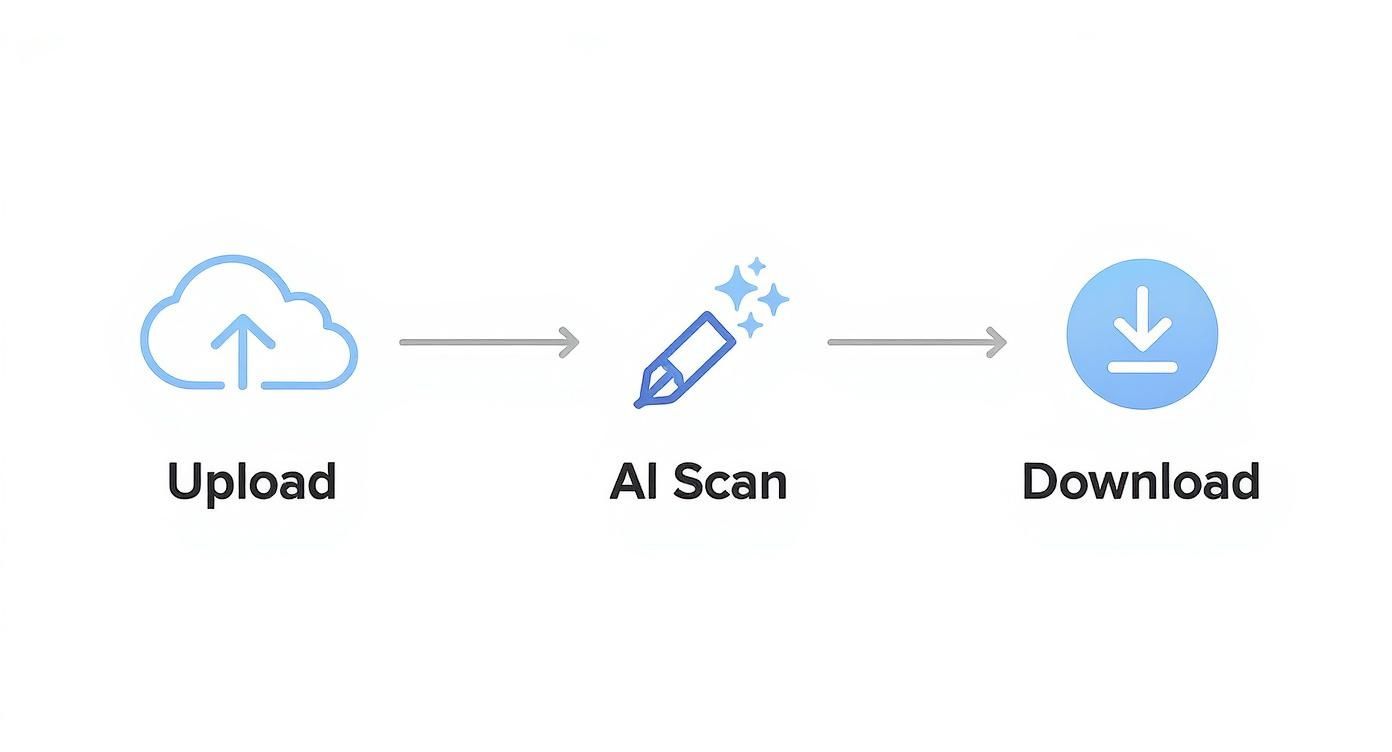
This visual breaks down that basic upload-scan-download process. Photoshop takes this concept and layers on powerful tools for ultimate control.
Refining Edges Like a Pro
For the really tough selections—I'm talking about hair, fur, or the fuzz on a sweater—the Select and Mask workspace is where you need to be. After making your initial selection, you'll see this option pop up in the toolbar at the top of your screen. This dedicated space is packed with specialized tools designed to handle those nightmare edges.
Here are the tools I use most in this workspace:
- Refine Edge Brush: This thing is a lifesaver. You just paint with it along the fuzzy, complicated edges, and Photoshop’s algorithm intelligently figures out what's subject and what's background. It’s brilliant for hair.
- Feather and Contrast Sliders: These are great for the final polish. A little bit of feathering can soften the selection's edge just enough to help it blend more naturally into the new white background, avoiding that harsh, "cut-out" look.
By combining the AI speed of Select Subject with the manual control of layer masks and the precision of the Refine Edge tool, you can isolate just about anything. You'll end up with a subject that looks completely natural on a crisp, clean white background. That attention to detail is what separates a decent image from a truly great one.
Editing on the Go with Mobile Apps
Believe it or not, your smartphone is a surprisingly capable editing machine, especially when you need to knock out a white background without being chained to your desk. If you’re a social media seller, a small business owner, or just creating content on the fly, mobile apps are a lifesaver. You can get professional-looking product shots ready to post in minutes.
The whole process is built for speed.
You just pull a photo from your camera roll, and most modern apps have some sort of 'magic' or AI selection tool. With one tap, these tools intelligently find your main subject and lift it right out of its surroundings. All the heavy lifting is done for you.
From there, swapping in a clean, solid white backdrop is instant. The whole thing can take less than a minute.
Cleaning Up the Edges
Now, while those automated tools are incredibly fast, they aren’t always perfect. We've all seen it: slightly jagged or messy edges, especially around fuzzy textures like a sweater or complex shapes like a plant. The AI might miss a tiny spot or leave a faint halo from the old background.
This is where the manual tools come in, and they're non-negotiable for a good result. Look for apps that give you:
- An eraser tool to manually wipe away any leftover background bits.
- A restore brush to bring back parts of your subject the AI accidentally snipped off.
- A solid zoom feature, so you can get right in there for precise work.
Don't be afraid to pinch-and-zoom and spend an extra 30 seconds cleaning up the edges with a manual eraser. This small step is what separates a quick, amateur-looking edit from a polished, professional result that looks clean on any platform.
Finding the Right Mobile App
The best apps walk a fine line between speed and precision. Some are designed purely for one-tap background removal, which is fantastic for simple, solid objects. Others pack in more robust editing features, giving you the fine-tuned control you need for more detailed images.
From my experience, the most effective setup is an app that offers both automated and manual tools. That way, you’re equipped to handle anything you throw at it—from a simple product on a table to a more complex portrait—all from your phone.
Pro Tricks for a More Realistic Look
So you’ve swapped out the background for a clean white one. Great start! But if your product now looks like a flat sticker slapped on the page, you're not done yet. This is where a little finesse comes in—the small tweaks that trick the human eye into seeing a real, three-dimensional object.
Honestly, these final touches are what separate an amateur edit from a professional-grade product shot that actually sells.
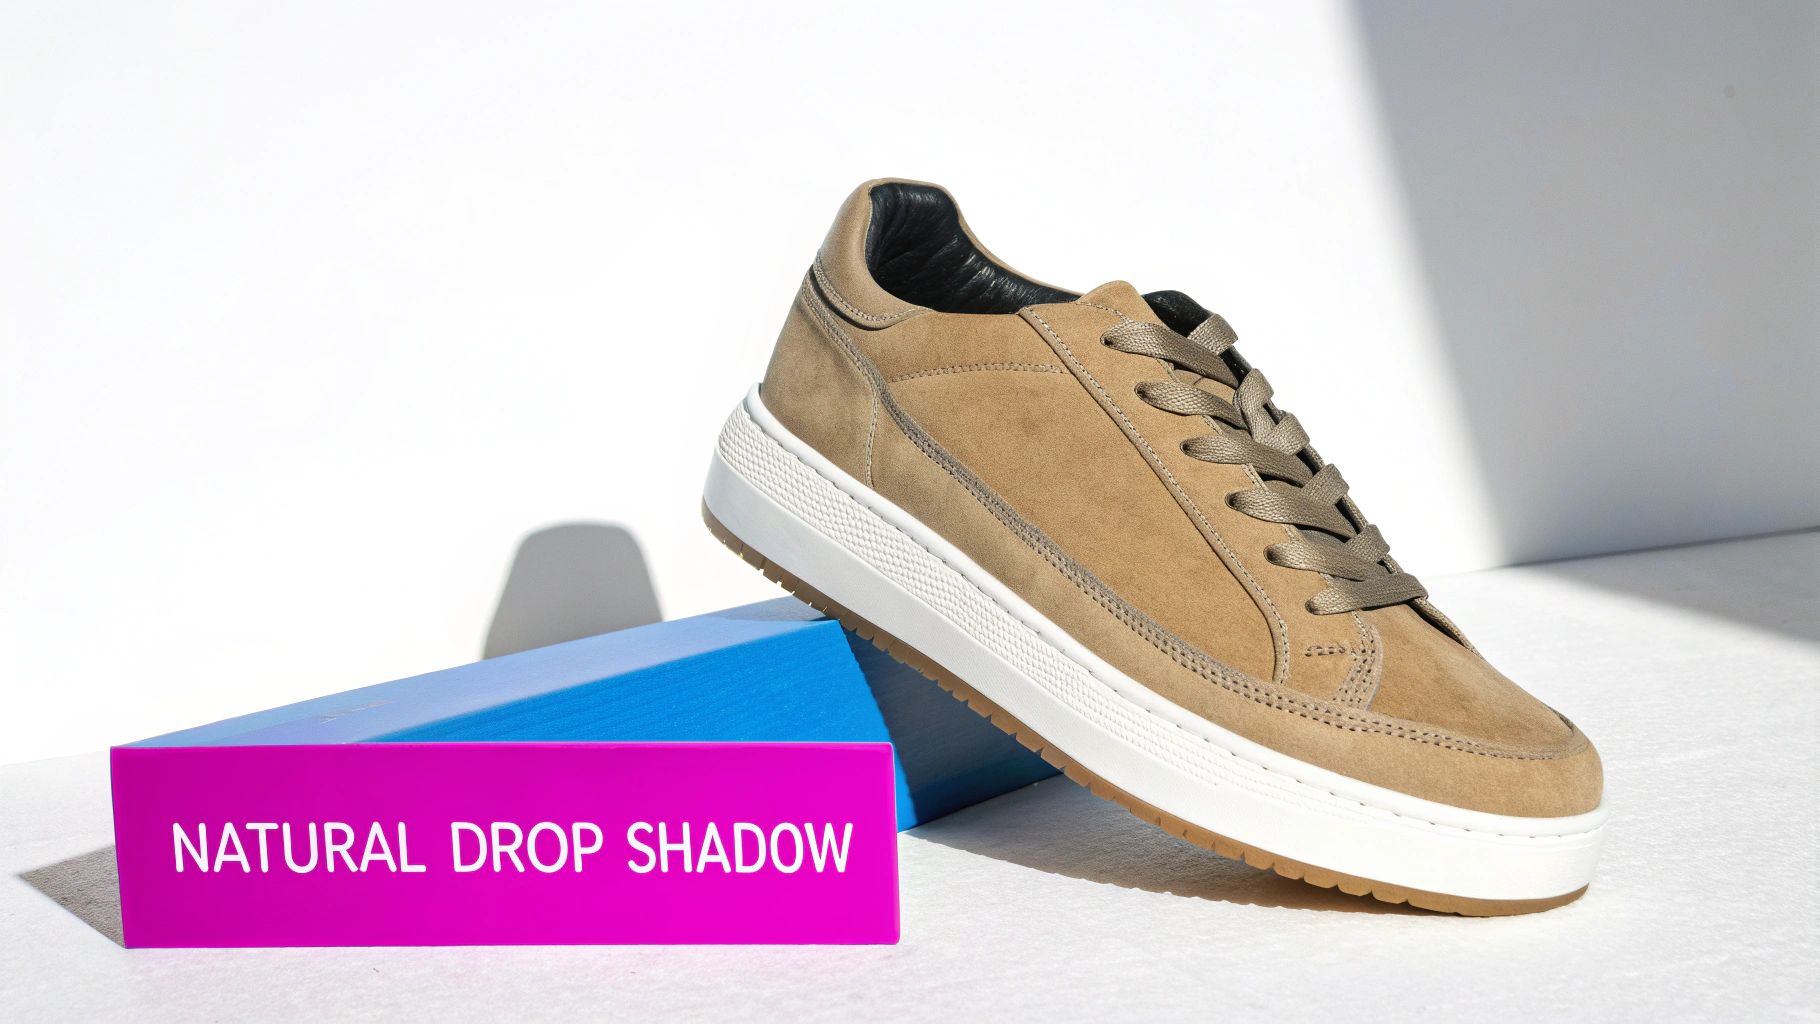
The quickest way to ground your product in reality is by adding a soft, natural drop shadow. It’s a simple move, but it stops your item from looking like it’s floating aimlessly in space. This gives it weight and presence. Nearly every editing tool has a drop shadow function; the real trick is to dial it back. Think subtle—low opacity and a gentle blur.
Start with a Better Photo
Here’s a tip that will save you a ton of editing headaches: think about the background before you even press the shutter.
If you shoot your product against a plain, contrasting background—like a solid blue or green screen—you make the AI’s job of isolating the subject way easier. The result is a much cleaner, more accurate cutout right from the get-go. Less manual cleanup for you, better final image.
The push for white backgrounds isn't just a trend; it's a global standard. A 2022 survey found that over 78% of designers prefer white backgrounds for most visual content, pointing to clarity and simplicity as the main drivers. It’s a huge part of what makes web content universally understood.
These are the kinds of details that add that final layer of polish and believability.
For those who want to take it even further, you can explore how to create stunning digital product images using AI generators. Many of these advanced tools can automatically handle shadows and lighting to create hyper-realistic scenes from scratch.
Common Questions About White Backgrounds
Even with the best AI tools in your corner, you're bound to hit a few snags. Getting a feel for these common issues is the real secret to creating a perfect white background every single time.
Why Does My White Background Look Gray?
One of the most common frustrations is exporting an image only to find the background is a dull gray or dingy off-white instead of that crisp, pure white you were aiming for. This almost always happens when the background wasn't lit separately from your subject during the original shoot.
The fix is usually pretty quick in post-production. Just pull up the levels or curves adjustment tool in your favorite editor. Use the eyedropper to click on the background and check its color values—for a true, clean white, the RGB values should all be 255. From there, you can gently nudge the highlights up until you hit that magic number. Just be careful not to blow out the details on your actual subject.
How Do I Fix Jagged Edges?
Another classic problem? Those jagged, pixelated edges that scream "I was cut out with an automated tool!" This is a dead giveaway that the AI struggled, usually because there wasn't enough contrast between your subject and the original background.
There are a couple of ways to smooth things out:
- Feather your selection: Softening the edge of your cutout by just 1-2 pixels can work wonders.
- Use a refine edge tool: Most good editors have a tool that lets you manually paint over tricky spots like hair or fuzzy fabric to clean up the selection.
Honestly, the best fix is preventing the problem in the first place. If you can, always shoot your subject against a solid-colored background that contrasts with it. It gives the AI a clean line to follow, which means a much better initial cutout and way less cleanup for you later.
Once you get the hang of creating flawless white backgrounds, learning to organize digital assets is the next logical step to make your entire content process run like a well-oiled machine.
Ready to create stunning, professional images without the manual editing hassle? Bulk Image Generation uses powerful AI to generate hundreds of unique visuals with perfect backgrounds in seconds. Try it now and see how easy it can be.