Image Resizer No Quality Loss How to Keep Images Sharp

Ryan Bennett • September 23, 2026
Learn how image resizer no quality loss really works. Get settings, formats and batch tips to resize without visible quality loss.
You've got a folder of images that look sharp in Finder, then go soft in Shopify, Instagram, or a PDF export. That's the point where image resizer no quality loss starts sounding like a promise you can trust, until you look closer and realize the actual job is to avoid visible quality loss, not to pretend pixels never changed.
The difference matters. Resizing always changes the pixel grid, so the honest question isn't whether quality changes at all, but whether the change is small enough that nobody notices it in the final use.
Why No Quality Loss Means No Visible Loss
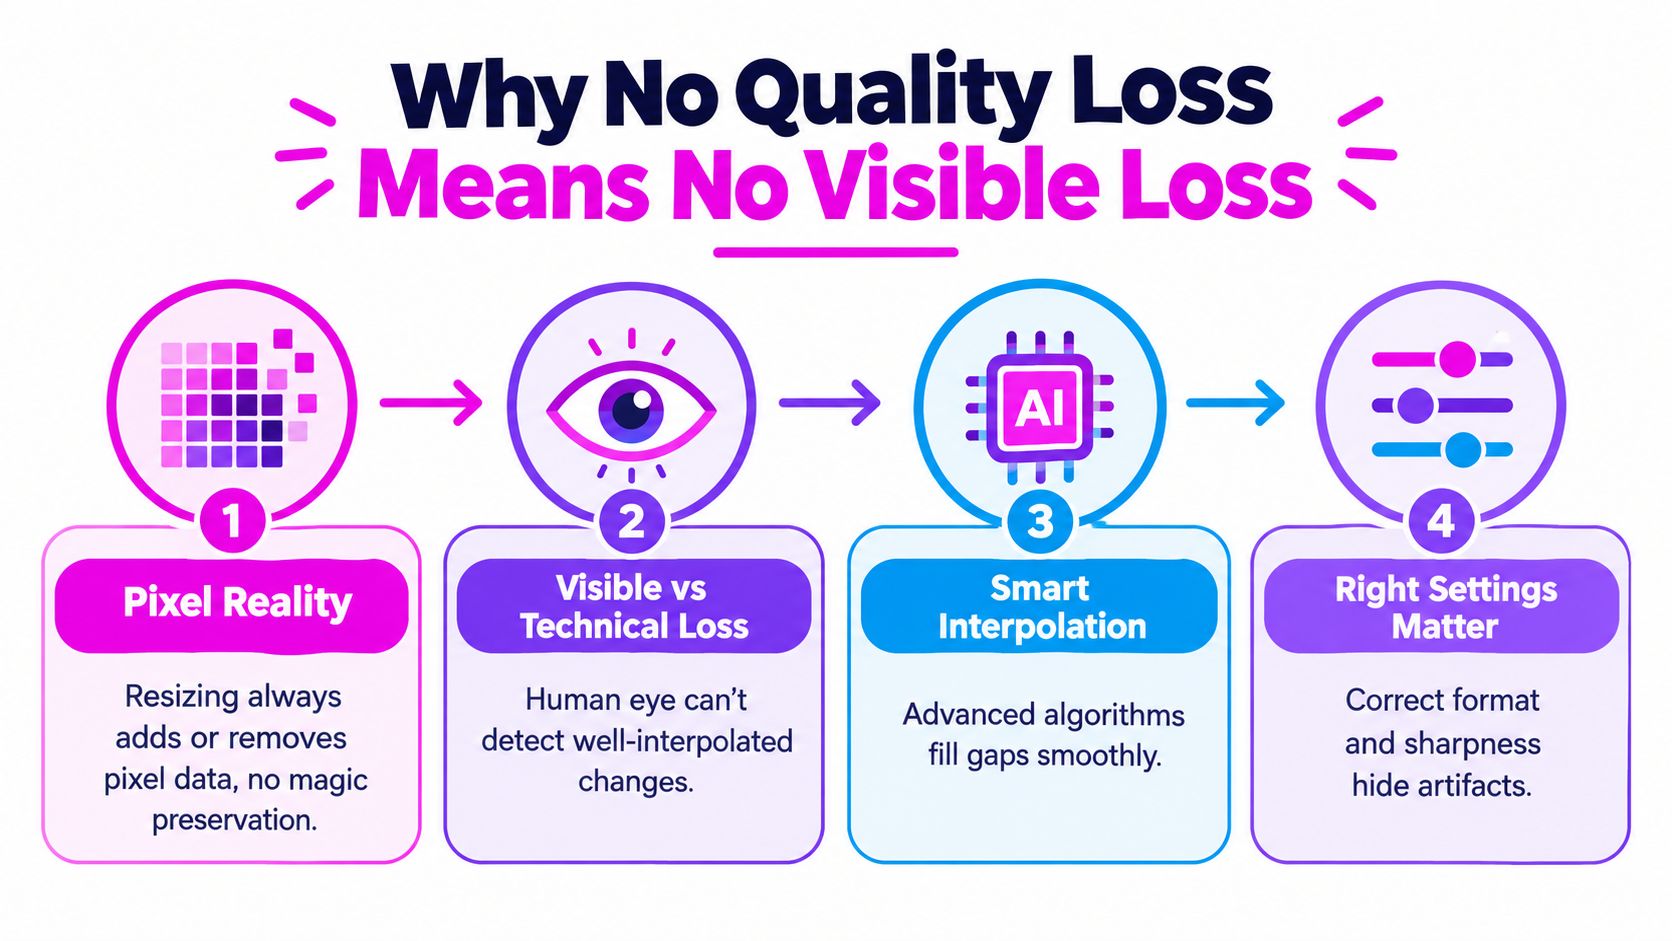
The phrase no quality loss gets used a little too casually. In practice, resizing always involves a tradeoff between size and fidelity, because resampling adds or removes pixel data, and Adobe's documentation says that upsampling adds data while downsampling removes it, with quality degrading to some extent in both cases. Adobe's resizing and resampling guidance is blunt about the core reality.
Pixel reality first
If you double a file from 250 KB to 500 KB, you're adding twice as much data, and Adobe notes that the result can look blurry, jagged, or blocky. That's why a resize is never magic. It either removes pixels you no longer need, or it invents new ones based on nearby information.
Practical rule: If the resized image looks fine at the size people actually view it, that's a success. If you have to zoom in hard to see the difference, you've probably achieved visible losslessness even though the file is technically different.
The important split is downscaling versus upscaling. Downscaling can look clean because the software is compressing detail into fewer pixels, while upscaling asks the software to create structure that wasn't captured in the original.
The right mental model
This is why a guide to reducing document size can be useful even outside PDF workflows, because the core idea is the same, remove unnecessary bulk without damaging what matters. For a broader file-size mindset, the guide to reducing document size is a helpful companion read.
A practical way to judge quality is to separate technical loss from visible loss. The former always happens. The latter depends on the resize method, the source file, and whether the final image is being shown on a screen, printed, or compressed again by a platform.
That's the mental model to keep in mind: the goal is not mythical perfection. The goal is the smallest change that preserves sharp edges, clean gradients, and the original feel of the image.
Choosing the Right Resizing Algorithm for Sharp Results
The algorithm matters more than many teams expect. Nearest-neighbor, bilinear, and bicubic sample pixels in different ways, and that changes how edges, text, and diagonal lines survive the resize. Nearest-neighbor copies the closest pixel, which is fast but usually leaves rough edges and blocky detail.
The everyday hierarchy
Bilinear smooths the transition by blending a small set of surrounding pixels. Bicubic goes further, using 16 surrounding source pixels and cubic polynomials, which is why it became a common quality standard in image editors and production pipelines. PetaPixel's explanation of digital photo resizing gives a clear technical summary of why bicubic became the default in so many workflows.
A comparison table makes the trade-offs easier to scan.
| Resizing Algorithms Compared for Quality and Speed | How It Works | Quality Tradeoff | Best For |
|---|---|---|---|
| Nearest-neighbor | Copies the closest pixel | Fast, but jagged edges and blocky detail | Tiny previews, pixel art, quick checks |
| Bilinear | Blends four nearby pixels | Smoother than nearest-neighbor, but softer | Simple UI tasks, low-stakes resizing |
| Bicubic | Uses a larger neighborhood and weighted curves | Better edge preservation, more natural gradients | Most web, social, and print-safe resizing |
| Lanczos | Uses a wider mathematical window | Can preserve detail well, but may feel sharper or more complex to tune | Demanding downscales and quality-sensitive work |
In practical terms, nearest-neighbor is the easiest way to show a poor resize. One comparison reported PSNR of 27.1291 dB for the Lena, Girl, and Pepper images under nearest-neighbor interpolation, which matches what designers usually see on screen, harsh edges and weakened detail. The broader comparison of common scaling methods also shows that linear interpolation can still reduce standard deviation by 1.9–3.2% across datasets, so even gentle resizing changes measurable image properties.
When bicubic is the safe default
For most production work, bicubic is the first filter I would try. A comparative study found bicubic resizing achieved PSNR values above 51 dB and MSE in the 0–1 range, outperforming nearest-neighbor and bilinear interpolation on quality metrics. That comparison is summarized in the UKMC journal study.
Bicubic is the filter you reach for when the image needs to look normal, not experimental.
There is still a ceiling. Once enlargement goes past about 2x, blur and detail loss become much more noticeable, even if the resize is mathematically correct. For a closer look at where enlargement starts to break down, see this upscaling guide.
Format Resolution and PPI Settings That Protect Quality
A resize can be technically correct and still look bad if the file format or output settings work against it. The most common mistake is treating pixel dimensions, format, and PPI like the same thing. They're not.
Downscaling is forgiving, upscaling is not
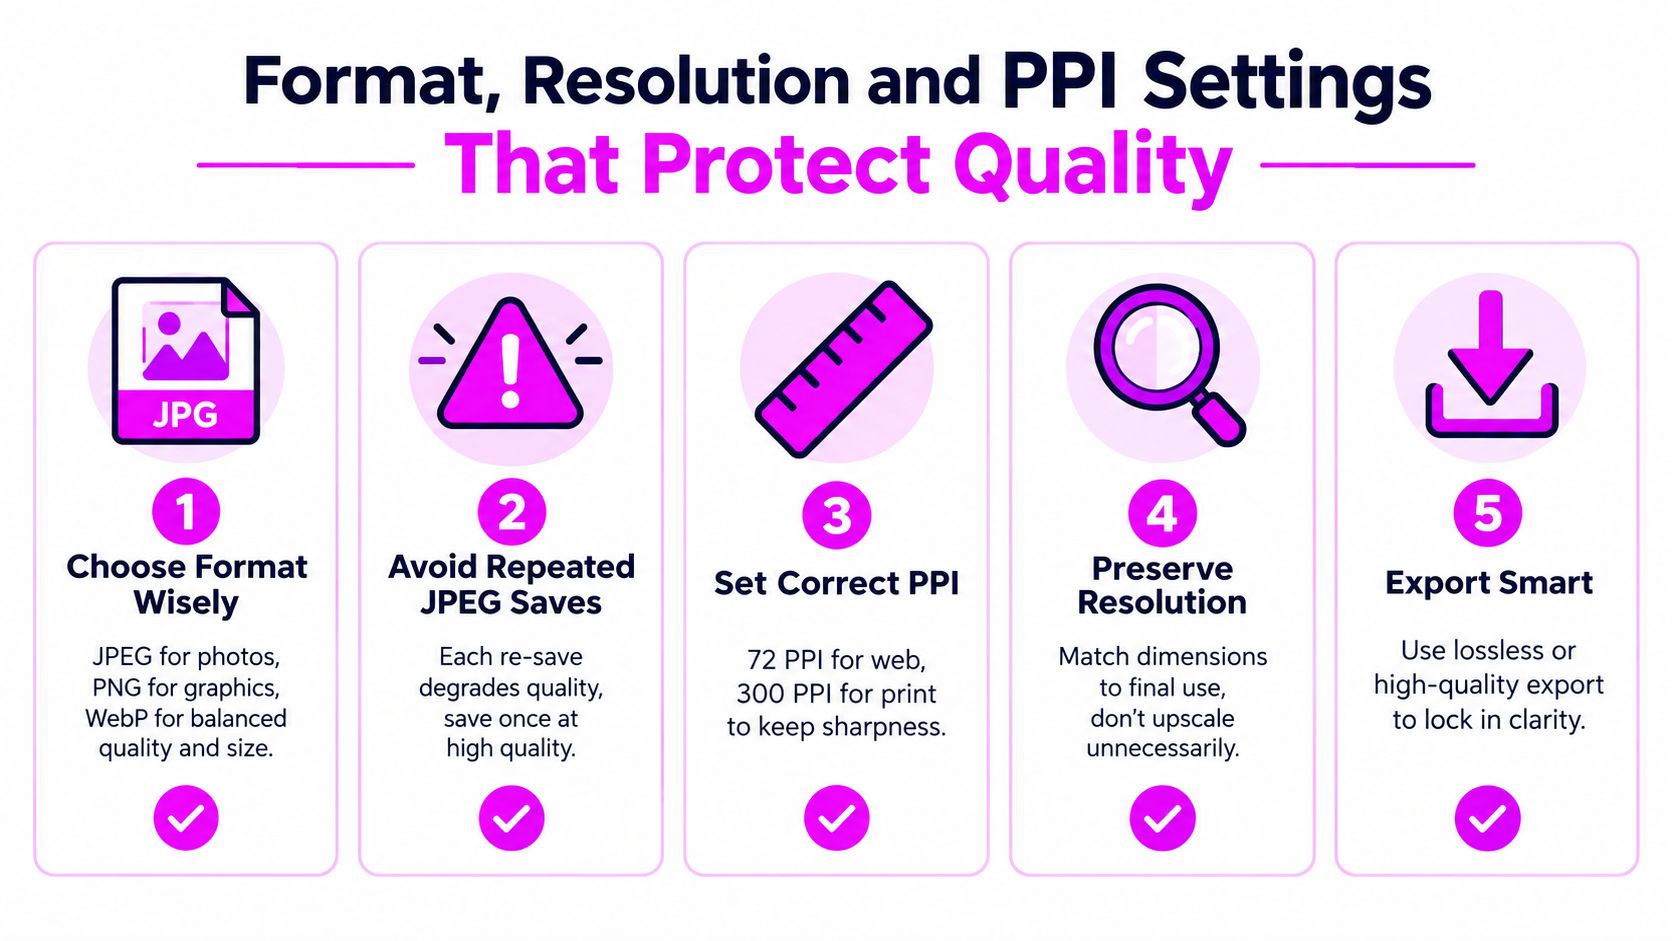
Recent technical coverage makes the practical split clear, downscaling can be effectively lossless to the human eye with methods like bicubic or Lanczos, while upscaling typically degrades detail unless AI-based enlargement is used, and repeated JPEG saving compounds loss. MergeImages' guide to resizing without losing quality captures that distinction well.
That means the format decision should match the image's job:
- JPEG: Good for photographs when file size matters and transparency isn't needed.
- PNG: Better for graphics, text overlays, logos, and transparency.
- WebP: Useful when you want a balance between visual quality and smaller delivery size.
For print, the output target matters just as much as the format. If you need a print-ready asset, use a proper size and resolution from the start, because a screen-sized image enlarged for print will never recover missing detail. The perfect print settings guide is useful if you're building assets for posters, flyers, or product inserts.
PPI is a print concern, pixels are the real starting point
PPI often gets overemphasized in web conversations. For web, pixel dimensions drive the result. For print, PPI helps determine how those pixels map onto paper, so a file that looks fine on a monitor can still fall apart on press if the source dimensions are too small.
Shortcut: Choose the pixel dimensions first, then confirm the output format, then check PPI only if the image is going to paper.
If you're planning sizes for banners, social crops, or product grids, this resolution and size reference is useful when you need a quick sanity check before export. The right sequence is simple, match the destination, avoid needless recompression, and don't enlarge a weak source file just to fill a box.
How to Resize Images Without Visible Quality Loss
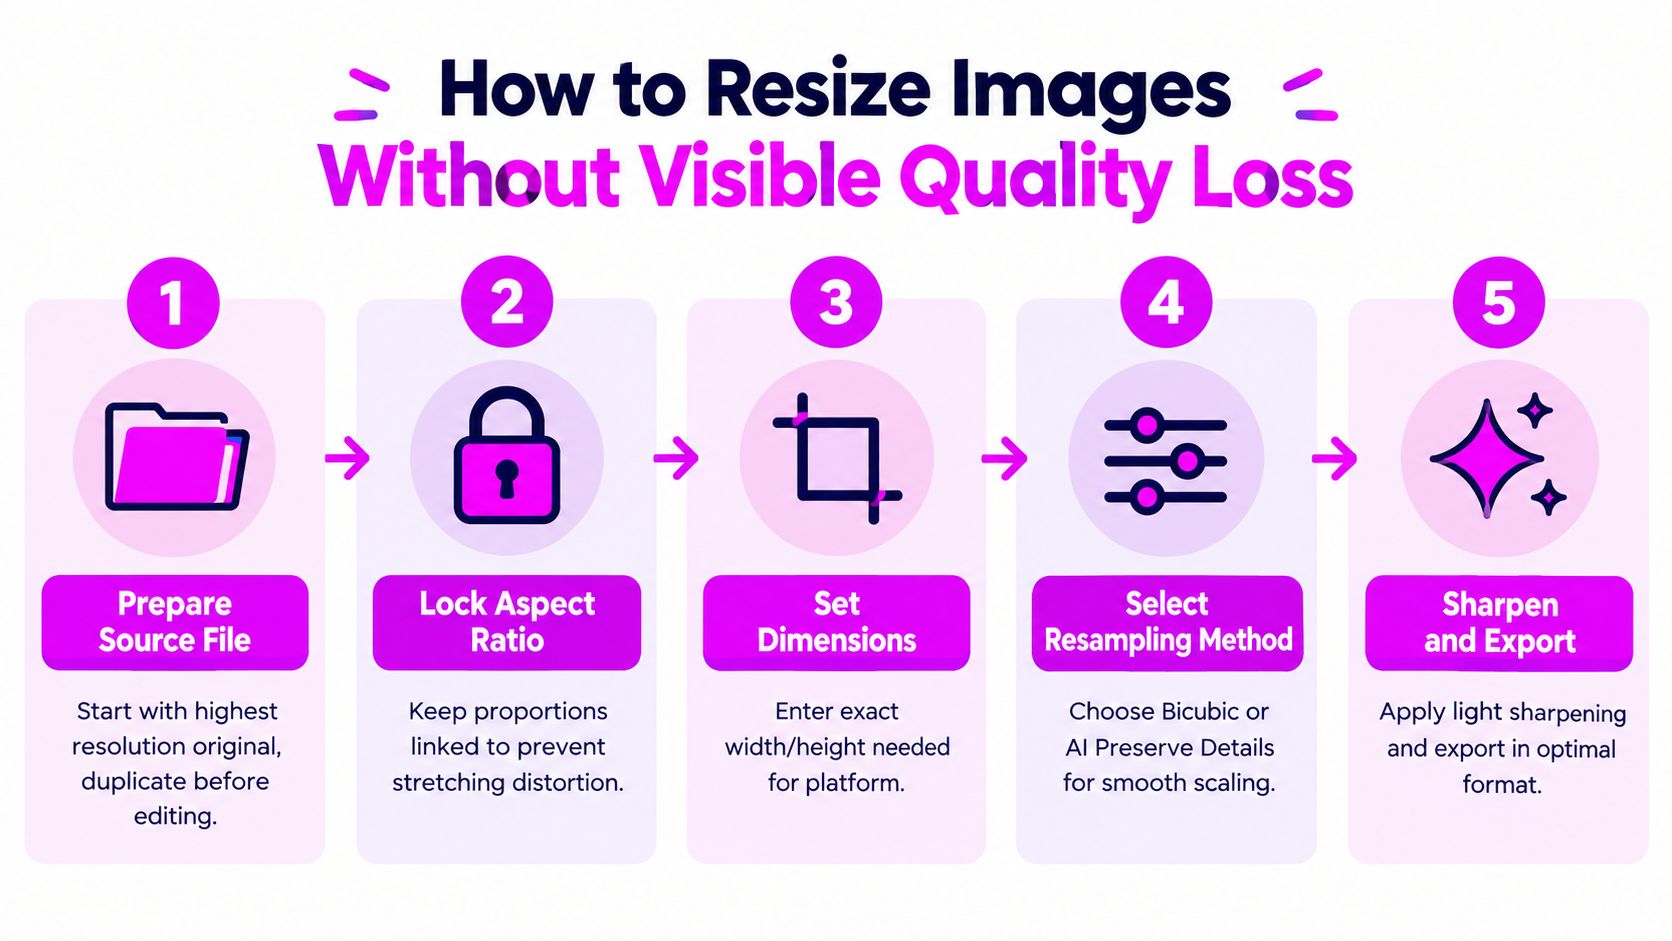
A product image can look sharp in your editor and soft after upload. The usual causes are a weak source file, an incorrect crop, repeated exports, or a platform applying its own resize. Start with the strongest original available, duplicate it, and work on the copy. Every additional save can discard detail, especially with lossy formats.
Settings that preserve visible sharpness
Lock the aspect ratio before changing dimensions. Editing width and height independently stretches subjects and makes clean images look distorted. Set the target dimensions first, then choose the output format and compression level.
Use bicubic resampling for routine downscaling. It samples a larger neighborhood than bilinear interpolation, helping retain edges and fine detail without introducing the artificial texture that aggressive sharpening can create. For modest reductions, bicubic is usually the practical production default.
Upscaling requires a different decision. If the source is only slightly smaller than the target, bicubic can produce a credible result. For a substantial enlargement, use AI super-resolution when extra apparent detail matters, then inspect faces, text, product edges, and repeating patterns. AI can invent texture, so it needs a visual check rather than automatic approval.
After resizing, apply light sharpening only if the image appears soft at its final display size. Excess sharpening creates halos around products and text, and those artifacts become more obvious after platform compression.
A workflow that holds up in production
For a Shopify product grid, resize square images to one consistent final size, keep the crop centered on the product, and export once in the delivery format. For Instagram and LinkedIn, match the intended aspect ratio before uploading so each platform has less work to do. For print, verify that the source has enough pixels before enlarging it.
Keep a master file separate from delivery files. Name exports by channel and dimensions, review them at actual size, and compare the smallest important details before publishing. A consistent process makes it easier to make a photo smaller MB without confusing lower file weight with preserved quality.
For catalogs and campaign assets, record the crop rule, resampling method, sharpening level, format, and compression setting. Apply those choices consistently across the set. The cleanest resize is the one viewers barely notice after upload.
Batch Resizing and AI Enhancement Tips for Faster Workflows
When a team has dozens of product shots, ad creatives, thumbnails, and story assets to prepare, consistency matters more than perfecting each file by hand. Batch processing keeps the set aligned, so the catalog or feed does not look like it came from separate sources.

Batch rules that keep quality consistent
Set one master aspect ratio for each channel, then keep to it. A square set for product grids, a widescreen set for banners, and a vertical set for stories makes cropping and file naming easier, and it speeds up QA because every image follows the same rule set.
For folder-based production, this batch photo resize guide is useful when you want one pass through a set instead of editing files one by one. Bulk Image Generation follows that same practical approach by handling resizing and enhancement in a single workflow, which saves time for marketers and small businesses that publish in volume.
When AI beats classic interpolation
Use classic interpolation for standard downscales and routine production work. Reserve AI super-resolution for enlargements beyond 2x, especially when the source needs to hold up in a banner, hero image, or print layout where missing detail is easy to spot. Bicubic is faster and predictable, but it will not invent detail. AI can add apparent texture, so it needs a visual check on faces, product edges, text, and repeating patterns before approval.
That workflow decision matters more than theory. The IJPREMS comparison study showed bicubic and deep-learning methods landing at different quality levels on test sets, but the practical takeaway is simple, choose the method based on the job, not on a promise of perfect recovery.
For a production folder, keep the rule set boring and repeatable. Use batch resizing for every standard size, apply the same export preset to the whole folder, and keep AI enlargement for the small number of files that need it. That avoids reprocessing the same assets and keeps the output consistent across channels.
Keep originals, resized files, and final exports in separate folders. Name files by channel and dimensions, review them at actual size, and export once per asset so nobody rescales an already resized file later.
Final Checklist Before You Publish Resized Images
Before you publish, check the image at the size people will see it. If it looks sharp at normal viewing distance, doesn't show ringing or stair-stepping, and fits the platform without extra cropping, the resize did its job.
The most important point is still the same: resizing is a geometric transformation and therefore always lossy in the strict sense, but what people usually need is no visible quality loss, especially when downscaling with good interpolation. Uploadcare's developer guide on image transformations makes that distinction clearly.
A quick pre-publish pass is enough for most assets:
- Check sharpness: look at text, edges, and faces first.
- Check format: make sure the file type matches the use case.
- Check dimensions: confirm the image fits the destination without platform resizing.
- Check re-save history: avoid exporting the same JPEG repeatedly.
- Check final size: if it still feels heavy, compress after resizing rather than stretching the source smaller.
That's the whole game. Don't chase a magical lossless promise, chase the combination of method, source quality, and output settings that keeps the image looking right where it's used.
If you're resizing images for web, social, print, or product catalogs, Bulk Image Generation gives you a batch workflow for resizing and enhancement without turning each file into a manual task. It's built for marketers and small teams who need consistent outputs at scale, especially when sharpness and speed both matter.