Image Resizer for Instagram: Sizes, Workflows, and Bulk Tips

Ryan Bennett • September 20, 2026
Find the best image resizer for Instagram. Learn pixel sizes, aspect ratios, bulk workflows, and quick settings for posts, stories, and Reels.
Launch day usually starts with the wrong folder.
You open a shared drive and find product shots, event photos, screenshots, and old ad creatives in every shape imaginable. Some are wide, some are square, some were clearly designed for print, and at least a few have text pushed right to the edge. If you upload those directly to Instagram, the platform will decide the crop for you, and it rarely chooses the part you wanted people to see.
That's why an image resizer for Instagram isn't just a convenience tool. It's part of production control. The job isn't resizing one image. It's building a workflow that turns messy source files into reliable exports for feed posts, grid previews, Stories, and Reels without forcing your team to fix crops by hand in the app.
Why Instagram Image Sizing Matters Before You Resize
The common mistake is starting with the tool instead of the target. Teams grab a resizer, drag in files, pick a preset, and hope that solves the problem. It doesn't. If the original composition wasn't built for Instagram's accepted formats, resizing alone can still leave you with cut-off faces, cramped text, and awkward thumbnails.
Instagram's format history explains why this is still a production issue. The platform launched in 2010 with a strict 1:1 square-only layout, then expanded in August 2015 to support portrait and photos up to 1080 pixels wide with aspect ratios between 1.91:1 and 4:5 without cropping, as noted in Instagram's aspect ratio change overview. That change gave creators more flexibility, but it didn't remove the need for precise sizing. It just created more surfaces where the same asset can display differently.
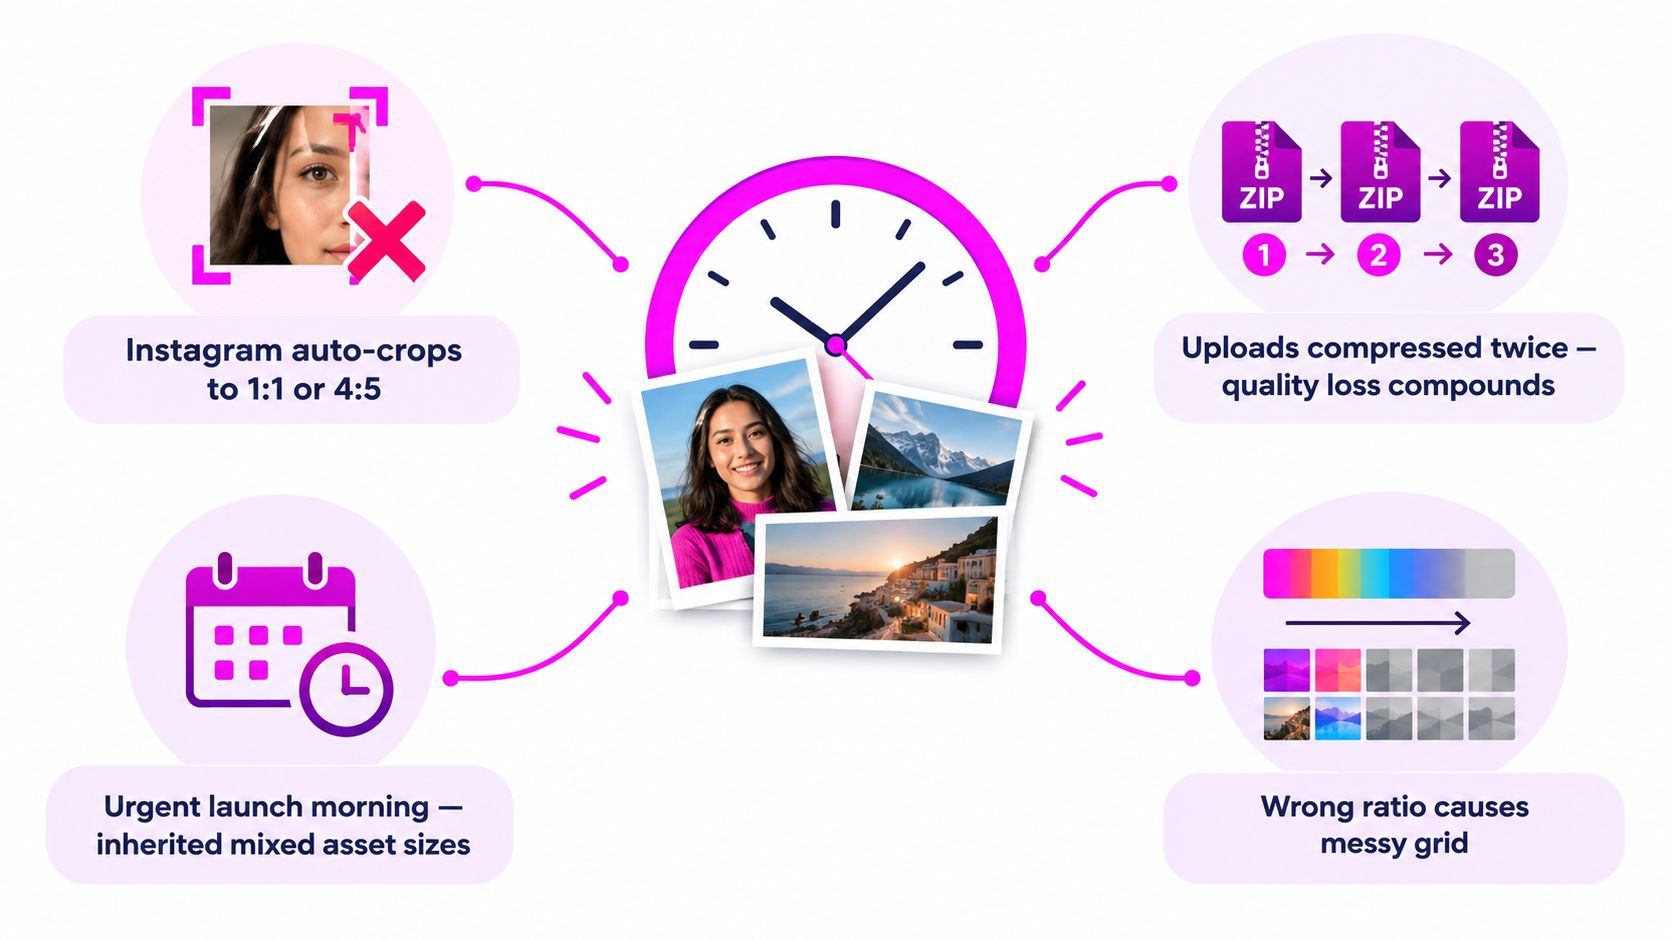
What goes wrong with badly sized uploads
A mis-sized source file usually breaks in predictable ways:
- Feed previews soften the crop: An image used as a feed post can lose its focal point once Instagram compresses and reframes it for mobile.
- Stories hide important text: Headers, offers, and captions near the top or bottom edge often sit under interface overlays.
- Grid thumbnails turn messy: A post that looked balanced in the composer can feel random once it lands in the profile grid.
- Manual in-app adjustment creates inconsistency: One editor nudges the crop left, another recenters it, and now the campaign no longer feels coordinated.
Practical rule: If the team has to “fix it in Instagram,” the file wasn't production-ready.
The dimensions to lock before anything else
Before anyone crops or exports, decide the destination format. Current guidance across major-market sources points to 1080 × 1350 for portrait feed posts, 1080 × 1080 for square, 1080 × 566 for a horizontal image, and 1080 × 1920 for Stories and Reels, according to Buffer's Instagram image size guide.
That matters because Instagram still centers the viewing experience around narrow mobile displays. Correct dimensions preserve composition, reduce unwanted cropping, and keep the upload process predictable. In practice, sizing discipline is the cheapest production upgrade most social teams can make.
Core Instagram Image Sizes Every Resizer Should Output
An image resizer for Instagram should cover the handful of outputs teams use, not a bloated preset list. If it can't export exact Instagram-ready dimensions cleanly, it's solving the wrong problem.
Independent guides in 2026 consistently point to a tight sizing set. Feed posts are best prepared at 1080 × 1350 pixels for portrait, 1080 × 1080 for square, 1080 × 566 for horizontal, and Stories and Reels require 1080 × 1920, with uploads effectively capped at 1080 pixels wide during posting, as outlined in this Instagram dimensions reference and supported by Buffer's platform sizing overview.
Instagram Image Size Reference Table
| Placement | Pixel Size | Aspect Ratio | Notes |
|---|---|---|---|
| Portrait feed post | 1080 × 1350 | 4:5 | Strong default for most organic posts because it occupies more vertical screen space |
| Square feed post | 1080 × 1080 | 1:1 | Useful when you need symmetry or cross-platform reuse |
| Landscape feed post | 1080 × 566 | 1.91:1 | Works for wide scenes, but often feels smaller in-feed |
| Stories | 1080 × 1920 | 9:16 | Keep key text and faces centered away from top and bottom UI-heavy areas |
| Reels cover | 1080 × 1920 | 9:16 | Design for the cover and the in-feed preview separately |
| Profile preview | 320 × 320 | Square preview | Check how the center crop reads in the grid |
What each output is really for
Portrait 4:5 is the workhorse format for most campaigns. It gives you more vertical presence on mobile than square posts, and that usually makes static creative feel less cramped.
Square 1:1 still has a place when the design relies on centered balance, product packs, or quote graphics. It's also easier to adapt when the same asset needs to travel to older content systems.
1.91:1 is the one teams overuse. It preserves wide compositions, but it often underperforms visually because it occupies less vertical space in the feed.
A resizer isn't enough if your presets stop at “Instagram post.” You need separate exports for portrait, square, landscape, and full-screen vertical placements.
Format choices that hold up in production
For photographic content, JPEG is the practical default. PNG still makes sense for graphics with crisp text, logos, or transparency during intermediate production, but many teams flatten to final JPEG exports for social delivery.
For carousels, be careful with mixed aspect ratios. If the opening frame is square and the rest were designed tall, the entire sequence can feel compromised. Pick the first frame ratio deliberately, then build the rest around it.
A Clean Resize Workflow From Master File to Upload
The fastest teams don't resize after the fact. They export from a master system that already assumes multiple placements. That's the difference between one-off editing and repeatable production.
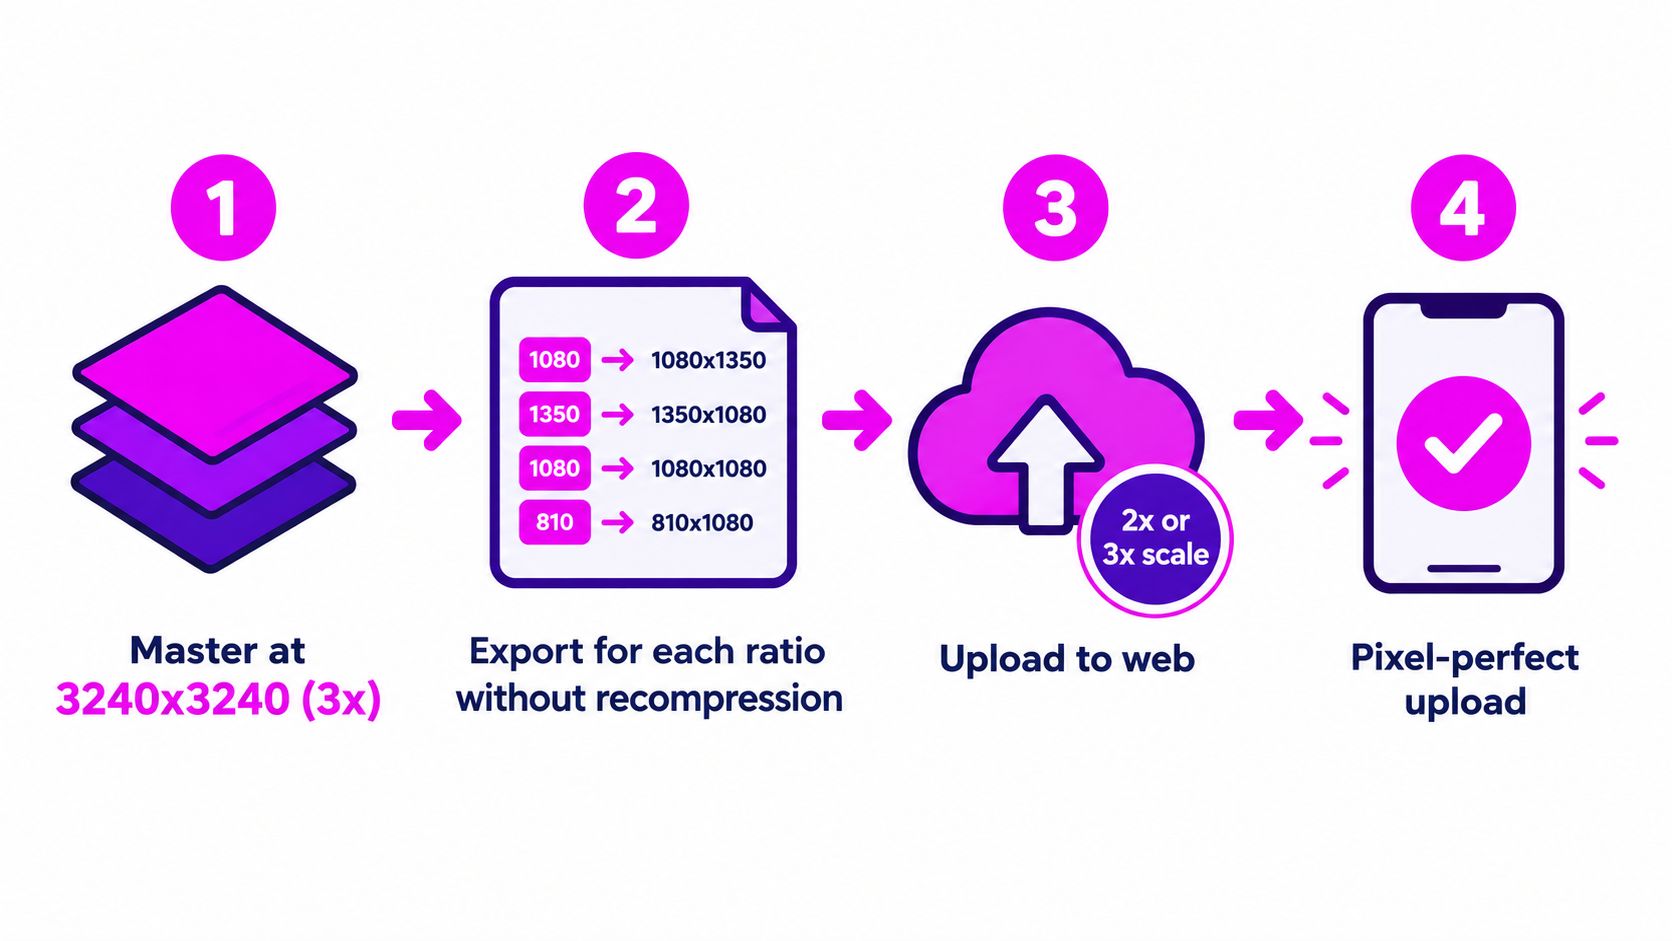
Four stages that keep quality intact
Stage one starts in the design file. Build or export a layered master at larger working dimensions so crops stay clean when you scale down. Figma and Photoshop are reliable here because they let you keep text, masks, and background elements editable.
Stage two is ratio-specific duplication. Create separate placement files, then resize with proper resampling in Photoshop, Affinity Photo, or ImageMagick. For batch-heavy teams, batch photo resize workflows are much easier to maintain than dragging files through browser tabs all day.
Stage three is export discipline. Use sRGB so mobile rendering stays predictable. JPEG works well for photos, while PNG-24 is better when graphics need sharp edges before final delivery.
Stage four is device review. Desktop previews lie. A file that looks balanced on a calibrated monitor can feel top-heavy or cramped on a phone.
Tool trade-offs that matter
Free online tools are fine for a handful of assets. They break down when campaigns need naming consistency, repeated presets, and coordinated exports across several placements.
Desktop editors give you precision, but they also depend on trained operators. If a non-designer has to prepare a week of listings, event promos, or product variations, a simpler batch pipeline often wins.
That's especially true in vertical-first categories. Anyone working with property media, for example, will recognize the same framing problem in social. This guide on how to optimize real estate photos for vertical video is useful because it shows the same practical principle: composition has to be adapted to the placement, not merely resized.
Comparing Image Resizer Tools for Instagram Workflows
Teams end up choosing from three categories: free online resizers, desktop creative apps, and AI-driven bulk platforms. Each can work. Each also creates different bottlenecks.
The wrong comparison is “which tool has more features.” The right comparison is “which tool gets exact exports out the door with the fewest manual corrections.”
Instagram Image Resizer Tools Compared
| Tool Type | Best For | Batch Support | Aspect Ratio Presets | Main Limitation |
|---|---|---|---|---|
| Free online resizers | Quick one-off posts | Usually light | Usually yes | Repetitive upload steps and limited production control |
| Desktop editors like Photoshop or Affinity Photo | Design teams that need precision | Strong with actions or macros | Yes, with templates | Slower for non-designers and multi-campaign handoff |
| AI bulk generators and batch platforms | High-volume campaign production | Strong | Usually preset-driven | Results still need creative rules and approval checks |
Where each category actually wins
Free online resizers are fine when you need to prep a single post before lunch. They're less fine when you have twenty variants, separate Stories, and a client who wants filenames cleaned up.
Desktop editors still own the high-control end of the workflow. If you need to adjust masks, reposition text, or retouch imagery while exporting multiple aspect ratios, Photoshop remains hard to beat.
AI-driven bulk platforms earn their place when you're not only resizing but also generating or adapting sets of images around a campaign structure. That's where the category starts to bridge the gap between creative production and social publishing. One example is Bulk Image Generation, which combines bulk image creation with post-production tasks like resizing inside the same workflow. That's more useful than a simple crop tool when the team is producing many Instagram-ready variations from scratch.
The biggest time sink in Instagram production isn't clicking “resize.” It's fixing all the things the resize didn't solve.
The under-covered problem is feed versus grid
Many tools still fall short. They export the correct upload size, but they don't help teams think through how that same asset appears in multiple Instagram surfaces.
Recent guidance doesn't fully agree on the ideal portrait target. Some guides still prefer 1080 × 1350 at 4:5, while others argue for 1080 × 1440 at 3:4 to align better with taller profile-grid previews, as discussed in this feed-versus-grid aspect ratio analysis. That disagreement matters because the practical issue isn't just file size. It's composition preservation across feed, grid, and carousel previews.
A serious Instagram workflow should account for that before export, not after posting.
Feed, Grid, Stories, and Reels Preview Differences
A post can look perfect in the upload screen and still feel broken once it goes live. That's usually a preview mismatch, not a design failure.
The feed favors one reading of the image. The profile grid often favors another. Stories and Reels add UI overlays that make edge placement risky even when the file dimensions are technically correct.
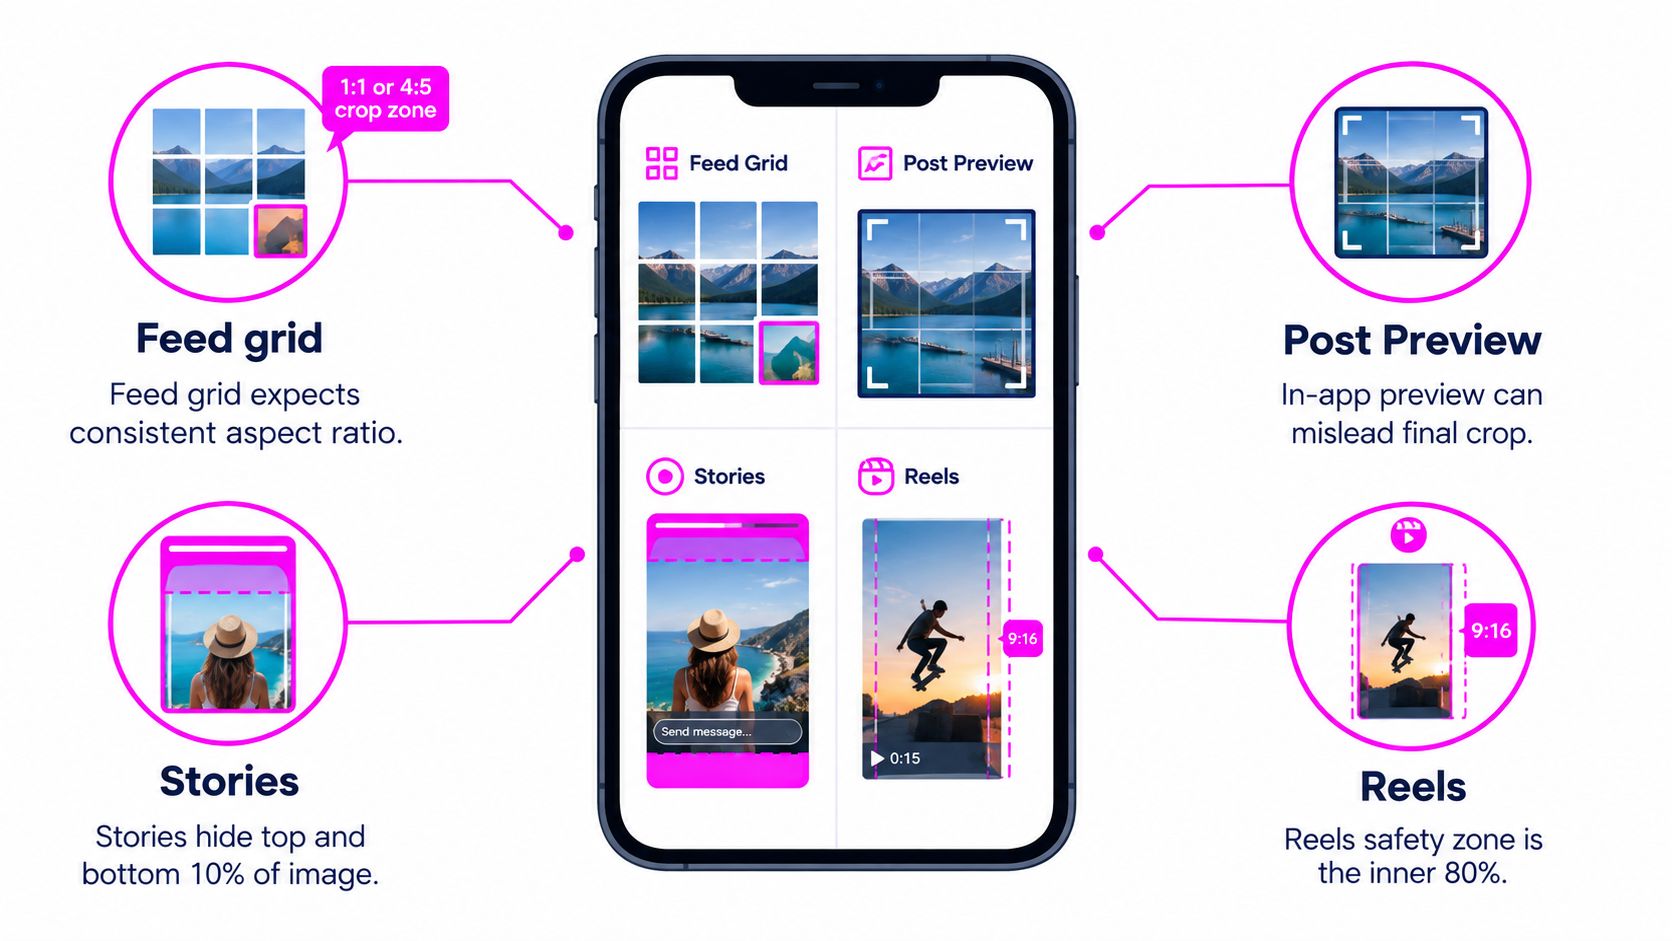
What to check before scheduling
Feed posts need focal discipline. If the subject sits too high or too low, the image may still upload cleanly but feel off once people scroll quickly past it on mobile.
Grid previews need center-weighted thinking. A post with corner-based text can read well in the feed but collapse into an awkward thumbnail on the profile.
Stories and Reels need safe-zone restraint. Industry guidance recommends keeping critical text inside the central safe area and avoiding the top and bottom zones where overlays and cropping risks are highest at 1080 × 1920, as explained in Hootsuite's image size guide.
A batch preview habit that saves campaigns
Use a planner or mock grid before you upload. Don't judge assets one by one in isolation.
A simple review loop works well:
- Check the grid first: Look for chopped headlines, off-center faces, and mismatched whitespace.
- Review vertical placements separately: Story and Reel covers need their own pass.
- Open sample files on a phone: Not every issue shows up on desktop.
- Cross-check specs when Instagram changes layouts: This summary of updated Instagram Story dimensions is a useful refresher when your older templates start drifting.
The teams that stay consistent don't trust a single preview surface. They verify the same asset where Instagram displays it.
Bulk Resizing Instagram Images Without Losing Consistency
Bulk resizing is where sloppy workflows reveal themselves. One person crops manually, another sharpens too aggressively, a third exports from the wrong color profile, and the campaign starts looking like it came from three different brands.
A repeatable system fixes that. It also makes an image resizer for Instagram far more useful than a one-click utility.
The production habits that keep batches clean
Start by standardizing the master export. Don't mix screenshots, raw edits, and flattened old JPEGs in the same processing folder if they need different treatment.
Then group files by target ratio before resizing. Portrait feed assets should move together. Story assets should move together. That alone prevents half the accidental crop issues teams create for themselves.
Use saved presets and actions whenever possible. If your team needs a practical tool for handling batches, the bulk image resizer for social-ready outputs is the kind of utility that fits this step because it's designed around repeated resizing instead of one-off edits.
A folder structure that scales
A simple folder structure beats clever naming every time:
- Masters: Original approved source files
- Feed-4x5: Final portrait feed exports
- Feed-Square: Square versions when needed
- Stories-Reels: Full-screen vertical outputs
- Archive: Replaced or older versions
For filenames, keep the ratio in the name. A file named launch-hero-feed-4x5 is easier to trust than final-final-new-2.
Consistency comes from process, not from hoping every editor makes the same crop decision.
Why one generic master keeps failing
Teams often try to force one image into every placement. That seems efficient, but it usually leads to compromises everywhere. The wide version loses impact in feed. The square version trims the subject. The Story version turns into a zoomed-in salvage job.
Platform-specific exports take a little more setup, but they reduce last-minute corrections and keep branding stable across the full campaign set.
Common Resize Mistakes and Final Pre-Upload Checklist
The most expensive Instagram resize mistakes don't look dramatic in the file browser. They show up later, after the post is scheduled, approved, and live.
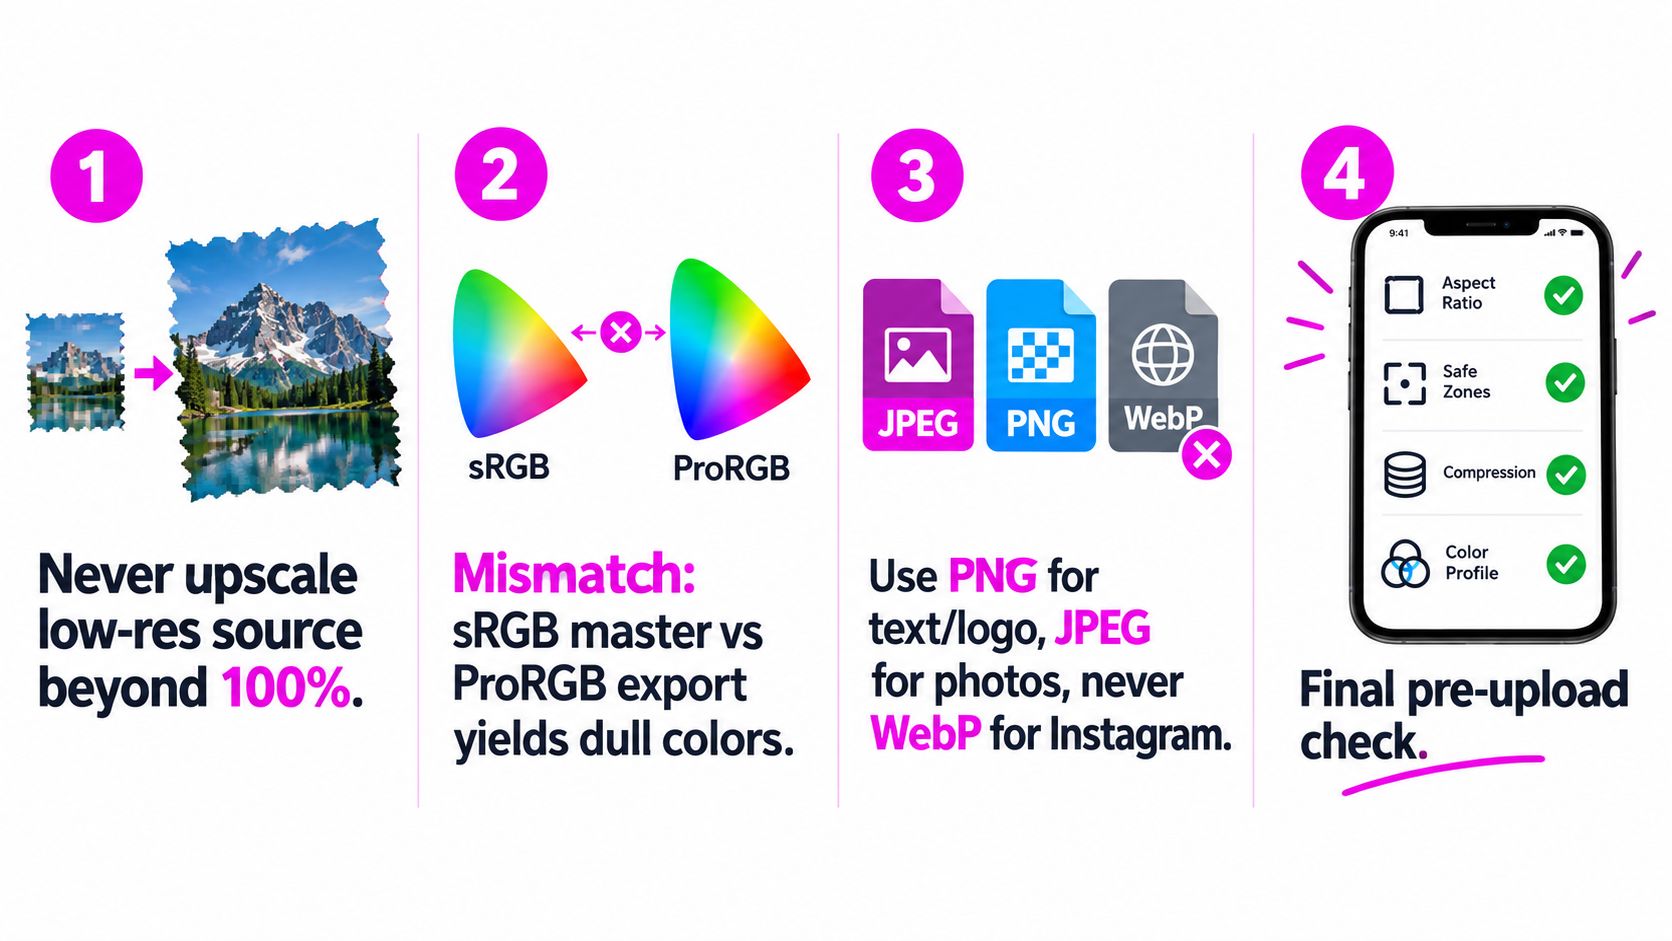
Low-resolution sources get stretched too far. Text sits near the edge because it looked fine on desktop. Shared folders fill with lookalike filenames, and someone uploads the wrong version because there wasn't a clear review pass.
The mistakes worth catching early
Upscaling weak source files is still common. A resizer can change dimensions, but it can't invent clean detail when the original image wasn't strong enough.
Color profile mismatches create avoidable dullness or shifts. If one editor exports in sRGB and another sends a wider color-space file without checking mobile appearance, the feed won't look consistent.
Unsafe text placement breaks otherwise good vertical creative. If your headline lives too close to the top or bottom of a Story layout, Instagram's interface competes with it.
Final pre-upload checklist
Run this pass before anything goes into a scheduler:
- Match the export to the placement: Confirm the file is intended for feed, grid-conscious feed, Story, or Reel cover.
- Check composition on mobile: Faces, products, and headlines should still read instantly on a phone.
- Review naming and version control: Remove duplicate or ambiguous finals from the handoff folder.
- Spot hidden artifacts: Look for leftover guides, accidental crop marks, or compression damage from repeated saves.
- Verify preview surfaces: Feed view alone isn't enough. Check the grid outcome and any vertical cover use.
A good Instagram workflow doesn't rely on the platform to rescue the asset. It assumes the opposite. The file should arrive ready, sized for the placement, and composed for the way people will see it.
If you're handling Instagram at campaign scale, Bulk Image Generation helps close the gap between creating visuals and exporting them in the right formats. It's useful when you need batches of images adapted for feed, Stories, and Reels without rebuilding every asset manually.