
How to Make a Collage: Learn how to make collage From Start to Finish

Aarav Mehta • January 15, 2026
Discover how to make collage with a complete guide, practical techniques, AI-powered tools, and expert tips for stunning visuals.
Making a collage is all about telling a story. You start with a theme, pull together a collection of images that fit, and arrange them into something new and compelling. You can go the old-school route, meticulously cutting and pasting in a design tool, or you can use modern AI to generate and assemble visuals almost instantly from a simple text description.
Your Modern Guide to Creating a Collage
Welcome to your complete guide on how to make a collage that truly stands out. We're going to walk through the entire creative process together, from that first spark of an idea to the final, polished artwork.
Whether you're a marketer who needs scroll-stopping social posts, a founder building a visual brand identity, or just someone exploring a new creative hobby, you're in the right place. This guide covers both the classic, hands-on collage methods and the incredible speed of today's AI tools.
Think of this as your blueprint for making beautiful, effective collages—a perfect blend of timeless art principles and modern tech.
Traditional Artistry Meets Modern Speed
Not that long ago, collage making was a totally tactile experience. It was all about scissors, glue, and piles of paper. Artists like Picasso and Braque literally invented the form by gluing real-world stuff onto their canvases, a move that completely shook up modern art. That hands-on approach gives you total creative control, letting you obsess over every little layer and personal touch.
Today, that same spirit is alive and well, but our tools have gotten a serious upgrade. Instead of spending hours hunting for the perfect image in stock photo libraries, you can now generate hundreds of unique visuals in a matter of seconds.
The heart of collage art hasn't changed a bit: it's still about combining different elements to create a new, unified whole. What has changed is just how fast and easy the tools have become.
Modern workflows, especially those using AI-powered platforms like Bulk Image Generation, cut out the most time-consuming parts of the process. This shift means you can spend more of your energy on the big-picture creative vision and less on tedious technical tasks.
To give you a better idea of what I mean, let’s quickly compare the two main approaches we'll explore.
Collage Creation Methods At a Glance
| Feature | Manual Collage Method | AI-Assisted Method (Using Bulk Image Generation) |
|---|---|---|
| Speed | Slow and methodical, often taking hours or days. | Extremely fast, generating options in seconds. |
| Image Sourcing | Requires searching stock sites or personal photos. | Generates original, stylistically consistent images on-demand. |
| Skill Level | Requires proficiency in design software like Photoshop. | User-friendly, relying on natural language descriptions. |
| Creative Control | Full, granular control over every single element. | High-level control through descriptive prompts. |
| Best For | Highly detailed, bespoke art projects. | Scalable content creation, branding, and rapid ideation. |
Ultimately, both paths lead to great results. The best one for you just depends on your goals, timeline, and how you like to work.
This guide is built to help you succeed with either method. We’ll cover everything from planning your composition and sourcing visuals to assembling the final piece and optimizing it for any platform. You’ll learn the core principles that make a collage work and discover how to apply them using the most effective tools out there today.
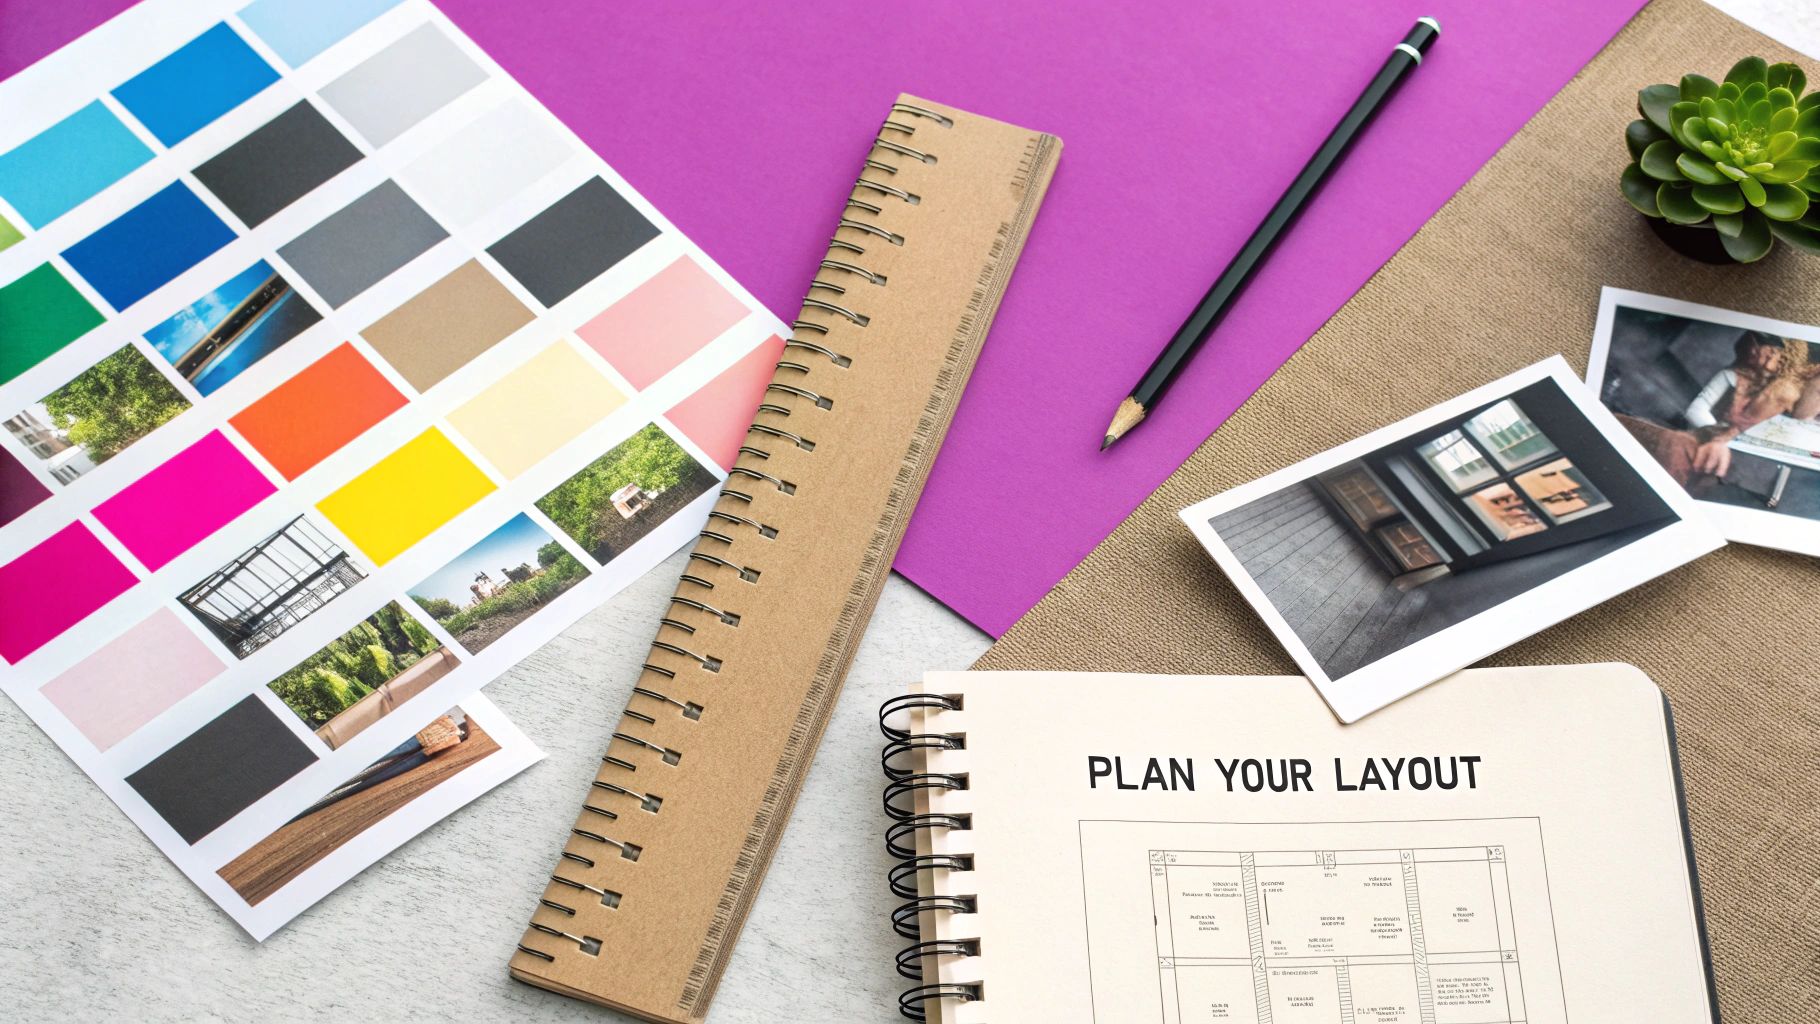
Planning Your Collage Composition
A truly great collage isn't just a random pile of pictures; it starts with a plan. This is where you move from just collecting images to actually telling a compelling visual story—one that grabs attention and sends a clear message. Before you even think about finding images, you need to lock down your collage's purpose.
What are you trying to do? Create an energetic, eye-catching post for a social media campaign? Or maybe a calming, aspirational mood board for your brand's new look? Your end goal shapes every single choice you'll make, from the theme right down to the color scheme. A collage for a kids' coloring book, for example, will feel completely different from one designed for a sleek corporate presentation.
Define Your Theme and Color Palette
Once you know why you're making the collage, you can pick a theme that clicks. Your theme is your creative North Star, guiding every image you select. It could be something concrete like "autumn harvest" or more abstract like "urban exploration." The trick is to choose a concept that gives you plenty of visual runway.
With a theme in mind, picking a color palette is much simpler. Color is a heavy hitter when it comes to setting a mood. Warm colors like reds and oranges can inject energy and excitement, while cool blues and greens bring a sense of calm and tranquility.
A few quick tips for nailing your palette:
- Keep it simple: Stick to 3-4 main colors to keep the design from feeling chaotic.
- Think about emotion: What do you want your audience to feel when they see it?
- Use online tools: Sites like Coolors or Adobe Color are great for generating balanced color schemes if you get stuck.
This deliberate approach to theme and color is what separates a professional-looking, unified collage from a messy one.
Mastering Core Design Principles
Alright, now it’s time to think like a designer. Don't worry, you don't need an art degree to get the hang of the basic principles that make a composition work. It’s all about guiding the viewer's eye and creating a sense of visual order.
The art of collage has deep roots in design. Back in the early 20th century, artists like Pablo Picasso and Georges Braque basically invented the form by gluing newspaper clippings onto their canvases, blurring the lines between reality and abstraction. Fast forward to the 1960s, and Andy Warhol’s silkscreen collages were everywhere, heavily shaping advertising. Today, digital tools let us do in seconds what used to take them days.
Key Takeaway: A successful collage isn't just about what you include, but how you arrange it. Flow, balance, and hierarchy are the secret ingredients that make your design feel right.
Getting a handle on these concepts is essential for creating stories with pictures that really connect.
Create a Visual Hierarchy
Visual hierarchy is all about controlling where people look first. You want to lead their eye through the collage in a specific order, starting with the most important stuff and moving to the supporting details. Think of it as creating a visual path for your viewer.
You can build this hierarchy in a few ways:
- Scale: Make your most important image the biggest. It’s a classic for a reason.
- Color: Use a bright, contrasting color to make your focal point pop.
- Placement: Things placed in the center or near the top of the frame naturally get more attention.
Finally, think about balance. Asymmetrical balance, where elements aren't perfectly mirrored but still feel visually stable, often creates a more dynamic and interesting layout. And don’t forget the final dimensions. If you're designing for something specific like Instagram Stories, use a handy aspect ratio calculator to get the size right from the get-go. This upfront planning ensures your composition looks perfect wherever it ends up.
Finding and Preparing Your Visuals
The soul of any good collage is the images you choose. They're not just space-fillers; they're the building blocks that create a mood and tell your story. Before you can even think about composition, you need a solid library of assets that feel like they belong together.
Sure, you could start by digging through your own photo library or getting lost for hours on stock photo sites. And for some projects, those are perfectly good options, especially if you need pictures of specific people or places. Public domain archives are another goldmine for finding unique, copyright-free images with that cool vintage vibe.
But let's be honest—each of those routes has its headaches. Your personal photos might be all over the place stylistically, and hunting for the perfect image on a massive stock site can feel like a fool's errand.
A Modern Approach to Sourcing Images
This is where AI image generation completely changes the game. Instead of searching for visuals that might fit your theme, you can literally create an entire, perfectly cohesive library from a simple text prompt. It gives you total control over the style, color palette, and subject matter from the get-go.
Learning how to generate AI images is a massive unlock for creative projects. Imagine you need a set of whimsical, pastel-colored botanicals for a social media campaign. A prompt like, "A collection of isolated fantasy flowers, watercolor style, soft pastel colors, on a clean white background," can spit out dozens of on-brand options in seconds.
You get to describe your vision and see it come to life almost instantly.
That immediate feedback loop lets you experiment and refine your entire concept on the fly, saving you hours of tedious searching.
Crafting the Perfect AI Image Prompt
The magic of AI-generated images lives and dies by the quality of your prompt. A good prompt is like a creative brief for the AI—it needs to be specific, descriptive, and crystal clear about what you want.
A solid prompt usually nails these four things:
- Subject: What is it? Be specific. "A vintage typewriter," not just "typewriter."
- Style: What should it look like? Think "photorealistic," "line art," "oil painting," or "3D render."
- Composition: How is it framed? Is it a "close-up shot," a "flat lay," or "isolated on a white background"?
- Mood & Color: What feeling are you going for? Use words like "serene and calming, with earthy tones" or "vibrant and energetic, with neon accents."
Pro Tip: Think of your prompt as a recipe. The more precise your instructions, the closer you'll get to what you're picturing. I usually start broad and then layer in more details to dial in the results.
If you're feeling stuck or just want to see what's possible, a specialized tool can be a huge help. You can get a feel for writing effective prompts with a free AI image prompt generator that’s built to structure ideas perfectly for different AI models.
Essential Prep Work for Assembly
Okay, you've got your images. Now what? A little prep work at this stage will save you a world of pain later. The goal here is to make sure every single element is clean, sized correctly, and ready to blend seamlessly into your design.
The number one task is almost always background removal. This lets you layer your visuals without those clunky, amateur-looking boxes around everything. Doing this by hand is a nightmare, but thankfully, most modern tools offer one-click background removal that you can apply to a whole batch of images at once.
While you're at it, knock out these other quick tweaks:
- Resize and Crop: Get everything scaled properly for your canvas and overall composition.
- Color Correction: Nudge the brightness, contrast, and saturation to make sure all your images have a consistent look and feel.
- Enhancements: A little sharpening or a subtle filter can make your images pop.
By front-loading this prep work, you make the actual collage assembly so much smoother. You can just focus on the fun part—creatively arranging your pieces—knowing that everything is already polished and ready to go.
Bringing Your Collage to Life with Digital Tools
Alright, you've done the hard yards. Your concept is solid, and your images are prepped and ready to go. Now for the fun part: actually putting it all together. This is where your vision starts to become a reality, and we'll walk through two very different ways to get there.
First, there's the classic, hands-on approach using design software, which gives you total control over every single pixel. Then, we'll look at a more modern, AI-driven workflow that can take your creative brief and spit out a finished collage in moments.
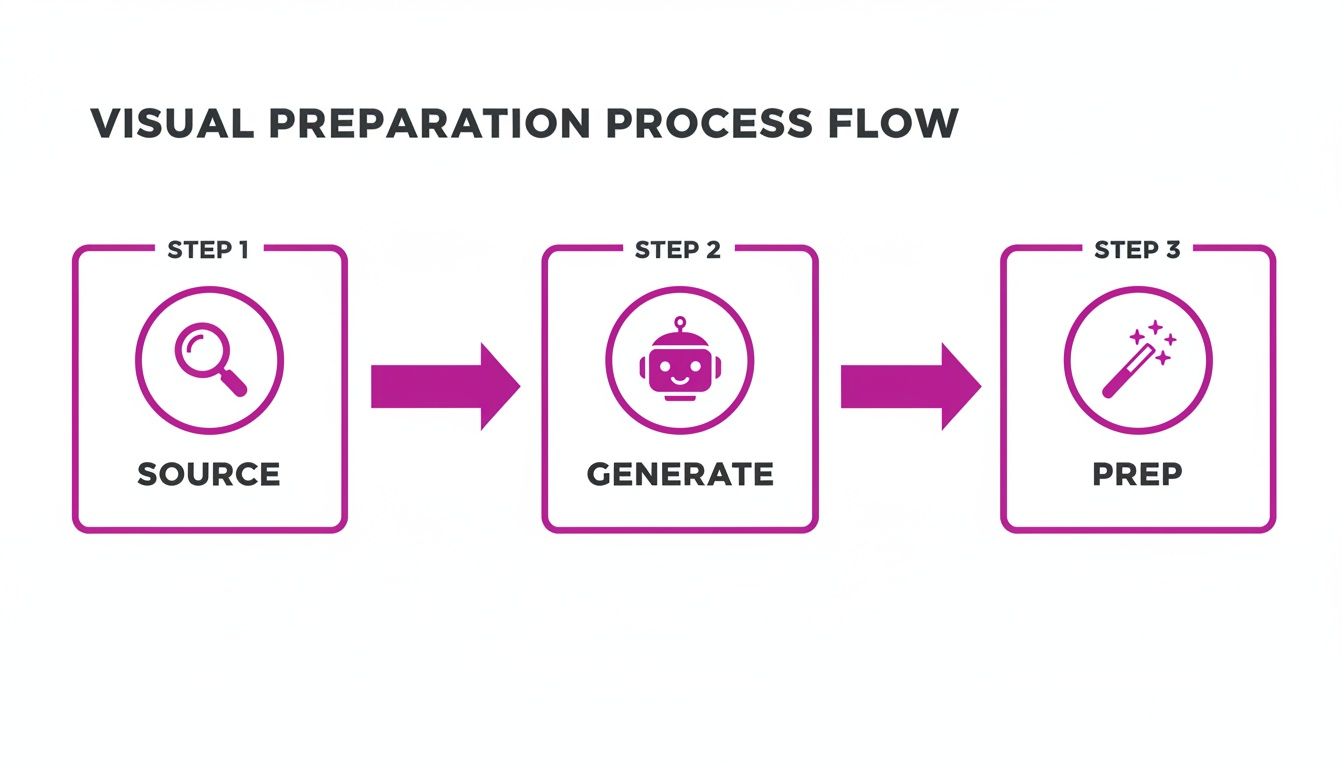
This little diagram sums up the modern workflow perfectly. You source or generate your images, and then the prep work is handled for you. It’s a huge shortcut that lets you dive straight into the creative side of things without getting bogged down in tedious manual steps.
The Manual Digital Workflow
If you love the feeling of getting your hands dirty (digitally, of course), then working in a tool like Procreate or Canva is for you. It’s the closest you’ll get to the traditional cut-and-paste method, but with an undo button.
The first thing you’ll do is set up your canvas. Make sure you get the dimensions and resolution right for your final goal, whether that’s a quick Instagram post or a high-quality art print.
Now, start bringing in your images. The golden rule here is to put each image on its own separate layer. This is non-negotiable. Layering is what gives you the freedom to move, resize, and shuffle elements around without messing up the rest of your composition.
With your main pieces in place, it's time to play. Start overlapping images and adjusting their scale to build that visual hierarchy we talked about earlier. Who's the star of the show? Make them bigger. What's just a background texture? Shrink it down.
Fine-Tuning with Blending and Effects
This is where you really start to cook. Blending modes, found in most design apps, are your secret weapon for making layers interact in interesting ways. For example, setting a layer to "Multiply" or "Overlay" can create these beautiful, see-through effects that make everything feel more connected.
Don't stop there. Here are a few other tricks I use all the time:
- Rough Edges: Grab the eraser tool, pick a textured brush, and go to town on the edges of your cutouts. This simple trick can instantly give your images that torn-paper, handmade vibe.
- Drop Shadows: A soft, subtle shadow under a layer can make it pop right off the canvas, creating a real sense of depth. Just don't overdo it!
- Opacity Adjustments: Try lowering the opacity of a few elements. This can create a dreamy, layered look and let some of those cool background textures peek through.
The whole point is to make your collage feel like a single, cohesive piece of art, not just a random pile of images. It’s these small, deliberate tweaks that separate an amateur collage from a professional-looking one.
The AI-Assisted Assembly Workflow
But what if you could just… skip all that? What if you could tell an assistant what you want, and they just made it for you? That's exactly what AI-assisted assembly feels like. Instead of dragging and dropping every little piece, you give the AI a creative brief, and it handles the grunt work.
This isn't just a minor convenience; it's a massive time-saver. A 2025 Forrester study found that marketers using AI for collage creation saved 75% of their time compared to doing it manually. I’ve seen branding agencies go from spending days sourcing images to generating hundreds of options in minutes.
With an AI-powered image generator tool, you can describe the entire collage in one go. Your prompt becomes the master blueprint for the AI.
For instance, you could just type:
- "Create a vibrant collage for an Instagram story about eco-friendly products. I need reusable water bottles, bamboo toothbrushes, and lots of lush green leaves. Keep the style clean and minimalist."
- "Generate a scrapbook-style collage for a Paris travel blog. Give it torn paper edges, vintage postcard textures, and throw in images of the Eiffel Tower, croissants, and a classic bistro."
- "Produce a set of 100 simple coloring page collages for kids. Theme it around friendly jungle animals like monkeys, lions, and elephants, all with bold, clear outlines."
The AI takes your instructions, generates all the needed assets, and puts them together in a thoughtfully composed layout. You get a finished collage in seconds, ready for any final touches you want to add. It’s the perfect workflow when you need to create amazing content at scale without burning out.
Putting on the Final Polish
This is where the magic really happens. Getting all your images onto the canvas is just the first step; the final touches are what turn a simple collection of photos into a cohesive, professional-looking piece. A few small tweaks at this stage can make all the difference.
First up, let's create some harmony. If your images feel a little disjointed—maybe the lighting is different, or the colors don't quite mesh—try applying a single, unifying color grade or filter. This one move can instantly pull all the elements together, giving them a consistent mood and making it feel like they were always meant to share the same space.
Think of it as the final coat of varnish. It’s a subtle layer, but it enhances everything underneath.
Adding Depth and a Tactile Feel
With your colors in sync, it's time to add textures and effects. This is your chance to give the collage a more engaging, almost tactile quality and introduce those little details that make people lean in for a closer look.
Here are a few techniques I lean on all the time:
- Texture Overlays: A faint paper, grain, or dust texture laid over the entire image adds a tangible feel, especially if you're going for a vintage or scrapbook vibe. Just set the layer’s blend mode to "Overlay" or "Soft Light" and dial back the opacity until it feels just right.
- Selective Sharpening: Don't just sharpen the whole thing. Instead, use a sharpening tool to subtly draw attention to your main focal point. This creates a natural contrast in focus that guides the viewer's eye exactly where you want it to go.
- Vignettes: A soft, dark vignette around the edges is a classic for a reason. It frames the collage, pulling the viewer’s focus toward the center and adding a polished, finished touch. Just be sure to use it sparingly.
My Two Cents: The goal here isn't to be flashy. It’s about adding just enough polish to make the final piece feel intentional and complete. You want all the individual parts to sing together as one powerful image.
Exporting Your Collage for Any Platform
All this creative work is for nothing if your final export is a blurry mess or takes ages to load. Nailing your export settings is crucial for making sure your collage looks perfect everywhere, whether it's a high-resolution print or a quick-loading Instagram post.
Your file format is the biggest decision here. Each one is built for a different job.
| File Format | Best For | Key Characteristics |
|---|---|---|
| JPEG | Web graphics, social media, photos | Great compression means small file sizes. Perfect for fast-loading websites. |
| PNG | Graphics with transparency, logos | Supports transparent backgrounds, which is a must-have for layering on websites. |
| WEBP | Modern web use where speed is king | Offers even better compression than JPEG and PNG, giving you tiny file sizes with great quality. |
For a high-quality art print, you'll need a high-resolution file (at least 300 DPI) saved as a PNG or TIFF to keep every last detail. For a website or social media, a JPEG saved at 72 DPI usually hits that sweet spot between quality and file size. Getting this right means your hard work gets displayed exactly as you envisioned it.
This whole process has changed so much. It's projected that by 2025, a staggering 85% of visual content in social media campaigns will feature collage elements—a massive leap from just 45% in 2015. Think about it: social media managers used to spend 4-6 hours manually building one collage in Photoshop. Now, modern tools have cut that time by over 90%. You can generate hundreds of options in seconds, which shows just how far these workflows have come. You can find more data about this trend on Mordor Intelligence.
Got Questions About Making Collages? We’ve Got Answers.
Even when you have the best tools and a solid game plan, you're bound to run into a few questions. Collage making is a creative process, after all, and every project has its own quirks and challenges.
Let’s tackle some of the most common questions artists and marketers bump into. My goal here is to clear up any lingering confusion so you can feel confident bringing your vision to life, whether it's for a single piece of art or an entire campaign.
What Is the Fastest Way to Make a Professional Collage?
Hands down, the single fastest way to get a professional-looking collage is by using an AI-powered tool.
The old-school method is a real time-sink. You have to manually hunt for images, painstakingly cut them out, and then carefully arrange every single piece in design software. If you're not a seasoned designer, this can easily eat up hours of your day.
AI just completely changes the game. Instead of doing all that grunt work yourself, you just describe what you want in plain English. The AI becomes your creative partner, figuring out your goal, generating dozens of unique and stylistically consistent images, and then putting them together in a balanced layout for you.
This approach automates the most tedious parts of the job. It gets rid of the steep learning curve of complex design software and turns what used to be a full afternoon of work into just a few minutes of creative direction.
How Can I Make My Collage Look Cohesive?
Cohesion is the magic ingredient that makes a collage look polished and intentional, not like a chaotic mess. The secret is to lock in consistency across your theme, color palette, and style.
Before you even start, decide on a clear concept. Then, pick a limited color palette—seriously, three to four complementary colors is usually more than enough. This will be your North Star when you're choosing images.
As you source your visuals, keep an eye out to make sure they all share a similar mood, lighting, and aesthetic. This is another spot where AI tools are a massive help.
By using a single, descriptive prompt, you can generate an entire library of images that are already stylistically consistent by default. This solves the cohesion problem before it even starts, making sure every single element feels like it belongs.
Once everything is assembled, applying a single filter or a subtle color grade over the whole collage is a great final touch. It’s what pulls all the individual pieces together into one unified whole.
What Are the Best Free Tools for Collage Making?
You don't need to break the bank to make a great collage. There are plenty of fantastic free tools out there for every skill level.
- For simple, template-based collages: Canva is the perfect place to start. Its drag-and-drop interface is super user-friendly, and it has a massive library of templates that make it easy for anyone to create something beautiful in minutes.
- For more advanced control: If you're looking for something with the power of Photoshop but without the price tag, Photopea is a brilliant web-based alternative. It gives you advanced features like layers, blending modes, and precise selection tools.
- For creating custom visuals: A lot of AI platforms offer free tools that are incredibly useful for collage work. Things like prompt generators or image-to-prompt converters can help you dream up completely original images for your project at no cost, giving you a powerful and unique starting point.
Combine these resources, and you can build a completely free workflow that covers everything from creating the images to final assembly.
Can I Make a Collage for My Business Without Design Skills?
Absolutely. This is exactly where modern AI platforms really shine. Not too long ago, creating on-brand marketing materials meant you either had to hire a designer or spend months getting good at complicated software. Today, that barrier has vanished.
You don't need to have a designer's eye anymore; you just need to be able to clearly describe your brand's style, values, and the message you're trying to send. The AI takes care of all the technical and artistic heavy lifting for you.
For example, you could give it a prompt like this:
“Create a sophisticated and minimalist collage for a luxury real estate brand. Use a neutral color palette of beige, charcoal, and gold. Feature images of modern architecture, high-end interior details, and serene landscapes.”
The AI takes those instructions and acts like your in-house designer, turning your words into a series of professional, on-brand visuals. This opens the door for anyone to create high-quality marketing collages that perfectly capture what their business is all about.
Ready to skip the manual work and create stunning collages in seconds? With Bulk Image Generation, you can turn a simple idea into hundreds of unique, professional-quality visuals with a single prompt. Try our AI-powered tools today and see how easy it is to scale your creative content.