How to Tile a Picture for Web, Print, and Games

Ryan Bennett • November 21, 2025
Learn how to tile a picture with our expert guide. We cover manual Photoshop methods, AI pattern generation, and seamless implementation for any project.
When you tile a picture, you're essentially creating a single image that can be repeated over and over again without any visible seams. Think of it like a perfectly cut piece of a puzzle that fits together with itself on all sides. This one skill can unlock everything from lightweight website backgrounds and vast video game worlds to custom print designs. It's all about turning one small image into an infinitely scalable surface.
Why Seamless Picture Tiling Matters
At its heart, tiling a picture is a game of efficiency and creativity. Why use a gigantic, slow-loading image to cover a big space when a small, lightweight tile can do the job flawlessly? This is the secret sauce behind the subtle, textured backgrounds you see on professional websites and the incredibly detailed landscapes in video games.
The idea is simple, but the effect is powerful. If you just repeat a normal, non-tiled image, you'll see ugly grid lines where the edges meet, completely shattering the illusion. A seamlessly tiled picture is different. It’s been carefully edited so that the right edge flows perfectly into the left, and the top melts right into the bottom. The result is a natural, unbroken surface, no matter how large an area you need to cover.
The Creative and Technical Advantages
Once you get the hang of this, you'll find yourself using it everywhere. The benefits are both practical and aesthetic, and they solve real-world problems for digital creators.
- Web Design: Tiled backgrounds are a lifesaver for page load times. A tiny 512x512 pixel tile is just a fraction of the size of a full-screen background image, which means a faster, happier experience for your visitors.
- Game Development: Game artists live and breathe this stuff. A single, seamless brick texture can be tiled to build an entire castle wall, saving precious memory and boosting performance without sacrificing an ounce of visual detail.
- Print and Graphic Design: This is how designers create unique wrapping paper, custom fabric prints, and large-scale posters where a repeating motif is key to the entire design.
The real magic of a tiled picture is its scalability. You create it once, and it can fill any space, from a tiny web banner to an enormous virtual environment, with perfect consistency and minimal resource cost.
This isn't just some niche trick; it's a fundamental technique in modern digital creation. The demand for well-executed tiled images has exploded. The global photography services market was valued at a massive $55.6 billion in 2023 and is expected to climb to $81.83 billion by 2032, largely driven by the need for high-quality image editing and composition like this.
For e-commerce, using well-designed tiled images can seriously boost conversion rates, making it a critical tool in the online retail space. You can dig into more photography industry statistics that show just how fast this field is growing.
Picture Tiling Methods at a Glance
Before we dive into the "how-to," it helps to get a bird's-eye view of the different ways you can approach this. Each method has its own strengths, depending on what you're trying to accomplish.
| Method | Best For | Primary Tools | Skill Level |
|---|---|---|---|
| Manual Editing | Complete creative control over textures and patterns. | Photoshop, GIMP, Photopea | Intermediate to Advanced |
| AI Generation | Quickly creating unique, complex, or abstract patterns. | Imagga's Bulk Tiling Tool, Midjourney | Beginner |
| Web (CSS) | Simple, lightweight backgrounds directly in code. | CSS (background-repeat) | Beginner |
| Print (Posters) | Breaking a large image into smaller, printable pages. | Adobe Acrobat, Poster-making software | Beginner |
| Game Engines | Applying textures to 3D models and environments. | Unity, Unreal Engine | Intermediate |
This table should give you a good starting point. Whether you're a designer needing pixel-perfect control, a developer looking for a fast solution, or a game artist building a new world, there’s a tiling method that fits your needs.
Creating Seamless Tiles Manually in Photoshop
While AI tools are fantastic for speed, there are times when you need absolute, pixel-perfect control. That's when rolling up your sleeves and creating a seamless tile by hand in an editor like Adobe Photoshop is the way to go. This hands-on method is perfect for turning a specific photograph—maybe a unique wood grain from your workshop or a swatch of fabric for a design mockup—into a flawless, repeating pattern.
The whole process hinges on making the edges of your image completely invisible. You're essentially tricking the eye, turning a finite picture into an infinite texture.
It all starts with picking the right source image. Look for photos with relatively even lighting and a texture that doesn't have a strong, obvious direction. A flat shot of a brick wall? Great candidate. A photo with a harsh diagonal shadow or one big, distracting element in the center? That’s going to make your life a lot harder. The goal is to find something that already feels pretty consistent from one side to the other.
Using the Offset Filter to Find Your Seams
Now for the magic trick: Photoshop’s Offset Filter. This simple tool is the key to the whole operation. Instead of trying to guess and blend the edges while they're at the very border of your canvas, the Offset Filter cleverly wraps the image around on itself. This brings those hard edges right into the middle where you can see and work on them.
You’ll find it under Filter > Other > Offset.
The best practice here is to offset the image by exactly half its dimensions. So, for a 1024x1024 pixel image, you'd pop 512 into both the horizontal and vertical fields. Just make sure the "Wrap Around" option is checked.
Suddenly, you’ll see a cross-shaped seam running right through the middle of your image. That's your canvas for the repair job.
This infographic breaks down how a single image gets turned into a versatile tile, ready for all sorts of digital applications.
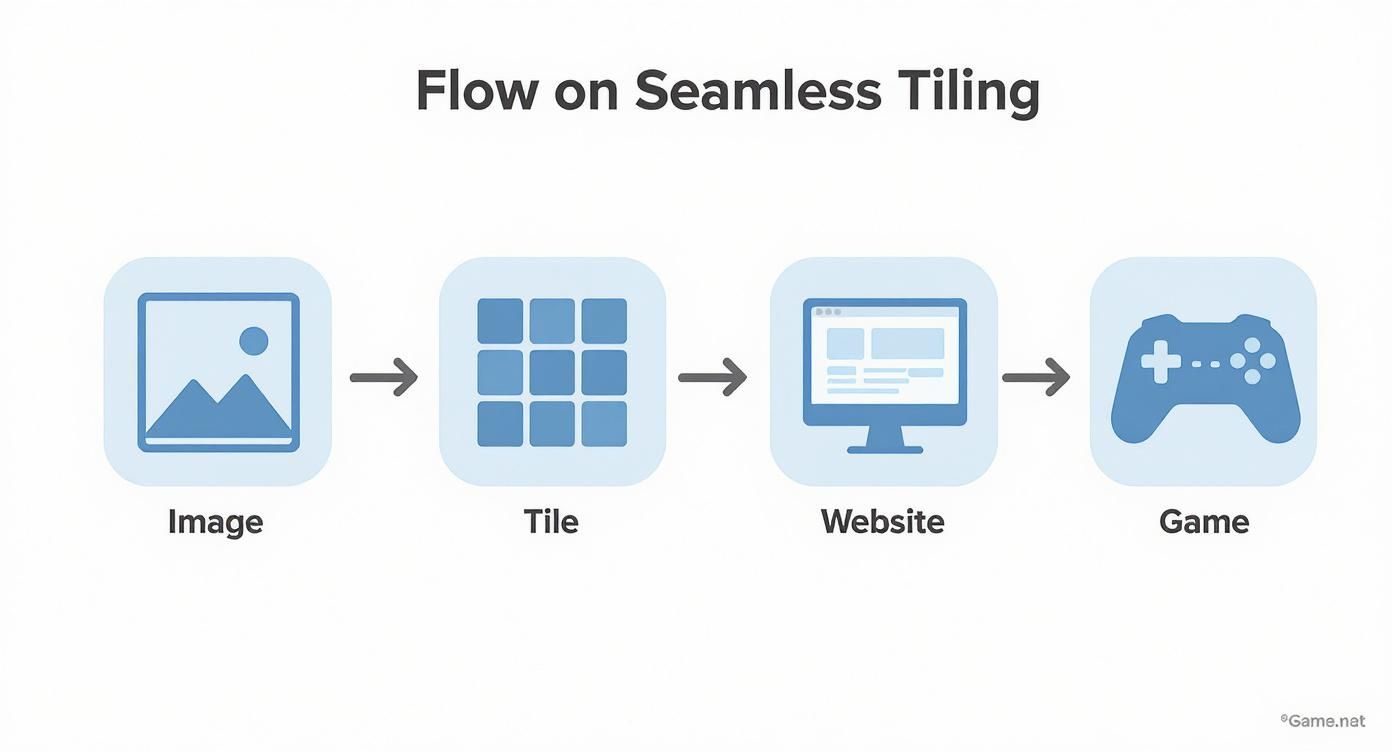
From a simple source photo to a building block for websites and games, you can see how powerful a good tile can be.
Blending Edges with Precision Tools
With the seams exposed, it's time to make them vanish. This is where your artistic eye comes in, but you’ve got some powerful tools to help you along. There’s no magic "fix it" button; this part takes a bit of patience and finesse.
- The Clone Stamp Tool (S): This will be your go-to. Hold Alt (or Option on a Mac) and click a clean part of your texture to sample it. Then, you can simply "paint" with that sampled texture right over the seam to cover it up. Pro tip: use a soft-edged brush and change your sample source often. If you don't, you'll end up with a repetitive, rubber-stamp look.
- The Healing Brush Tool (J): Think of this as the Clone Stamp's smarter cousin. It doesn't just copy the texture—it also intelligently blends the lighting and color of the area you're painting onto. This makes it brilliant for smoothing out any subtle differences in tone or brightness along the seam.
Here's a little trick I swear by: always work on a new, empty layer stacked on top of your image. Before you start cloning or healing, set the tool's sample setting to "Current & Below." This is a non-destructive workflow, meaning all your fixes are painted onto the separate layer. If you make a mistake, you can just erase it without ever touching your original photo.
Let's say you're working with a picture of a pebble beach. You could use the Clone Stamp to copy whole pebbles and place them strategically over a hard edge. Then, you'd switch to the Healing Brush to blend the surrounding sand and shadows, making the patch look completely natural. The real skill is in combining these tools, constantly re-sampling from different spots to build a seamless transition that looks entirely organic.
Generating Tileable Images with AI Tools
While manually editing a photo gives you total control, the absolute fastest way to get a tileable image is to have an AI generate it for you from scratch. This whole approach flips the traditional workflow on its head. Instead of spending time painstakingly clone-stamping seams on a photograph, you just tell the AI what you want, and it builds a perfectly seamless texture in seconds.
AI image generation has completely changed the game for creators. We're talking about a massive shift—it's estimated that 34 million AI images are being created every single day. This boom is fueled by a global AI market that hit $279 billion in 2024 and is projected to skyrocket to $1.8 trillion by 2030. This isn't just a niche tool; it's a fundamental change in how we create visuals.
Crafting the Perfect AI Prompt for Tiling
The secret to getting great results from any AI is learning how to ask for what you want. It's all about the prompt. Most modern AI image generators recognize specific keywords and commands that tell them to create a repeating pattern.
Here are the magic words you'll want to sprinkle into your prompts:
--tile: This is a classic parameter, especially in tools like Midjourney. It explicitly tells the AI to make the output a seamless tile.seamless pattern: A simple, descriptive phrase that nearly every AI model understands. It’s a clear instruction to make sure the edges line up perfectly.repeating texture: Another great descriptor that leaves no room for confusion. It signals that you need a pattern that can repeat without any visible breaks.
Think about it this way: a prompt like "brick wall" might give you a nice picture of a wall, but chances are it won't be tileable. A far more effective prompt would be something like, "photorealistic red brick wall, clean grout, even lighting, seamless pattern." Those extra details are what guide the AI to create a genuinely useful asset.
Prompt Examples for Different Styles
Experimentation is your best friend here. The more specific your description, the closer the AI will get to what you're imagining. This is where you can really have fun and generate entire collections of themed textures for a project in a fraction of the time.
To get you started, here are a few ideas:
| Style | Example Prompt |
|---|---|
| Realistic | cracked desert ground texture, dry earth, photorealistic, 8k, repeating texture |
| Abstract | geometric synthwave pattern, neon grids, glowing lines, dark background, --tile |
| Organic | delicate watercolor floral design, pastel colors, soft edges, seamless pattern |
| Sci-Fi | futuristic carbon fiber weave, metallic sheen, intricate details, seamless texture |
The real game-changer here is the speed and variety. You can whip up a dozen different tileable wood grain textures in the time it would take to manually fix the seams on just one photo. It opens the door to rapid prototyping and creative exploration that just wasn't practical before.
If you’re just getting started or working on a budget, it’s worth checking out the many free AI image generators out there. Many of them are surprisingly powerful. For anyone ready to go deeper, our guide on using an AI Texture Generator covers more advanced techniques to help you get professional-grade results. This isn't just a shortcut; it's a powerful way to create completely original, perfectly seamless visuals whenever you need them.
How to Export and Implement Your Tiled Picture
You’ve done the hard work and created a flawless, seamless tile. That's a huge win, but it’s only half the battle. Now you have to get it out of your editor and into the wild, and how you do that is just as important as how you made it.
Whether it’s for a website background, a massive printed poster, or a video game environment, the export settings you choose will make or break the final result. A file optimized for a fast-loading website is a world away from one prepped for a high-res print job. Let's get this part right so your work looks as crisp and professional as it should.
Exporting for Web Backgrounds
For the web, it's all about balance. You need the smallest possible file size that still looks fantastic on screen. Poorly optimized images are one of the biggest reasons for slow websites, so understanding the basics of optimizing images for web is non-negotiable.
Your go-to formats will be JPG for photographic textures and PNG when you need transparency. Stick to the screen standard resolution of 72 DPI. A tile size of 512x512 pixels is often a great sweet spot, giving you enough detail without bloating the file size.
Getting it onto your website is a breeze with a bit of CSS.
body { background-image: url('your-tile.jpg'); background-repeat: repeat; } This simple code tells the browser to take your image and repeat it infinitely across the page, filling the background perfectly.
Preparing Tiles for Print Design
When you're dealing with print, forget everything you just learned about file size. Here, resolution is king. To avoid a fuzzy, pixelated mess, you absolutely must export your tile at a high resolution. The industry standard is 300 DPI (dots per inch), and you shouldn’t settle for less.
Imagine you're in a program like Adobe InDesign, laying out a huge poster. You’d place your high-res tile, then simply copy and paste it, snapping the duplicates together until the entire area is covered. Because it's seamless, the pattern looks like one single, continuous image.
The most important takeaway for print is to plan ahead. Figure out your final print dimensions first and ensure your tile has enough pixel density (300 DPI) to stay sharp when repeated over that large an area.
If you end up with a huge file that a specific platform can't handle, you'll need to resize it carefully. You can use a tool like a bulk image resizer to manage file dimensions without losing critical quality.
Implementing Textures in Game Engines
Game development demands both stunning visuals and rock-solid performance. Game artists almost always export textures in formats like PNG or TGA. A key practice here is using "power-of-two" dimensions (256x256, 512x512, 1024x1024 pixels). This isn't an arbitrary rule—it's for optimal memory usage and compatibility with graphics hardware.
Inside an engine like Unity or Unreal Engine, the workflow is pretty standard:
- First, import your texture file into the project's asset library.
- Next, create a new "Material" in the engine.
- Then, assign your texture to the material's main color slot (often called "albedo" or "base color").
- Finally, just drag and drop this new material onto a 3D model, like a floor, wall, or character's clothing.
The engine takes care of the tiling automatically based on the model's UV map. This technique is incredibly efficient, allowing a single, relatively small texture to cover a massive surface area in the game world.
Export Settings at a Glance
Choosing the right settings can feel like a lot to remember, so here’s a quick-reference table to help you decide what's best for your project.
Export Settings for Different Tiling Applications
| Application | Recommended Format | Color Mode | Resolution/Size |
|---|---|---|---|
| Web Design | JPG (for photos), PNG (for graphics/transparency) | sRGB | 72 DPI (e.g., 512x512 pixels) |
| Print Design | TIFF, PDF, High-Quality JPG | CMYK | 300 DPI (size varies by project) |
| Game Development | PNG, TGA | sRGB | Power-of-two (e.g., 1024x1024 pixels) |
Think of this table as your starting point. While these are the industry standards, you might need to adjust based on the specific requirements of your platform or project. Always double-check documentation if you're unsure.
Troubleshooting Common Tiling Mistakes
Even when you follow all the steps perfectly, sometimes your tiled image just doesn't look right. It happens to everyone. The good news is that most of these issues are pretty simple to fix once you know what to look for, and they're the key to getting that seamless, professional finish.
The most common problem by far is the visible seam or grid line. You'll see a faint but definite line where the tiles meet. This is almost always caused by uneven lighting in the original photo—one edge is a touch darker than the opposite one, creating a jarring transition when repeated. The easiest fix is usually an adjustment layer in Photoshop, like Curves or Levels, paired with a soft gradient mask. You can use it to subtly brighten that dark edge just enough to make the seam vanish.
Solving the Checkerboard Effect
Okay, so your tile is technically seamless, but it still screams "I'm a repeating pattern!" This is what we call the "checkerboard effect." Your brain instantly picks up on the grid, usually because one or two elements in your texture are too distinct, like a single dark knot in a wood grain or a uniquely shaped leaf.
To get around this, try a couple of things:
- Tone Down Stand-Out Features: Before you even start the tiling workflow, grab the Clone Stamp or Healing Brush. Use them to soften or remove any elements that are too unique. You’re not trying to erase all detail, just aiming for a more uniform pattern that doesn't have obvious "landmarks."
- Create and Layer Variations: Make a second or even a third version of your tile. Maybe rotate one slightly or shift the colors a bit. By layering these different versions on top of each other with low opacity, you can break up the repetition and create a much more organic-looking final texture.
A great seamless tile should be invisible. It needs to feel like a continuous, natural surface. If your eyes can immediately trace the grid, it’s a clear sign your texture needs a bit more randomization.
Avoiding Blurry or Pixelated Results
Another headache is ending up with a blurry or pixelated result. This almost always boils down to one of two things: resolution or your export settings.
If you’re designing for a massive print display but you started with a small, low-quality image you grabbed from the web, no amount of editing magic is going to make it sharp. It's a classic "garbage in, garbage out" scenario. Always, always start with the highest-resolution source image you can get your hands on.
Equally important are your export settings. Aggressive file compression can completely ruin your hard work. Over-compressing a JPG, for instance, introduces ugly blocky artifacts that become painfully obvious once the image is tiled over and over.
It's also interesting to see how these techniques fit into the bigger picture. Creating a seamless tile is a form of photo manipulation, and by 2025, the rise of AI has significantly blurred the lines between what's real and what's composite. This makes ethical use and transparency more crucial than ever. To get a better sense of this evolving landscape, it's worth reading about the broader implications of AI in photo manipulation and truth. By keeping an eye on these common pitfalls, you can make sure your tiled images are both technically solid and visually stunning.
Picture Tiling Questions Answered
As you start tiling images, you'll inevitably run into a few common questions. Getting these sorted out early will save you a lot of headaches and help you build a solid workflow, whether you're just getting started or have been doing this for years.
Let's dive into some of the most frequent things that trip people up.
What Is the Best Image Size to Start With?
This is a classic "it depends" situation, but I can give you some solid rules of thumb.
For anything digital—like web backgrounds or game assets—stick to power-of-two dimensions. Think 256x256, 512x512, or 1024x1024 pixels. This isn't just a random convention; game engines and graphics hardware are optimized to handle these sizes, which means better performance and fewer glitches.
Print is a completely different ballgame. Your starting size is dictated by the physical scale you need and the print resolution (DPI). The golden rule here is to always start with the highest quality image possible. You can always scale down, but you can't magically add detail back in when you scale up.
How Can I Test if My Image Is Truly Seamless?
The quickest sanity check is right in your image editor. If you're using a tool like Photoshop, use the "Define Pattern" command. Then, create a new canvas that’s much larger than your tile—say, 4x or 5x the size—and fill it with your new pattern. This is the moment of truth. Any harsh seams, obvious repetition, or weird lighting shifts will jump out at you immediately.
For web projects, I often do a quick real-world test. I'll throw together a simple HTML file and use a couple of lines of CSS to set my image as a repeating
background-imageon the page. This shows me exactly what a user will see in their browser.
This kind of practical testing isn't optional; it's the final quality check before you put your work out there.
Can I Tile a Picture That Has a Person in It?
Technically, yes, but should you? Almost always, no. The results are usually pretty bizarre and unsettling. Tiling works best for textures and abstract patterns where the edges can blend together naturally—things like wood grain, fabric, or subtle geometric designs.
Our eyes are incredibly good at spotting repetition, especially with something as distinct as a face or a human figure. Seeing the same person tiled over and over shatters the illusion of a continuous surface. If your image has a clear subject, it’s much better to treat it as a standalone element.
If you're looking to create more abstract or textural patterns from scratch, playing around with a free AI image prompt generator can be a great way to spark some ideas that are perfectly suited for seamless tiling.
Ready to create stunning, unique visuals in seconds? Bulk Image Generation uses powerful AI to turn your ideas into professional-quality images, perfect for any project. Skip the tedious editing and generate everything from game assets to marketing materials instantly at https://bulkimagegeneration.com.
