Create a Stunning Stained Glass Window Image with AI

Ryan Bennett • February 9, 2026
A practical guide to generating a unique stained glass window image with AI. Learn pro-level prompts, batch workflows, and post-processing tricks.
Creating a breathtaking stained glass window image doesn't mean you need a workshop full of expensive glass and a decade of practice anymore. With the right AI tools, you can bring intricate, light-filled designs to life in just a few seconds. I'll walk you through the entire process, from getting the prompt just right to prepping your final artwork for professional use.
Bridging Ancient Art and Modern Technology
Stained glass has captivated people for centuries, but it’s always been an incredibly hands-on, painstaking craft. Working with glass, lead, and fire isn't exactly accessible. Now, anyone with an idea can explore this beautiful art form digitally, bypassing all the physical barriers.
This shift is a huge deal for creators, marketers, and artists. Instead of pouring weeks into a single physical piece, you can generate dozens of unique concepts in minutes. You can visualize complex ideas on the fly, experiment with wildly different styles without any real commitment, and scale up your creative work in ways that were simply impossible before.
From Medieval Marvels to Digital Designs
The history of stained glass is just incredible. The art form really hit its stride during the Gothic period, transforming massive stone cathedrals into galleries of light and color. Just look at Chartres Cathedral in France—it has 176 windows that cover a mind-boggling 2,600 square meters. That’s the kind of legacy we're tapping into.
Today, we can channel that same visual power into our digital projects. AI is the bridge that connects the timeless appeal of stained glass with the speed and flexibility of modern tech. The core principles haven't changed—it's still all about color, light, and story. The tools just look a little different now.
Let's break down how this evolution changes things for creators.
From Ancient Craft to AI Generation
| Attribute | Traditional Stained Glass | AI Image Generation |
|---|---|---|
| Time | Weeks or months per piece | Seconds or minutes |
| Cost | High (materials, tools, labor) | Low (subscription-based) |
| Skills | Years of specialized training | Basic prompt writing |
| Revisions | Difficult and costly | Instant and unlimited |
| Accessibility | Limited to skilled artisans | Open to anyone |
| Materials | Glass, lead, solder, chemicals | None (fully digital) |
| Output | One physical piece at a time | Hundreds of variations at once |
As you can see, the barriers to entry have practically vanished. What once required a dedicated workshop and a master's skill set now just requires a good idea and the right prompt.
The real magic of AI here isn't just about copying old styles; it's about exploration. You can smash together historical aesthetics like Art Nouveau with sci-fi themes, or create visuals for stories that have never been told in glass before.
New Possibilities for Creative Projects
The applications for this are practically endless. Think about what you could do with a high-quality, AI-generated stained glass image:
- Marketing Campaigns: Design stunning, eye-catching social media graphics for a boutique or a special event.
- Product Creation: Develop unique patterns for print-on-demand items like phone cases, journals, or even fabric.
- Educational Content: Create beautiful, historically-themed coloring pages for a school project or an Etsy shop.
- Personal Art: Produce custom artwork for your own home or build out your digital portfolio without any of the mess.
If you want to get a better sense of how AI is shaking up the world of visual art, exploring how people are creating personalized images, like AI-driven portraits, can really open your eyes to what’s possible.
Now, let's get practical. This guide will give you the exact steps and prompt templates you need to start making your own incredible stained glass visuals right away.
How to Write Prompts for Flawless Stained Glass Images
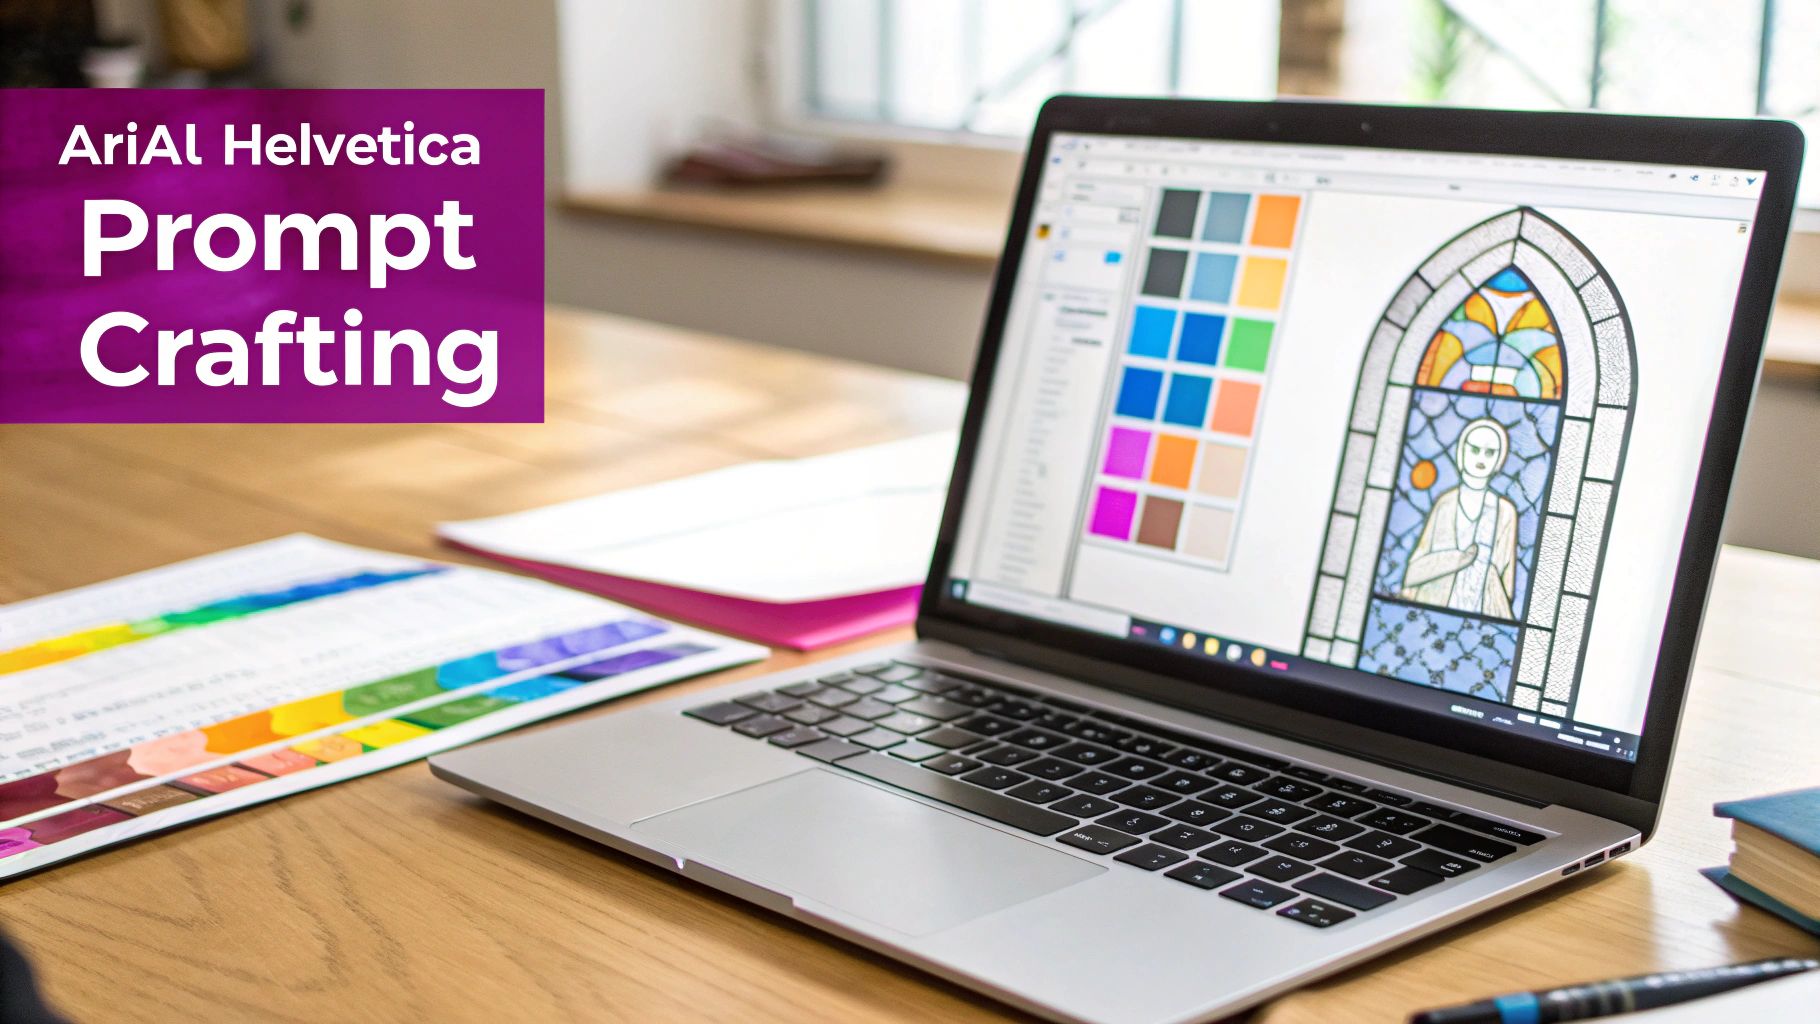
The real magic behind a jaw-dropping AI-generated stained glass window isn’t just the model—it’s the way you talk to it. A lazy, vague instruction will get you a generic, forgettable result. But a precise, descriptive prompt? That acts like a detailed blueprint for the AI, letting you call the shots on everything from the subject matter to the final artistic flair.
Think of yourself as a director, not just a user. Your words set the scene, define the characters, and dictate the entire mood. The clearer your direction, the closer the final image will be to what’s in your head. This is the difference between making simple pictures and crafting intentional works of art.
The Anatomy of a Powerful Prompt
A truly great prompt for a stained glass image has a few key ingredients. I’ve found that mixing and matching these elements gives you an insane amount of control over the final piece. You don’t need to use all of them every single time, but knowing your options is half the battle.
Here are the core components I always consider:
- Core Subject: What’s the main focus? A "lion," a "knight," or a "geometric mandala." Start with something clear and concise.
- Artistic Style: This is where you inject personality. Words like "Art Nouveau," "Gothic," "Tiffany-style," or "modern abstract" make a massive difference.
- Color Palette: Don't leave the colors up to the AI's whims. Specify a vibe like "warm, sunset colors" or get specific with shades like "cobalt blue, ruby red, and emerald green."
- Composition & Framing: How is the subject laid out? Guide the AI with terms like "close-up," "symmetrical design," or "circular window frame."
- Lighting & Atmosphere: Describe how the light behaves. Is it "sunlight streaming through," creating "dramatic god rays"? Or is the lighting more "soft and diffused"?
By layering these elements, you build a much richer instruction. For example, instead of just prompting "stained glass flower," try this: “An Art Nouveau stained glass window image of an iris, with flowing lead lines, in a palette of deep purples and vibrant yellows, backlit by soft morning light.” The difference in the results will be night and day.
Specifying Historical and Artistic Styles
One of the quickest ways to level up your stained glass designs is by referencing specific art movements. Each style brings its own distinct baggage—from the type of glass it simulates to the thickness of the lead lines.
Gothic Style: Think classic cathedral windows. Your prompts should include terms like "pointed arches," "religious iconography," "deep jewel tones," and "intricate tracery." A prompt could look like this: “Gothic cathedral stained glass window depicting Saint George slaying a dragon, rich reds and blues, dramatic lighting.”
Art Nouveau Style: This style is all about organic, flowing lines and themes pulled from nature. Use phrases like "whiplash curves," "stylized floral patterns," "dragonflies," and "elegant female figures." For example: “Art Nouveau stained glass panel of a woman with flowing hair surrounded by lilies, iridescent glass, intricate leadwork.”
The key is to use the language of the art style itself. When you tell the AI to create something with "whiplash curves," you're giving it a specific visual cue that is far more powerful than just saying "curvy lines."
If you’re ever stuck for ideas or want to speed things up, a dedicated tool can be a lifesaver. You can check out how our free AI image prompt generator helps you build these detailed instructions without having to start from a blank page.
Using Negative Prompts for Cleaner Results
Sometimes, what you don't want in an image is just as critical as what you do. This is where negative prompts are your best friend. They’re basically a list of things for the AI to avoid, helping you clean up the final output and sidestep common AI weirdness.
For stained glass images, I often see issues like fuzzy details, unrealistic textures, or random elements creeping into the frame. A good negative prompt can fix most of that.
Here’s a quick cheat sheet for common problems and their fixes:
| Common Issue | Negative Prompt Solution | Why It Works |
|---|---|---|
| Blurry or soft edges | blurry, out of focus, hazy, soft | Forces the AI to generate crisp, well-defined lead lines. |
| Modern elements appear | photograph, realistic, 3d render, modern | Pushes the output toward a classic, hand-crafted aesthetic. |
| Unwanted text or watermarks | text, signature, watermark, letters | Prevents the AI from adding distracting, nonsensical text. |
| Messy or broken lines | broken, messy, sloppy, imperfect lines | Encourages clean, continuous leadwork for a more professional look. |
By strategically adding a few negative prompts, you gain a final layer of quality control. It’s a simple step that makes a huge difference, helping you polish your work and produce a flawless stained glass window image every time.
Scaling Your Creativity with Batch Image Generation
Making one stunning stained glass image is great, but the real magic of AI is in turning that single idea into a whole collection with the same amount of effort. Batch generation is the secret sauce for scaling your creative work, letting you produce dozens of unique but cohesive visuals in just minutes. It's a total game-changer if you need lots of quality content without the soul-crushing manual work.
Let's say you're running a social media campaign and need images for all twelve zodiac signs. Instead of prompting each one by one, you can just give the AI a high-level goal: “Generate a series of stained glass window images for each zodiac sign in a detailed Art Nouveau style.” The system takes it from there, creating a beautiful, on-theme image for Aries, Taurus, Libra, and all the rest, all while keeping the same aesthetic across the entire set.
From One Idea to a Full Collection
The whole process is built for speed. For a digital marketer, this could mean knocking out a month's worth of visual content in under an hour. An artist could build an entire portfolio around mythological creatures or botanical illustrations, making sure every piece feels like it belongs together. The idea is simple: you provide the vision, and the AI handles the variations and the grunt work.
This is a world away from how stained glass was historically created. For centuries, the craft was incredibly slow and painstaking. This meticulous art form took a massive hit during the Protestant Reformation, when a wave of iconoclasm led to the widespread destruction of religious art. In the 1640s, Parliament's orders in England resulted in countless panels being smashed, nearly turning the craft into a 'lost art' by the mid-17th century.
Thankfully, today's digital tools let us bring this art form back to life and reimagine it on a massive scale.
How Batch Generation Works in Practice
The workflow is pretty straightforward. You kick things off by defining your project's main parameters—the overall style, the subject matter, and any specific rules you want the AI to follow. Modern AI platforms have really user-friendly interfaces to manage all of this.
Here’s a glimpse of what a typical batch generation dashboard might look like. You can see where you’d input your main goal and set the number of images you want.
This setup lets you define a single creative goal, tell the AI how many versions you need, and then just let it run.
The real power here is the AI's ability to interpret your goal and intelligently create diverse results that still feel connected. If you ask for "cats in a Tiffany-style stained glass," it won't just spit out the same cat over and over. You’ll get different breeds, poses, and compositions, all unified by that classic Tiffany lampwork look.
The secret to a killer batch is setting strong initial parameters. A well-defined style and a clear theme act as creative guardrails, ensuring that even with dozens of variations, your final images look professional and intentional, not like a random mess.
Fine-Tuning Your Batch for Cohesion
While the AI does most of the heavy lifting, you're still in the driver's seat. Before you hit "generate," you can refine the parameters to make sure everything comes out looking consistent.
- Lock Down a Color Palette: If your brand has specific colors, tell the AI. For instance, you could add "using a palette of navy blue, gold, and cream."
- Specify the Composition: To keep a uniform look, you can dictate the framing for every image. Try using phrases like "circular window frame" or "centered close-up" to guide the layout.
- Maintain a Consistent Aspect Ratio: Make sure all your images are generated in the same dimensions (like 1:1 for Instagram) to save yourself the headache of resizing them later. If you want to dive deeper into creating consistent visuals, you might find our guide on using a bulk social media image generator helpful.
By taking just a few moments to set these rules, you can produce a large volume of stained glass window image assets that are ready to go, whether it's for a marketing campaign, an online store, or a personal art project. This strategic move transforms the AI from a simple image creator into a seriously powerful production assistant.
Taking Your AI Images From Raw Output to Polished Asset
Generating a beautiful stained glass image with AI is a fantastic start, but the real magic happens in post-processing. This is where you take a cool digital creation and turn it into a truly professional, versatile asset ready for any project. Don’t skip these final touches—they’re what separate a fun experiment from a valuable piece of content.
Simple edits can make a world of difference. You can isolate your design on a transparent background for easy layering, or convert it into a line-art coloring page. These steps elevate your work from a neat AI output to a polished, ready-to-use graphic.
This whole workflow is designed for efficiency. You move from a core idea to a batch of finished, project-ready images without getting bogged down in manual, repetitive tasks.
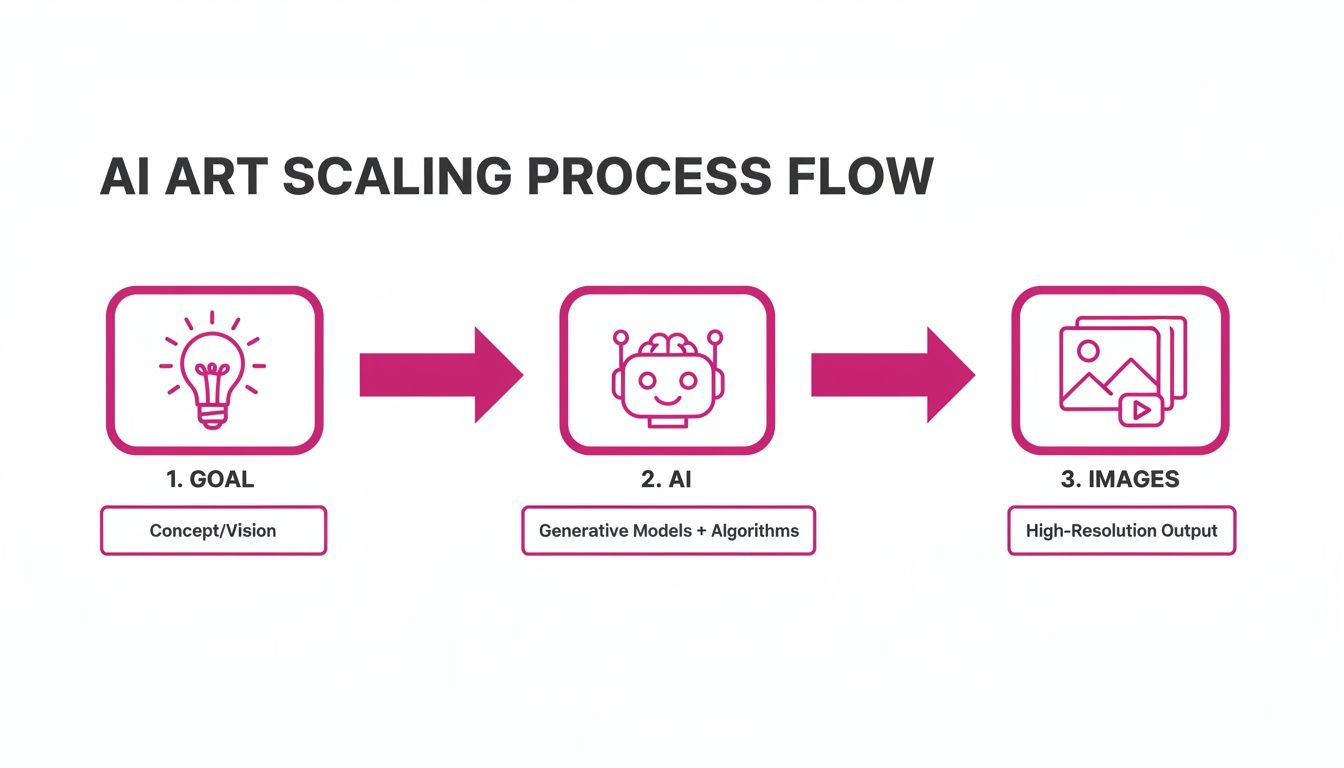
As you can see, the AI does the heavy lifting of interpreting your prompt and generating the initial art. Your job is to focus on that final polish.
Creating Transparent PNGs for Ultimate Flexibility
One of the most useful edits you can make is removing the background to create a transparent PNG. This instantly makes your stained glass design incredibly flexible. No more awkward white boxes around your image—a transparent background means you can drop your art onto any product mockup, website banner, or social media post seamlessly.
Imagine you've generated a stunning floral stained glass pattern. Once you make the background transparent, you can:
- Overlay it on a photo of a journal cover to create a realistic product mockup for your online store.
- Place it in the corner of a promotional graphic without covering important text.
- Use it as a logo or decorative element on a website with a colored or textured background.
Most modern image editors, especially those built into AI platforms, now offer one-click background removal. A task that once required tedious, careful work in Photoshop can now be done in seconds, which is a massive time-saver.
From Colored Glass to Printable Coloring Pages
Here's a clever use case for your intricate stained glass designs: turn them into coloring pages. This isn't just about removing the color. The goal is to isolate the dark "lead lines" and get rid of the colored "glass" panels, leaving you with a clean, black-and-white outline ready for printing.
The process usually involves cranking up the contrast and brightness to make the lead lines as dark as possible. From there, you can use color selection tools to delete the colored sections. Some of the more advanced editors can even automate this, cleanly separating the line art from the fills.
This technique is a goldmine for educators creating lesson plans, artists selling digital products on Etsy, or parents looking for a unique activity for their kids.
The real win here is speed. Manually tracing a complex stained glass window to create a coloring page could easily take hours. With the right tools, you can convert a detailed AI generation into a printable outline in under five minutes.
Bulk Enhancements and Resizing to Work Smarter
When you're dealing with a large batch of images, editing them one by one is a huge time sink. This is where bulk processing comes in. Instead of opening, resizing, and saving 50 different images individually, you can apply the same changes to the entire set at once.
Common bulk actions include:
- Resizing: Instantly format an entire collection for a specific platform, like making a batch of 1080x1080 pixel squares for an Instagram campaign.
- Enhancing: Apply a sharpening filter or upscale the resolution across all your images to make sure they look crisp and professional.
- Watermarking: Add your logo or website URL to every image in a batch to protect your work and promote your brand.
For anyone looking to take their AI art off the screen and onto physical products like prints or merchandise, proper file preparation is non-negotiable. You’ll need to learn how to embed images in professional design software to create flawless, print-ready files. Getting this right ensures the vibrant colors on your monitor translate perfectly to a physical product, saving you from costly printing errors.
Essential Export Settings for Common Use Cases
Choosing the right export settings is the final, crucial step. The format and resolution you pick depend entirely on where you plan to use the image. Here’s a quick guide to get you started.
| Use Case | Recommended Format | Resolution | Key Setting |
|---|---|---|---|
| Website Graphics & Logos | PNG or WebP | 72 DPI | Enable transparency, optimize for web |
| Social Media Posts | JPG | 72 DPI (e.g., 1080x1080 px) | Compress for fast loading |
| High-Quality Art Prints | TIFF or PNG | 300 DPI or higher | Lossless compression, use CMYK color profile |
| Digital Coloring Pages | PDF or PNG | 300 DPI | High contrast, pure black and white |
| Product Mockups | PNG | 150-300 DPI | Transparency enabled for easy layering |
Getting familiar with these settings ensures your images look sharp and load quickly online, and print beautifully without any nasty surprises. Mastering these post-processing workflows is how you scale up your creativity while maintaining quality and consistency.
Bringing Your AI Stained Glass Art to Life: Inspiring Use Cases
Alright, you've got the technical side down. Now for the fun part: seeing what this actually looks like in the real world. Moving from theory to practice is where the magic happens, watching a simple text prompt blossom into something you can actually use for a project.
I've pulled together a few scenarios to show how different creators are using this exact workflow. Think of these as jumping-off points to get your own ideas flowing. The goal isn't just to show you what to create, but why it works in a specific context.
A Social Media Campaign for a Boutique Brand
Imagine you're running marketing for an artisanal soap company. The brand vibe is natural, elegant, maybe a little vintage. You need a full month's worth of stunning visuals for Instagram to launch a new lavender collection. The key is creating a cohesive, eye-catching theme that stops people from scrolling.
This is where an Art Nouveau stained glass style really shines. Its flowing, organic lines and deep connection to nature are a perfect match for the brand. Instead of using the same old stock photos of lavender fields everyone else uses, you can generate a series of unique, artistic images that feel custom and high-end.
- Project Goal: Generate a set of 12 cohesive Instagram posts with botanical themes in a stained glass style to promote the new product line.
- Sample Prompt:
Art Nouveau stained glass window image of a lavender plant, with flowing whiplash lead lines, in a color palette of soft purples, sage green, and cream, circular frame, clean white background. - The Result: You get a batch of beautiful, on-brand visuals that feel like they were commissioned just for you. This elevates the brand's social media presence way beyond typical product shots.
This approach is so effective because it builds a strong visual identity. Once a follower sees one of these unique stained glass images in their feed, they'll instantly connect it with your brand. That's how you build recognition and stand out.
Unique Print-on-Demand Products
If you're an independent artist or creator, print-on-demand (POD) is an incredible way to sell your work without having to deal with inventory. And let me tell you, AI-generated stained glass patterns are an absolute goldmine for this market. Their intricate details and punchy colors look fantastic on products like phone cases, tote bags, and journal covers.
Let's say you want to launch a series of fantasy-themed phone cases on your Etsy shop. You could easily generate a whole collection of mythical creatures, each one designed in a bold, colorful stained glass style.
- Project Goal: Design a collection of 10 unique stained glass patterns for a new line of POD phone cases.
- Sample Prompt:
Symmetrical stained glass window image of a majestic phoenix, fiery oranges and deep reds, bold black lead lines, designed to be a repeating pattern. - The Result: In minutes, you have a full product line of eye-catching designs ready to upload. The best part? Since the AI can create endless variations, you can expand your collection with new creatures whenever inspiration strikes.
Educational History-Themed Coloring Books
Parents and educators are always on the hunt for engaging learning materials. A coloring book that explores historical periods or figures through the lens of stained glass is both fun and informative. It's a natural fit, given that the art form itself has such deep historical roots.
This connection to history is no joke. The 19th and 20th centuries saw a massive revival of stained glass, pushing it beyond just religious scenes and into modern architecture. The American industry really kicked off in 1887 with the Kokomo Opalescent Glass Company, which even won a gold medal at the 1889 Paris World Exposition. And of course, iconic marvels like Paris's Sainte-Chapelle—with its 15 towering windows soaring nearly 50 feet high—still draw millions of visitors a year.
For a history-themed project, you could easily create a page for every major civilization.
- Project Goal: Generate 20 black-and-white line art images for a printable coloring book about ancient civilizations.
- Sample Prompt:
Stained glass coloring page of an Egyptian pharaoh, thick clean outlines, no color, full-body portrait, hieroglyphic border. - The Result: A complete, ready-to-print educational resource. After generating the initial images, you can use the post-processing tricks we covered to separate the lead lines, creating perfect outlines for coloring. This is also a fantastic technique if you're exploring how to create religious art, as you can see in our guide on the AI bible art generator.
These use cases are just the beginning, but they show how a single AI skill can unlock countless creative and commercial doors.
Common Questions About AI Stained Glass Generation
Jumping into AI art is a blast, but let's be real—it's not always a straight line from prompt to perfect image. You're going to have questions. Getting that perfect stained glass window image often means doing a bit of creative problem-solving.
Think of this as your go-to troubleshooting guide. I've seen these same issues pop up time and time again, so let's get them sorted out. Whether you're fighting with weird lead lines or just trying to keep a consistent vibe across a whole set of images, these tips should save you some headaches.
How Do I Get the Lead Lines to Look Right?
This is the big one. It's probably the most common snag people hit. The AI spits out lines that are too thin, broken, or blurry, and the whole stained glass illusion just falls apart. Thankfully, the fix is usually just a few quick tweaks to your prompt.
You have to be direct. Don't just ask for "lead lines." Get specific with strong, descriptive phrases like "bold black lead lines," "thick, clean outlines," or "distinct leadwork." Words like these give the AI much clearer marching orders.
And don't forget about negative prompts—they're your secret weapon here. Tossing blurry, thin lines, messy, broken into the negative prompt field works like magic. You're explicitly telling the AI what not to do, which forces it to lean into the clean, solid lines you'd see in real stained glass. It’s a tiny change that makes a huge impact.
Can I Blend Different Artistic Styles?
Absolutely, and this is where the real fun begins. The AI is a master at mashing up different aesthetics. You could, for instance, mix the flowing, organic shapes of Art Nouveau with the sharp, geometric feel of Art Deco to cook up something totally new.
The trick is to be clear about both styles in your prompt. A good starting point might be something like: “A stained glass window image blending Art Nouveau and cyberpunk styles, featuring a robotic hummingbird among neon flowers.”
The AI will usually find a sweet spot in the middle, borrowing key elements from each style and weaving them together. Don't hesitate to throw some weird combinations at it—that's how you discover a visual style that's completely yours.
Just know that some pairings will work better than others. You might need to play with the "weight" of each style by mentioning one more prominently than the other to see which one takes the lead. It's all part of the creative discovery process.
What About Commercial Use and Copyright?
This is a super important question, especially if you plan on selling your creations or using them for your business. The rules around AI-generated art and commercial rights can feel a bit murky, and they really come down to the terms of service of the AI tool you're using.
Generally speaking, a lot of AI image platforms grant you broad commercial rights for the images you create. That means you can typically use your stained glass designs for things like:
- Print-on-demand products (t-shirts, mugs, posters)
- Marketing materials, social media graphics, and website visuals
- Digital goodies like coloring books or stock art packs
But—and this is a big but—you absolutely must read the terms of service for whatever platform you’re on. Some tools have restrictions, particularly if you’re using a free version. Always, always double-check the licensing agreement before you use your art in a commercial project. A little due diligence upfront can save you from major legal headaches down the road.
Ready to stop prompting one by one and start creating entire collections of stunning stained glass images effortlessly? With Bulk Image Generation, you can turn a single idea into hundreds of unique, high-quality visuals in seconds.
