Stable diffusion img to img: A Practical Guide to Image Transformation

Ryan Bennett • February 7, 2026
Master stable diffusion img to img with a hands-on guide to essential parameters and workflows for transforming images.
Stable Diffusion's img to img is an incredible process that uses AI to transform one image into another, all guided by a simple text prompt. Instead of starting with a blank canvas, you give it a source image to use as a structural and compositional guide. This lets you pull off stylistic changes, creative remixes, and targeted edits that would otherwise take hours of manual work in something like Photoshop.
How Img to Img Transforms Creative Workflows
At its heart, the img to img process is really a partnership between your creative vision and the AI's processing power. You bring the initial idea—whether it's a rough sketch, a product photo, or even a messy doodle—and then you steer the AI's transformation with a text prompt. This isn't just slapping on a filter; it's a complete reimagining of your original image.
The AI first breaks down your image to understand its composition, colors, and shapes. Then, it uses your prompt as instructions to "repaint" it, blending the original structure with totally new concepts. This simple but powerful workflow opens up a massive range of possibilities for both professionals and hobbyists.
Who Benefits From This Technology
The applications for img2img are incredibly broad, touching just about every creative field. For anyone who works with visuals, it's a genuine game-changer.
- Digital Marketers: Need to A/B test ad creative? You can instantly generate dozens of variations from a single stock photo. Test different visual styles, add seasonal themes, or swap out product placements in seconds to see what resonates with your audience.
- Small Business Owners: Create professional-looking product mockups without booking an expensive photoshoot. You can see your logo on different merchandise, visualize new packaging designs, or generate lifestyle shots of your products in different settings.
- Artists and Hobbyists: This is where it gets really fun. Turn a simple pencil sketch into a photorealistic portrait, a vibrant oil painting, or a detailed piece of concept art. The AI acts like a powerful assistant, speeding up the entire process from ideation to final piece.
The real magic of img to img is its ability to automate iteration. Instead of spending hours manually editing one image, you can produce hundreds of high-quality variations. This lets you explore creative directions that were simply too time-consuming before.
Shifting From Manual Labor To Creative Direction
This technology fundamentally changes the creative process. You're no longer bogged down by the tedious, technical side of image editing. Instead, you can focus on the big picture: the creative direction. Your role shifts to that of a director, guiding the AI to produce visuals that line up with your vision and goals.
This is especially powerful for generating unique visuals for specific markets. For anyone trying to get into new creative fields, it's also crucial to understand the needs of those markets. For instance, if you want to learn how to design for print on demand, the ability to rapidly prototype designs on different products is a massive advantage.
Ultimately, Stable Diffusion img to img is more than just a tool—it's a whole new workflow. It bridges the gap between imagination and execution, making it possible to bring complex visual ideas to life with incredible speed and flexibility. This guide will walk you through exactly how to harness that power.
Getting Your Img to Img Environment Ready
Before you can really dive into stable diffusion img to img, you need to get your workspace set up. The good news? You’ve got options. It really just comes down to a trade-off between convenience and total control.
You can either use a cloud-based web interface that’s ready to go instantly, or you can run everything on your own machine for maximum power and customization.
The Easy Route: Web-Based Tools
For anyone just starting out, or if you just need to get results fast, web-based tools are the way to go. They completely sidestep all the technical setup.
You just upload an image, type out your prompt, and let it rip. This approach means you don't have to worry about whether your computer is powerful enough or installing a bunch of software. You can just focus on being creative. Many services, including our own AI image generator, are built specifically for this kind of easy, intuitive workflow.
The Power User's Path: A Local Setup
On the flip side, running Stable Diffusion locally on your own computer gives you the keys to the kingdom. You get complete freedom to install custom models, tweak every single parameter imaginable, and play with advanced community-built extensions without any restrictions.
This is the path for the power users, the developers, and the artists who need absolute, granular control over every pixel they generate.
Choosing a Local Setup Interface
If you do decide to run it locally, you'll need an interface to actually interact with the Stable Diffusion models.
The community favorite, by a long shot, is AUTOMATIC1111's Stable Diffusion WebUI. It's a powerhouse that runs in your browser and has become the gold standard because of its massive feature set and constant updates.
Another fantastic choice is ComfyUI. This one uses a node-based system, which looks a bit like a flowchart. It has a steeper learning curve, for sure, but it offers unmatched flexibility for building complex, multi-step workflows. It’s a favorite among technical artists who want to chain different processes together in creative ways.
Whichever you pick, you'll need to install a couple of things first:
- Python: Stable Diffusion is built on Python. You'll need a specific version, usually something like Python 3.10.6, so always check the latest requirements for the interface you're installing.
- Git: This is a tool that helps download and keep the WebUI software updated directly from its source.
Don't worry, these installations are pretty straightforward, and the setup guides for both AUTOMATIC1111 and ComfyUI walk you through it clearly.
Pro Tip: If you're on Windows and installing AUTOMATIC1111, find its one-click installer. It automatically handles setting up Python, Git, and everything else for you, which can save you a ton of time and potential headaches.
Hardware: What You'll Need for a Local Install
Let's be blunt: the single most important piece of hardware for running Stable Diffusion locally is your graphics card (GPU). The performance you get is tied directly to how much Video RAM (VRAM) your GPU has. More VRAM means you can generate bigger images, faster.
Here’s a quick rundown of what you can expect based on your VRAM:
| VRAM Amount | Expected Performance |
|---|---|
| 4-6 GB VRAM | You can get it running, but you’ll likely be stuck with smaller images (like 512x512) and generations will feel slow. |
| 8-12 GB VRAM | This is the sweet spot for most people. It's enough to run modern models like SDXL and generate high-res images comfortably. |
| 16+ GB VRAM | This is pro-level. It’s ideal for training your own custom models, using heavy-duty extensions, or just generating images at top speed. |
While the GPU does the heavy lifting, your system's regular RAM and CPU are important too, especially when loading models or handling other tasks. You'll want at least 16 GB of system RAM to keep things running smoothly. Getting your environment ready is the first real step to mastering the stable diffusion img to img workflow.
Getting to Grips with the Core Img to Img Parameters
If you really want to master Stable Diffusion img to img, you have to move past just fiddling with sliders and start making deliberate choices. The real power isn’t in the prompt alone; it’s in understanding the core parameters. Each setting is a lever you can pull to guide the AI, influencing everything from tiny enhancements to a complete artistic overhaul.
Think of it like this: your starting image gives the AI the basic composition, and your prompt sets the creative direction. But it’s the parameters that lay down the rules of engagement. They tell the AI exactly how much of the original image to keep and how strictly it needs to follow your text prompt. Nailing these settings is what separates random, hit-or-miss results from consistently professional work.
The first big choice is your environment. Are you using a cloud-based Web UI for convenience, or are you running a Local Setup for maximum control? It really comes down to your hardware.
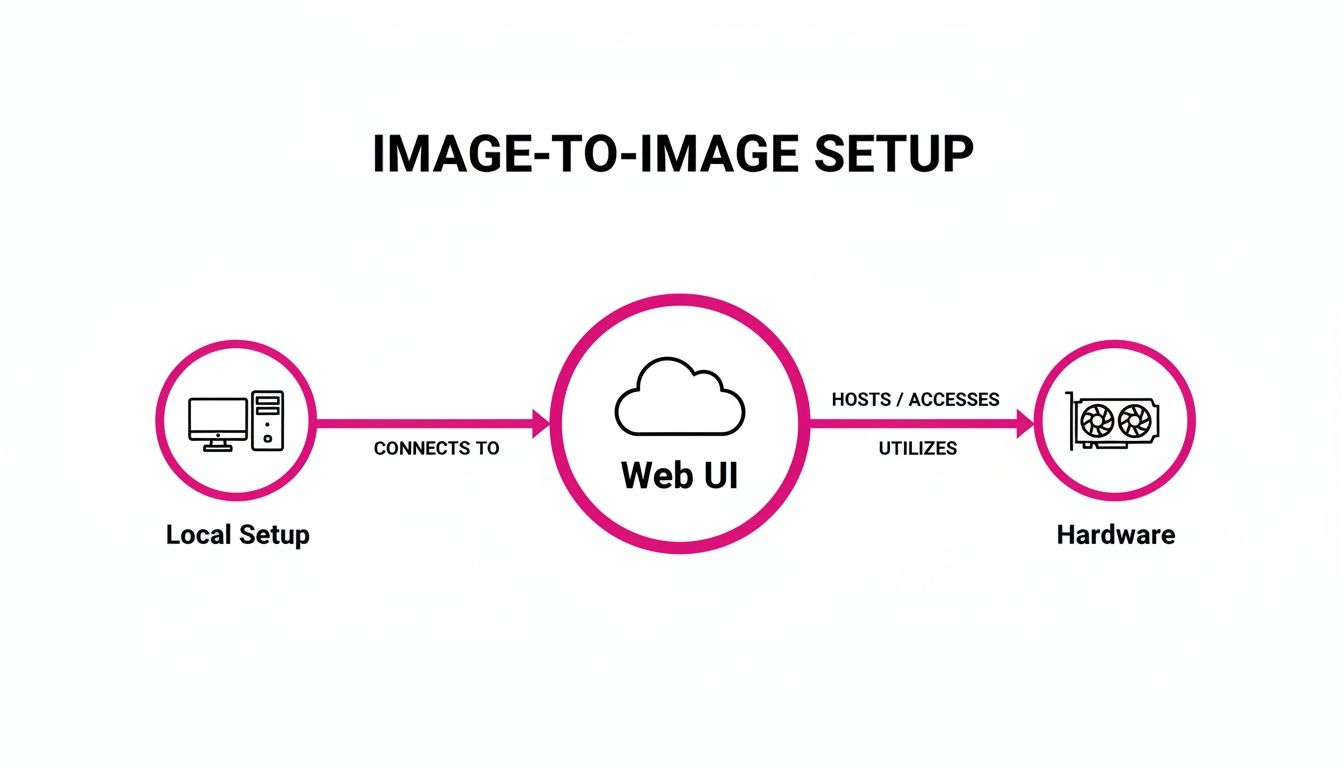
As the diagram shows, a Web UI is a great way to get started quickly. But a local setup gives you direct access to your own GPU, which is a must-have for more serious or high-volume projects where performance is key.
Denoising Strength: The Most Important Slider
If you only learn one parameter, make it this one. Denoising Strength is the absolute heart of the img2img process. It’s usually a slider that goes from 0.0 to 1.0, and it directly controls the tug-of-war between your original image and the AI's imagination.
A low Denoising Strength (think 0.1 to 0.4) tells the AI to play it safe and stick very close to the source image. This range is your go-to for small fixes—like changing the color of a car, adding a subtle texture to a wall, or making other minor adjustments where you want to keep the original structure perfectly intact.
Crank it up to a high Denoising Strength (somewhere between 0.7 and 1.0), and you’re unleashing the AI's creativity. The model will heavily deconstruct the original image and rebuild it almost from scratch based on your prompt. This is what you use for dramatic transformations, like turning a photo into an oil painting or evolving a rough sketch into a photorealistic render.
Most of my best work happens in the middle ground. A value between 0.5 and 0.75 is often the sweet spot for stylistic changes that still honor the original composition. For example, if I'm turning a sunny cityscape into a rainy, neon-drenched cyberpunk scene, I'll often start around 0.7 and tweak from there.
CFG Scale: How Closely Should the AI Listen?
Next up is the CFG (Classifier-Free Guidance) Scale. This parameter is all about prompt adherence. In simple terms, it dictates how strictly the AI has to follow your text prompt.
- Low CFG (2-6): This gives the AI more creative leeway. Your results might be more artistic and unexpected, but they could also wander off-topic from your prompt.
- High CFG (7-12): This forces the AI to stick to your instructions like glue. The output will be a very literal interpretation of your prompt, but be careful—pushing it too high can make the image look overly processed or "fried."
I've found that a CFG value between 7 and 10 usually hits the mark, giving me a solid balance between following my directions and allowing for a bit of creative flair. If the AI seems to be ignoring a key part of your prompt, nudging the CFG up a point or two is often the solution.
Seed: Your Key to Repeatable Results
The Seed is just a number, but it’s the secret sauce for reproducibility. It initializes the random noise pattern that the AI uses as its starting canvas. While it seems insignificant, using the same seed with the same prompt and parameters will generate the exact same image, every single time.
This is an absolute lifesaver when you're refining an idea. Got an image that's almost perfect? Just lock in the seed and start tweaking other settings, like the prompt or CFG Scale, to dial it in. If you want to explore completely new ideas, set the seed to -1, which tells the system to pick a new random one for each generation.
The tech behind this is moving fast. The release of Stable Diffusion 3.5 was a huge leap, introducing models with up to 8.1 billion parameters. These new models are incredible at following prompts and producing high-quality images. The Large Turbo variant, for example, can generate a 1024x1024 image in just 34 seconds on a 24GB RTX 4090—a massive time-saver for anyone doing bulk work. You can dive deeper into these advanced AI image models to see what's possible.
Samplers and Steps: Balancing Quality and Speed
Finally, you have the Sampler and Sampling Steps. These two work together to control how the AI refines the image from random noise into your final picture.
- Samplers are the different algorithms the AI can use for the denoising process. Some, like Euler a, are really fast and perfect for getting quick previews. Others, like DPM++ 2M Karras, might take a little longer but often produce sharper, more detailed results.
- Sampling Steps define how many refinement cycles the sampler goes through. Generally, more steps mean better quality but also a longer wait time. For most modern samplers, somewhere in the 20-40 step range is a great starting point.
To help you remember how these key settings work together, here’s a quick-reference table.
Key Img to Img Parameter Effects
| Parameter | Low Value Effect | High Value Effect | Best For |
|---|---|---|---|
| Denoising Strength | Preserves original image, subtle changes. | Major stylistic transformation, less original detail. | Fine-tuning (0.1-0.4), stylistic changes (0.5-1.0). |
| CFG Scale | More creative freedom, may ignore prompt. | Strictly follows prompt, can look "over-baked." | Creative exploration (2-6), precise results (7-12). |
| Seed | Randomizes output for new ideas. | Locks output for consistent, repeatable results. | Exploring concepts (-1), refining a specific image (fixed number). |
| Sampling Steps | Faster generation, potentially lower detail. | Higher quality and detail, longer generation time. | Quick previews (15-25), final renders (25-50). |
Getting a feel for these parameters takes a bit of practice, but it's a worthwhile investment. Once you understand how to adjust these core settings thoughtfully, you'll go from being a passive user to an active director, making sure every stable diffusion img to img creation is a perfect match for your vision.
Taking Your Images to the Next Level with Advanced Techniques
Once you've got the hang of the core parameters, it's time to dig into the more advanced features that really make your stable diffusion img to img results shine. These are the techniques pros use to get surgical control, fix nagging imperfections, and keep everything consistent across big projects. This is where you stop just transforming an image and start truly sculpting it.
You're about to learn how to guide the AI with much more precision, telling it not only what to create but also what to leave out. That kind of control is a game-changer, whether you're a branding agency creating marketing materials or a game developer needing consistent character assets.
Mastering Prompts for Img to Img
In an img2img workflow, your text prompt plays a slightly different role than it does in text-to-image. The AI already has a composition and structure to work from, so your prompt is less about building from scratch and more about directing the style, mood, and specific details. Good prompting here is a balancing act.
You need to be descriptive enough to guide the change, but not so specific that you start fighting the structure of the original image. For example, instead of just "a cat," a much better img2img prompt would be something like "a fluffy siamese cat, cinematic lighting, detailed fur, sharp focus." This adds a ton of stylistic direction without messing with the original pose.
One of the most powerful tools in your toolkit is the negative prompt. This is your chance to list everything you don’t want to see in the final image. It's an incredibly efficient way to clean up common AI weirdness and unwanted junk.
Common negative prompts often include terms like:
blurry, fuzzy, distortedextra limbs, deformed hands, extra fingersugly, tiling, poorly drawnwatermark, signature, text
By actively steering the AI away from these common pitfalls, you’ll get cleaner, more professional results with far fewer attempts.
Surgical Precision with Inpainting and Outpainting
Sometimes, the whole image is great except for one little thing. That's where inpainting is your best friend. Inpainting lets you mask a specific area of your image and tell the AI to regenerate only what's inside that mask, using your prompt as a guide.
It’s perfect for removing an unwanted object from a photo, fixing a distorted face, or dropping a new element into a scene. A real estate photographer, for example, could easily use inpainting to erase clutter from a room or fix a dead patch of grass in a lawn shot.
Outpainting, on the other hand, is all about expanding the canvas. Got an image that feels a bit too cramped? Outpainting lets you extend the borders. The AI looks at the existing image and intelligently fills in the new space to create a larger, seamless picture. It's a fantastic tool for turning a portrait-oriented photo into a wide landscape banner for a website header.
Pro Tip: When you're inpainting, try setting your Denoising Strength a bit higher—somewhere around 0.75-0.9. This gives the AI enough creative freedom to blend the new content perfectly with the pixels around it. A similar high value works wonders for outpainting, too.
Gaining Control Over Composition with ControlNet
One of the biggest headaches in AI image generation has always been controlling a specific pose or composition. Enter ControlNet, an extension that works with Stable Diffusion to give you an almost unbelievable level of control over the final structure.
ControlNet works by first analyzing your input image to create a "map" that the AI is forced to follow. This map can be based on different kinds of information, depending on which ControlNet model you use.
Here are some of the most useful ControlNet models for img2img:
- OpenPose: This one is a must-have for character design. It detects the pose of any human figures—their skeletons, faces, and hands—and makes the generated image match that pose exactly.
- Canny: Canny creates a map of all the hard edges in your source image. This is perfect when you want to preserve the exact outlines of objects while completely changing their internal style or texture.
- Depth: This model generates a depth map from your image, making sure the spatial relationships and perspective of the original scene are locked in place.
Using ControlNet feels like you have a safety net. You can crank the Denoising Strength way up to get dramatic stylistic changes, all while being confident that the core composition and character poses will stay exactly where you want them. For any project that demands consistency, this level of control is absolutely essential. And if you're creating unique patterns or surfaces, you might also find specialized tools like an AI Texture Generator to be a huge help.
Scaling Your Output with Bulk Img to Img Workflows
Making one great image with Stable Diffusion img to img is a solid start. But the real magic happens when you need to create hundreds, or even thousands, of variations. That's where you move from being an artist to running a production line, and bulk workflows are your best friend.
Modern tools are built for exactly this. Instead of grinding through images one by one, you can feed a single source image into the system and apply dozens of different prompts or styles to it all at once. For a lot of us, this completely changes the game.
From Manual Batching to Smart Automation
If you’ve been doing this for a while, you probably remember the old way. You’d set up a batch process in a local UI like AUTOMATIC1111, point it to a folder of images, feed it a list of prompts, and then let your computer scream for a few hours. It worked, sure, but it hogged all your resources and you had to keep an eye on it.
Today’s cloud-based generators are on another level entirely. They’re designed for speed and simplicity, letting you create a massive number of stylistically different images from a single starting point, all in one go. This frees up your local machine and saves an incredible amount of time.
The real win here is shifting from a one-to-one creative process to a one-to-many model. You bring the initial idea, set the creative boundaries, and the system does all the heavy lifting, spitting out a whole suite of visuals ready to go.
This isn’t just a nice-to-have feature; it’s a total workflow upgrade. Stable Diffusion’s img-to-img has been at the heart of this shift since day one. It powers an insane 80% of the entire AI-generated image market and has contributed to a mind-boggling 12.59 billion images created so far. Its open-source nature makes it perfect for transforming existing visuals at scale.
Real-World Use Cases for Bulk Img to Img
So what does this look like in practice? The applications are surprisingly practical and cut across all kinds of industries. By automating variations, you can tackle specific business needs with ridiculous speed.
Here are just a few scenarios where I’ve seen this work wonders:
- Social Media Content: A social media manager can take one approved brand image and spin it into a whole month's calendar. They can create versions for different holidays, promotions, or even just different platform vibes—like something punchy for Instagram versus a more polished look for LinkedIn. All in minutes.
- E-commerce Product Shots: An online shop owner can upload a single clean product photo and instantly generate dozens of lifestyle mockups. That same product can suddenly appear on a kitchen counter, in a modern living room, or even outdoors, all without booking a single expensive photoshoot.
- Educational Materials: A teacher or parent can start with a simple line drawing and generate an entire coloring book. Every page can have a new theme, from jungle animals to fantasy castles, all branching from that one initial sketch.
For anyone deep in the social media trenches, the ability to churn out custom content this fast is a lifesaver. You can see how these techniques are applied with a bulk social media image generator to really streamline your campaigns.
At the end of the day, using bulk Stable Diffusion img to img workflows is all about getting more done with less effort. It lets you explore more creative avenues, smash tight deadlines, and produce a volume of quality content that would be completely impossible to create one image at a time. It puts industrial-scale content creation right into the hands of individual creators and small teams.
Solving Common Img to Img Problems
Even with the best settings, you're going to run into frustrating issues with your stable diffusion img to img generations sometimes. It happens to everyone. The good news is that most common problems have surprisingly simple fixes. It’s really just a matter of matching the symptom to the right parameter tweak.
When Your Output Looks Nothing Like Your Input
If your generated image is a total departure from your reference, the first culprit is almost always Denoising Strength. A value that's too high (think above 0.85) gives the AI way too much creative freedom, letting it completely ignore the structure of your source image.
Just pull that slider back. Dropping it into a more moderate range, like 0.6-0.75, usually restores the balance. This little adjustment forces the AI to pay much closer attention to the composition you gave it.
What if the composition is perfect but the style is wrong? That often means your prompt isn't strong enough or your CFG Scale is too low. Try nudging the CFG Scale up a point or two to make the model follow your stylistic instructions more literally.
Fixing Blurry or Distorted Outputs
It's a common complaint: the generated images come out looking soft, blurry, or just plain weird. Nine times out of ten, this is a sampler issue. Some samplers, like the popular Euler a, are incredibly fast but can produce softer results, especially if you're not using enough steps.
To fight the blur, you have a few options:
- Increase the Sampling Steps: Bumping your steps from 20 up to 30 or even 40 gives the sampler more time to cook and refine the details.
- Switch Your Sampler: Experiment with samplers known for sharper results. My go-to choices for crisp images are DPM++ 2M Karras or DPM++ SDE Karras.
- Check Your VAE: Make sure you're using the right Variational Autoencoder (VAE) for your chosen model. A mismatched or missing VAE is a classic cause of washed-out colors and a general lack of sharpness.
Here's a pro tip: If an image looks great but has a slightly distorted face, don't trash it and start over. Take it into the inpainting tab, mask only the face, and regenerate just that small section with a strong prompt for a "detailed, realistic face." It saves a ton of time.
What to Do About "Fried" or Over-Processed Images
Ever get an image that just looks… crunchy? The colors are oversaturated, the contrast is through the roof, and it's full of strange artifacts. We call this a "fried" or "over-baked" result. It happens when you push the AI too hard to follow your prompt.
The cause is almost always a CFG Scale that’s set way too high. If your CFG is creeping above 12, you’re definitely in the danger zone.
Lowering it back to a more standard range of 7-10 will usually solve the problem instantly. This gives the model enough guidance to follow your prompt without forcing it to create something that looks unnatural. A detailed negative prompt forbidding things like artifacts, oversaturated, high contrast can also do wonders for keeping your outputs clean.
Your Top Img to Img Questions, Answered
Once you get started with stable diffusion img to img, you'll quickly run into questions. It’s a powerful tool, but getting the perfect result often comes down to a few key settings. Let's walk through some of the most common hurdles I see people facing.
What’s the Single Most Important Setting in Img to Img?
Hands down, it’s Denoising Strength. This one slider is the entire balancing act between your original image and the AI’s creative freedom. Think of it this way:
- Low values (0.1-0.4) whisper suggestions to the AI. You'll see minor tweaks, refinements, and texture changes.
- High values (0.7-1.0) give the AI a megaphone. It will completely transform your image based on the prompt, using your original mostly for color and basic shapes.
Mastering this setting is 90% of the battle. Start here before you touch anything else.
Can I Just Change the Style but Keep My Original Composition?
Absolutely. This is what img2img was built for. The sweet spot for this is a Denoising Strength somewhere between 0.5 and 0.7. This gives the AI enough room to completely change the artistic style without messing up the underlying structure of your photo.
Just pair that setting with a clear prompt describing the new look you're after, like "impressionist oil painting" or "a still from a 1980s sci-fi film."
If you need rock-solid compositional control, especially for character poses or specific layouts, you need to bring in ControlNet. Using a preprocessor like Canny Edge or OpenPose forces the AI to trace the lines and poses of your input image exactly, while still giving it the freedom to reinvent the style.
Why Do My Img to Img Generations Look Blurry?
Blurriness is a classic problem, but it’s usually easy to fix. It almost always comes down to one of three culprits.
First, garbage in, garbage out. A low-resolution or blurry starting image will only get worse. Make sure your input is sharp.
Second, your sampler and step count might be working against you. Some samplers need more steps to resolve details. Try bumping your steps up to 30+ or switch to a sharper sampler like DPM++ 2M Karras, which is known for crisp results.
Finally, a mismatched VAE (Variational Autoencoder) is a common cause of foggy, washed-out images. Double-check that you're using the recommended VAE for your model.
Tired of creating images one by one? Bulk Image Generation lets you turn one idea into hundreds of unique, high-quality images in seconds. It’s the fastest way to scale your creative output. Check it out at https://bulkimagegeneration.com.
