
8 Essential Product Photography Tips for 2025

Aarav Mehta • June 26, 2025
Unlock stunning visuals with our top 8 product photography tips for 2025. Learn pro techniques for lighting, composition, and editing to boost your sales.
In a crowded online marketplace, compelling product photos are not just an advantage; they are essential. Since customers cannot physically interact with your products, your images must bridge that gap, conveying quality, building trust, and ultimately driving conversions. High-quality visuals can mean the difference between a quick scroll and a confident purchase. However, achieving professional results often seems complex, associated with costly equipment and steep learning curves.
This guide is designed to simplify that process. We will provide a comprehensive set of product photography tips that are both practical and powerful. These insights are created to be immediately actionable, whether you are a small business owner using a smartphone or a digital marketer managing a large-scale campaign.
You will learn how to:
- Master foundational techniques like lighting and composition.
- Implement advanced methods such as focus stacking for impeccable detail.
- Style your products to tell a compelling story.
- Streamline your workflow with efficient post-production and optimization strategies.
From capturing the perfect shot to preparing it for various platforms, these tips will equip you with the knowledge to transform your product imagery. The goal is to help you create visuals that not only showcase your products in the best possible light but also resonate with your target audience and significantly boost your sales. Let's dive into the techniques that will make your products stand out.
1. Master Natural Lighting
Harnessing natural light is one of the most effective and budget-friendly product photography tips for achieving a professional, high-end look. Unlike harsh artificial lights, sunlight provides a soft, diffused illumination that accurately represents your product's colors and textures. The goal isn't to blast your product with direct sun, but to capture the gentle, indirect light that fills a room, creating subtle shadows and a clean, authentic aesthetic. This technique is especially powerful for products like food, handmade goods, and apparel, where conveying a natural, relatable feel is crucial for connecting with customers.

This method is favored by many successful brands, from small Etsy sellers showcasing artisanal crafts to high-end jewelry companies like Mejuri, which often uses soft window light to make its pieces gleam without looking artificial. The consistent, flattering quality of light from a north-facing window, for example, is a long-held secret among food photographers for making dishes look fresh and appealing.
How to Implement Natural Lighting
Getting the perfect natural light shot requires a bit of strategy. It’s not just about placing your product near a window; it's about controlling the light to suit your subject.
- Find the Right Window: A large, north-facing window is ideal because it provides consistent, indirect light throughout the day without the harshness of direct sunbeams. If you don't have one, a window covered with a sheer white curtain or diffusion paper will achieve a similar softening effect.
- Optimal Timing: The "golden hours" shortly after sunrise and before sunset are famous for their warm, soft light. However, the period between 10 AM and 2 PM on an overcast day is often even better for product shots, as the clouds act as a giant, natural softbox, eliminating harsh shadows entirely.
- Positioning is Key: Place your setup 2-3 feet away from the window. Position your product so the light hits it from the side (sidelighting) to create depth and highlight texture, or from behind (backlighting) for a more dramatic, ethereal glow.
- Use Reflectors: Even with perfect window light, one side of your product might be in shadow. Use a simple white foam board or a professional reflector placed opposite the window to bounce light back onto the product, filling in dark areas and creating a balanced exposure. This single tool is one of the most impactful yet simple product photography tips for beginners.
While mastering natural light is a fundamental skill, modern workflows are also exploring innovative solutions. For businesses needing to create a high volume of diverse lifestyle images quickly, AI-powered tools are becoming invaluable. They can take a single studio shot and place it in countless naturally lit scenes. You can discover more about these advanced techniques and how they complement traditional photography in our guide to AI-powered product photography.
2. Use a Tripod for Sharp, Consistent Images
A sturdy tripod is one of the most non-negotiable tools in product photography. Its primary role is to eliminate camera shake, a common culprit behind blurry, unprofessional images. By providing a stable base, a tripod ensures every shot is perfectly sharp. It also guarantees consistency in framing and angles across multiple shots, which is crucial for creating a cohesive look for a product line or an e-commerce catalog. This stability allows you to use slower shutter speeds in lower light without sacrificing image quality, a key advantage over handheld shooting.

The use of tripods is a standard practice for brands where precision is paramount. Apple, for instance, relies on exacting tripod setups to produce its iconic, clean product imagery. Similarly, e-commerce giants like Amazon mandate tripod use for their photographers to maintain uniformity across millions of product listings. Fashion brands such as Zara also use tripods to shoot apparel on models or mannequins from the exact same angle, ensuring a consistent and professional shopping experience for their customers.
How to Implement Tripod Use
Effectively using a tripod goes beyond simply mounting your camera. It involves a methodical approach to ensure you get the maximum benefit from this essential tool.
- Choose the Right Tripod: Invest in a sturdy tripod that can comfortably support the weight of your camera and heaviest lens. Look for one with adjustable leg angles and a versatile head (like a ball head or a 3-way pan-tilt head) to allow for overhead and other creative shots.
- Use a Remote Shutter or Timer: Even with a tripod, the simple act of pressing the shutter button can cause a tiny vibration, blurring your photo. To avoid this, use a remote shutter release, a tethered shooting setup, or your camera’s built-in two-second timer.
- Mark Your Positions: For shoots involving multiple products that need the same angle, use painter's tape to mark the tripod leg positions on the floor. This simple trick is one of the most effective product photography tips for ensuring absolute consistency between shots.
- Check for Stability: Before you begin shooting, ensure all legs are securely locked and the tripod is on a level, stable surface. A wobbly tripod defeats the entire purpose, so double-check that every component is tightened.
- Consider a Tabletop Tripod: If you primarily shoot small products like jewelry or cosmetics, a compact tabletop tripod can be more convenient and easier to manage in a tight space than a full-sized one.
3. Create a Clean, Distraction-Free Background
The background in your product photography serves a single, crucial purpose: to make your product the hero. A clean, simple, and uncluttered background ensures the viewer's focus lands squarely on the item for sale, highlighting its features, quality, and design without any competing visual noise. This approach is the industry standard for e-commerce, as it creates a consistent, professional shopping experience and allows the product's details to shine through. While a pure white background is the most common, neutral or subtly colored backgrounds can also effectively add context or mood for lifestyle shots.

This principle is rigorously enforced by major e-commerce platforms like Amazon, which mandates a pure white background (RGB 255, 255, 255) for all primary product images. This standard was pioneered by catalog photographers and has been perfected by tech giants like Apple, which uses pristine, minimalist backgrounds to elevate its products to iconic status. Similarly, luxury brands such as Tiffany & Co. rely on flawless white backdrops to ensure their intricate jewelry pieces are the sole focus of admiration.
How to Implement a Clean Background
Achieving that seamless, professional look is a matter of having the right setup and lighting technique. It’s about creating an environment where the product exists in its own clean space, free from the distractions of the world around it.
- Use a Seamless Sweep: For that classic "infinity curve" look with no horizon line, use a roll of seamless paper or a sheet of flexible vinyl. This creates a smooth, continuous background that curves from the vertical wall down and under your product.
- Light the Background Separately: A key professional secret is to light your background independently from your product. This gives you complete control. Aim to make a white background about one to two stops brighter than the light hitting your product to blow it out to pure white, which makes post-production cleanup significantly easier.
- Ensure Sufficient Size: Make sure your background is large enough to fill the entire frame when you shoot. Nothing looks more amateur than seeing the edges of your backdrop in the final image. It's better to have too much background than too little.
- Consider Subtle Gradients: While pure white is the standard, a subtle light gray or a soft gradient can add a touch of sophistication and depth without becoming a distraction. This can be achieved with careful lighting placement or in post-production. This is one of those product photography tips that can subtly elevate your brand's aesthetic.
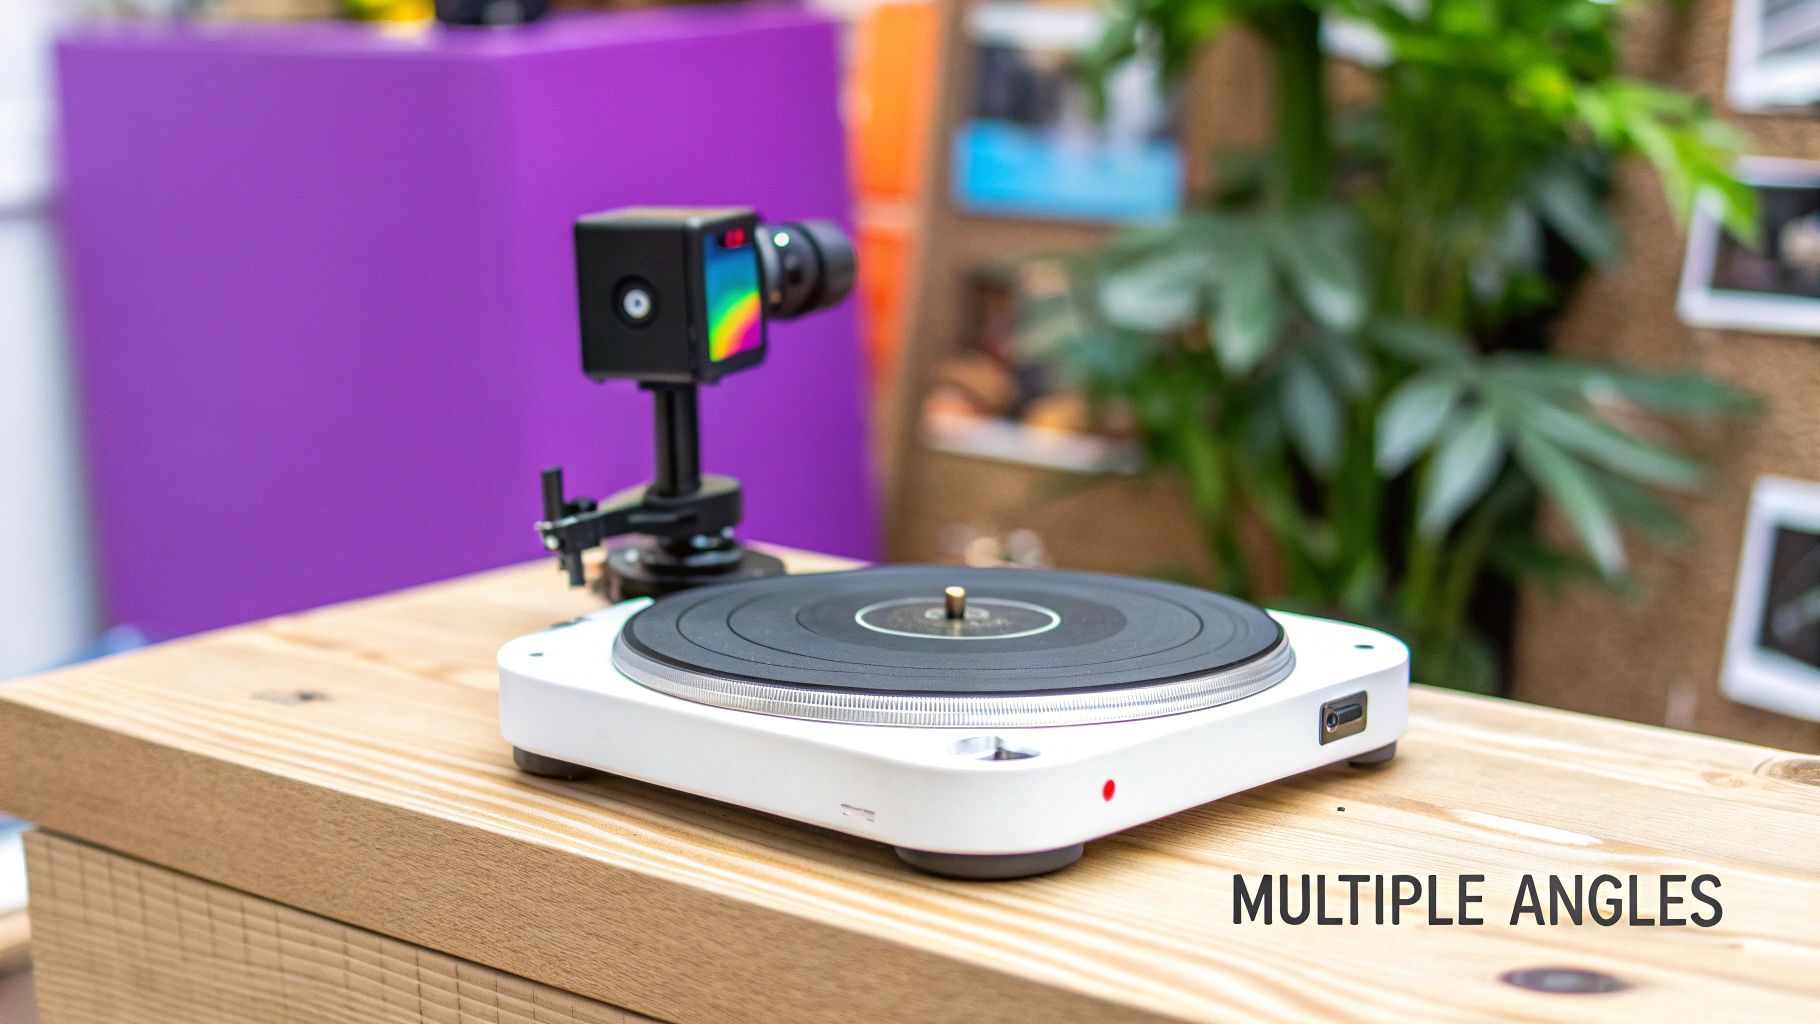
4. Show Products from Multiple Angles
Since customers can't physically touch or inspect products when shopping online, providing a comprehensive set of images from multiple angles is crucial for building trust and reducing returns. A single hero shot isn't enough; buyers need to see the front, back, sides, and intricate details to feel confident in their purchase. This approach bridges the gap between the digital and physical experience, answering questions about quality, functionality, and design before they are even asked. It’s about creating a virtual "hands-on" experience through your photography.
This practice was popularized by e-commerce giants like Amazon and has been perfected by leading brands across industries. Nike, for example, often showcases shoes from eight or more angles, including detailed shots of the sole's tread and close-ups of the material's weave. Similarly, electronics brands meticulously photograph every port and button, while a jewelry company like James Allen provides 360-degree views to show how a diamond catches the light from every perspective. This level of detail has become a customer expectation, not just a bonus.
How to Implement Multi-Angle Shots
Creating a consistent and informative set of multi-angle photos requires a systematic workflow. The goal is to present the product as a complete object, leaving no room for a customer's doubt.
- Establish Core Angles: Start with a baseline of 5-7 essential shots for every product: front, back, left side, right side, top, and a 45-degree angle. This provides a complete overview. For certain items, like shoes or electronics, a bottom view is also essential.
- Capture Detail Shots: Go beyond the standard views. Zoom in on important features that signify quality or function. This includes zippers, fabric textures, logos, stitching, connection ports, or labels. These close-ups are powerful trust signals.
- Ensure Consistency: This is one of the most vital product photography tips for a professional gallery. Maintain the exact same lighting, background, and camera settings for every angle. Using a tripod is non-negotiable for this task.
- Use a Turntable: For smaller items, a manual or motorized turntable can help you achieve precise, evenly spaced rotation angles with minimal effort, ensuring a seamless viewing experience for customers.
- Create a Shot List: Develop a standardized shot list template for different product categories. Your list for a handbag (including interior shots and strap details) will be different from your list for a coffee mug, streamlining your process for future shoots.
5. Implement Proper Focus Stacking for Sharp Details
Focus stacking is an advanced photography technique essential for products where every detail must be perfectly sharp. It involves capturing multiple photos of the same product at different focal points and then merging them in post-production. The result is a single image with an extended depth of field, ensuring everything from the closest edge to the farthest detail is in crisp focus. This method is non-negotiable for small or intricate items like jewelry, watches, and electronics, where a shallow depth of field would leave crucial features blurry.
This technique is a cornerstone of high-end commercial photography. Luxury watch brands like Rolex rely on it to present flawless images where the dial, hands, and intricate case details are all equally sharp. Similarly, cosmetics brands use focus stacking to showcase the rich texture of a lipstick or the fine shimmer in an eyeshadow palette, details that a single shot could never capture fully. This commitment to sharpness communicates quality and precision, directly impacting a customer's perception of the product.
How to Implement Focus Stacking
While it sounds technical, focus stacking is a systematic process that can be mastered with practice. The key is precision and consistency from one shot to the next.
- Set Up for Stability: Your camera and product must remain perfectly still. Use a sturdy tripod for your camera and ensure your product is on a stable surface. Any movement between shots will ruin the final composite image.
- Use Manual Focus: Switch your lens to manual focus (MF). This gives you complete control. Start by focusing on the part of the product closest to the camera and take your first shot.
- Capture a Series of Shots: Gently adjust the focus ring to move the focal plane slightly further into the product. Take another shot. Continue this process, taking a series of 5-15 images (or more for very complex items), until you have captured every part of the product in focus, from front to back.
- Overlap Your Focus Points: To ensure seamless blending in software, make sure each new focal plane overlaps the previous one by about 30-50%. This prevents gaps or soft bands in your final stacked image.
- Merge in Software: Use specialized software to blend the images. Adobe Photoshop has a built-in focus stacking feature ("Auto-Blend Layers"), while dedicated programs like Helicon Focus or Zerene Stacker offer more advanced control and often produce superior results for complex stacks.
6. Style with Props and Context
Adding props and creating a lifestyle context is a powerful product photography tip that transforms a simple item into an aspirational story. This technique helps customers visualize how your product will fit into their lives, creating an emotional connection that goes beyond features and specifications. The key is to use props that complement the product and brand aesthetic without stealing the spotlight, building a scene that resonates with your target audience and tells a compelling narrative. This is crucial for products where feel and lifestyle are as important as function, such as home decor, fashion, and food.
This approach has been perfected by lifestyle brands that sell an experience, not just a product. Anthropologie, for instance, creates elaborate, inviting scenes with books, textiles, and plants to showcase their home goods. Similarly, coffee brands often include whole beans, a wisp of steam, or a pastry to evoke the comforting ritual of a morning cup. These contextual clues make the product more desirable by placing it within an appealing real-world scenario.
How to Implement Props and Context
Styling effectively requires a thoughtful approach to ensure your props enhance, rather than detract from, the main product. The goal is a balanced composition that feels authentic and looks professional.
- Choose Relevant Props: Select items that align with your brand's color palette, aesthetic, and the product's use case. For a skincare product, this might be a clean white towel and a sprig of lavender; for a tech gadget, it could be a sleek notebook and a modern desk lamp. The props should support the story you're telling.
- Balance the Composition: Use compositional rules like the rule of odds (grouping items in odd numbers like 3 or 5) and the rule of thirds to create a visually pleasing arrangement. Place the main product in a key focal point and arrange props around it to lead the viewer's eye without creating clutter.
- Demonstrate Scale and Use: Props are excellent tools for showing the size of your product and how it's used. A hand holding a coffee mug, a phone next to a wallet, or a necklace worn on a model instantly provides valuable context that a simple white-background shot cannot.
- Keep it Simple: One of the most common mistakes is over-styling. Your product must remain the hero of the shot. If a prop is too bright, too large, or too distracting, it's competing for attention. Start with fewer props and add them one by one until the scene feels complete but not crowded.
While physical styling is a craft, generating ideas for these scenes can be challenging. AI tools can help spark creativity for these lifestyle shots. You can explore how to build effective descriptions for image generation with our free AI image prompt generator, which can help you brainstorm countless contextual scenes for your products.
7. Master Post-Processing and Retouching
Post-processing is the crucial final stage where good product photos are transformed into great ones. This is not about drastically altering the product but about refining the image to achieve a polished, professional look that accurately represents its best features. The process involves adjustments like color correction, blemish removal, background cleanup, and detail enhancement. A meticulous retouching workflow ensures your images are not just photos, but powerful selling tools that look consistent and clean across all your marketing channels.
This practice is standard across all major e-commerce and advertising industries. Fashion brands like H&M and Zara meticulously retouch clothing to ensure colors are precise and fabrics appear flawless. Jewelry companies painstakingly remove microscopic dust particles and fingerprints while enhancing the sparkle of gems. Similarly, electronics brands like Apple perfect their product shots by removing screen glare and ensuring every line is crisp and clean. This level of refinement, pioneered by legendary photographers like Mario Testino in high-fashion, is now an essential step in modern product photography tips.
How to Implement Post-Processing and Retouching
Effective post-processing is a blend of technical skill and artistic judgment. The key is to enhance, not deceive, by creating a consistent and repeatable workflow for your brand.
- Shoot in RAW Format: Always capture your images in RAW instead of JPEG. RAW files retain all the unprocessed image data from the camera's sensor, giving you far greater flexibility to adjust exposure, white balance, and colors non-destructively.
- Create Actions for Repetitive Tasks: If you have a series of photos shot under the same conditions, use Photoshop Actions or Lightroom Presets to automate repetitive steps like resizing, applying basic color corrections, or sharpening. This saves time and ensures brand consistency.
- Use Layer Masks for Non-Destructive Editing: Instead of directly erasing or altering parts of your image, use layer masks in Photoshop. This allows you to make precise adjustments that can be easily modified or reversed later without permanently damaging the original image data.
- Maintain Realistic Representation: The goal is polish, not perfection that misleads. Correct distracting flaws like dust, but avoid altering the product's fundamental shape, texture, or color. Your customer should receive exactly what they saw online.
- Develop a Consistent Editing Style: Establish a go-to workflow for your brand. Decide on a standard for brightness, contrast, and color saturation that will be applied across all your product images to create a cohesive and professional-looking catalog.
8. Optimize for Different Platforms and Uses
One of the most overlooked product photography tips is tailoring your images for their final destination. A single, one-size-fits-all photo rarely performs optimally across every channel. Different platforms and uses demand specific aspect ratios, compositions, and file sizes. An image that looks stunning on your website banner might get awkwardly cropped on an Instagram feed, while a detailed shot perfect for an Amazon listing could feel out of place in a promotional email. Planning your shoot with these varied requirements in mind ensures every image delivers maximum impact and value.
This multi-platform strategy is standard practice for digital-first brands that rely on a cohesive yet channel-specific presence. Fashion brands like Allbirds, for example, shoot wider lifestyle scenes that can be cropped into a 1:1 square for Instagram, a 9:16 vertical for Stories, and a wide horizontal banner for their homepage. Similarly, successful Amazon sellers prioritize creating thumbnail images that are instantly clear and compelling, even at a small size, a different compositional challenge than creating an atmospheric brand image.
How to Implement Platform-Specific Optimization
Strategically planning for multiple outputs from a single photoshoot is an efficient way to build a robust library of marketing assets. It’s about shooting smarter, not harder.
- Shoot Wider Compositions: Always frame your shots wider than you think you need. By leaving ample space around your product, you give yourself the flexibility to crop the image into various formats-vertical, horizontal, or square-without cutting off key elements. This is a fundamental product photography tip for content creators.
- Create a Platform Cheat Sheet: Before your shoot, create a simple document listing the image specifications for each platform you use. Note the required aspect ratios (e.g., 1:1 for Instagram feed, 16:9 for YouTube thumbnails, 9:16 for Stories) and optimal resolutions. This reference guide will ensure you capture all necessary formats.
- Prioritize Negative Space: When composing your shots, intentionally leave empty areas, or negative space. This is crucial for creating versatile assets where you might later need to overlay text, logos, or call-to-action buttons for advertisements, social media posts, or website banners.
- Test and Resize Efficiently: Before finalizing, upload test images to see how they actually appear on different platforms and devices. To manage this process efficiently, especially when dealing with hundreds of images, it's vital to have the right tools. You can find out more about streamlining this workflow with a powerful bulk image resizer that can handle multiple formats at once.
Product Photography Tips Comparison Guide
| Item | Implementation Complexity | Resource Requirements | Expected Outcomes | Ideal Use Cases | Key Advantages |
|---|---|---|---|---|---|
| Master Natural Lighting | Low | Minimal (natural light, reflectors) | Soft, even illumination; natural colors | Beginners, cost-effective setups | Cost-effective, natural color accuracy |
| Use a Tripod for Sharp, Consistent Images | Low to Medium | Tripod equipment, remote shutter | Sharp, blur-free images; consistent framing | Catalogs, low light, detailed composition | Improved sharpness, hands-free shooting |
| Create a Clean, Distraction-Free Background | Low | Seamless paper/vinyl, lighting | Professional look; focused product visibility | E-commerce, brand consistency | Simplifies editing; meets marketplace standards |
| Show Products from Multiple Angles | Medium | More time, storage, possibly turntable | Comprehensive product view; increased trust | Online sales, builds customer confidence | Reduces returns; boosts conversion |
| Implement Proper Focus Stacking for Sharp Details | High | Specialized software, multiple shots | Extended depth of field; ultra-sharp details | Macro, jewelry, intricate products | Maximum sharpness; professional results |
| Style with Props and Context | Medium | Props, styling time and budget | Emotional connection; storytelling | Lifestyle branding, social media content | Engages customers; supports premium pricing |
| Master Post-Processing and Retouching | Medium to High | Editing software, skills | Polished, consistent images; corrected flaws | Professional advertising, high-end brands | Enhanced professionalism; image impact |
| Optimize for Different Platforms and Uses | Medium | Planning, multiple compositions | Multi-platform optimized images | E-commerce, social media, marketing | Saves time; maintains brand consistency |
Scaling Your Visuals: The Future of Product Imagery
We've journeyed through a comprehensive set of foundational product photography tips, equipping you with the knowledge to transform your product visuals from standard to stunning. From the foundational necessity of a stable tripod and the creative power of natural light to the intricate details of focus stacking and the strategic use of props, each tip serves as a crucial building block. Mastering these techniques is no longer just a bonus; it's a core requirement for any brand, creator, or marketer looking to capture attention in a visually saturated digital landscape.
The principles of clean backgrounds, multiple-angle presentations, and meticulous post-processing are what separate amateur shots from professional, conversion-driving imagery. These aren't just steps in a process; they are opportunities to communicate quality, build trust, and tell a story about your product without saying a word. Implementing these strategies will immediately elevate the perceived value of your offerings, whether you're a small business owner launching a new product line or an educator creating engaging materials.
From Foundational Skills to Scalable Success
The true value of mastering these product photography tips is understanding the "why" behind each action. Why does a specific lighting setup evoke a certain mood? Why is a consistent background essential for a cohesive brand experience? Answering these questions moves you from simply following a checklist to thinking like a visual strategist.
This strategic mindset is the key to unlocking the next level of content creation. The challenge for most growing businesses, agencies, and creators isn't just taking one great photo; it's producing hundreds of great photos efficiently. The bottleneck of manual setups, repetitive shooting, and individual edits for every product variation or marketing campaign can quickly stifle growth and consume valuable resources. This is where the landscape of product imagery is undergoing a revolutionary shift.
Embracing the Power of AI-Enhanced Workflows
The future of high-volume visual content lies in the intelligent integration of traditional skills and cutting-edge technology. The foundational knowledge you've gained from this guide is your creative compass. AI-powered tools, in turn, are the high-speed vehicle that can take you to your destination faster than ever before. Imagine having mastered the perfect lighting and composition for your flagship product. Now, instead of painstakingly recreating that setup for dozens of variations, you can leverage AI to generate those variations in minutes, maintaining brand consistency while exploring new creative contexts.
This hybrid approach allows you to scale your output without sacrificing the quality you've worked so hard to achieve. You can instantly create lifestyle shots, generate unique backgrounds, or place your product in scenarios that would be costly and time-consuming to stage in reality. By blending your human creativity with the computational power of AI, you move beyond the limitations of traditional photography. You become an art director of a nearly infinite visual engine, capable of producing tailored content for every platform, from social media stories to high-resolution e-commerce listings, at a scale previously unimaginable. This is how you win in the modern visual economy.
Ready to move beyond manual setups and scale your visual content effortlessly? Discover how Bulk Image Generation can transform your product photography workflow by turning a single image into hundreds of unique, AI-powered scenes in minutes. Stop shooting and start creating with Bulk Image Generation today.