
How to Tile an Image for Seamless Patterns

Aarav Mehta • November 17, 2025
Learn how to tile an image to create perfect, seamless patterns. This practical guide covers everything from generating your base image to advanced techniques.
To tile an image means to repeat it across a surface, creating a continuous background or texture without any visible seams. It’s all about designing the image so its right edge perfectly matches its left, and its top edge lines up flawlessly with its bottom.
Why Seamless Image Tiling Is a Core Design Skill
 Before we dive into how to do it, let's talk about why this is a skill worth having. Seamless patterns are the invisible workhorses of design. Get it right, and you create an immersive, professional-looking background. Get it wrong, and you end up with jarring lines and obvious repetition that can torpedo an entire project.
From the subtle textures on a website to the sprawling landscapes in a video game, tiling is everywhere. But this isn't just a digital trick; it mirrors real-world applications. Think about the flooring industry, where physical tiles have to fit together perfectly. The demand for these solutions is massive, with the global flooring market projected to hit $646.70 billion by 2032. You can read the full insights on flooring market growth to see just how closely digital skills reflect physical world demands.
The Old Way vs The New Way
Not long ago, making an image seamless was a manual, often tedious grind inside software like Photoshop. The workflow usually involved the offset filter, then painstakingly using the clone stamp and healing brush to blend the edges. It took a good eye, a steady hand, and a whole lot of patience.
Luckily, modern tools have completely changed the game. Specialized AI pattern generators and dedicated tiling utilities can automate almost all of the heavy lifting. This shift means creators can spend less time on tedious technical fixes and more time on what actually matters—the creative side of the design.
It's a huge leap forward in efficiency. The old methods were reliable but slow, while today's tools offer speed and creative freedom that just wasn't possible before.
Comparing Manual vs Modern Tiling Workflows
Here's a quick look at how the traditional approach stacks up against what's possible now.
| Feature | Manual Method (e.g., Photoshop Offset Filter) | Modern Tool (e.g., AI Pattern Generators) |
|---|---|---|
| Speed | Slow and methodical; can take hours for complex patterns. | Extremely fast; generates multiple options in seconds. |
| Skill Level | Requires intermediate to advanced skills in image editing. | Beginner-friendly; often just requires a text prompt. |
| Creative Process | More focused on technical execution and blending seams. | Emphasizes creative exploration and iterating on ideas. |
| Consistency | Depends entirely on the user's precision and patience. | Automatically ensures perfect seams and repetition. |
| Flexibility | Limited to editing an existing image or starting from scratch. | Can generate entirely new patterns from simple descriptions. |
The takeaway is pretty clear: while manual methods still have their place for fine-tuned control, modern tools have made creating seamless patterns more accessible and faster than ever.
A seamless pattern is successful when the viewer doesn't even notice it's a repeating tile. The goal is to create a texture or background that feels natural and infinite, enhancing the overall design without drawing attention to itself.
Generating Your Ideal Base Image for Tiling

The final quality of your seamless pattern lives or dies by the source image you start with. It's a simple truth. Putting a little extra thought in at this stage will save you a massive headache trying to clean things up later.
Our goal here is to create a base that’s already primed for repetition. That means consistent lighting, uniform color, and an even texture from edge to edge.
When you tile an image, any unique or eye-catching element will instantly give the game away. Think of it like a single oddly colored brick in a wall—it’s all you’ll ever see. The best candidates for tiling are images that feel uniform and almost abstract, without a single dominant focal point.
Crafting Prompts for Tiling-Friendly Images
Using an AI image generator is a fantastic way to get a perfect starting point, but everything hinges on your prompt. Forget about asking for a specific, dramatic scene; we need to focus on texture and repetition.
Here’s how to guide the AI:
- Be Direct: Start with phrases like "seamless pattern," "repeating texture," or "endless background."
- Describe the Feel: Get descriptive with your textures. Think "subtle floral wallpaper," "rough concrete texture," or "geometric mosaic pattern."
- Control the Light: This one is crucial. Add terms like "flat lighting" or "even, soft light" to your prompt. This prevents harsh shadows or gradients that create obvious seams when the image repeats.
A great prompt for a tiling-friendly image might be: "Seamless pattern, watercolor botanicals, soft green and beige, flat lighting, minimalist style." This tells the AI to prioritize consistency over a standalone piece of art.
While this guide is all about digital tiling, the core idea of turning one image into a repeating design is a classic concept. For a different but related take, you can see how the same principles apply when you learn how to create cross stitch patterns from any image.
What to Look for in a Good Base Image
Once you have a few options from a tool like our AI image generator, it’s time to put on your critic’s hat. You need to be ruthless here.
Here's what to screen for:
- No Hard Edges: Scan the borders of the image. You want to avoid any distinct objects or lines that touch the edge. A half-finished leaf or a sharp line is a guaranteed seam.
- Check for Uniformity: The color and texture should feel consistent across the entire image. Any dark corners or bright spots will stick out like a sore thumb when tiled.
- Reject Obvious Features: That one bright flower in a field of green leaves? Or a single, unique shape? Ditch it. Anything that draws the eye will make the final pattern look unnatural and repetitive.
Picking an image with these qualities makes the next steps of making it truly seamless so much easier.
Making Your Image Seamless: The Core Technique
Alright, you've got a great base image. Now for the fun part: making it perfectly seamless so it can be tiled forever. This is where we hunt down and eliminate those hard edges that scream "repeated pattern!"
You don't need fancy software for this. A free, web-based tool like Photopea or the open-source classic GIMP has more than enough power to get the job done.
The trick is beautifully simple: we're going to offset the image so its original edges meet right in the middle of the canvas. This move is the key, as it instantly reveals the seams you need to blend away. Most editors have this feature under a filter called "Offset" or "Tile." The goal is to shift the image by exactly half its width and half its height.
So, if you're working with a 1024x1024 pixel image, you'll apply a horizontal and vertical offset of 512 pixels. This brings the four outer corners together in the center, forming a cross-shaped seam that’s now impossible to miss.
Identifying and Fixing the Seams
With the image offset, you'll see those glaring vertical and horizontal lines. Your mission is to make them vanish. Don't worry, you only need a couple of basic tools to do most of the heavy lifting.
- Clone Stamp Tool: This will be your best friend. It lets you copy (or clone) a texture from one area and paint it over another. It’s perfect for covering up the hard seam lines with textures from nearby.
- Healing Brush: This is like a smarter version of the clone stamp. It copies texture but also intelligently blends it with the color and lighting of the area you're painting over. It's fantastic for the final touches to make everything look natural.
- Content-Aware Fill: Got a really stubborn gap or a weird, distracting element that landed right on the seam? This tool is a lifesaver. Just select the problem area, and the software will analyze the surroundings to fill it in for you.
The real secret to a seamless blend? Use a soft-edged brush and constantly change the source point for your clone stamp. If you keep cloning from the exact same spot, you’ll just create new, obvious patterns while trying to fix the old ones.
Interestingly, this digital process has a real-world parallel. The professional tiling services industry is expected to hit $250 billion by 2033, all driven by the demand for perfectly seamless, visually pleasing installations. Whether it's pixels on a screen or tiles on a wall, the goal is the same: flawless integration. You can see more data on the tiling services market here.
The Ultimate Test: The 2x2 Grid
You might think you’ve blended the seams perfectly, but the only way to be sure is to see how it looks when actually tiled. The definitive test is to build a 2x2 grid.
Here's how:
- Create a new canvas that's four times the size of your original tile. If your tile was 1024x1024, make a new 2048x2048 document.
- Now, copy and paste your edited tile into this new canvas four times, placing one in each quadrant.
This simple layout is ruthless—it will immediately expose any lingering lines, repeating elements that are too obvious, or faint artifacts you might have missed. If you spot an issue, just hop back to your original tile, make the fix, and repeat the 2x2 test. Keep going until it looks completely flawless.
You’ve done the hard part—creating a seamless tile is a major win. But we're not quite at the finish line yet. Now it's time to add that final layer of polish and get your pattern ready for its final destination, whether that’s a website background or a custom print project.
This last step is all about the subtle tweaks—small adjustments to brightness, contrast, and color balance. These refinements make sure your pattern looks just as good scaled up as it does up close. You want the colors to pop and the details to stay crisp without being distracting.
Choosing the Right Export Settings
Once you’re happy with how everything looks, it's time to export. This might seem like a simple click, but the file format you choose can make or break your project, especially if it’s for the web. An unoptimized, heavy image will drag down a webpage’s loading speed, which is a surefire way to frustrate visitors.
Here’s a quick rundown of the most common formats I use:
- JPG: This is your go-to for patterns with lots of complex colors and smooth gradients. It compresses files nicely, but don't get too aggressive with it, or you'll start to see quality loss.
- PNG: If your pattern has any transparent areas, PNG is the format for you. It's a "lossless" format, which means it keeps every single pixel of quality, but that often comes at the cost of a larger file size.
- WebP: This is a more modern format that really gives you the best of both worlds—great quality packed into a surprisingly small file. Support for WebP is widespread now, making it an excellent choice for web backgrounds.
This simple infographic breaks down the core process to tile an image before you get to the export stage.
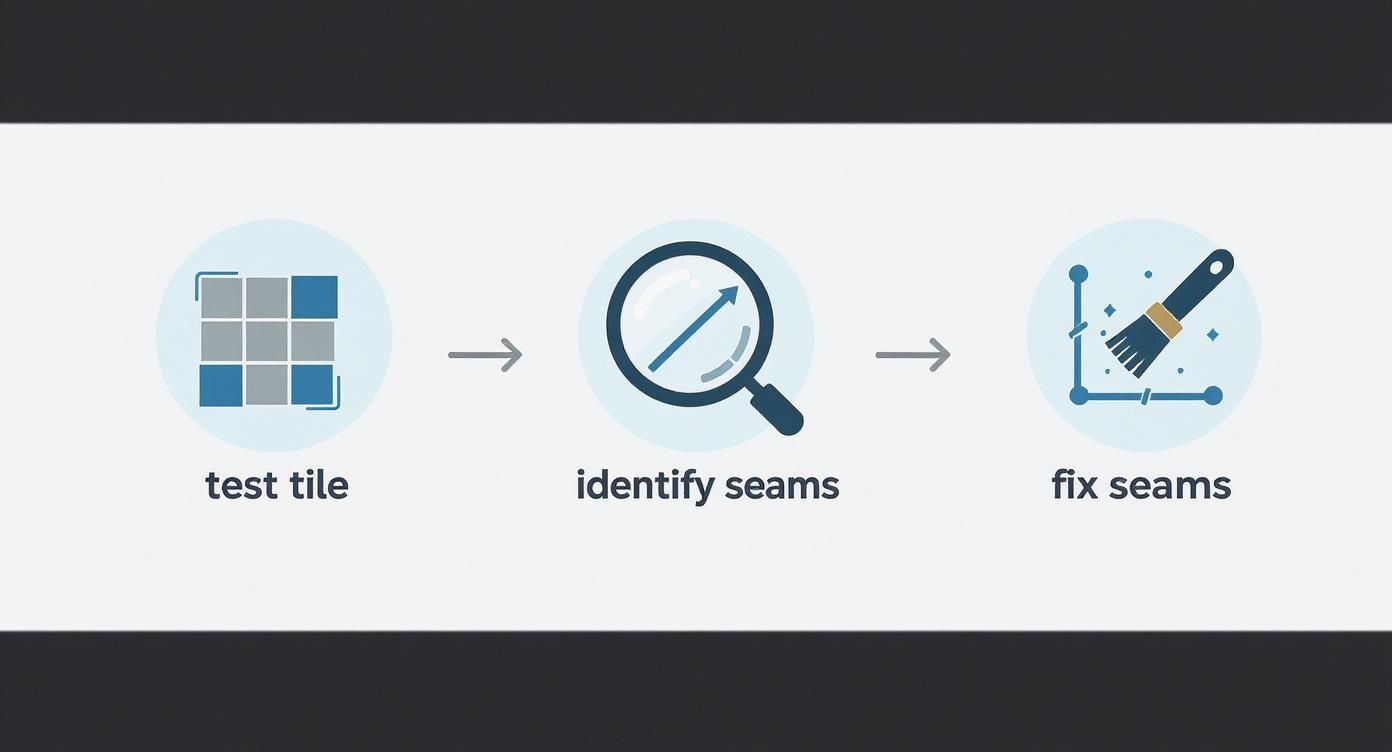
It’s a great visual reminder of that essential loop: test, spot the flaws, and fix them until the result is perfect.
For any web project, the golden rule is to aim for the smallest file size you can get away with without a noticeable drop in quality. If you find yourself needing to resize your tile for different uses, check out our handy and free bulk image resizer at https://bulkimagegeneration.com/tools/bulk-image-resizer to make that part of the process a breeze.
Once your pattern is perfected, why not put it to use in the real world? It's amazing for practical home decor projects like creating custom DIY peel and stick floor tiles.
It's pretty cool to see how digital design skills line up with real-world trends. The demand for digital patterns mirrors the growth in physical materials; the ceramic tile market alone is on track to hit $212.17 billion in 2025. Your new skill is more relevant than ever.
Once you've nailed the basics of tiling an image, it's time to add some real sophistication. Moving beyond a simple grid repeat is what separates a decent pattern from one that looks professionally designed and organic. A great way to start is by introducing subtle, intentional variations.
Instead of just cloning parts of your texture to hide a seam, try rotating or slightly scaling smaller elements within your tile. This simple trick does wonders for breaking up the visual monotony that screams "digital." For instance, if you're working on a leaf pattern, cloning a few leaves and tweaking their rotation adds a beautiful touch of natural randomness.
Exploring Advanced Repeat Types
The standard grid repeat is just your starting point. To truly elevate your work, you need to understand different repeat structures that make the repetition almost impossible to spot. The most common—and one of my favorites—is the half-drop repeat.
A half-drop repeat is where each row of tiles is shifted down by half the height of the tile itself. Think of how bricks are laid in a wall—it’s the exact same concept, which is why it's also called a "brick" repeat.
This technique is incredibly effective at eliminating the harsh vertical or horizontal lines that often appear in a basic grid. It forces the eye to move diagonally across the design, making the underlying tile structure much, much harder to detect. The good news is that most design software (and even CSS for web design) has simple settings to apply this type of repeat.
If you're curious about how AI can help you generate these foundational textures in the first place, check out our guide on using an AI texture generator. It dives deep into crafting the perfect base image to work with.
Another classic issue, especially with AI-generated images, is inconsistent lighting. If one side of your tile is even slightly darker than the other, you’ll get a subtle but very noticeable banding effect when it’s tiled. Always fix this before you start blending seams. A gentle gradient overlay in your image editor can even out the lighting across the whole tile. This one small step makes a massive difference in the final quality.
A Few Common Questions About Tiling Images
Even when you have a good workflow down, a few questions always pop up when you're just starting to create seamless patterns. Let's tackle some of the most common hurdles I've seen people run into.
What’s the Best Image Resolution to Start With?
For most of what you'll be doing online—like website backgrounds or simple game assets—starting with a 1024x1024 pixel image is a great baseline. It gives you plenty of detail to play with in the editing stage and scales down really nicely without turning into a blurry mess.
But if you’re planning to print your pattern, you need to think bigger. A lot bigger. Aim for a starting canvas of at least 3000x3000 pixels at 300 DPI. This is a much safer bet to make sure your final print comes out looking sharp and professional, not pixelated.
How Do I Stop My Pattern From Looking So... Repetitive?
The trick is to start with a base image that doesn't have one obvious thing to look at. You want textures or designs where all the elements are pretty evenly distributed. If you have a pattern with one super bright, unique flower, the eye is just going to jump from that one flower to the next, and the grid becomes painfully obvious.
A great pro-tip here is to create a half-drop repeat. This is where you offset each row by half the width of your tile. It’s a simple shift, but it completely breaks up that rigid, grid-like feel and gives the pattern a more organic flow, making the repetition way less noticeable.
Can I Tile an Image That Has a Person in It?
Technically, you can. But it's incredibly tough to make it look good. Tiling works best for textures, abstract designs, and patterns where the whole point is to hide the seams.
When you have a unique and instantly recognizable subject, like a person's face, you're going to get a really jarring, often bizarre-looking pattern. The entire goal of making an image seamless is for the repetition to become invisible. If you absolutely have to use a specific object, it's far better to make it one of many small, scattered elements instead of the main focus of the tile.
Ready to generate some stunning, tiling-friendly images with just a text prompt? Bulk Image Generation lets you create hundreds of unique visuals in seconds, giving you the perfect starting point for any pattern project. Ditch the manual effort and start creating at https://bulkimagegeneration.com.