Convert Any Image to Line Art Using AI

Ryan Bennett • September 23, 2026
Discover how to convert any image to line art with powerful AI tools. This guide offers expert prompts, pro tips, and refinement techniques for perfect results.
Turning a detailed photo into clean, simple line art used to be a real chore. Now, with AI, it’s ridiculously easy. The process lets you instantly convert complex images into elegant outlines perfect for coloring pages, branding, or just about any creative project. What was once a tedious manual task is now a quick, creative first step.
Why AI Is a Game Changer for Line Art
Before AI came along, if you wanted line art from an image, you were in for a long, technical process. It took a steady hand, a great eye for detail, and real skill with design software to manually trace every important line. Honestly, for most people, that barrier was just too high.
Today, AI tools have completely flipped the script. What once took hours of meticulous work can now be done in seconds. This isn't just about speed—it's about making it accessible to everyone. You don’t need to be a trained artist to produce high-quality line drawings anymore, and that’s unlocked a ton of new possibilities.
New Creative Opportunities
The uses for AI-generated line art are popping up everywhere, opening doors for professionals and hobbyists alike.
- Educators and Parents: Instantly whip up custom coloring pages from photos of animals, characters, or classroom subjects.
- Branding Experts: Cook up minimalist logos and icons by turning product photos into sleek, vector-style graphics.
- Small Business Owners: Generate unique patterns for packaging or promotional materials using images of their own products.
- Content Creators: Design eye-catching social media graphics or YouTube thumbnails with a distinct, artistic vibe.
The real magic is getting high-quality results so efficiently. The AI does the heavy lifting of interpreting shapes and shadows, giving you a clean, usable file that’s a fantastic starting point for any project.
The proof is in the numbers. Modern design platforms report that image-to-line-art conversions now make up 15-20% of all their image transformation requests. We've also seen an estimated 40% rise in line art use among social media managers and creators, which just shows how this technology has democratized a once-specialized skill.
This guide will show you exactly how to tap into this power. We'll go beyond simple conversions to create polished, professional-grade line art for any purpose. If you're curious about where this is all heading, you can also explore the future of creative workflows in our guide on AI image generation trends for 2025.
Choosing and Prepping Your Source Images
Here's a little secret I've learned after countless hours of generating AI line art: the magic really starts with the image you choose. A fantastic source photo acts as a clear roadmap for the AI, giving you a clean result that barely needs any touching up.
Think of it this way: you're trying to make the AI's job as easy as possible. The model looks for contrast and edges to figure out where to draw the lines. A photo with strong, clear definition will always, always give you a better result. Putting in a tiny bit of effort upfront will save you a ton of cleanup time later.
What Makes a Good Source Image
Before you even think about uploading a photo, take a few seconds to see if it has the right stuff for a great image to line art conversion. I always look for these three things:
- High Contrast: You want images with bright spots and dark shadows. This creates those crisp edges the AI loves to trace. A portrait shot in good light will work way better than a quick snap in a dim room.
- Clear Subject: The star of your photo should be obvious and not lost in a sea of background noise. A single flower against a plain wall is perfect; that same flower in a busy garden is not.
- Sharp Focus: Muddy, blurry lines are usually the result of a blurry photo. Make sure your subject is in focus, with all the important details looking crisp and well-defined.
Pro Tip: Not every photo is going to be a winner, and that’s totally fine. The real trick is picking images where the main subject’s silhouette is instantly recognizable. If you have to squint to figure out what you're looking at, the AI will definitely struggle.
Quick Edits for Better Results
You absolutely do not need to be a Photoshop wizard to dramatically improve your source images. A few tweaks in just about any basic editing tool can make a world of difference.
- Remove the Background: This is my number one tip. If the background is even slightly busy, use a one-click removal tool to isolate your subject. It's the single most effective way to keep the AI from getting sidetracked by details that don't matter.
- Increase Contrast and Sharpness: Give the contrast a little bump to make the subject's edges pop. A subtle sharpening filter can also help define finer details like hair or fabric textures, giving the AI more to work with.
- Crop Strategically: Get in close! Trim the image to frame your subject tightly. This gets rid of any distracting junk on the edges and focuses the AI's attention right where you want it.
These simple prep steps are actually a great foundation for lots of digital art projects. For instance, if you want to get really creative, you can even turn your image into an embroidery pattern, which uses a lot of the same principles for getting your source image just right.
Mastering AI Prompts for Line Art Conversion
Once your source image is prepped and ready, it's time to start talking to the AI. This is where you really take the driver's seat. Your prompt is the instruction manual you give the AI, and you'd be surprised how small changes in wording can lead to dramatically different results when you convert an image to line art.
Forget generic inputs. If you want professional-grade line art, you have to get specific. Think of yourself as an art director—you need to tell the AI not just what to draw, but how to draw it.
The Anatomy of a Powerful Prompt
A truly effective prompt for turning a photo into line art usually has two key parts: a style descriptor and a subject focus.
- Style Descriptor: This is where you define the vibe of the line art. Are you going for something playful and chunky, or clean and technical? Simple or highly detailed?
- Subject Focus: This directs the AI’s attention to the most important parts of your image, telling it what to keep and what to ignore. It’s crucial for cutting through the noise.
For instance, just prompting "line art" is a gamble. A much better starting point would be "Clean vector line art of the main subject, ignore background." This simple tweak provides critical context and instantly improves the output.
Think of it like ordering coffee. Just saying "coffee" is vague—you could get anything. But asking for an "iced latte with oat milk" gives the barista clear instructions for a specific outcome. The same principle applies here. Clarity is king.
Prompt Formulas for Different Scenarios
The real magic of AI is its adaptability. You can coax a huge range of styles from the very same source image just by swapping a few keywords. Here are a couple of my go-to formulas that I use all the time.
For a Children's Coloring Book:
Let’s say you have a great photo of a dog and want to turn it into a simple, charming outline that a kid can easily color in.
- Prompt Example:
Thick, bold outlines for a coloring book page, simple and clean, single line weight, no shading.
This prompt uses keywords like "thick, bold outlines" and "coloring book page" to signal a friendly, uncomplicated style. Specifically adding "no shading" is a pro-tip—it stops the AI from adding complex gradients or details that would make it a nightmare to color.
For a Sleek Product Icon:
Now, imagine you’re converting a product photo—maybe a cool sneaker—into a minimalist icon for a website. You need precision, clarity, and a modern feel.
- Prompt Example:
Minimalist single-line vector illustration of the product, clean lines, high detail, white background.
Here, phrases like "minimalist vector illustration" tell the AI you're after something scalable and professional. Adding "high detail" ensures important features of the sneaker aren't lost, and "white background" is a must for a clean, isolated final image ready for any design.
The tech behind this has come a long way. Models like Generative Adversarial Networks (GANs) have really pushed the envelope. Some studies show modern AI line drawing generators can hit accuracy rates over 85% on standard images, with processing times dropping from 30 seconds to practically instant.
AI Prompt Modifiers for Different Line Art Styles
Beyond complete formulas, certain keywords act as powerful "modifiers" you can sprinkle into any prompt to fine-tune the result. Getting a feel for these is what separates good results from great ones.
Here’s a quick-reference table I put together based on a lot of trial and error:
| Desired Style | Effective Prompt Keywords | Best Use Case |
|---|---|---|
| Architectural | Architectural sketch, technical drawing, precise lines, blueprint style | Converting buildings or technical objects into clean schematics. |
| Artistic & Loose | Hand-drawn sketch, pencil drawing, sketchy lines, cross-hatching | Creating a more organic, artistic feel for portraits or landscapes. |
| Bold & Graphic | Bold outlines, graphic novel style, high contrast, heavy ink | Making a strong visual statement, perfect for t-shirts or posters. |
Playing around with these modifiers is the key to mastering the image to line art process. Sometimes the perfect look comes from an unexpected mix of terms. If you ever feel stuck or just want fresh ideas, check out a good AI prompt generator; it can be a great way to spark some new creative directions.
How to Scale Production with Bulk Generation
Converting a single image to line art is great, but what happens when you need to process dozens, or even hundreds, of them? Tackling each one manually is a serious time-drain. This is where a bulk generation workflow becomes an absolute game-changer for anyone managing brand assets, creating educational materials, or just running a high-volume content operation.
Let's say you're an e-commerce store owner launching a new product line. You need clean line art for instruction manuals, packaging designs, and maybe even a few promotional coloring pages. Instead of painstakingly converting all 50+ product shots one by one, you can knock them all out in a single, automated batch.
Locking in a Consistent Style
The secret to making bulk conversions work is consistency. You need a workflow that stamps the exact same artistic style across every single image. This guarantees your final assets look cohesive and professional, not like a random collection of drawings. It all comes down to creating one master prompt and applying it to everything.
This approach is incredibly powerful for projects like:
- Book Illustrations: Turning a whole set of character photos or scene mockups into a uniform series of line drawings.
- Branding Assets: Building a library of icons from photos of your company's products, all with the same clean, branded look.
- Educational Materials: Generating a full curriculum's worth of worksheets from different source images, ensuring they all feel like part of the same set.
The whole process is pretty simple. You upload all your prepped source files, write a single prompt that nails your desired style—something like "minimalist vector line art, single line weight, ignore shadows"—and let the AI work its magic across the entire batch.
The real power here is locking in your creative direction. Once you've perfected a prompt that delivers the exact style you want, you can reuse it indefinitely. This guarantees brand consistency across all future assets without any extra effort.
This diagram breaks down how a single, well-structured prompt can be adapted for different image types, which is the core idea behind a truly scalable workflow.
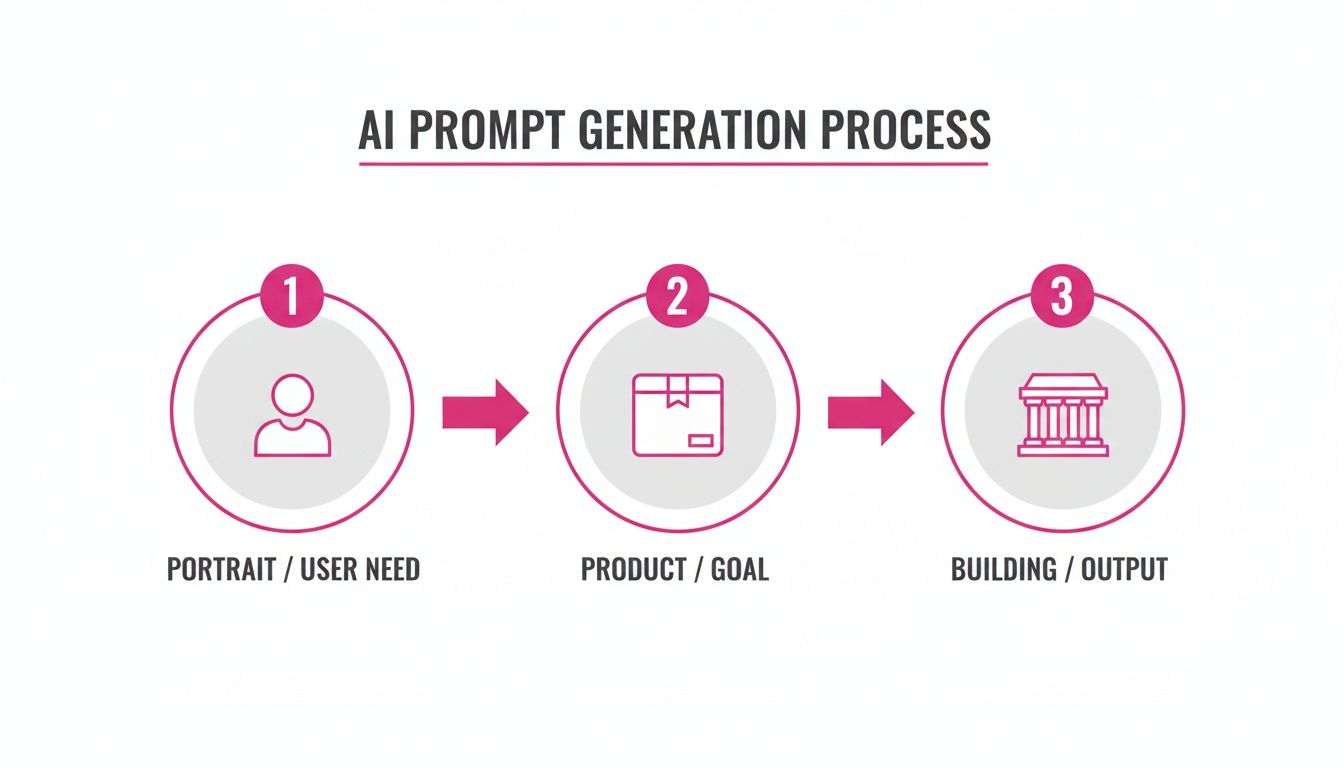
By standardizing your approach, you’re telling the AI how to treat every image, ensuring a portrait, a product, and a building all get the same consistent line art treatment.
A Practical Bulk Conversion Workflow
Getting a batch process running is surprisingly straightforward. First, pull all your source images into one folder. Just make sure they’ve been prepped similarly—ideally with consistent lighting and clean backgrounds—to give the AI the best shot at creating uniform results.
Next, you'll upload that entire folder to a bulk processing tool. Instead of typing out a prompt for each individual image, you'll define your master prompt and any negative prompts just once. This single set of instructions will guide the AI for every image in the queue. For projects that also need uniform dimensions, you can use a bulk image resizer to standardize your files before or after conversion.
Finally, hit go. The system will churn through your entire image library, applying your chosen style with precision. What could have easily taken a full day of tedious, manual work is often finished in just a few minutes. You're left with a complete, consistent set of high-quality line art, ready to go. This simple workflow transforms the image to line art process from a creative bottleneck into an efficient production line.
Refining and Polishing Your Final Artwork
The AI gets you about 90% of the way there, but that last 10% is where the real magic happens. It’s what separates a cool AI generation from a truly professional asset you can use anywhere.
Even the best models can leave behind little quirks—a stray line here, a weird digital artifact there, or a slightly jagged edge. Taking a few extra minutes to clean things up makes a world of difference. Think of the AI's output as a fantastic rough draft. Your job is to be the editor, giving it that final polish.
Simple Cleanup Techniques
You don't need a high-end software suite for this part. Most of the quick touch-ups can be handled in any basic image editor, even the free ones. The goal here is just to smooth out any rough spots the AI left behind.
- Erase Stray Artifacts: Zoom way in and hunt for tiny, disconnected lines or digital "dust." These often come from the AI misinterpreting texture in the original photo. A simple eraser tool will make them disappear in seconds.
- Smooth Jagged Lines: If some of your curves look a bit blocky, use a smoothing or blur tool on a very low setting. Be gentle. The idea is to refine, not completely rework what the AI has done.
- Connect Broken Lines: Sometimes the AI leaves tiny gaps in what should be a solid outline. Grab a simple brush or pencil tool that matches the line weight and just connect the dots. This makes the artwork feel solid and complete.
The Power of Vectorizing Your Line Art
Once you've done your initial cleanup, there's one more step that's absolutely critical for any art destined for professional use: vectorization.
AI tools usually spit out a raster image (like a JPG or PNG), which is made of pixels. That's fine for your screen, but it has one huge limitation—it gets blurry and pixelated the moment you try to scale it up.
Vectorizing solves this by converting your pixel-based art into a format built on mathematical equations. This means you can stretch your design to the size of a billboard or shrink it down for a business card, and it will stay perfectly crisp and sharp every single time.
Vectorization is non-negotiable for professional projects like logos, print materials, or any design that needs to be used in multiple sizes. It's the step that makes your AI-generated art truly versatile and future-proof.
You can do this with automated "image trace" features in programs like Adobe Illustrator or free alternatives like Inkscape. It takes the clean lines you've just polished and turns them into an infinitely scalable SVG, AI, or EPS file.
Preparing Your Files for Any Use Case
With your artwork cleaned up and vectorized, the final piece of the puzzle is exporting it correctly for wherever it’s going to live. After converting your images to line art, it's also a good idea to optimize images for web to make sure they load fast and play nice with search engines.
Here’s a quick cheat sheet for the most common file types:
| File Type | Best Use Case | Key Benefit |
|---|---|---|
| SVG | Web graphics, logos, icons | Infinitely scalable and has a small file size. |
| PNG | Coloring pages, digital art | Supports transparent backgrounds, perfect for layering. |
| PDF/EPS | Professional printing | The industry standard for high-resolution print jobs. |
By walking through these refinement steps, you’re ensuring that every piece of line art you create isn't just beautifully generated but also technically sound and ready for whatever project you throw at it.
Common Questions About AI Line Art
When you first start turning photos into line art with AI, a few questions always pop up. It's totally normal. Getting the hang of this process is really just about understanding why the AI acts the way it does.
Let's walk through some of the most common hurdles I see people run into. Knowing what works from the get-go will save you a ton of time and help you get much better results, much faster.
What Kind of Images Work Best for AI Line Art Conversion?
Think high contrast. Images with a clear, well-defined subject against a simple background will always give you the cleanest results. The AI needs a good roadmap to follow, and things like strong lighting, sharp focus, and minimal clutter provide just that.
Some slam-dunk candidates include:
- Portraits: A clean headshot against a plain wall is perfect.
- Product Photos: A single item shot in a studio setting is ideal.
- Architectural Shots: Buildings with crisp, geometric lines are easy for the AI to trace.
On the flip side, try to avoid photos that are blurry, low-resolution, or have really busy, overlapping patterns. These tend to confuse the AI, leaving you with a messy drawing that needs a lot of manual cleanup.
Can I Turn a Detailed Painting into Clean Line Art?
You absolutely can, but it takes a little more finesse than a simple photo. When you're working with something complex and colorful, like a painting or a detailed illustration, your prompt is everything. You have to tell the AI to look past all the color and texture.
Try adding specific instructions to your prompt, like "extract primary outlines" or "simplify details into a line drawing." I've also had good luck with "ignore color and texture." This nudges the AI to focus on the core structure of the image, not the artistic flair.
Another pro tip? Pre-process the image a bit yourself. Converting it to grayscale or bumping up the contrast can make a huge difference in helping the AI find the essential shapes.
How Do I Keep the Line Art Style Consistent Across Many Images?
Consistency is king, especially if you're working on a branding project, a set of book illustrations, or any other series. The secret here is to nail down a single, consistent base prompt and use it for every single image in your batch.
The real key to a cohesive look is creating a "master prompt" that locks in your style. Apply it universally, and every piece of line art will share the same visual DNA, no matter the original photo.
This is where a tool designed for batch processing really shines. It lets you set your prompt and style settings once and then run hundreds of images through it. For the absolute best results, start with source photos that have similar lighting and composition. Combine that with your master prompt, and you'll get a perfectly unified set of artwork every time.
Ready to move past converting images one by one? If you need to produce consistent, high-quality line art at scale, Bulk Image Generation is the answer. You can apply a single master prompt to hundreds of photos, creating a cohesive set of assets in minutes, not hours.
Streamline your creative workflow with Bulk Image Generation today!
