How to Create a Character From Concept to AI Art

Ryan Bennett • January 2, 2026
Learn how to create a character from a core idea to a finished visual. This guide covers personality, design, and using AI for stunning character art.
Before you even think about sketching a silhouette or writing a single AI prompt, your character needs a soul. The most memorable characters—from cynical space pirates to wide-eyed revolutionaries—feel real because they're built on a solid foundation of who they are, not just what they look like.
This is where the real work begins. We're moving past generic archetypes to dig into the core of their identity.
The data backs this up. Just look at platforms like Character.AI, where users rack up over 2 billion chat minutes monthly. The average user spends a whopping 75 minutes per day engaging with AI personalities. With 9 million new characters created monthly, it's obvious that a compelling identity is what hooks people, not just a pretty picture. In fact, research shows the first 3,200 characters of a description are the most critical for shaping an AI's behavior and grabbing an audience's attention.
It all boils down to a simple, three-part process: concept, traits, and backstory. Get this right, and the visual creation becomes infinitely easier and more impactful.
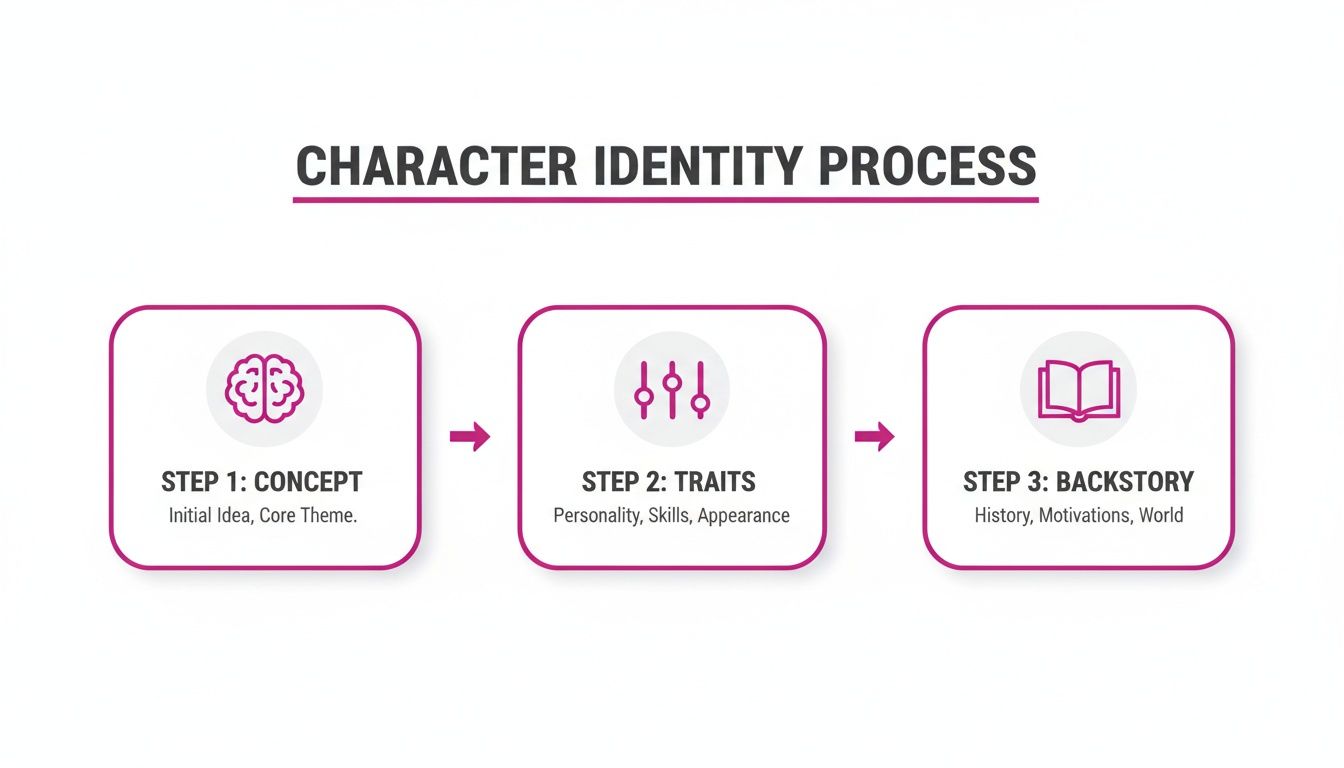
This process gives you a roadmap, starting with a powerful idea that blossoms into the specific details that make a character unforgettable.
To make this even more practical, I’ve put together a quick checklist. Use these questions as your guide to make sure you're building a well-rounded and believable character from the ground up.
Character Foundation Checklist
| Development Area | Key Questions to Ask | Example Trait (for a 'Cyberpunk Detective') |
|---|---|---|
| Core Concept | What is their one-sentence elevator pitch? What is their central theme or purpose? | A washed-up detective haunted by a past case, addicted to neural-enhancements. |
| Strengths | What are they exceptionally good at? What skills do they rely on? | Uncanny ability to read micro-expressions; navigates the digital underworld with ease. |
| Flaws | What holds them back? What is their critical weakness or blind spot? | Crippling self-doubt masked by cynicism; overly reliant on tech he doesn't trust. |
| Quirks | What are their small, unique habits? What makes them feel human and distinct? | Constantly fiddles with an antique coin; has a soft spot for stray androids. |
| Backstory | What single event shaped them most? What do they want more than anything? | A botched case led to his partner's death, now he seeks redemption... or oblivion. |
This table isn't just a list of questions—it's a framework for breathing life into your creation. Once you can answer these, you're ready to start building.
Pinpoint a Core Concept
Let's start high-level. This isn't their job title; it's their essence. Think of it as their one-line pitch. Are they a "disgraced knight seeking redemption" or a "curious android discovering humanity"? This central theme becomes the North Star for every other decision you make.
A strong concept makes it so much easier to figure out how they would act, think, and feel in any situation. It's the difference between a flat drawing and a person with a purpose.
Layer in Personality Traits
With a concept locked in, it’s time to add some complexity. A character’s personality is more than a simple list of adjectives. It's a messy, interconnected web of traits that defines how they see and interact with the world around them.
To sidestep one-dimensional archetypes, think about their strengths, flaws, and those small, humanizing quirks.
- Strengths: What are they genuinely good at? Maybe they're a master strategist or possess an unwavering sense of loyalty.
- Flaws: What holds them back? Perhaps they're crippled by self-doubt or have a reckless temper. Flaws are what create conflict and make a character relatable.
- Quirks: These are the little habits that add flavor. Do they constantly hum an old tune, collect antique maps, or tap their fingers when they're deep in thought?
A great character is a bundle of contradictions. A brave warrior who is secretly afraid of spiders or a ruthless CEO who volunteers at an animal shelter immediately becomes more interesting because they defy our expectations.
Construct a Meaningful Backstory
A character's past is what fuels their present motivations, fears, and desires. Their backstory doesn't need to be a novel, but it absolutely must explain why they are the way they are. Why is that disgraced knight so desperate for redemption? What exactly happened that made him lose his honor in the first place?
Ask yourself a few pointed questions to flesh this out:
- What was their defining childhood event?
- Who is the most important person in their life (past or present)?
- What is their greatest failure or deepest regret?
- What do they want more than anything else in the world?
Answering these gives your character a history that informs their every action. This narrative foundation isn’t just for writers, either. It’s essential for creating powerful visuals and can even inform how you might craft custom gaming username art to reflect their unique persona.
Translating Personality Into Visual Design
A character's appearance is their silent introduction—a visual story told before they ever speak a word. This is where you get to turn all that rich personality and backstory into something tangible. Even if you don't consider yourself an artist, getting a handle on a few core design principles is the key to crafting a character that an AI can bring to life accurately.
This process doesn’t start with tiny details. It starts with the big picture. We’re going to build a visual blueprint piece by piece, kicking things off with the most fundamental element of all.
Start with a Strong Silhouette
Before you even think about color, texture, or facial features, there is shape. A character’s silhouette is their most basic, recognizable form. Just think about iconic characters from animation or video games; you can often tell who they are from their shadow alone. That's the power of a distinct outline.
A strong silhouette immediately telegraphs key information. A character with broad, square shoulders and a rigid posture might feel strong and unyielding. On the other hand, someone with a curved, flowing silhouette could suggest grace, elegance, or a gentler nature.
Think about how your character’s core traits would show up in their physical shape:
- A Stoic Guardian: Might have a blocky, immovable silhouette, almost like a walking fortress.
- A Cunning Spy: Could have a sleek, sharp, and angular shape, suggesting speed and danger.
- A Gentle Scholar: Might have a softer, rounded silhouette, maybe hunched over from years buried in books.
Focus on creating a unique and memorable shape first. This foundation will guide every other design choice you make down the line.
Choose a Meaningful Color Palette
Color is pure emotion. The hues you pick for your character can instantly signal their personality, alignment, and even their role in the story. A good grasp of basic color theory for beginners is a massive help here, as it's the language you'll use to translate mood into visuals.
For instance, warm colors like reds and oranges often scream passion, anger, or energy. Cool colors like blues and greens can suggest calmness, intellect, or sadness. It's not just about picking a favorite color; it's about building a palette that tells a story.
A character's color scheme is a powerful non-verbal cue. A hero clad in bright, primary colors feels optimistic and trustworthy, while a villain draped in dark, desaturated tones often reads as sinister or corrupt.
A simple three-color system is a great place to start:
- Primary Color: The dominant color that covers the most ground and sets their overall feel.
- Secondary Color: This complements the primary and adds some visual pop.
- Accent Color: Just a small splash of a contrasting color used to draw the eye to important details, like their eyes or a specific accessory.
Tell Stories with Wardrobe and Accessories
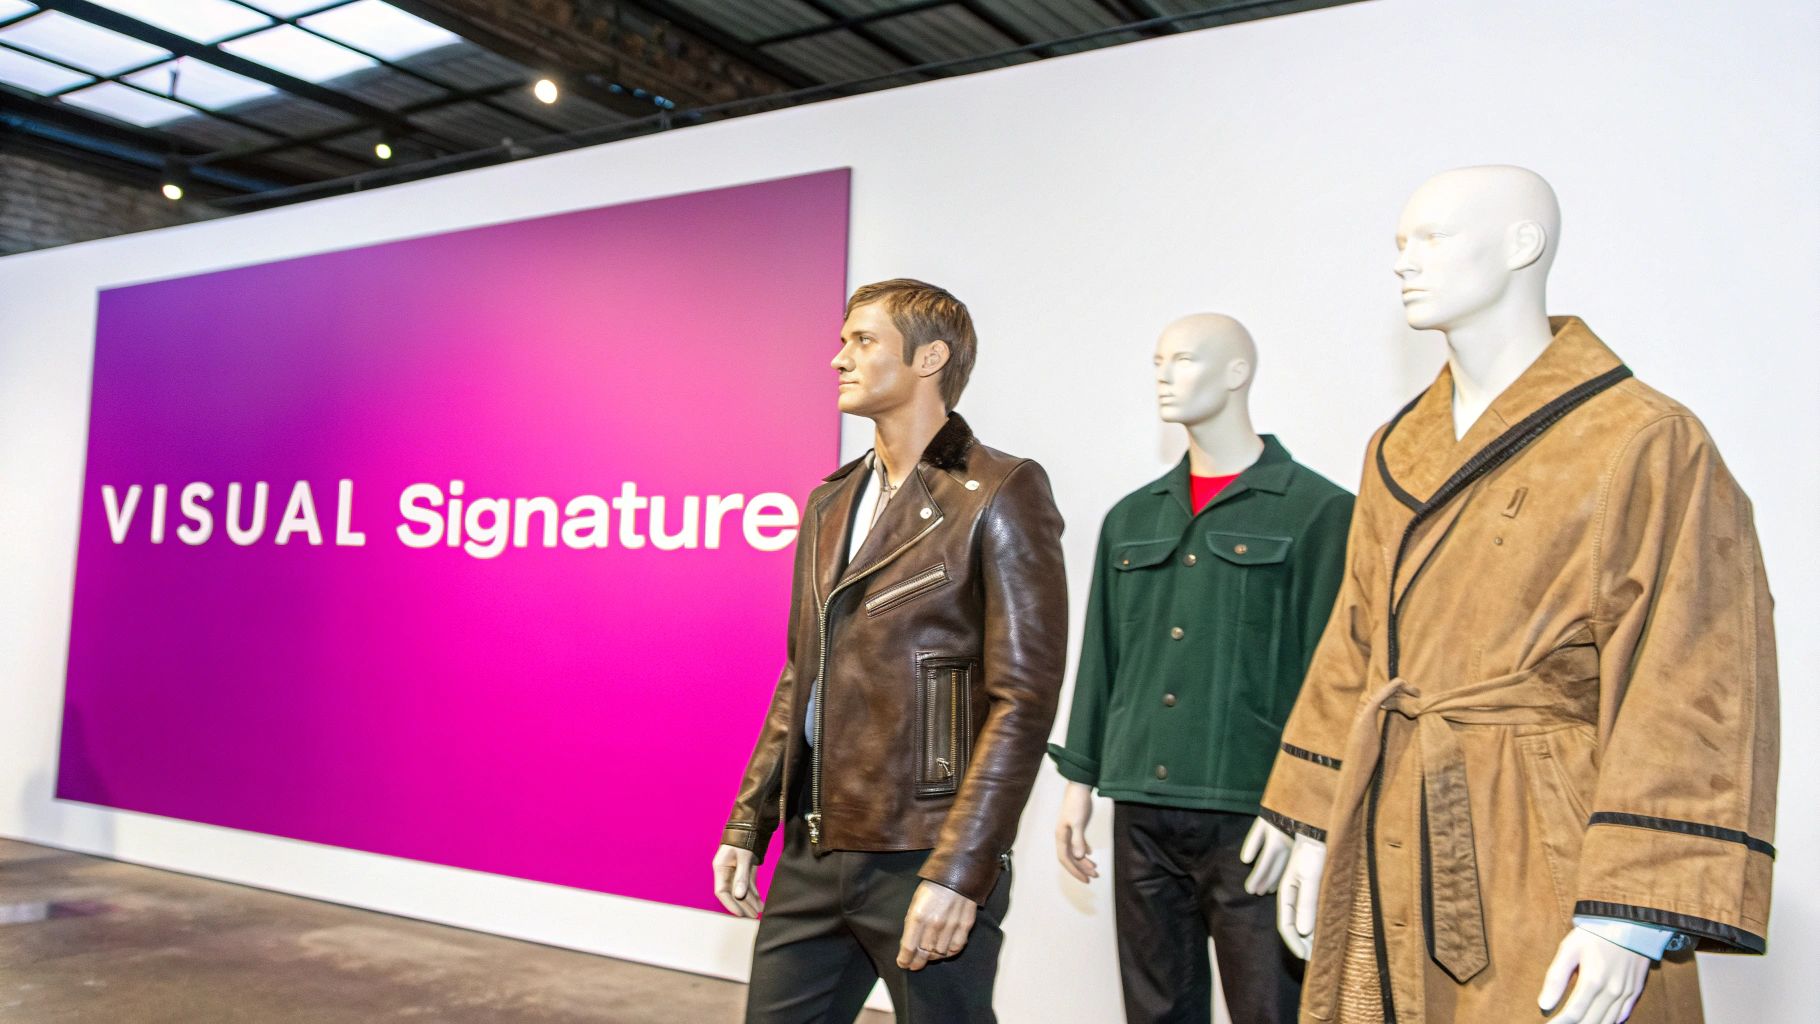
Clothing is never just clothing. It's a character's history, profession, and status all rolled into one. Every single item they wear should be a deliberate choice that reveals something about them. A pristine, perfectly tailored suit tells a very different story than a patched-up, road-worn leather jacket.
What does their wardrobe say about where they've been and where they are now? A soldier’s uniform, for example, speaks of discipline and conformity. Frayed, handmade garments might suggest a life of poverty or a flat-out rejection of societal norms.
And don't forget the small stuff—it often carries the most weight. Accessories are perfect for adding those extra layers of personality and backstory.
- An old, dented locket could hold a picture of a lost loved one, hinting at their core motivation.
- A state-of-the-art cybernetic arm immediately drops them into a sci-fi world and speaks to a past injury or enhancement.
- A simple, hand-carved wooden bird might be a memento from their childhood, revealing a softer side they keep hidden.
By thoughtfully combining silhouette, color, and wardrobe, you're not just creating a character anymore; you're building a visual identity. This detailed blueprint is exactly what you need to feed an AI image generator, ensuring the final output is a true reflection of the person you've imagined.
Writing AI Prompts That Actually Work
Now that you have a solid blueprint for your character’s personality and look, it’s time to teach the AI how to see what’s in your head. This is where the magic happens. We’re translating your creative vision into a clear set of instructions the machine can actually follow.
Think of it like this: telling the AI to create a "knight" is like giving a painter a single word and hoping for the best. You'll get a knight, sure, but it won't be your knight. A great prompt, on the other hand, is a detailed creative brief. It gives the AI all the pieces it needs to build something specific and unique.
The Anatomy of a Great Prompt
The most effective character prompts aren't just a jumble of keywords; they're built in layers. You start with the absolute core of the character and then strategically add details that define everything from their expression to the world they inhabit. It's a methodical process, moving from a fuzzy concept to a crystal-clear command.
Here are the essential building blocks I always start with:
- Core Subject: This is the heart of your prompt, the one thing that is non-negotiable. Get specific from the get-go. Instead of "detective," try "A grizzled cyberpunk detective" or "a cheerful forest spirit."
- Facial Features & Expression: Don’t just say "a woman's face." Give the AI something to work with. Think about details like "sharp jawline, tired eyes with faint laugh lines, and a subtle, knowing smirk." The emotion you describe here sets the entire mood.
- Attire & Accessories: Pull directly from the wardrobe choices you made earlier. Use evocative language like, "wearing a worn, brown leather duster over a high-tech armored vest, a glowing data-jack at his temple."
- Setting & Environment: Where is your character? The background is more than just scenery; it’s context and atmosphere. "Standing on a rain-slicked neon street at midnight" paints a much richer picture than just "in a city."
When you layer these elements together, you're not just hoping for a good result—you're engineering it. This approach dramatically boosts your chances of getting an image you love on the very first try.
Level Up with Modifiers
Once the core description is locked in, you can start having some real fun. Modifiers are the keywords that inject style, mood, and artistic flair. A few carefully chosen terms can be the difference between a flat, digital-looking image and a piece of dynamic art.
Let’s look at a few that make a huge impact:
- Lighting: Don't leave the mood to chance. You can command it with phrases like "dramatic rim lighting," "soft morning glow," "cinematic noir lighting," or my personal favorite for sci-fi, "eerie volumetric light rays."
- Composition: You're the director, so tell the AI where to put the camera. Use terms like "dynamic action pose," "full-body shot," "extreme close-up portrait," or "rule of thirds composition" to frame your character perfectly.
- Medium & Style: This is where you define the whole vibe. Keywords like "oil painting aesthetic," "hyperrealistic digital art," "anime key visual," "concept art," or the classic "photorealistic, 8k" give the AI a clear artistic path to follow.
If you’re ever feeling stuck or just want to explore some new combinations, playing around with a prompt generator can be a great way to spark ideas. We actually built a free AI image prompt generator to help you mix and match different styles and create incredibly detailed prompts from scratch.
Pro Tip: Don't be afraid to "stack" your styles. Combining keywords can produce some incredible, unexpected results. A prompt like "A knight in ornate armor, oil painting, impressionistic brushstrokes, style of Frank Frazetta" gives the AI multiple stylistic guardrails, often resulting in a more textured and unique image.
The table below breaks down how adding these layers transforms a simple idea into a detailed, actionable prompt.
Prompt Component Breakdown
Adding layers of detail is the single most effective way to improve your AI-generated characters. This table shows the direct impact each new component has on the final image, moving from a generic concept to a specific, high-quality visual.
| Prompt Element | Simple Prompt Example | Advanced Prompt Example | Impact on Output |
|---|---|---|---|
| Core Subject | A woman | A stoic elven ranger | Establishes the fundamental character archetype and genre. |
| Facial Details | with brown hair | with piercing green eyes, a subtle scar over her left eyebrow, and a determined expression | Defines personality, mood, and backstory through specific facial features. |
| Attire | wearing armor | wearing practical leather armor adorned with leaf motifs and a dark green hooded cloak | Adds world-building details and communicates the character's role and environment. |
| Setting | in a forest | standing in a misty, ancient forest at dawn, with sunbeams filtering through the canopy | Creates atmosphere, mood, and provides a narrative context for the character. |
| Style Modifiers | fantasy art | cinematic lighting, photorealistic, ultra-detailed, fantasy concept art, 8k | Dictates the artistic style, quality, and overall aesthetic of the final image. |
As you can see, the advanced prompt leaves far less to chance, giving the AI a rich and precise set of instructions to follow.
Reverse-Engineering for Success
One of the fastest ways I learned to write better prompts was by studying images I already loved. When you find an AI-generated piece with a style that blows you away, don't just admire it—deconstruct it. Many platforms now include "image-to-prompt" tools that analyze a picture and spit out a text prompt that would likely create a similar result.
Here's an example of what that kind of interface might look like.
This is a fantastic way to build up your own vocabulary of powerful keywords for specific lighting, textures, and artistic styles.
To really push your work to the next level, it's worth exploring the wider ecosystem of the best AI tools for content creators. By learning from existing art and getting fluent in the language of AI, you gain the precise control needed to bring any character to life, exactly as you see them in your mind.
Generating Character Variations in Bulk
You’ve done it. You’ve nailed that perfect master prompt and generated a single, stunning image of your character. That’s a win. But what happens when your project needs more than just one hero shot? What if it needs an army?
A single image is art; a hundred consistent variations is a production pipeline. This is where you graduate from one-off creations to building a scalable asset library for your character.
Going from a single concept to a full suite of character art used to mean days, if not weeks, of painstaking manual work. Now, you can spin up dozens of unique visuals in one go, all while keeping your character’s core identity intact. We're not talking about creating identical clones, either. This is about exploring different poses, expressions, and even lighting with a single command.
This kind of speed is essential in a world that’s constantly hungry for more content. The scale of modern character creation is absolutely mind-blowing. Take platforms like Character.AI, which hit 223.16 million visits in February 2024 alone, with its users creating over 18 million unique characters. That gives you a sense of how user-driven creation can explode. Bulk generation mirrors this approach, letting a single creator spawn 100 unique visuals in under 20 seconds. You can dive deeper into this explosive growth in AI character creation.
Setting Up Your First Batch Job
Making the jump to bulk generation is surprisingly simple. Instead of feeding your prompt to the AI for one image, you’ll use a tool designed for batch processing. You just take that detailed master prompt you perfected and tell the system how many versions you want.
Let's stick with our elven ranger. Your master prompt might be:
A stoic elven ranger with piercing green eyes and a subtle scar over her left eyebrow, wearing practical leather armor with leaf motifs, standing in a misty, ancient forest at dawn, cinematic lighting, photorealistic, fantasy concept art.
Instead of hitting "generate" for a single image, you just tell the tool to create 50 or 100 variations. The AI then gets to work, intelligently interpreting that prompt to produce a whole range of outputs that still fit the core description. You'll get your ranger in different stances, with varied expressions, and from multiple camera angles—all from that one initial setup.
Here’s a glimpse of what setting up a bulk job looks like. You plug in your prompt and specify the number of images you need.

The interface is usually clean and straightforward, letting you focus on the creative side of things instead of getting bogged down in technical settings.
Achieving Consistency Across Variations
Okay, so here's the big challenge: consistency. How do you make sure your elven ranger actually looks like the same person in all 100 images? The secret is in the specificity of your master prompt.
Your prompt needs what I call "consistency anchors"—these are the unique, non-negotiable details the AI can lock onto every single time. They are the little things that make your character theirs.
- Distinctive Features: Don't just say "a scar." Get specific: "a jagged, lightning-shaped scar over her right eye."
- Unique Accessories: Instead of "a necklace," try "a silver amulet with a glowing blue gem."
- Named Items: You can even give gear a name, like "wearing the 'Shadow-Weave' cloak," which helps the AI recall a particular visual style.
By baking these super-specific, repeatable elements into your prompt, you’re giving the AI strong guardrails. The pose, lighting, and composition will change, but those core identifiers will stick around, tying the entire batch together into a cohesive set.
A great bulk prompt is like a character sheet for the AI. It provides all the critical info needed to ensure that no matter the situation, the character stays recognizable and true to their original design.
Practical Use Cases for Bulk Generation
Once you start thinking in terms of batches, a whole world of possibilities opens up. You’re no longer held back by the time it takes to create each visual asset one by one.
Here are just a few real-world scenarios where this becomes a total game-changer:
- Game Development: Generate dozens of character portraits for dialogue systems, create inventory icons for their specific gear, or pump out concept art showing them in different environments.
- Social Media Campaigns: Create a month's worth of content in minutes. You can feature your brand mascot or character in all sorts of seasonal or promotional settings without breaking a sweat.
- Story Illustrations: Need a wide range of visuals for a children's book or a graphic novel? Produce scenes showing your character expressing different emotions and performing various actions, all in a consistent style.
Ultimately, bulk generation takes character creation from a painstaking, image-by-image grind and turns it into a smart, system-level workflow. It frees you up to think bigger and produce the volume of high-quality, consistent assets needed for any ambitious project.
Refining and Editing Your AI Images
Generating your character images is a huge milestone, but honestly, it’s just the start of the creative fun. The raw AI output is your clay, and the final refinement is where you really sculpt it into a masterpiece. This post-production stage is where you polish your visuals, fix any little quirks, and get them ready for whatever project you have in mind—all without ever leaving the platform.
Think of it as your digital darkroom. With the right tools baked right in, you can take a whole batch of character variations and apply edits across the board. This saves an insane amount of time and gives you that professional, consistent finish that makes a character feel truly real.
Streamline Edits with a Batch Editor
Editing images one by one? That's a total workflow killer. The real magic happens when you can make changes to your entire character set at once. A batch editor is built for exactly this, letting you apply powerful edits like background removal or face swaps to hundreds of images with just a few clicks.
It’s all about working smarter, not harder. Instead of spending hours in Photoshop meticulously cutting out backgrounds, you can just select your entire generation and strip them all out simultaneously. The time you get back is staggering, freeing you up to focus on the creative side of your project instead of tedious, repetitive tasks.
Here’s a look at what a batch editing interface looks like, where you can manage and fine-tune everything you've generated.
This centralized dashboard is your command center for post-production. It gives you a clean overview of all your assets and the tools you need to perfect them.
Perfecting Your Character’s Presentation
Once your images are generated, a few key editing functions can take them from good to truly great. These tools are designed to solve the most common headaches in AI character creation, like nailing consistency and prepping assets for use.
- One-Click Background Removal: This is a complete game-changer. With a single click, you can strip the background from every single image in your batch, leaving you with a clean, transparent PNG of your character. This is absolutely essential for creating versatile assets you can drop onto any website, marketing graphic, or game environment without weird, clashing backgrounds.
- Face Swapping for Ultimate Consistency: Even with the best prompts, AI can sometimes create slight facial variations between images. The face swap feature is your secret weapon. You can pick one "perfect" face from your batch and instantly apply it across every other image. This guarantees your character looks identical in every single pose and scene.
- Bulk Resizing and Upscaling: Your character needs to look sharp everywhere, from a tiny social media icon to a high-resolution poster. Bulk resizing lets you export your entire set to specific dimensions, while upscaling sharpens the details for large-format use. You'll never have to worry about your character’s quality being compromised. You can also explore different methods for creating detailed surfaces, and a good place to start is our guide on using an AI texture generator for your projects.
The point of post-production isn’t to fundamentally change your character—it’s to enhance and standardize what the AI has already created. A streamlined editing workflow makes sure every asset you produce is polished, consistent, and ready to go.
By building these editing steps directly into your generation workflow, you close the loop on character creation. You go from initial concept to a final, polished set of assets all in one place. This not only speeds things up but also maintains a high standard of quality that makes your character feel cohesive and professionally made, ready for any application you can dream up.
Your Top AI Character Questions, Answered
As you get comfortable creating characters with AI, you'll inevitably run into a few common sticking points. I see them pop up all the time. Getting these figured out early is the difference between banging your head against the wall and actually getting into a creative flow.
Let's walk through some of the most frequent questions I get. Nailing these concepts will help you put everything you've learned into practice and create characters that are consistent, adaptable, and ready for whatever you have in mind.
How Do I Keep My Character Looking Consistent?
Consistency is the name of the game, and it's probably the biggest challenge in AI character creation. The secret is to bake unique, repeatable features directly into your master prompt. Think of these as your character's visual DNA.
Don't just say "a scar." Get specific: "a distinct lightning-shaped scar over her right eye." Instead of "a necklace," try "wearing a silver amulet with a blue gem." You'll want to reuse this core description every single time you generate a new image of them.
For that extra layer of precision, many tools let you use an existing image as a reference or "seed" for future generations. On a platform like ours, the face swap feature in the batch editor is an absolute game-changer. It lets you take one perfect face you've generated and apply it across dozens of different outfits and poses, locking in that likeness every time.
What's the Best Prompt for a Coloring Book Character?
When you're making a coloring book, you're aiming for clean, crisp line art, and your prompt needs to reflect that. It’s all about using the right keywords to steer the AI away from realistic renders.
I always include phrases like "coloring book page," "clean black and white outline," and "bold lines." Adding "minimal shading" and "vector style" also helps the AI understand the goal. This combination makes it crystal clear that you want an image ready to be colored in.
Pro tip: I always, always add "clean white background" to my coloring book prompts. It’s a simple trick, but it saves a ton of editing work later and makes the pages ready to print right out of the gate.
Once you have that prompt dialed in, you can use a bulk generator to create dozens of different scenes with your character. It’s an incredibly fast way to build out an entire coloring book's worth of pages.
Can I Use AI Characters in My Business?
The short answer is yes, but with a huge caveat: you absolutely must check the terms of service of the AI platform you're using. I can't stress this enough—it's non-negotiable.
Most professional-grade AI image tools grant you full commercial rights to the images you create with your own prompts. This means you’re free to use your original characters in marketing, on merchandise, for your website's branding—you name it. You typically own the output.
The golden rule is to never prompt for copyrighted characters or styles. Asking for "Mickey Mouse" or an image "in the style of Disney" is a fast track to legal headaches. As long as your characters are born from your own ideas and descriptions, you're almost always in the clear for commercial use.
Ready to take a single idea and turn it into a full set of character assets? With Bulk Image Generation, you can create hundreds of consistent, high-quality character variations in minutes and polish them with our powerful batch editor. Start creating your characters for free today.
