Create Product Photos with AI: A Practical 2026 Guide

Aarav Mehta • September 16, 2026
Learn how to create product photos with AI in 2026. Practical workflow for prompts, batching, editing, and distribution without losing product accuracy.
At 11 p.m., a small-brand owner is still staring at a spreadsheet of products that need new hero images before the next campaign launches. The products are ready, but the photography queue is not. A studio booking, props, retouching, cropping, and marketplace exports can turn a simple catalog refresh into a production bottleneck.
Learning to create product photos with AI removes much of that friction, but it doesn't remove the need for judgment. The useful question isn't whether a model can make an attractive image. It can. The useful question is whether the image still shows the product accurately, earns buyer confidence, and meets the disclosure rules that apply to synthetic or substantially altered content.
The market is moving in that direction quickly. One independent estimate places the global AI product photography market at about $450 million in 2024, with a projection of roughly $5 billion by 2035, implying a compound annual growth rate of about 24.5%. The same estimate places North America at about $201 million in 2024, with projected growth to $2.176 billion by 2035. These are projections, not guarantees, but they point to a structural change in how retailers produce visual assets for large and localized catalogs. The State of AI Product Photography provides the market context.
Why AI Product Photos Change the Math for Small Catalogs
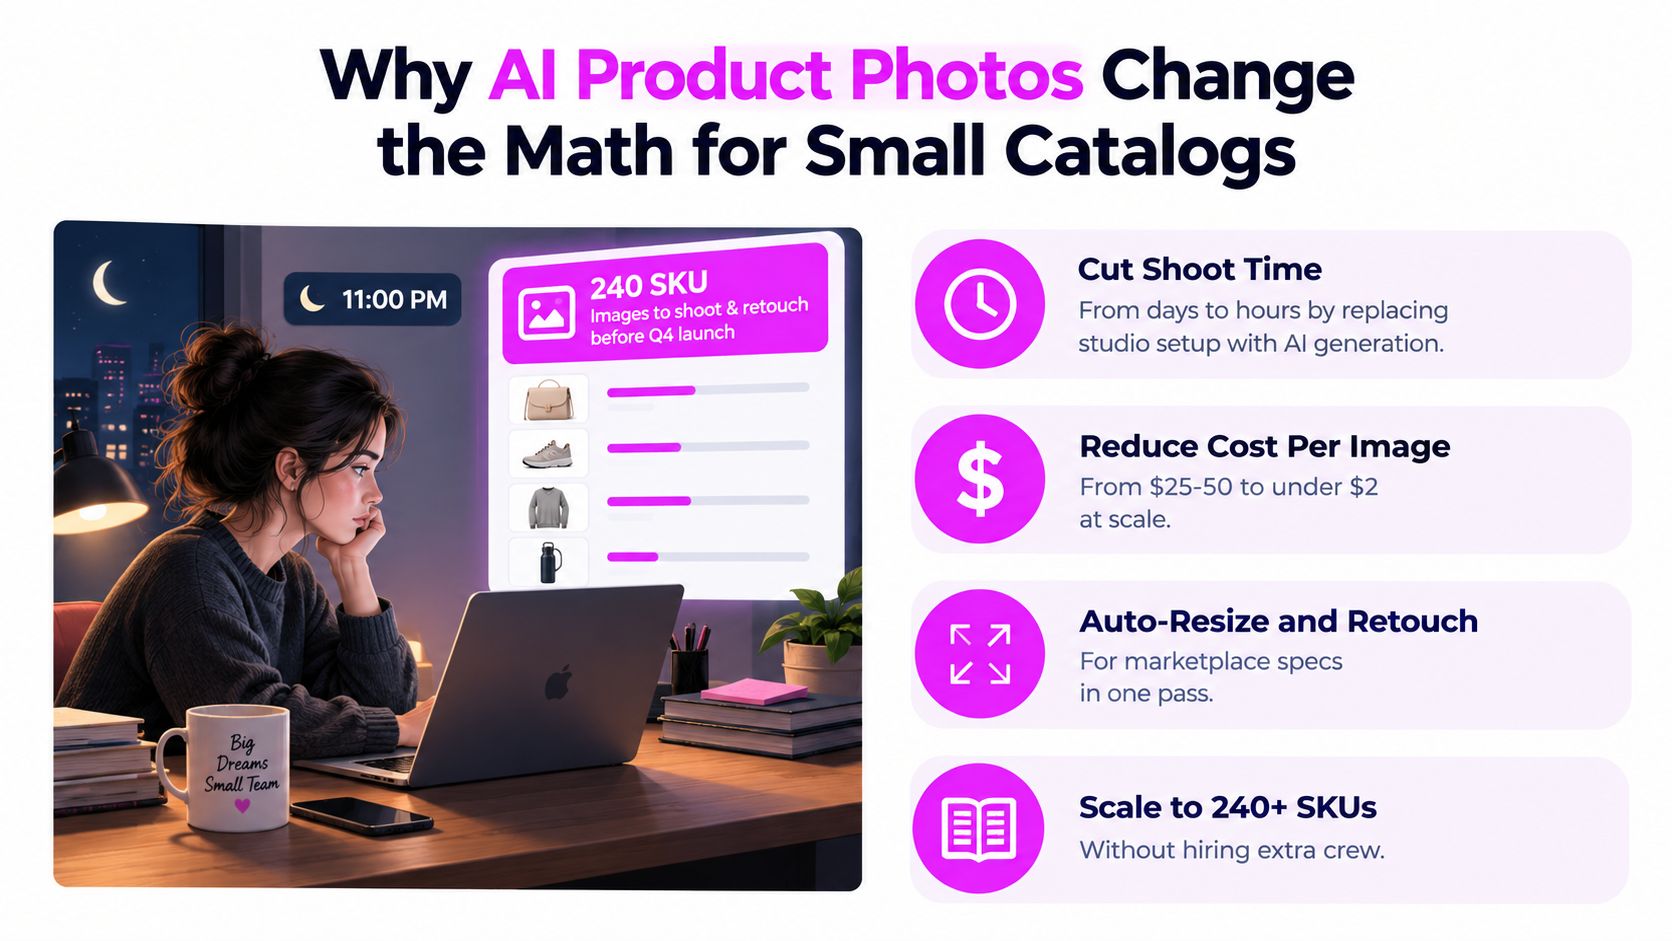
The first benefit is volume. A seller with a few hundred SKUs no longer has to treat every background, angle, and lifestyle variation as a separate shoot. AI can handle the presentation layer around a clean product reference, allowing the team to explore more compositions without rebuilding a physical set for each item.
That matters because commercial image generation can cost about $0.02 to $0.20 per image, while a finished studio product photograph can cost roughly $25 to $170, according to an industry comparison of AI and traditional workflows. Another dataset reports that AI workflows can be 85% to 97% cheaper than studio shoots, while 79% of e-commerce brands use AI-generated video and imagery for product showcases and 78% of creative agencies use AI imagery commercially. Those figures come from AI product photography statistics and cost comparisons. The exact economics will vary by tool, review time, retouching needs, and product complexity, but the direction is clear: routine visual production becomes easier to repeat.
Start with a production brief
Before opening a generator, write a short brief for each product group. Include the product name, category, destination channel, final aspect ratio, and deadline. A PDP hero image needs a different composition from an Instagram lifestyle post, even when both use the same source photo.
Then choose one clean reference image. It should show the actual product clearly enough for the model to preserve its shape, color, proportions, and branding details. A blurry or angled reference gives the model room to guess, and those guesses often become warped handles, altered seams, or unreadable labels.
Create a must-keep list before generation:
- Brand marks: Logo placement, label text, packaging symbols, and distinctive typography must remain unchanged.
- Construction details: Record stitching color, button style, hardware shape, closures, and visible joins.
- Material finish: Note whether the surface is glossy, matte, brushed, woven, translucent, or textured.
- Product count: State how many objects belong in the image and whether accessories are part of the sale.
Practical rule: If a buyer could verify the detail by holding the product, treat it as a fidelity requirement, not a styling suggestion.
Lock the scene before you iterate
Finish the brief with one lighting direction, one background tone, and one composition anchor. For example, use soft front-left light, a warm neutral background, and the product centered with its primary face visible. Consistency makes a catalog feel intentional, while uncontrolled variation makes each SKU look as if it came from a different brand.
AI-generated imagery can be a practical alternative to conventional photography, but the trade-offs deserve a balanced review. A useful comparison of AI content and real photography can help teams decide which parts of a catalog should stay photographic and which parts are suitable for generated styling. For foundational terminology, see what product photography involves.
The failure pattern to avoid is subtle drift. A generated scene may look polished while changing the bottle shoulder, softening a logo, enlarging a clasp, or inventing a fabric texture. AI speeds up production, but it also speeds up the distribution of mistakes if no one compares the output with the source.
Prompt Anatomy for Product Photos That Look Real
A reliable prompt has fewer decorative adjectives and more constraints. Start by naming the exact product, then tell the model which visual facts it must preserve, followed by the scene, lighting, camera treatment, frame, and exclusions.
For a ceramic coffee mug intended for a square PDP image, a useful structure might look like this:
White ceramic coffee mug, preserve the exact handle shape, rim thickness, glaze color, printed logo, proportions, and surface finish from the reference image. Place one mug on a warm neutral tabletop with a clean uncluttered background. Use soft front-left studio lighting, a restrained contact shadow, realistic ceramic reflections, eye-level camera angle, and a 1080x1080 composition. Keep the full mug visible and centered. No extra objects, no altered logo, no warped handle, no melted rim, no duplicate mug, no text changes, no exaggerated reflections.
The fidelity anchor is doing most of the work. “Make it premium” describes an ambition, not a verifiable requirement. “Preserve the exact handle shape and printed logo from the reference” gives the model specific constraints.
Regenerate by re-anchoring
When the first output fails, don't only edit the wording. Reattach or reselect the original reference image and state the failed detail explicitly. If the handle bends, add “maintain the original circular handle geometry.” If the background overwhelms the product, replace atmospheric language with “plain warm neutral background, product edges clearly separated.”
Use negative prompts for recognizable failure modes:
- Geometry defects: warped handles, uneven rims, distorted straps, asymmetrical packaging.
- Identity defects: changed logo, altered label text, missing stitching, invented buttons.
- Scene defects: extra products, floating objects, harsh horizon lines, background bleed.
- Material defects: plastic-looking ceramic, melted metal, synthetic fabric, painted-over texture.
Re-anchoring matters more than endless prompt polishing because the reference remains the source of truth. For marketers building content that may appear in generative search results as well as traditional listings, this guide to generative search optimization offers useful context on making visual and written assets easier for AI-driven discovery systems to interpret.
| Intent | Prompt Fragment | When to Use |
|---|---|---|
| Preserve identity | “Match the reference image exactly for logo, label, color, proportions, and construction.” | Every product render |
| Show ceramic or glass | “Realistic glaze or transparent reflections, with physically plausible edges.” | Mugs, bottles, glassware |
| Keep fabric believable | “Preserve weave, drape, seam placement, and natural folds from the reference.” | Apparel and soft goods |
| Control lighting | “Soft front-left studio light with a restrained contact shadow.” | PDP hero images |
| Prevent clutter | “One product only, no props, no duplicates, no invented accessories.” | Marketplace main images |
Batch Generation Without Burning Your Catalog
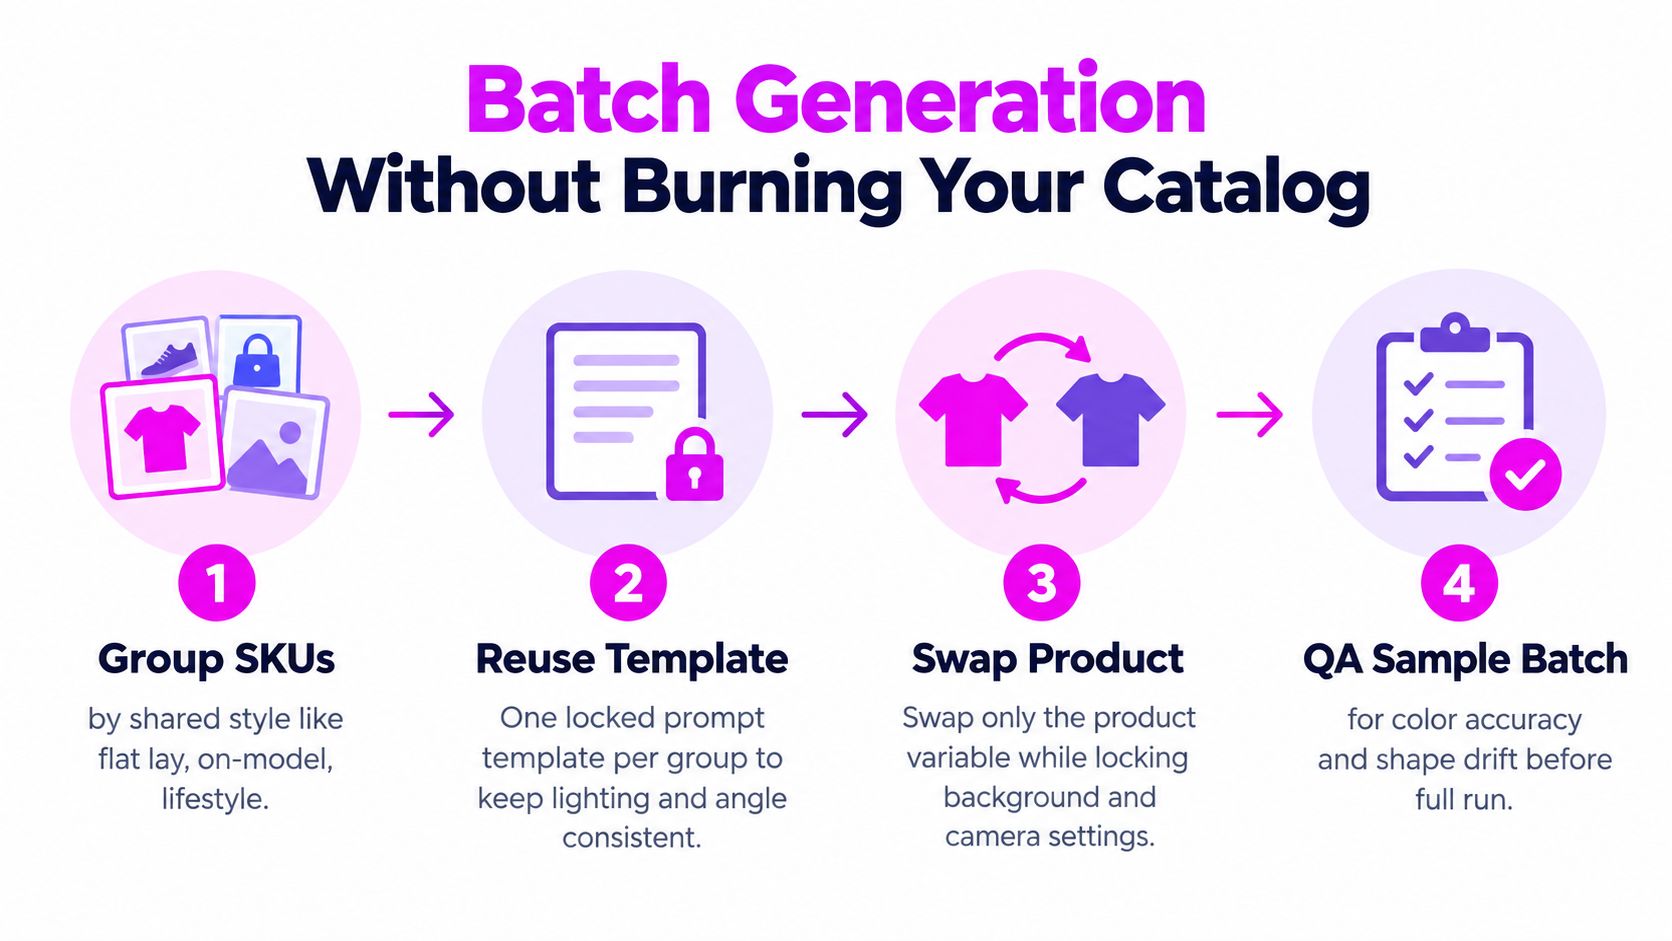
Batching works when you group products by visual treatment rather than throwing the entire catalog into one run. Put flat lays together, separate on-model concepts, and keep lifestyle scenes in their own groups. Each group should use one locked prompt template, with only the product description and reference image changing.
A practical batch contains 8 to 12 variants. That gives the team enough options to identify a strong composition without making review unmanageable. A run of 50 or more images often creates more consistency problems because small changes in interpretation accumulate across the set. The objective isn't maximum output. It's a controlled pool of candidates that can pass inspection.
Use a simple operating sequence:
- Group the SKUs: Sort by category, visual style, aspect ratio, and intended channel.
- Lock the template: Fix the camera angle, lighting direction, background, composition anchor, and negative prompt.
- Swap one variable: Change only the product description and reference image.
- Review a sample: Check the first outputs before committing the rest of the group.
Put every image through a quality gate
Before an image reaches a listing, compare it side by side with the source photo. Check shape, color, label accuracy, and the presence of every required component. Then inspect a 5% zoom crop around logos, seams, closures, and hardware. Small distortions that disappear at thumbnail size can become obvious on a product page.
Set a reject-and-regenerate rule for any image below a 90% fidelity threshold. Because that threshold is an internal operating standard rather than a universal measurement, define what counts as a pass in your rubric. A missing logo, changed label, incorrect product count, or altered structure should fail the image even if the overall scene looks attractive.
Log rejected outputs with the SKU, template version, failure type, reference image, and regeneration notes. This makes prompt drift diagnosable instead of anecdotal. For teams connecting generation to a repeatable workflow, an image generation API overview can help frame the handoff between inputs, batch processing, and review.
A commercial benchmark shows why this gate matters. On an 850-product benchmark, the highest observed product-accuracy preservation was only 29.0%, with Nano Banana 2 at 29.0%, Nano Banana Pro at 28.2%, GPT Image 2 Medium at 27.2%, and FLUX.2 Klein 9B at 16.8%. The fidelity gap in AI product photography makes the production lesson plain: strong-looking outputs still require strict rejection rules.
Post-Production Pipeline for AI Product Images
Raw generation rarely belongs on a live listing without cleanup. A four-stage post-production pipeline turns a promising render into a traceable, channel-ready asset.
Clean the edges first
Start with background removal or replacement. Prefer an edge-aware masking tool that can be used independently of the image generator, because generated backgrounds may bleed into hairline edges, handles, straps, transparent packaging, or reflective surfaces. Keep the original render untouched so you can compare the cleaned version against it.
Next, correct color and exposure. Photograph or select a neutral reference once, establish the desired white balance, and apply the same correction approach across the SKU group. This prevents one colorway from looking warm, another blue, and a third overexposed when shoppers compare them on the same category page.
Make shadows support the product
Contact shadows should ground the object, not compete with it. Reduce floating appearances with a restrained shadow under the product, then inspect reflections on metal, glass, and glossy packaging. Stray highlights can reveal that the scene is synthetic, but removing every reflection can make the product look flat and inaccurate.
The final stage is export. Keep a master PNG at 3000px on the longest edge, then create channel-specific versions:
| Channel | Dimensions | Format | Notes |
|---|---|---|---|
| Amazon | 2000x2000 | JPG or PNG | Keep the product clearly separated from the background |
| Shopify | 2048x2048 | JPG or PNG | Use a consistent square set for collection pages |
| 1080x1080 | JPG | Suitable for square feed creative | |
| Instagram Stories | 1080x1920 | JPG or PNG | Leave space for interface overlays |
Use a naming convention such as SKU_STYLE_VARIANT_CHANNEL_VERSION, for example MUG-042_STUDIO_A_SHOPIFY_V1. Preserve the source SKU and generation status in your asset library. A detailed post-production workflow for product images can help formalize these handoffs. For broader listing considerations, this guide to images that boost conversion rates is a useful reference when deciding which cleaned assets deserve placement.
Buyer Trust and When Disclosure Actually Helps
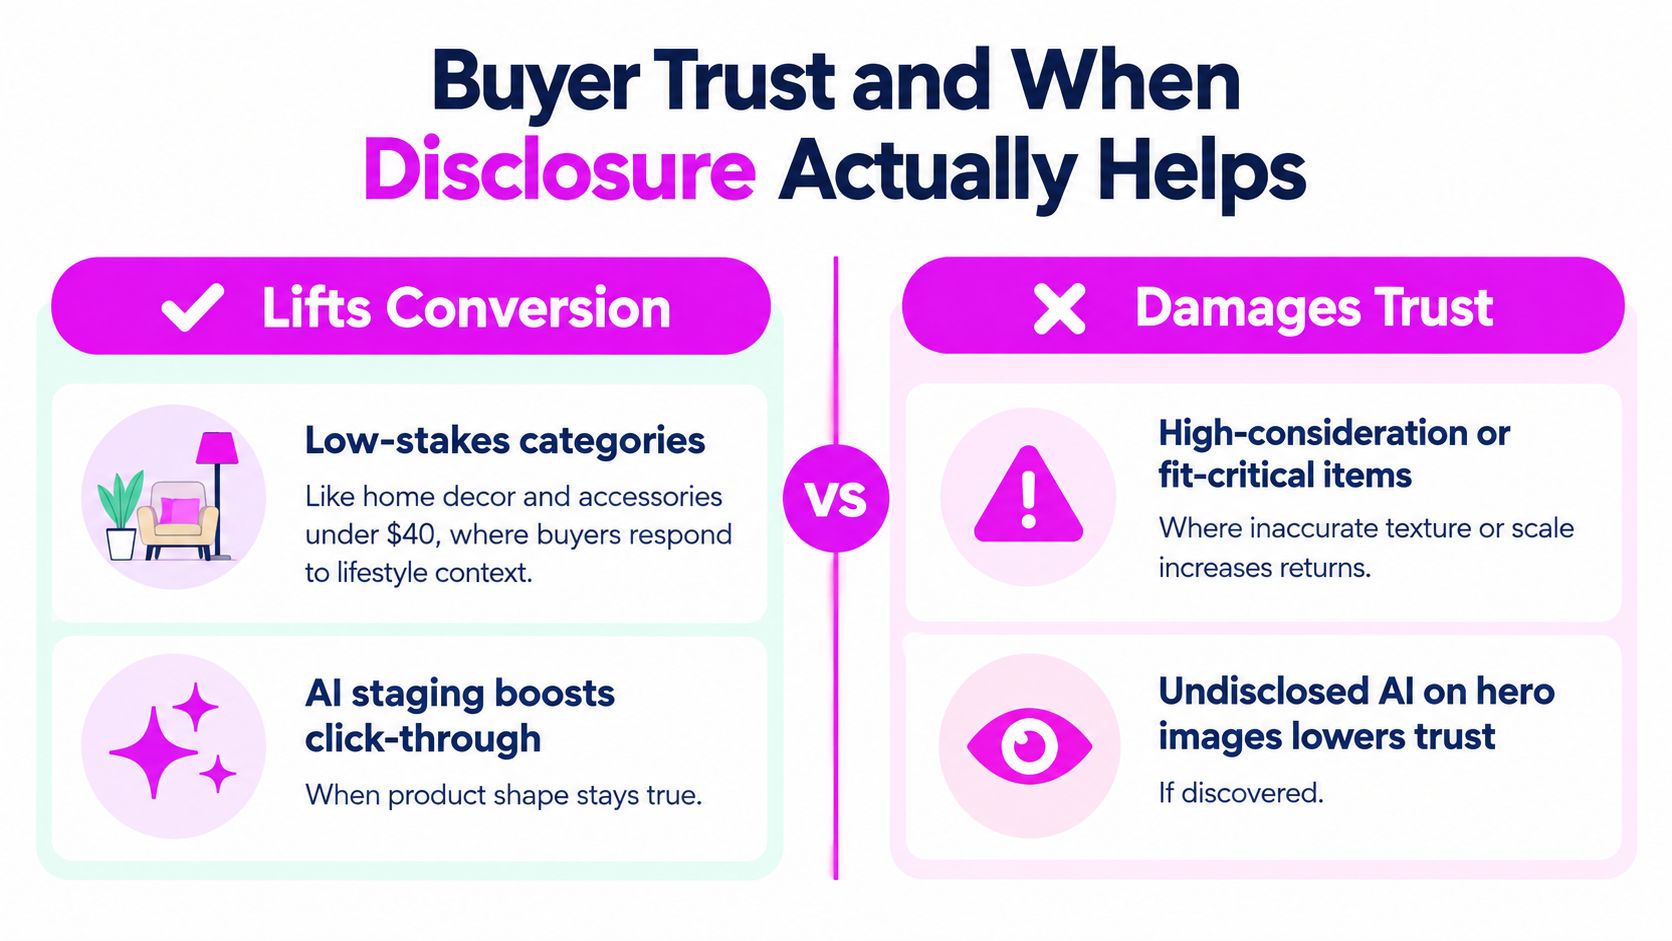
AI visuals help when they add context without changing the product. A styled room can show how a lamp might sit on a side table. A restrained lifestyle scene can make an accessory easier to understand. The image earns its place when the product remains the most reliable object in the frame.
Trust falls when the visual introduces a fact the product doesn't support. A changed shade of blue, a different fabric weave, an inflated scale, or an extra component can create disappointment even if the buyer never identifies the image as AI-generated. Apparel and other fit-sensitive products need particular care because seams, proportions, drape, and texture influence expectations.
One consumer-research summary reports that shoppers generally react to accuracy, not to the presence of AI. It also notes that disclosure can strengthen trust by signaling honesty, while apparel can be more sensitive and disclosure may slightly lower purchase intent in that category. The same source reports that nearly 90% of consumers want to know whether an image was AI-created, and 84% want disclosure. These findings are summarized in research on AI fashion product imagery and consumer trust.
Use a fact-change rule
A practical decision rule is straightforward:
- Disclose or label it: The image changes a verifiable fact such as color, count, material, scale, construction, or packaging.
- Treat it as enhancement: The image changes only the setting, lighting, crop, background, or restrained shadow around a real photographed product, subject to the applicable platform and legal requirements.
- Review manually: The product is reflective, transparent, highly detailed, fit-dependent, or expensive enough that a small mismatch could alter the purchase decision.
An AI-styled hero image shouldn't replace a clear, accurate product view. Use generated lifestyle assets to support comprehension, then keep documentary views available wherever shoppers need to inspect construction or scale.
Compliance in 2026 and the EU AI Act Disclosure Rule
Compliance starts by separating ordinary retouching from synthetic fabrication. Background removal, cropping, resizing, sharpening, color correction, exposure adjustment, background cleanup, and shadow work on a real product photograph are generally treated as routine operations in independent guidance. Fully generated scenes, fake models, invented surroundings, changed materials, or altered proportions require a more careful classification. Guidance on product photography and the EU AI Act explains this distinction.
Use a three-layer review
Layer one is asset classification. Record whether the source is a real photograph, a real photograph with routine edits, or an AI-generated or substantially AI-altered image. Don't let the same filename or folder hide these differences.
Layer two is disclosure. Under Article 50 of the EU AI Act, AI-generated or substantially AI-altered images that could appear real require machine-readable disclosure, with enforcement beginning August 2, 2026. The practical requirement is to preserve the synthetic nature of the asset rather than presenting generated surroundings or invented product details as an untouched photograph.
Layer three is channel review. Check the current requirements for Amazon, Shopify, Meta, and TikTok Shop before publishing. Platform expectations can differ, and a legally cautious workflow still needs to meet each marketplace's content rules.
A simple asset record might include:
| Item | Example |
|---|---|
| Caption | “AI-generated lifestyle scene. Product details shown from the reference image.” |
| Filename | SKU-042_LIFESTYLE_AI-GENERATED_EU_V1.png |
| Audit record | Source SKU, reference image, prompt, model version, seed, reviewer, approval status |
Machine-readable marking belongs in the asset workflow, not as an afterthought added during a complaint. Store the original reference, prompt, seed values when available, model version, edits, and rejection history. If a marketplace or regulator asks how an image was produced, the team should be able to trace the asset back to its source product and review decision.
The safest operating principle is simple: don't use synthetic presentation to conceal a product difference. Use it to stage an accurate product, and label the asset when the law or channel rules require that transparency.
Distribution Checklist and Your First Batch This Week
A small controlled test gives you better evidence than a large catalog launch. Start with six SKUs from a slow-moving line, where an underperforming image creates less commercial risk. Choose products with clear reference photographs and avoid beginning with the items most likely to fail, such as highly reflective objects or intricate apparel.
Use this Monday-to-Friday plan:
- Monday, prepare the inputs: Select one reference image per SKU, write the shared prompt template, define the must-keep details, and choose the destination aspect ratios.
- Tuesday, generate variants: Produce four variants per SKU with the same template, reference treatment, seed controls where available, and channel framing.
- Wednesday, run post-production: Remove or replace backgrounds, correct color and exposure, clean shadows, export the required sizes, and preserve the source files.
- Thursday, apply the accuracy gate: Compare every output with its source, inspect logos and hardware at the specified crop, and reject anything that fails the internal fidelity threshold.
- Friday, distribute and review: Upload three tested SKUs to the main storefront, compare new hero images with the current versions, schedule two variants for Meta Advantage+ and TikTok Shop, and reserve one for email or SMS creative.
Don't judge the test by aesthetic preference alone. Track the operational and commercial signals that tell you whether the workflow deserves a wider rollout:
- Ad click-through rate: Compare creative variants within the same campaign context.
- Product-page add-to-cart rate: Check whether stronger visual context helps shoppers continue after the click.
- Return rate by SKU: Look for evidence that the image created a false expectation about color, material, fit, or scale.
- Production time saved per listing: Record preparation, generation, review, and post-production time rather than counting generation time alone.
The test needs a clear stop rule. If the images look attractive but produce accuracy failures or higher returns, reduce the synthetic styling and keep the product photograph as the primary asset. If the outputs preserve product truth and reduce production effort, expand one style group at a time instead of opening the entire catalog to an uncontrolled batch.
Start today by choosing the six SKUs, photographing or locating one accurate reference image for each, and writing the must-keep details before you generate anything. That preparation will determine more of your result than adding another adjective to the prompt.
Bulk Image Generation supports bulk visual creation and a batch editor for tasks such as background removal, resizing, and enhancement, which fits a workflow built around consistent references and review gates. Visit Bulk Image Generation to test a small product-photo batch and organize the resulting assets for your sales channels.