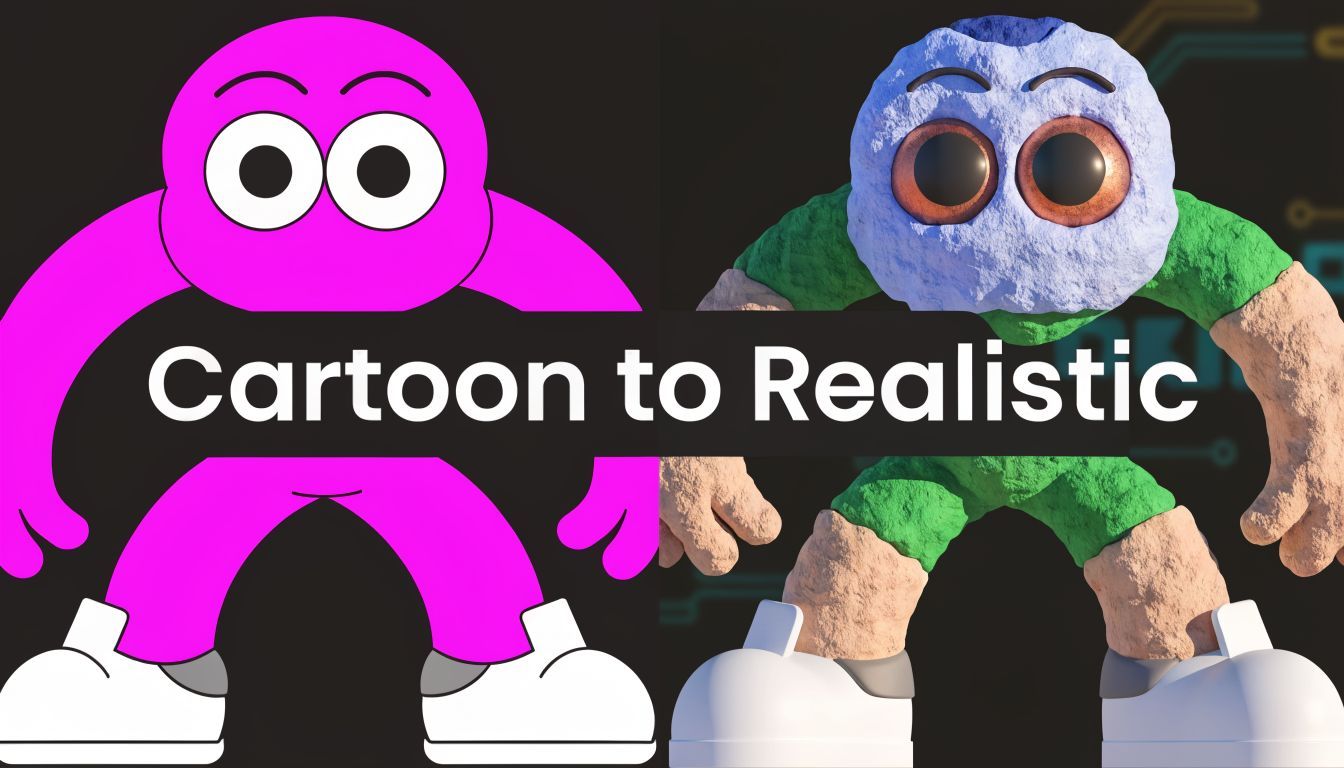
Cartoon to Realistic AI: Transform Images Instantly

Ryan Bennett • May 1, 2026
Transform any cartoon to realistic AI images with our guide. Learn Flux 1.1, write perfect prompts, and batch generate stunning visuals in seconds.
You already know the frustrating version of this job. You have a cartoon mascot, an illustrated character, or a stylized brand figure that works well on a website banner, product label, or explainer slide. Then someone asks for a realistic campaign visual, social ad creative, or a more human-looking version for a landing page, and the simple request turns into hours of trial and error.
Single-image tools can get you a nice result once. They’re much less helpful when you need a full set of consistent assets, multiple expressions, alternate crops, seasonal variants, and different formats for paid social, email, and print. That’s where cartoon to realistic ai stops being a gimmick and starts becoming production infrastructure.
The biggest shift in the last wave of image models is usability. The workflow isn’t just “upload and hope” anymore. Diffusion-based systems now handle texture, lighting, depth, and facial detail far better than older generators, and newer platforms are pushing beyond one-off conversions into repeatable batches. If your end goal is campaign-ready output at scale, that changes the tool choice.
Marketers working with mascots run into a parallel challenge when they need lifelike people rather than stylized characters. That’s why resources around ai generated models are useful to study alongside cartoon conversion workflows. The creative problem is similar. You’re asking AI to preserve identity while changing visual realism, and the best results come from treating it as a controlled production process rather than a novelty prompt.
From Sketch to Hyperrealism The AI Transformation
The request usually shows up after the cartoon asset is already approved. The mascot works on packaging, slides, and social posts. Then the campaign team needs a realistic hero image, paid ad variants, and a few vertical crops by tomorrow, all without losing the character people already recognize.
That is where simple one-off generators start wasting time. One image may look good, but the second changes the face, the third adds clothing details no one approved, and the fourth drifts so far from the original that it stops functioning as brand creative.

The reliable approach is to treat cartoon to realistic ai as a production workflow, not a novelty effect. The source character acts like a spec sheet. Head shape, expression logic, costume blocks, and color relationships need to survive while the model upgrades surface detail, lighting, anatomy cues, and material realism.
In practice, the actual bottleneck is consistency across batches. Prompt writing helps, but output management matters more once a team needs 20 usable variations instead of one lucky hit. A dedicated bulk platform solves the part that single-image tools leave unfinished. Batch generation, quick comparisons, upscaling, background cleanup, and post-processing in one place cut a lot of manual sorting.
I use the same mindset when building lifelike character sets or synthetic people for campaigns. The identity-preservation problem is similar to work covered in ai generated models. The model has to change the rendering style without dropping the visual traits that make the subject recognizable.
Where the newer workflow helps
Newer diffusion workflows are much better at translating flat design cues into believable skin, fabric, hair, and depth. The bigger improvement for working teams is operational. You can run many interpretations of the same character, review them side by side, reject weak branches fast, and keep the ones that hold brand identity under realistic lighting.
That speed changes the economics of the job. Instead of hand-correcting every attempt in separate tools, you can generate in bulk, keep the best structure, and polish only the finalists.
Practical rule: Preserve silhouette, proportions, and signature features first. Push realism in texture, lighting, and material response after that.
What this is actually good for
Cartoon to realistic ai works well for jobs that need volume, consistency, and fast revision cycles:
- Brand mascot expansion: Turn a flat spokesperson into realistic campaign visuals across multiple ad formats.
- Pitch and concept testing: Show how a character reads in cinematic, retail, or lifestyle settings before paying for a full 3D pipeline.
- Educational and publishing assets: Convert simple illustrated characters into richer scenes while keeping a familiar identity.
- Content libraries: Produce a usable set of expressions, crops, and seasonal variants from one approved source.
Illustration still does the original design work. AI handles the translation layer, especially when the target is a repeatable asset library rather than a single polished frame.
Preparing Your Cartoon for a Realistic Makeover
You can lose an hour before the model even starts. The prompt looks fine, the style reference looks fine, but the upload is a low-res PNG with a busy background and three details fighting for priority. The result usually comes back with the right vibe and the wrong character.
Preparation fixes more bad outputs than prompt tweaking.
A source image that reads clearly lets the model spend its effort on skin texture, fabric, lighting, and depth. A messy source forces it to guess anatomy, edges, and separation. In bulk runs, that guesswork gets expensive fast because the same weakness repeats across every variation. That is why I prep one strong hero input first, then send it through a bulk image generation workflow for realistic character variants instead of cleaning up twenty broken generations later.

What a strong source image looks like
The best starting file is boring in the right way. It is easy to read, easy to isolate, and hard for the model to misinterpret.
Use an input with:
- A clear silhouette: Head shape, body proportions, and pose should read at thumbnail size.
- A simple background: White, transparent, or one flat color keeps extraction clean.
- Readable facial landmarks: Eyes, mouth, nose area, and hairline should be distinct.
- One visual language: Avoid mixing sketch lines, painted shading, screenshots, and collage textures.
- Clean edges: Jagged compression artifacts often turn into random texture in realistic outputs.
If you have multiple versions of the same character, pick the file with the cleanest structure. Extra decoration helps less than clear anatomy.
What usually breaks the conversion
Ambiguity causes more failures than lack of realism.
The model struggles when the character overlaps props, the background shares the same colors, or the face is hidden by stylized linework. In production, those problems show up as drifting facial features, unstable clothing details, and inconsistent body shape across a batch. One image might look usable. Ten variations will expose the weakness.
The fix is simple. Crop to the subject. Remove dead space. Flatten or mask the background. Keep signature traits obvious. Teams that also transform selfies into headshots run into the same rule. The cleaner the separation, the less the model invents.
Clean separation beats detailed art. If the character boundary is unclear, realistic rendering usually amplifies the mistake.
A fast prep checklist
Before upload, run this pass:
- Crop around the character. Leave a little margin, but cut empty space and unrelated objects.
- Simplify the background. Transparent is ideal. One flat tone is usually good enough.
- Check resolution accurately. Upscale only if the original is too small to read. Over-sharpening creates fake detail.
- Use one hero frame. Avoid contact sheets, sprite rows, and multi-pose collages.
- Mark signature features. Glasses, ears, hair shape, clothing patterns, logos, and color blocks should stand out.
- Remove text overlays. Captions, UI elements, and watermarks often bleed into the generated image.
Good input versus bad input
| Input type | What happens in generation |
|---|---|
| Clean vector mascot on plain background | The model can focus on realistic materials, lighting, and facial structure |
| Low-res screenshot with text overlays | Noise gets interpreted as detail, and identity drifts faster across variations |
| Group illustration with overlapping figures | Features can bleed between subjects and mask selection becomes unreliable |
| Side-profile sketch with rough lines | The model fills missing facial information differently from image to image |
This step feels mechanical. It is also where scalable cartoon-to-realistic work gets easier. Clean one source well, batch from that file, and reserve manual retouching for the finalists instead of every attempt.
The Core Workflow Generating Realistic Images in Bulk
Most tutorials stop at “upload your image and write a prompt.” That’s enough for an experiment. It’s not enough for a campaign. If you need a character in multiple moods, scenes, and crops, the winning workflow is batch-first.
The basic sequence is simple. Start with one clean input, extract a usable description from it, define the production goal in natural language, then generate a full variation set rather than chasing one perfect frame at a time.

Step one starts with structure, not prompt poetry
A lot of users overcomplicate the opening prompt. In practice, the first useful move is turning the image into a plain-language description of what’s already there.
That description becomes your baseline. It should capture the essentials:
- character type
- age impression
- clothing
- signature shapes
- accessories
- emotional tone
- pose
- color identity
- any essential brand details
If you’re working with portrait-style conversions too, the same principle applies in adjacent workflows like guides that transform selfies into headshots. Good AI image direction starts with extracting what must stay consistent before you ask the system to stylize anything.
Use natural language goals for the batch
Once you have the base description, switch from “prompt engineering” to “production directing.” Instead of micromanaging every image, define the output set.
A strong bulk goal sounds like this:
Create a realistic version of this cartoon mascot for a spring retail campaign. Preserve the round ears, cheerful expression, red jacket, yellow shoes, and compact body proportions. Generate variations with studio lighting, outdoor storefront lighting, and soft lifestyle lighting. Keep the character friendly, commercial, and believable rather than uncanny. Produce a mix of close-up portraits, half-body shots, and full-body poses.
That tells the system what matters across the whole batch. It’s much more effective than writing 20 isolated prompts from scratch.
Why batch generation changes the economics
With a dedicated platform, you can create up to 100 unique visuals in under 20 seconds using natural-language goals, according to the product details for the Bulk Image Generation image generator. That’s the operational difference between making one lucky image and building an asset library.
For cartoon to realistic ai, this matters because variation is the key deliverable. You usually need:
- Pose coverage: standing, walking, pointing, seated
- Scene coverage: studio, street, office, seasonal environment
- Crop coverage: hero, square social, story format, banner
- Mood coverage: playful, premium, calm, energetic
The model doesn’t have to nail every frame. It needs to give you enough strong candidates inside one coherent run.
What works best in the generation brief
Write your batch brief like a creative director, not a prompt hacker.
Use language that controls:
| Goal area | Better instruction |
|---|---|
| Identity | Preserve signature ears, facial proportions, jacket shape, shoe color |
| Realism level | Photorealistic materials and lighting, but retain mascot proportions |
| Commercial fit | Clean composition suitable for ad creative and product marketing |
| Variation | Produce multiple environments, expressions, and framing options |
| Restraint | Avoid turning the character into a generic human model |
What not to do
Avoid these habits because they usually create drift:
- Stacking style clichés: “ultra-detailed, masterpiece, award-winning, 8k” rarely improves identity retention.
- Changing too many variables at once: new angle, new outfit, new scene, and new emotion in one instruction often breaks the character.
- Demanding narrow perfection too early: start broad, then refine the best cluster.
The strongest bulk workflow is iterative. Generate a wide first pass, shortlist the images that preserve identity, then run a second batch that narrows the lighting, pose family, or environment. That approach is faster than trying to force one exact image from a cold start.
Mastering Prompts for Photorealistic Results
Good prompts for cartoon to realistic ai don’t sound fancy. They sound specific. The model needs instructions about realism in the language of photography, materials, and anatomy, not generic praise words.
The easiest upgrade is separating your prompt into layers. First define identity. Then define environment and light. Last, define surface detail and camera feel.
Build prompts in layers
Use this order:
- Subject preservation Keep the signature traits that make the character recognizable.
- Real-world translation Describe how cartoon forms should become believable materials.
- Lighting Decide where the realism comes from. Studio softness, daylight, or cinematic contrast.
- Camera language Add lens and framing cues for a photographic look.
- Texture restraint Ask for detail where it matters, but don’t overload the prompt.
A free tool like the AI image prompt generator is useful here because it helps organize the vocabulary when you know the look you want but don’t want to build every line manually.
The prompt should tell the model what to preserve first. Realism is a treatment, not the identity.
The keywords that usually help
Focus on descriptive phrases such as:
- Lighting: soft window light, overcast daylight, golden hour, studio beauty light, cinematic rim light
- Camera feel: shallow depth of field, 85mm portrait lens, medium shot, close-up, full-body framing
- Texture: natural skin texture, detailed fabric weave, brushed denim, matte rubber, worn leather
- Mood control: clean commercial portrait, editorial realism, grounded fantasy, nostalgic film look
If your source is highly stylized, add a guardrail phrase like “retain original character proportions and silhouette.”
Prompt Templates for Photorealism
| Desired Style | Prompt Additions |
|---|---|
| Corporate headshot from cartoon avatar | realistic professional portrait, neutral studio background, soft key light, natural skin texture, tailored blazer, 85mm portrait lens, polished but believable |
| Fantasy character portrait | realistic interpretation of the original character, weathered materials, cinematic side lighting, textured skin and fabric, dramatic atmosphere, preserve iconic costume details |
| Vintage photograph look | realistic character portrait, muted film tones, soft grain, gentle contrast, period clothing details, natural facial texture, nostalgic candid framing |
| Lifestyle campaign image | realistic mascot in a commercial environment, clean composition, soft daylight, product-friendly framing, approachable expression, believable materials and shadows |
| Toy-like mascot made realistic | retain stylized proportions, realistic plastic and fabric materials, studio lighting, subtle reflections, high detail on seams and surface finish |
A better way to phrase realism
Weak prompt: “Make this cartoon realistic and high quality.”
Stronger prompt: “Convert this cartoon character into a believable photorealistic version. Preserve the rounded head shape, wide-set eyes, red bomber jacket, and compact proportions. Use soft commercial studio lighting, realistic fabric texture, natural facial detail, and clean shallow depth of field. Keep the expression friendly and brand-safe.”
That second version gives the model a map. It says what stays, what changes, and how realism should look.
Post-Production Perfecting Your AI Creations
Generation gets you options. Post-production gets you usable assets.
Many teams lose time at this juncture. They produce a strong batch, then export everything into separate apps for cleanup, cropping, face fixes, and social resizing. The speed gains vanish with that handoff.

Why the editing layer matters
Realistic conversion often introduces small issues that aren’t obvious in thumbnail view. A cheek contour may shift. An ear edge may soften. A hand may look passable until you crop tighter for paid social.
That’s why integrated tools matter more than “perfect generation.” The faster you can clean, isolate, and resize a batch, the more practical cartoon to realistic ai becomes for actual production teams.
The edits that save the most time
The best post-production stack usually includes:
- Background removal: Move a mascot from a plain test output into campaign layouts or product scenes.
- Face refinement: Correct minor asymmetry or consistency issues across selected images.
- Batch resizing: Turn one chosen set into platform-ready crops without rebuilding the asset manually.
For distribution, a tool like the bulk image resizer is especially useful because campaign teams rarely need just one format. They need square, vertical, wide, and ad-specific variants from the same approved image family.
A realistic image isn’t finished when it looks good on screen. It’s finished when it survives every crop your campaign requires.
The practical standard
If an image can’t survive these checks, it isn’t ready:
| Check | Why it matters |
|---|---|
| Tight crop on face | Exposes subtle anatomy errors |
| Transparent background version | Reveals edge quality and masking flaws |
| Vertical social crop | Tests whether composition still works in narrow formats |
| Multi-image set review | Shows whether the character still feels like the same identity |
Teams that treat post-production as part of generation move faster because they evaluate outputs by usability, not novelty.
Troubleshooting Common Conversion Pitfalls
You run a batch of 40 conversions, and half of them land in the same frustrating zone. The character is recognizable, the render is detailed, and the result still feels wrong. That usually means the model pushed realism harder than the design could support.
The failure pattern is predictable. Skin turns plastic, eyes get glassy, and signature cartoon proportions collapse into generic human features. In production, I get better results by preserving a few stylized anchors and dialing back prompt intensity. Ask for natural skin texture, realistic lighting, and photographic detail. Do not force pore-level realism onto every part of the face.
When identity starts drifting
Identity drift usually starts with vague preservation language. If the prompt says “keep the same character,” the model has too much room to improvise. Call out the features that carry recognition. Head shape, eye spacing, nose size, hair silhouette, outfit blocks, and any mascot-specific accessory.
Be selective. A prompt stuffed with ten “must preserve” clauses often performs worse than one with three or four strong anchors.
For harder scenes, consistency gets worse fast. Solo portraits see over 90% success, but fidelity can drop below 70% for group scenes or obscured faces, and batch enhancers such as face swaps can reduce necessary post-production editing time by 50%, according to Fotor’s discussion of cartoon-to-realistic consistency. The practical takeaway is straightforward. Use single-character generations to lock identity first, then expand into more complex scenes once the face and proportions are stable.
That matters even more in bulk workflows. On a dedicated generation platform, the fastest path is not regenerating the whole set every time one batch slips. Keep the strongest cluster, identify the exact failure mode, and rerun only that subset with a tighter prompt.
A practical problem-solution list
- Uncanny face: Reduce words like “ultra-detailed,” “hyperreal skin,” and “cinematic pores.” Replace them with “natural skin texture,” “realistic face,” and “clean photographic lighting.”
- Lost proportions: Re-state the silhouette in plain language, such as “large head relative to body,” “short rounded muzzle,” or “broad cartoon eyes preserved in realistic style.”
- Inconsistent batch: Sort outputs into usable and unusable groups first. Then refine the usable group in bulk instead of starting over from zero.
- Broken group scene: Generate each character alone, approve the identity, then build the multi-character composition with post-processing and alignment tools.
- Overcorrected realism: Keep one or two stylized traits on purpose. Full anatomical conversion often removes the charm that made the original character work.
One rule saves a lot of wasted credits. Fix one variable at a time.
If the face is correct but the body shape slips, adjust structure language only. If the structure is correct but the skin looks artificial, adjust texture and lighting only. Teams using bulk generation platforms move faster here because they can test prompt revisions across a controlled batch, compare failure rates side by side, and pass only the winners into post-processing. That is far more efficient than treating every image like a one-off experiment.
If a batch keeps missing in the same way, the problem is usually the prompt recipe, not the model.
Advanced Techniques and FAQs
Most users assume the hard part is realism. It usually isn’t. The hard part is perspective.
Front-facing images are the comfort zone for many models because that’s what much of the training data reinforces. Side views, overhead angles, and dramatic low shots are where character structure starts to wobble.
How to handle camera angles better
A useful rule is to soften the angle request. Don’t jump from a straight-on mascot reference to “extreme side profile from below.” Guide the model through a gradual transition.
A better approach looks like this:
- Use “three-quarter view” instead of “side view”
- Use “slightly low angle” instead of “heroic worm’s-eye shot”
- Keep one stable anchor, such as the facial expression or costume front
- Avoid complex backgrounds while testing perspective
Most tools are trained on front-facing images, which leads to distortions in other views, while Flux 1.1 shows 20 to 30% better fidelity on gradual angles and responds better to prompts like “three-quarter view” than vague side-view language, as noted in Neolemon’s camera angle guide.
Common advanced questions
How do you keep a mascot consistent across many scenes?
Lock the essential features first. Ears, facial spacing, outfit blocks, and body proportions should stay stable while lighting and setting change around them.
Should you use long prompts for every image?
Not usually. A concise identity brief plus scene-specific adjustments tends to hold up better than a bloated prompt.
Can extreme poses work?
Yes, but they’re best introduced after you’ve already established a stable realistic version of the character in simpler views.
The best results come from treating realism as a controlled expansion of a known character, not a total redesign.
If you need to turn one approved cartoon character into a full campaign library without manually prompting every image, Bulk Image Generation is built for that kind of workload. You can describe the outcome you want in natural language, generate large sets of realistic variations quickly, and handle cleanup tasks like resizing, background removal, and face refinement in the same workflow. For marketers, small teams, and agencies, that’s the difference between experimenting with AI and shipping assets on schedule.
