
Stable Diffusion Prompt Guide for Better AI Art

Aarav Mehta • July 6, 2025
Our Stable Diffusion prompt guide offers expert strategies to craft prompts that generate stunning AI art. Learn to master prompts for incredible results.
Staring at a blank prompt box can feel a bit paralyzing. I've been there. The secret to getting great images out of Stable Diffusion isn't about writing impossibly complex prompts from the start. It’s about shifting from a vague idea to a clear, specific instruction the AI can actually work with. Let's walk through how to build your first meaningful prompt and get a result that builds your confidence.
Crafting Your First Meaningful Prompt
The journey into AI art really begins the moment you write that first prompt. It's easy to get intimidated by the super-detailed examples you see online, but the foundation of a high-quality image is surprisingly simple. Think of it like giving directions—the clearer you are, the better the final destination.
To get started, let's focus on three core building blocks:
- Subject: What’s the main thing you want to see? Be direct. A good starting point is something like, "A dragon."
- Medium: What form should the image take? Is it a "photograph," an "oil painting," or maybe a "3D render"? This tells the AI how to draw it.
- Style: What’s the artistic vibe? Words like "fantasy art," "steampunk," or "vaporwave" immediately set the mood and overall aesthetic.
Just combining these three elements creates a solid base. For instance, "A dragon, oil painting, fantasy art" is a much stronger instruction for the AI than simply "dragon." Right away, you've told it what to create, what it should look like, and the artistic style to use.
Adding Detail for Better Results
Once you've got the basics down, the real magic happens when you start layering in descriptive words. Specificity is your best friend. In my experience, vague prompts are a fast track to generic or unpredictable results. It’s not just a feeling; the data backs it up. Shifting from a simple prompt like "castle" to "castle, blue sky background, wide-angle view" can slash output randomness by over 60%. This means the AI’s creation will be much closer to what you actually had in mind.
To see how this works in practice, let's look at how a simple prompt can evolve with a few extra details.
Prompt Evolution From Basic to Detailed
| Prompt Level | Example Prompt | Expected Outcome |
|---|---|---|
| Basic Idea | A robot | Extremely generic. Could be anything from a toy to a factory arm. High variability. |
| With Medium | A photograph of a robot | Better. Now we know it should look realistic, but the robot's design and setting are still a mystery. |
| With Detail | A photograph of a friendly robot waving | Good. The AI now has a specific action and mood to work with. |
| Fully Detailed | A photograph of a friendly robot waving, standing in a sunny city park, cinematic lighting, 8k | Great! This gives the AI a clear subject, action, mood, setting, and technical details to produce a high-quality, specific image. |
As you can see, each layer removes ambiguity and guides the AI toward a more refined picture. If you're ever stuck for ideas, browsing a list of the 25 best prompt ideas for an AI image generator is a fantastic way to find some solid starting points.
The most common mistake I see beginners make is under-specifying their vision. Don't be shy about adding details about the lighting, color, or composition, even on your first try. A simple addition like "dramatic lighting" can completely transform an image from flat to fantastic.
For a broader overview of the core principles, there are great resources that explain how to write effective prompts for AI text-to-image generation that apply across different models. The main goal is to get into the habit of thinking in descriptive layers. Once you master that, you're well on your way to mastering prompt creation.
When you’re just starting out, it’s tempting to throw a simple subject and style at Stable Diffusion and see what sticks. But to get real creative precision—especially when you need hundreds of consistent images—you have to think differently.
A truly powerful prompt isn’t a single idea; it's a carefully layered set of instructions. You need to act like the director of your own digital photoshoot. Every element, from the model to the mood lighting, shapes the final shot. Getting this layered approach right is what closes the gap between the vision in your head and the image on your screen.
Think of a great prompt as having a few core components. Each one is a lever you can pull to fine-tune the output with incredible control. It's the artful combination of these levers that separates generic, forgettable images from polished, professional work.
Subject and Action
This is your foundation. Don't just define what you want to see—tell the AI what it's doing. The more specific you are, the less guesswork the model has to do.
- A bit vague:
A dog - Much better:
An old golden retriever sleeping on a sunlit porch swing
See the difference? The second prompt instantly gives the AI more context, emotion, and narrative to work with. Specificity is your best friend for preventing the model from making its own creative choices that might not align with your goal.
Defining the Style
Style dictates the entire look and feel. This is where you can instruct the AI to mimic specific art movements, famous artists, or even technical qualities of a photograph. This component is incredibly powerful, as modern models have become much better at understanding subtle stylistic requests.
The Stable Diffusion 3.5 model, for instance, really raised the bar for prompt adherence, allowing it to follow complex instructions with impressive accuracy. To get the most out of models like this, you need to blend your subject, style, and other elements into a structured description. You can get a feel for what works by checking out some of the top Stable Diffusion prompts on blaze.today.
My favorite trick? Mix and match styles. Something like,
Cyberpunk warrior, art deco stylecan create fascinating, unexpected results by blending futuristic themes with classic design principles. Don't be afraid to experiment.
Composition and Framing
How do you want the scene to be shot? This is where you take control of the virtual camera. Using terms from photography and cinematography gives you direct influence over how the final image is framed.
- Dramatic Wide-Angle Shot: Captures a sweeping, expansive view.
- Intimate Close-Up: Focuses tightly on a subject's details or expression.
- Dutch Angle: Tilts the camera for a sense of unease or energy.
- Symmetrical Framing: Creates a feeling of balance and order.
Using these terms tells Stable Diffusion not just what to create, but how to present it. A wide-angle shot of a mountain feels majestic and grand; a close-up feels personal and intimate.
Controlling Light and Color
Finally, the secret sauce for setting the mood: light and color. These descriptors can completely transform the emotional tone of an image. Instead of leaving it up to the AI, be explicit about the atmosphere you're after.
Here are a few ideas to get you started:
- Lighting:
Cinematic lighting,soft morning light,dramatic backlighting,neon glow - Color:
Vibrant color palette,monochromatic black and white,muted earthy tones,pastel colors
When you thoughtfully combine these four elements—subject, style, composition, and lighting—your prompts become robust recipes for success. This structured approach is the backbone of any effective workflow and is what turns you from a passive user into an active creator.
Advanced Techniques for Creative Control
Alright, you've got the hang of writing basic prompts. Now it's time for the fun part—the techniques that give you real artistic control. This is where you graduate from simply describing a scene to directing the AI with precision, much like an art director on a photoshoot.
These advanced methods are what separate the good images from the truly exceptional ones. One of the most powerful tools in your kit? The negative prompt.
Mastering Negative Prompts
Think of negative prompts as your "do not include" list. It’s like sculpting by chipping away stone; you're telling Stable Diffusion exactly what to get rid of, which is often far easier than trying to describe a flawless image from scratch.
They're absolutely essential for cleaning up those all-too-common AI mistakes. You know the ones—distorted hands, weird extra limbs, or a background that’s just a chaotic mess. Without a negative prompt, you can get a nearly perfect image ruined by one tiny, glaring flaw.
Here’s how I use them in my own workflows:
- Remove Artifacts: I always include terms like
poorly drawn hands, extra limbs, deformed, disfigured, blurryto avoid those classic AI blunders. - Control Quality: Adding
low quality, worst quality, jpeg artifactshelps push the model to generate a much cleaner, more professional-looking output. - Simplify Composition: If the scene is too busy, I'll use
cluttered, messy, too many objectsto get a more focused and intentional composition.
By being explicit about what you don't want, you give the AI much clearer guardrails. This one step can dramatically increase your success rate, especially if you're generating images for professional use, like product mockups. If you're creating visuals for digital products, our tutorial on how to create stunning digital product images using AI generators has some great, targeted advice on this.
A well-crafted negative prompt is often the unspoken hero behind a flawless AI-generated image. I spend almost as much time refining my negative prompts as I do the positive ones, especially for portrait work.
Fine-Tuning with Prompt Weighting
Another go-to technique for me is prompt weighting. This is how you tell Stable Diffusion which parts of your prompt are the most important. It gives you incredible control over the final image by letting you dial the influence of certain words up or down.
The syntax can look a little different depending on the interface you're using, but a common method uses parentheses and numbers. For example, (red car:1.3) tells the AI to make "red car" 30% more important than everything else. On the flip side, [blue sky:0.8] would decrease its influence.
Let's say you want an image of a "knight in a fantasy forest," but the AI keeps generating these overwhelming, dense forests that swallow your subject. You could tweak the prompt to: (knight in shining armor:1.4), fantasy forest. This simple change tells the model, "Hey, the knight is the star of the show," ensuring your subject stands out.
This is where the real artistry comes in. Getting comfortable with these techniques elevates your work from simple generations to carefully curated visuals. Plus, understanding how to craft prompts for Stable Diffusion can provide useful insights into prompt engineering for other AI models, as many of the core ideas translate across different platforms.
Building a Workflow for Image Generation at Scale
Making one stunning AI image feels great. But the real game-changer for businesses and big creative projects is doing it at scale. When you suddenly need hundreds of consistent visuals for an e-commerce store, a social media blitz, or a new set of game assets, a single good prompt just won’t cut it. You need a system.
This is the point where you have to graduate from one-off creations to a structured, repeatable workflow. The core of this system is what I call a "master prompt template." It's a way to lock in your brand's look and feel while giving you the freedom to create endless variations.
Designing a Master Prompt Template
Think of your prompt as a recipe. The core ingredients—your signature style, lighting, and composition—are non-negotiable. They ensure every image looks like it belongs to the same family. The variable ingredients are the specific products, subjects, or details you need to swap out.
Let's say you're creating product shots for a new line of handmade ceramic mugs. Your master template would nail down all the consistent elements first.
- Core Prompt:
Professional product photograph of [MUG_DESIGN], sitting on a rustic wooden table, soft morning light, cozy coffee shop background, photorealistic, 8k. - Variable Slot:
[MUG_DESIGN]
With this structure in place, generating a full catalog is simple. You just plug in your variables: "a speckled blue ceramic mug," "an earthy green mug with a large handle," or "a minimalist white porcelain mug." Every single photo will share that same professional aesthetic, saving you from hours of tedious, manual prompting and editing.
The Impact of an Efficient Workflow
This isn't just about saving a little time; it's a massive productivity multiplier. In fields like advertising and game design, teams have reported that using well-crafted prompt templates can speed up concept design by as much as 40%.
It’s this kind of efficiency that has drawn over 10 million users to models like Stable Diffusion, with most of them actively trying to get better at writing prompts. For a deeper dive into these numbers, you can find additional details on prompt effectiveness at datasimplifier.com.
A solid template is the foundation of any serious image generation project. It essentially turns your creative vision into a repeatable process, letting you make small, targeted changes that produce predictable and consistent results.
This templated approach is the backbone of any stable diffusion prompt guide that's serious about bulk creation. It lets you A/B test different styles, automate image batches with scripts, and build a reliable pipeline for producing high-quality visuals at a speed that used to be pure science fiction.
Getting Your Prompts Just Right: A Guide to Testing and Refining
Let's be real: you almost never nail the perfect prompt on your first attempt. Getting from a "pretty good" image to a "wow, that's exactly what I wanted" image is all about methodical refinement. This isn't just frustrating guesswork; it's a structured process that turns good prompts into great ones—a must-have skill for any serious bulk generation project.
The first rule of thumb? Isolate your variables. If an image feels off, don't just scrap the whole prompt and start over. That won't teach you anything. Instead, tweak just one element. Change a single keyword, adjust a weight, or swap out the lighting description. Then, regenerate and see what happens. This is how you learn what actually works.
How to Get Reproducible Results
To test variables properly, you need a stable baseline. This is where the seed parameter becomes your best friend. The seed is basically the starting point for the random noise that Stable Diffusion uses to create an image. If you use the same seed with the same prompt, you'll get the exact same image, every single time.
Why is this so important? Locking in a seed lets you:
- Make a tiny change to your prompt (like swapping
cinematic lightingforsoft morning light). - Run the generation again with the same seed.
- Directly compare the new image to the old one, knowing with certainty that your one change caused the difference.
This back-and-forth process is the heart of effective prompt engineering. It gives you clear, direct feedback on how each word nudges the final output. Without a fixed seed, you're just rolling the dice every time you hit "generate."
Troubleshooting Common Headaches
Even with a systematic approach, you'll hit roadblocks. The AI might completely miss your intent, introduce weird artifacts, or fail to capture the style you were after.
The trick is to stop seeing failed generations as mistakes and start treating them as data. A weird output is just the AI showing you exactly how it interpreted your instructions, giving you a roadmap for how to clarify them.
For instance, if you ask for a "watercolor painting" but get a photorealistic image, it's a dead giveaway that other words in your prompt—like "hyperdetailed" or "8k"—are overpowering your style keyword. The fix? Use prompt weighting to crank up the influence of (watercolor painting:1.4) and get the AI back on track.
This simple workflow below really hammers home the refinement cycle: define your goal, pick your keywords, and then tweak the style until it's perfect.
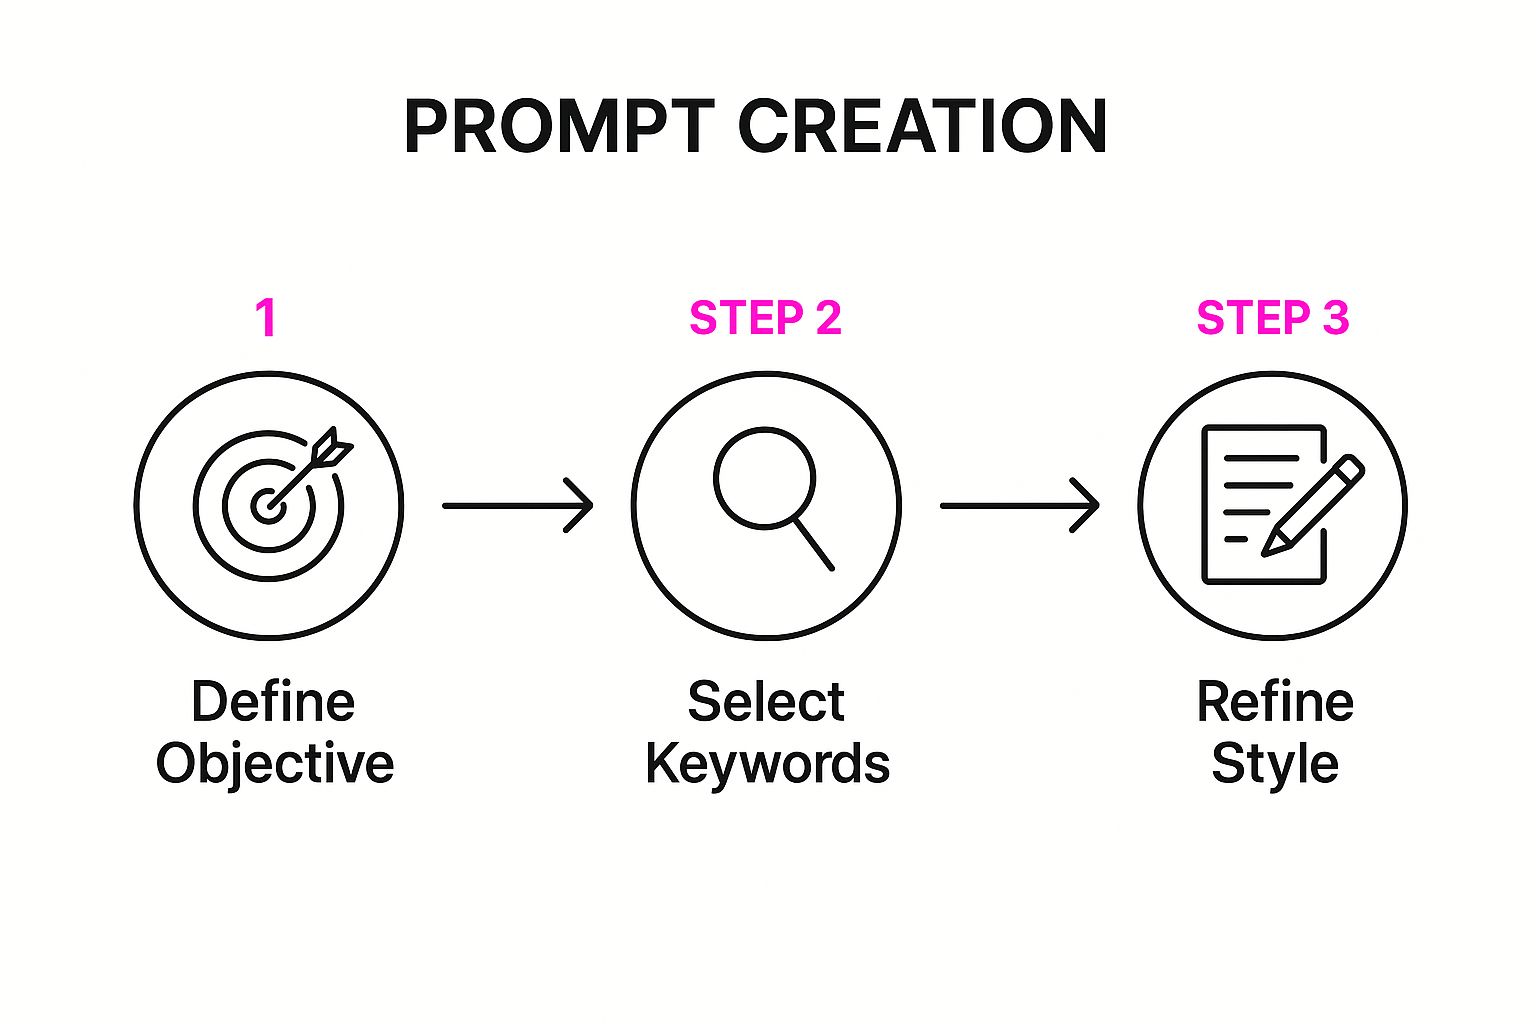
The diagram makes it clear that prompt creation isn't a one-and-done deal; it's a continuous loop of improvement. The more you refine your prompts, the more you'll build an intuition for how the AI "thinks." And for those moments when you're stuck in a creative rut, a free AI image prompt generator can be a great way to find new ideas and keyword combos to experiment with. This systematic approach is a true cornerstone of any good stable diffusion prompt guide.
Got Questions About Your Prompts?
Once you start getting your hands dirty with Stable Diffusion, you're bound to run into a few head-scratchers. It's just part of the process. The good news is that most of the common frustrations have pretty straightforward fixes.
Think of this as your personal troubleshooting guide. I've gathered the questions I hear most often from people trying to build a solid, repeatable workflow. Getting these concepts down is a huge leap forward.
How Long Should a Stable Diffusion Prompt Be?
There’s no magic number here, but I've found the sweet spot for a detailed, high-quality image is usually between 20 and 60 words. Honestly, what matters more than word count is clarity.
A short, punchy prompt almost always beats a long, rambling one. Something like ultra-realistic photograph of a red apple on a wooden table, morning light gives the AI clear, distinct concepts to work with.
One crucial tip: Stable Diffusion pays more attention to the beginning of your prompt. Always load the front with your most important ideas—the main subject and the core style. If you cram too many conflicting ideas into one prompt, you'll just confuse the AI and get a muddled, diluted image.
Why Is Stable Diffusion Ignoring Parts of My Prompt?
Ah, the classic frustration. This usually comes down to one of three things. First, you might have conflicting terms. Asking for bright noon sun and dark moody lighting in the same prompt is like telling a driver to turn left and right at the same time. The AI just can't resolve it.
Second, the model might not have enough training data for what you're asking. If your concept is super niche or obscure, the AI may not have a clue what to create and will default to something it knows better.
Finally, some keywords are simply "stronger" than others. A powerful, dominant term like photorealistic can easily overpower a more subtle one like soft watercolor.
Here's the fix: Use prompt weighting. Most interfaces let you boost a word's influence. By using syntax like
(word:1.3), you can make a term 30% more important. It's like telling the AI, "Hey, this part really matters!"
What Are Negative Prompts and Why Should I Care?
Negative prompts are your "do not draw" list, and they are an absolute game-changer for getting clean, professional results. Instead of cluttering your main prompt with things you don't want, you put them here.
It's an incredibly powerful way to filter out common AI weirdness and artifacts. For example, if you're generating portraits, you can add these to your negative prompt to sidestep a lot of headaches:
ugly, tiling, poorly drawn handspoorly drawn face, out of frameextra limbs, disfigured, deformedblurry, low contrast, jpeg artifacts
By explicitly telling the AI what to avoid, you steer it toward a much more polished and coherent image.
Can I Recreate the Exact Same Image Again?
Yes, you absolutely can. This is essential for fine-tuning your work. To do it, you need to lock in two things: the prompt and the seed number.
The seed is just a number that kicks off the random generation process. If you use the exact same prompt, the same settings (like sampler and CFG scale), and the exact same seed number, Stable Diffusion will produce the identical image every single time.
This is my go-to method for refining an image. Find a seed that gives you a great composition, lock it in, and then you can experiment with small prompt tweaks to see exactly how they change the final result.
Ready to stop wrestling with individual prompts and start creating at scale? Bulk Image Generation uses advanced AI to turn your simple goals into hundreds of high-quality, consistent images in seconds. Generate your first batch of images for free and see how easy professional image creation can be.