
Batch Edit Photos Like a Pro: Expert Tips That Actually Work

Aarav Mehta • June 18, 2025
Transform your photo workflow with proven batch edit photos techniques. Learn from professionals who process thousands of images efficiently and effectively.
Why Smart Photographers Swear by Batch Editing
The secret of photographers who produce a massive amount of work isn't magic; it’s a smarter workflow. Professionals don't get ahead by tweaking every single photo one by one. Picture a wedding photographer facing a mountain of 3,000 images from one event, or an e-commerce studio needing to process a whole new product line. Their success hinges on batch editing photos. This is more than a time-saver; it’s a mental shift from correcting individual files to crafting a cohesive collection that tells one strong story.
The Shift From Individual Photos to Cohesive Collections
When you start thinking in batches, you stop seeing each photo as a separate chore. Instead, you see the entire gallery as a single, unified project. For a wedding album, this means the bright, airy vibe of the ceremony flows seamlessly into the moodier, dimly lit reception, creating a consistent narrative. This approach is what gives professional work its polished, uniform feel. It’s no surprise that pro-level tools are built around this idea, with interfaces designed for handling huge volumes of images. Just look at the workspace in Adobe Photoshop, which is built for exactly this kind of project-based work.
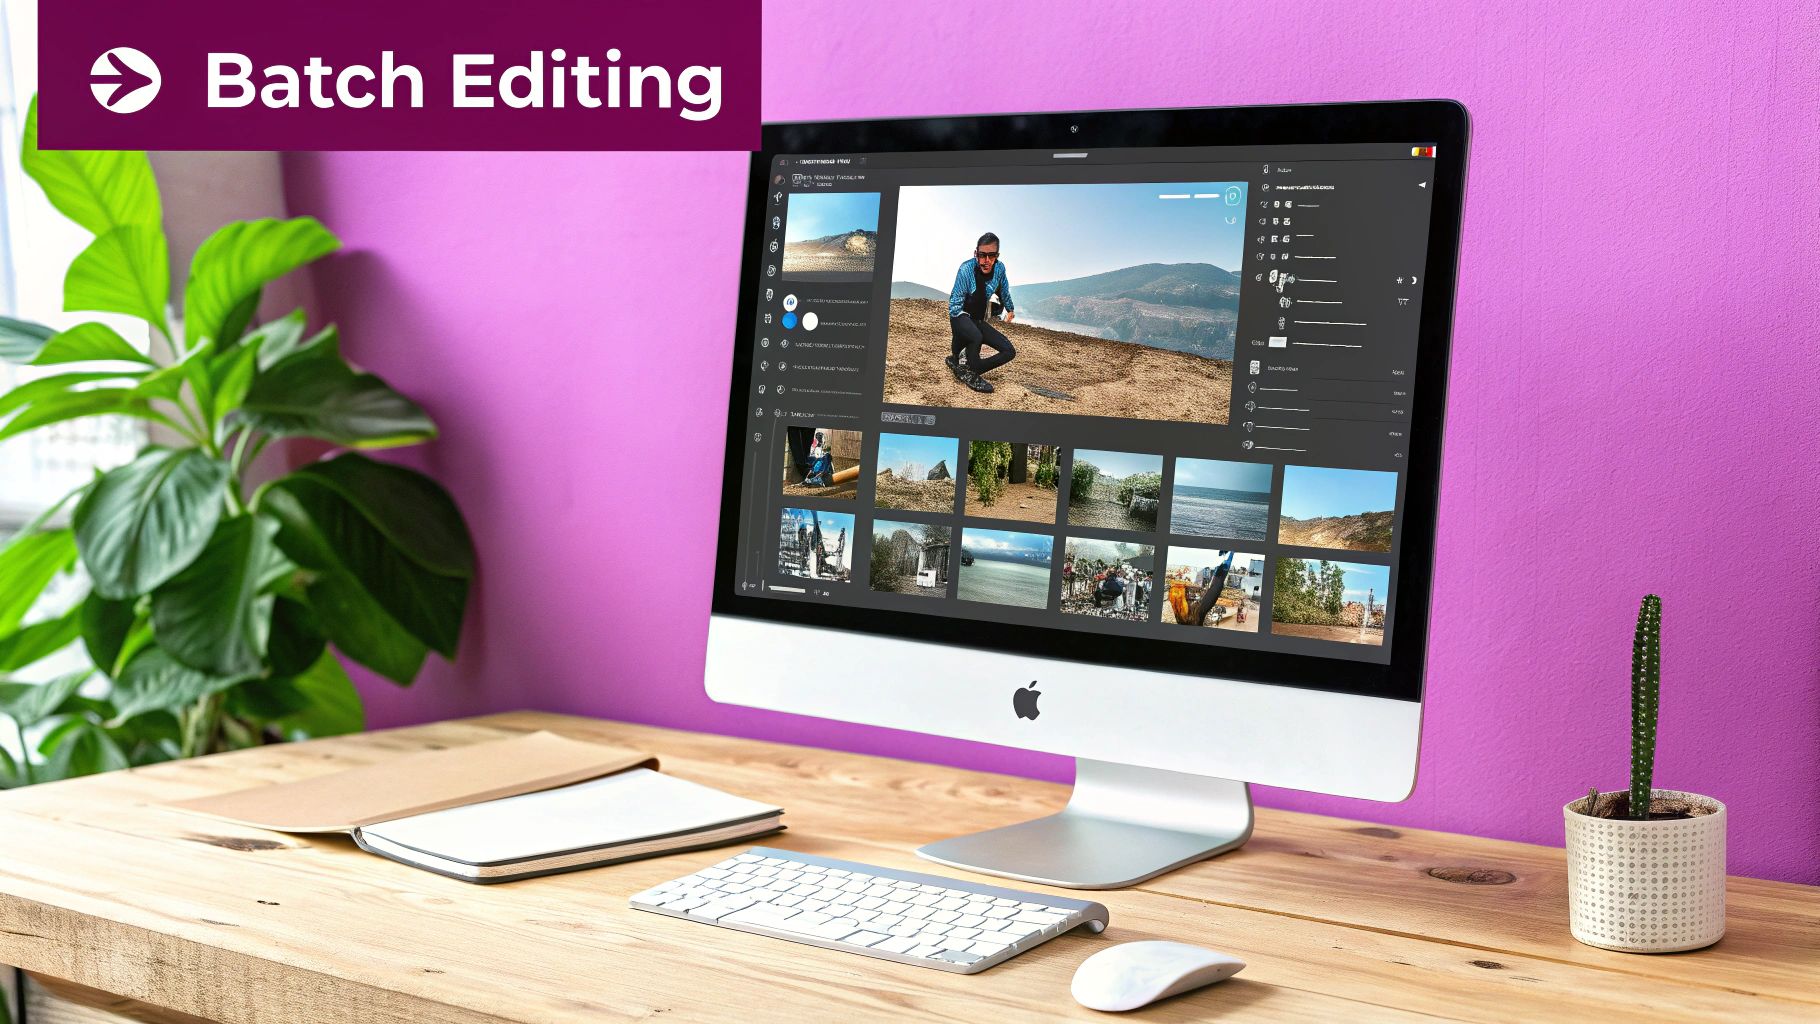
As you can see, high-end software is structured around managing entire collections, not just making one-off tweaks.
More Than Just a Timesaver: The Economic Impact
The time you get back is huge, often turning days of monotonous clicking into a few hours of focused creativity. But the real benefit is economic. Those saved hours directly impact your bottom line, giving you the capacity to take on more clients and grow your business. This move toward efficiency is happening across the entire industry. The global photo editing software market is expected to hit USD 3.29 billion by 2032, which shows that photographers and businesses are actively investing in tools to work smarter. Being able to batch edit is no longer a perk—it’s a necessary skill to stay in the game. You can explore the market growth analysis for more details.
Identifying the Right Tasks for Batching
The key is knowing what to automate and what needs your personal attention. The goal is to let the software handle the repetitive, foundational edits in bulk, which frees you up for the creative work that truly matters. You can even apply this thinking to your creative process; if you need some fresh ideas, check out our guide on generating AI image prompts to get inspired.
Here are the perfect tasks for batch processing:
- Initial Adjustments: Correcting exposure, white balance, and contrast across all photos taken in similar lighting conditions.
- Aesthetic Consistency: Applying your signature color grade or a favorite preset to an entire photo session.
- Output Preparation: Resizing images for web, applying watermarks, and converting file types for the final delivery.
- Basic Enhancements: Applying a standard level of sharpening or noise reduction across the board.
On the other hand, things like detailed blemish removal, tricky object removal, or perfecting the composition of a "hero" shot should always be done individually. This hybrid approach—automating the repetitive and personalizing the crucial—is the mark of an efficient professional.
Finding Your Perfect Batch Editing Software Match
Choosing the right software to batch edit photos isn't about finding the "best" tool, but the best tool for you. The powerful editor a portrait photographer relies on to standardize skin tones across an entire session is often overkill for a travel blogger who just needs to apply a consistent filter and resize hundreds of vacation shots. Picking a tool that doesn't match your actual workflow can end up costing you more time, not less.
Evaluating Tools for Your Workflow
The first thing to do is take an honest look at your most common, repetitive editing tasks. Are you a photographer shooting in RAW format? Then a robust system like Adobe Lightroom is probably already on your radar. It’s built from the ground up to manage and process large photo galleries, not just individual images. Its entire interface, with the classic filmstrip view, is designed to help you make a set of images feel like a unified collection.
For many professionals, this kind of workflow is essential for maintaining consistency. You can quickly jump between photos, copy-paste adjustments, and sync changes across dozens of images in a few clicks. That’s a huge time-saver when you’re trying to deliver a cohesive look for a wedding album or a product line.
To give you a better idea of what’s out there, let’s compare a few popular options that cater to different needs and workflows.
Popular Batch Editing Tools Comparison
| Software | Batch Features | Pricing Model | Best For | Learning Curve |
|---|---|---|---|---|
| Adobe Lightroom | Preset syncing, copy/paste settings, metadata tagging, batch export | Subscription | Professional photographers needing RAW processing and library management. | Moderate |
| Adobe Photoshop | Actions (recordable steps), Scripts, Batch processing dialog | Subscription | Creatives needing complex, multi-step edits and graphic design integration. | High |
| Luminar Neo | AI-powered presets, bulk AI sky replacement & enhancements | One-time Purchase / Subscription | Hobbyists and pros looking for fast, AI-driven enhancements. | Low-to-Moderate |
| Bulk Image Generation | AI-driven background removal, face swaps, bulk image creation | Subscription / Credit Packs | E-commerce, marketing, and social media content creation at scale. | Low |
As you can see, the "best" tool really depends on whether your priority is deep manual control, AI-assisted speed, or highly specialized functions like generating hundreds of product shots from scratch.
The Rise of AI and Automation
Beyond manually syncing presets, automation is now at the heart of modern editing. Let's be honest, nobody enjoys spending hours on tedious, repetitive tasks. This is where AI is truly changing the game for creatives and marketers.
This shift toward automation isn't just a niche trick; it's a mainstream strategy for saving serious time. The global photo editing software market is expected to grow from USD 6.36 billion in 2025 to a massive USD 13.34 billion by 2034, and smarter, AI-driven tools are a huge reason why. You can explore the full market projection for more details. While features like Adobe Photoshop's Actions have let users record and replay edits for years, today's AI integrations make these processes far more intelligent and accessible to everyone.
Beyond the Usual Suspects
However, a big, all-in-one suite like Adobe's isn't always the answer. Sometimes, a more specialized tool is much faster for a specific, recurring job. If your main bottleneck is creating a high volume of marketing visuals, a platform that combines content creation with editing might be a much better fit. Many creators now need to generate and refine visuals in the same place, which makes a powerful AI-powered image generator an absolute game-changer.
When comparing your options, look past the brand names and focus on what will actually speed up your day-to-day work. Ask yourself:
- Processing Power: Can the software handle my typical batch size without slowing my computer to a crawl?
- Specialized Features: Does it excel at the one task I do most often, like background removal or applying a specific style?
- Workflow Integration: Does it play nicely with the other tools I already use, or will it create more steps?
- Simplicity vs. Power: Is the interface straightforward, or is it packed with complex features I'll never touch?
The best software feels like an extension of your hands, taking care of the grunt work so you can stay focused on the creative finish.
Building a Workspace That Works Under Pressure
Even the most advanced editing software can't save you from a messy digital workspace. When you need to batch edit photos on a tight deadline, disorganization is your biggest obstacle. It brings your entire workflow to a screeching halt. Just imagine a wedding photographer getting an email from a client six months later, asking for a specific reception photo. Without a solid system, that simple request turns into a stressful, time-consuming hunt.
Taming the File Naming Beast
A logical file naming system is your first line of defense against chaos. It's time to say goodbye to those generic, camera-generated names like "IMG_1234.jpg" that tell you absolutely nothing. Instead, use a format that tells a story just by looking at it. I’ve found a system like YYYYMMDD_ClientName_ShootType_Sequence# (for example, 20241026_SmithCorp_Headshots_001) works wonders.
This simple change makes every file instantly searchable and keeps them sorted chronologically. This one habit will save you from countless frantic searches later, making it incredibly easy to find a specific group of images you need to process together.
A Scalable Folder Structure
Your folder structure needs to be able to grow with your business. A simple and effective method I've stuck with for years is creating a main folder for the current year, then subfolders for each client or project. Inside each of those, I create three more folders that map out my workflow:
- 01_RAWs: This is the vault for your original, untouched camera files. Think of it as a digital negative you never touch directly.
- 02_Selects: After culling, your "keeper" images move here. This is your staging area before you start the actual editing.
- 03_Finals: The home for your fully edited and exported images, perfectly polished and ready for client delivery.
This tiered system keeps everything clear and scales beautifully, whether you're working on a small portrait session or a massive commercial project. To manage this all visually, a digital asset manager like Adobe Bridge becomes your command center.

Being able to see previews, metadata, and your folder hierarchy all in one window is what makes selecting images for a large batch edit so efficient. This level of organization is what allows professionals to handle thousands of assets without breaking a sweat. It ensures your valuable time is spent on creative work, not on frustrating digital housekeeping. This solid foundation is truly the unsung hero of efficient photo batch editing.
Mastering Background Removal at Scale
I remember the days of meticulously tracing product outlines in Photoshop, a process that felt like it took forever, especially with a backlog of hundreds of shots. For anyone running an e-commerce studio, that bottleneck is all too familiar. Thankfully, smart batch processing has completely changed the game, turning that tedious chore into a quick, almost automatic step when you need to batch edit photos.
Prepping Your Images for a Perfect Cutout
The secret to getting great results from any automated tool is giving it good material to work with. AI thrives on consistency. Before you upload an entire folder of images, take a few minutes to quickly sort them. Grouping photos with similar, clean backgrounds and good contrast between the subject and its surroundings is a game-changer. A product shot against a plain white wall is the perfect example.
When you feed the AI images with similar lighting and subject distance, it can apply its logic uniformly and produce much cleaner cutouts. From my experience, you’ll get the best results when your images have:
- Clear, well-defined subject edges.
- Minimal shadows connecting the subject to the background.
- A background that doesn’t share colors with the subject.
Modern tools like Remove.bg have made this process incredibly simple, often just requiring a drag-and-drop. The tool instantly identifies the subject and provides a transparent background, showing just how much time automation can save compared to hours of manual work.
Navigating Common AI Hurdles
Of course, not every photo is taken in a perfect studio setting. Busy backgrounds, tricky lighting, or complex subjects like fine hair can sometimes confuse AI tools. The trick isn't to give up on automation but to be smarter about it. I always segment my photos, separating the easy shots from the more challenging ones.
For subjects with fuzzy edges, like a person's hair or a wool sweater, I look for a tool that offers edge refinement controls. This simple feature creates a softer, more natural transition instead of a harsh, cut-out line. If I have low-contrast images where the subject seems to blend into the background, a quick pre-edit to boost the contrast gives the AI the clear data it needs to find the edges properly.
The Professional's Workflow: Combining Speed with Quality Control
A true professional doesn’t just click a button and hope for the best. The real workflow combines powerful automation with smart human oversight. Before I commit to processing a large batch of 500 images, I always run a small test of 5-10 varied shots to make sure the settings are just right.
After the full batch is done, a quick scan of the thumbnails is a non-negotiable final step. This allows me to spot any glaring errors, like a missing part of a product or a chunk of leftover background. This final check is what ensures you’re getting both incredible speed and professional-grade quality.
Professional Face Swapping and Portrait Enhancement
Alright, you’ve nailed the clean backgrounds, but now it’s time for the main event: the face. When you need to batch edit photos that feature people, you’re trying to balance two critical things. On one hand, you have the incredible speed of automation; on the other, you have the detailed quality control that protects your professional reputation.
The Fine Line Between Automation and Artistry
The secret is knowing which images can be safely processed together. Think about a portrait studio that handles a high volume of corporate headshots. They often shoot in perfectly controlled lighting, which makes it easy to apply standard enhancements—like a bit of skin smoothing or teeth whitening—across hundreds of photos without a problem.
Now, contrast that with a wedding photographer. They’re dealing with completely different lighting from one moment to the next, from a bright outdoor ceremony to a dimly lit reception hall. Applying one rigid preset across that entire gallery would create bizarre skin tones and destroy the event's authentic feel. This is where you have to group images by lighting scenario before applying any batch edits.
Creating Presets That Adapt
Most experienced photographers don't just use one "magic" preset. They build an entire library of presets made for specific situations, like "Golden Hour Portraits," "Indoor Fluorescent," or "Dance Floor Flash." While this is a smart manual strategy, modern AI tools can take this a step further.
Instead of just applying fixed values, AI-driven enhancers analyze each face individually, automatically adjusting for different skin types and lighting. This helps preserve a natural appearance while keeping the look consistent—a huge benefit for event photographers.
You can see how effective this is when dealing with large volumes. A social media manager, for example, might have to resize and add a filter to hundreds of influencer photos for a campaign. Batch editing tools make this job fast and uniform. This drive for speed is a key reason the photo editing software market is expected to reach USD 1818.90 million by 2034, with a 4.70% CAGR. You can discover more about these market trends.
Quality Control Is Non-Negotiable
No matter how good your tools are, a final quality check is absolutely essential. This is especially true for more complex edits like face swapping, where one small error can produce some pretty embarrassing or hilarious results. Before you deliver any project, get into the habit of doing a quick "flick-through."
- Scan all the thumbnails for any obvious mistakes.
- Spot-check a handful of images at 100% zoom to see the details.
- Look for the tell-tale signs of over-processing, like "plastic" looking skin or eyes that glow a little too much.
This final five-minute review is what separates an amateur from a professional. It’s the last step that catches mistakes, upholds your standards, and ensures every client gets a gallery that looks both polished and authentic.
Smart Resizing Without Compromising Quality
Resizing an image seems simple enough, but when you're staring at a gallery of a hundred photos, it suddenly becomes a strategic challenge. The goal isn't just to shrink files; it's to maintain every crucial detail, especially when those images are destined for the web. Imagine you're a social media manager about to launch a campaign. You need different sizes for Instagram, Facebook, and your blog, and every single one has to look flawless. This is where smart resizing becomes a game-changer when you batch edit photos.
Handling the Chaos of Mixed Orientations and Sizes
Now, let’s get real about that folder of a hundred photos. It’s likely a jumble of vertical shots from your phone and horizontal captures from a DSLR. Trying to crop and resize each one manually is a surefire way to lose an entire afternoon. This is exactly where smart resizing tools prove their worth by automatically managing mixed orientations through aspect ratio preservation.
Instead of crudely forcing a photo into a box and stretching it into a distorted mess, the tool intelligently resizes it to fit within your set dimensions. For instance, if you set a maximum width of 1080 pixels, every photo, whether tall or wide, will be resized to that width while keeping its original proportions perfectly intact. No more stretched faces or squished logos.
Balancing Speed, Size, and Platform Needs
The next hurdle is striking that perfect balance between file size and visual quality. Web developers are constantly working on this for faster page loads without serving up pixelated images. While aggressive compression can drastically reduce file sizes, you need to have control over the process. This is also where selecting the right output format is critical. A JPEG is usually great for photos, whereas a PNG is essential if you need a transparent background.
The real power move is generating multiple versions from a single upload. You can process your high-resolution source files just once to get everything you need:
- A 1080x1080px square ready for your Instagram grid.
- A 1200x630px landscape image for Facebook link previews.
- A smaller, highly optimized WebP version for your website’s image gallery.
For anyone who prepares images for the web regularly, a dedicated bulk image resizer can save countless hours. To help you get started, here’s a quick guide to the ideal settings for various platforms.
Optimal Image Formats and Sizes for Different Platforms
Recommended dimensions, formats, and quality settings for various social media and web platforms
| Platform | Recommended Size | Format | Quality Setting | File Size Target |
|---|---|---|---|---|
| Instagram Post (Square) | 1080 x 1080 px | JPEG / WebP | 85-90% | < 500 KB |
| Facebook Link Preview | 1200 x 630 px | JPEG / WebP | 80-85% | < 300 KB |
| Website Hero Image | 1920 x 1080 px | WebP | 80-90% | < 1 MB |
| E-commerce Product | 2048 x 2048 px | WebP / JPEG | 90% | < 700 KB |
| LinkedIn Post Image | 1200 x 627 px | PNG / JPEG | 85-90% | < 5 MB |
As you can see, there's no one-size-fits-all solution. Each platform has its own sweet spot for dimensions and file size, and optimizing for them ensures your images load quickly and look their best.
Ultimately, smart resizing is so much more than a simple "Save As" command. It’s about creating an automated pipeline that takes your raw photos and turns them into a complete package of perfectly optimized, platform-specific assets. When you master this, you ensure your visuals look consistently professional everywhere they appear, from a client’s website to your own social feed. You move from just making pictures smaller to strategically preparing your entire visual library for delivery with maximum impact and efficiency.
Your Next Steps to Batch Editing Success
Knowing the theory behind how to batch edit photos is one thing, but actually changing your day-to-day habits is a completely different ballgame. The secret is to avoid trying to do everything at once. Think of this as a gradual process, based on real advice from photographers who have already made this shift. Trying to completely rebuild your workflow overnight is a recipe for frustration.
How to Actually Start Without Getting Overwhelmed
Begin by identifying your single biggest, most time-consuming task. Is it resizing hundreds of images for a web gallery? Or applying the same basic color grade to an entire shoot? Pick one and focus on mastering it with a batch process. For example, you could dedicate one week to using only batch functions for exporting your web-ready JPEGs. Once that feels natural, you can move on to the next task.
- If you're just starting out: Get comfortable with bulk exports and applying a single, go-to preset across a set of photos that were all shot in consistent lighting.
- For more experienced editors: Start grouping images by their lighting conditions. Batch-correcting white balance and exposure for these groups is a massive time-saver, especially for event and wedding photography.
Seeing the Proof and Building Trust
You need to see for yourself that this is actually working. Try this: time how long it takes you to process 50 photos using your old, one-by-one method. Then, try it again with a new batching technique. If you see a 20% time reduction, that’s a huge win. It might feel a bit awkward at first, but you're just building new muscle memory.
The most common hurdle I see is learning to trust automation. It’s completely normal to want to maintain control over every single pixel. My advice is to start with photos that don't have a lot riding on them, like your personal vacation pictures or less critical client work. When you see high-quality results on these lower-stakes projects, it becomes much easier to trust and adopt these methods for your most important jobs.
Ready to put this plan into action? Bulk Image Generation provides the AI tools and an intuitive batch editor designed to implement these strategies today, helping you slash your post-production time.