
How to Use Midjourney A Practical Guide

Aarav Mehta • July 3, 2025
Learn how to use Midjourney with this practical guide. From Discord setup to advanced prompts, start creating stunning AI art with tips from experienced users.
So, you want to dive into Midjourney. The whole process is actually pretty simple once you get the hang of it. You’ll start by joining the Midjourney Discord server, hopping into a “newbie” channel, and typing the /imagine command. After that, you just add a description of whatever image is in your head.
The AI bot then whips up four initial concepts for you. From there, you can pick one to refine, make it bigger (upscale it), or ask for different versions. It’s all a text-to-image workflow that happens right inside a chat window.
Getting Started on the Midjourney Discord Server
Your creative journey kicks off on Discord, which is the heart and soul of the Midjourney community. Unlike a lot of apps that have their own websites or desktop programs, Midjourney’s core experience is built directly into Discord. This was a deliberate move to create a collaborative space where everyone can share what they’re making and learn from each other’s prompts in real-time.
This Discord-first approach is so central to the experience that you absolutely need a registered Discord account to even begin. In fact, research shows that around 50% of users interact with Midjourney only through this platform. It’s just that integral. If you want a deeper dive into its unique setup, this comprehensive guide to AI artwork creation is a great resource.
Finding Your Creative Space
Once you’ve accepted the invitation to the official Midjourney server, you’ll see a list of channels on the left. The first thing you need to do is find a channel for newcomers. They’re usually easy to spot, with names like #newbies-1, #newbies-23, or #general-5.
These channels are your starting point—your creative playground. They are public, so you'll see your prompts and the images they generate pop up right alongside everyone else's. It can feel a little chaotic at first, but honestly, it’s an incredible way to get inspired and see what kind of prompts other people are using.
Your First 25 Images Are Free
Midjourney hooks you up with a free trial that gives you about 25 free image generations, which they refer to as "queries." A query isn't just your first /imagine prompt; it also includes any time you ask to upscale an image or create variations. This trial is your chance to mess around and see what’s possible without any commitment.
Pro Tip: Those 25 free queries are perfect for getting a feel for prompting. Don't stress about making a masterpiece on your first go. Use this time to learn how the AI interprets different words, styles, and commands.
Before you go all-in on Midjourney, it helps to understand where it fits in the wider world of AI tools. For a solid overview, I’d suggest exploring the various AI applications in digital marketing to see how this kind of tech is shaking things up everywhere. It helps frame Midjourney not just as a fun toy, but as a seriously powerful asset for all kinds of creative and professional work.
Essential Midjourney Commands for Beginners
To get you started, here are some of the most important commands you'll be using constantly. Think of this as your cheat sheet for creating, managing, and perfecting your images right from the get-go.
| Command | Function | Example Usage |
|---|---|---|
/imagine | The main command to generate an image from a text prompt. | /imagine a photorealistic cat wearing a tiny astronaut helmet |
/settings | Opens a menu to adjust your default settings like AI version, quality, and style. | /settings |
/info | Shows your account information, including how many free queries you have left. | /info |
/subscribe | Generates a personal link to the Midjourney subscription page. | /subscribe |
/help | Provides quick links and basic information about the Midjourney bot. | /help |
Learning these basic commands will make your first steps into Midjourney much smoother. You'll be surprised at how quickly you pick them up and start focusing on the creative side of things.
Crafting Prompts That Bring Your Ideas to Life
Here’s the secret to getting incredible results from Midjourney: it's not about memorizing a bunch of obscure commands. The real magic happens in how you write your prompts. This is where you translate the vision in your head into language the AI can actually work with. Think of a good prompt as a detailed blueprint for your final image.
The first big leap you'll make is moving beyond a simple /imagine command with just a one-word subject. The gap between a generic, forgettable output and a stunning visual is all in the details you provide. You need to act like a film director setting up a shot, guiding the AI by defining not just the what, but also the how, where, and when.
Just look at the difference here:
- Simple Prompt:
a dog - Detailed Prompt:
photo of a golden retriever puppy playing in a lush green field, soft morning light, shallow depth of field, joyful expression, hyperrealistic
The first prompt gives you, well, a dog. It could be anything. The second one gives you a specific moment, a tangible emotion, and a clear aesthetic. By adding that rich context, you strip away the ambiguity and gain real control over the final image.
Core Elements of a Powerful Prompt
To consistently generate images you’re proud of, you need to get comfortable layering several key components into your prompts. Each element is like a lever you can pull to fine-tune the AI’s interpretation.
A really strong prompt structure will usually include:
- Subject: Get specific. Don't just say
a car; saya vintage 1967 Ford Mustang. Clearly define who or what the image is about. - Medium: What should the final image feel like? Is it a
photograph, anoil painting, a3D render, awatercolor sketch, or maybepixel art? - Environment: Ground your subject in a location. Is it
in a neon-lit cyberpunk cityoron a serene, misty mountain peak? - Lighting: This is your mood-setter. Words like
soft morning light,dramatic studio lighting,cinematic rim lighting, orgolden hourmake a huge difference. - Composition: How is the shot framed? Guide the virtual camera with terms like
close-up shot,wide-angle view, orsymmetrical portrait.
By thoughtfully combining these elements, you stop being a passive user and become an active creator. You're no longer just rolling the dice; you're stacking the deck to get exactly what you want.
From Idea to Polished Prompt
Getting the hang of this takes a bit of practice, but certain tools can definitely speed up the learning curve. If you’re ever stuck for ideas or just need help organizing your thoughts, playing around with a free AI image prompt generator is a great way to see how different elements click together.
If you’re doing a lot of work within the Discord ecosystem, getting your text inputs right is crucial. While your main focus is on the Midjourney prompt itself, understanding how to structure other commands, which can be simplified with tools like a Discord post generator, helps keep your entire workflow smooth.
Ultimately, your goal is to build an intuitive sense of how different words influence the AI. Experiment constantly. Add details, then take them away. See how changing sunny day to overcast day transforms the entire mood of an image. This constant cycle of tweaking and regenerating is the fastest path to mastering prompt engineering.
Once you’ve started getting the hang of writing detailed prompts, you're ready to really level up your Midjourney skills by mastering parameters.
Parameters are just simple commands you tack onto the end of your prompt. They're your way of giving the AI very specific, technical instructions. Think of it this way: your text prompt is the creative brief, but the parameters are the director's notes on how the scene should actually be shot.
These little commands give you a whole new layer of control over the final image. You can dictate everything from the dimensions to the artistic intensity. Honestly, this is the secret to moving from just generating interesting images to creating exactly what you need, whether it's for a social media post, a blog header, or a piece of concept art. It’s as simple as adding a short suffix, like --ar 16:9, to your prompt.
The image below gives you a great visual for how you can tweak these core settings to get the output you're aiming for.
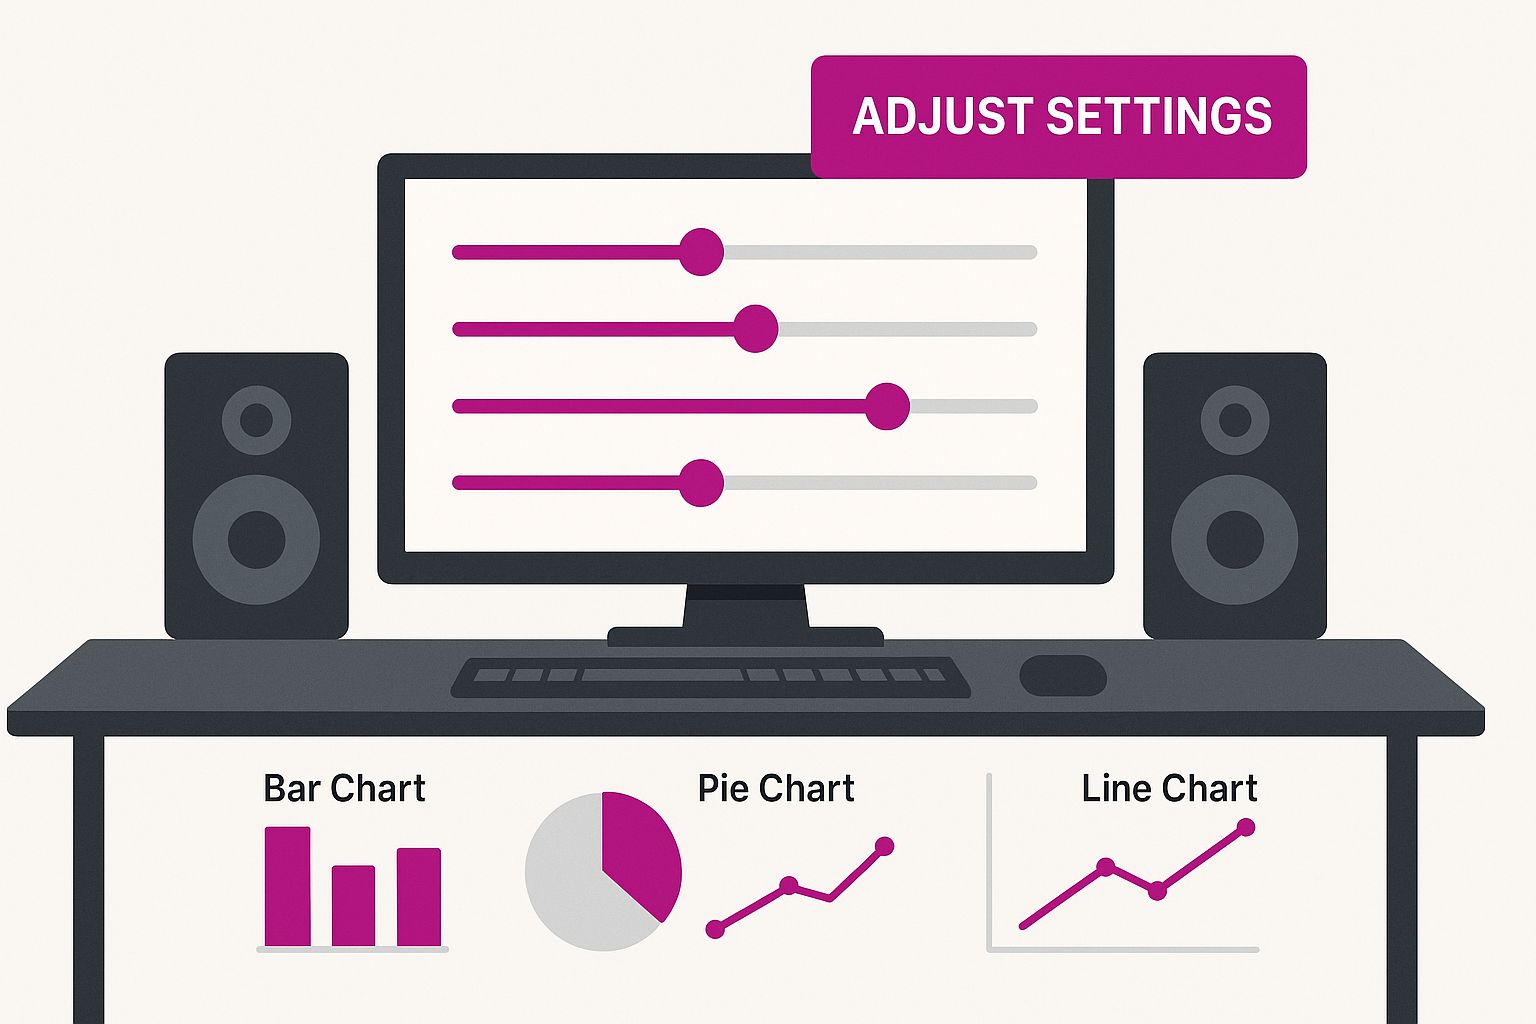
As you can see, it's like having a set of digital sliders to directly influence the AI's creative process, turning your abstract ideas into something tangible.
Controlling the Canvas with Aspect Ratio
One of the most practical and frequently used parameters is Aspect Ratio (--ar). Out of the box, Midjourney defaults to square images (--ar 1:1). That’s fine for Instagram, but pretty limiting for most other uses. This is where the --ar parameter becomes your best friend.
- Need a cinematic banner for your website? Try
--ar 16:9or even a super-wide--ar 21:9. - Creating a pin for Pinterest or content for a mobile story?
--ar 2:3is the perfect vertical format. - Designing something for print, like a poster? A standard ratio like
--ar 4:5works beautifully.
So, if you were making a blog header, your prompt might look something like this:
cinematic shot of a lone hiker on a mountain ridge at sunrise, misty valley below, vibrant orange and purple sky --ar 16:9
That one tiny addition completely transforms the output from a simple square into a wide, scenic view that fits perfectly as a web banner.
Defining Artistic Style with Stylize and Chaos
Beyond just the shape of your image, you can heavily influence its artistic feel. The Stylize (--s) parameter tells Midjourney how strongly it should apply its own baked-in aesthetic. The values go from 0 to 1000, with 100 being the default.
A lower value (like --s 50) forces the AI to stick very closely to your prompt, producing a more literal image. Cranking it up to a higher value (like --s 750) gives the AI more creative license, often resulting in highly artistic, detailed, and sometimes wonderfully abstract compositions.
For a real-world scenario, imagine creating a logo. You'd likely use a low stylize value to keep the design clean and faithful to your core idea. But if you're generating abstract background art, you might crank the stylize value way up to see what unexpected and beautiful results you can get.
Then you have the Chaos (--c) parameter, which is all about variety. Its values range from 0 to 100, and it controls how different the four images in your initial grid will be. A high chaos value is fantastic for brainstorming when you aren't quite sure what you want—you'll get four wildly different takes on your prompt. A low chaos value (or leaving it at the default of 0) will generate four variations that are much more similar and consistent.
Here's a quick cheat sheet for some of the most useful parameters you'll encounter.
Key Midjourney Parameter Functions
| Parameter | What It Controls | Common Values & Effects |
|---|---|---|
Aspect Ratio (--ar) | The width-to-height ratio of the final image. | 1:1 (Default Square), 16:9 (Widescreen/Banner), 2:3 (Vertical/Portrait) |
Stylize (--s) | How artistic and interpretive the AI gets. | 0-1000 (Default 100). Low values are literal; high values are very artistic. |
Chaos (--c) | The variety and randomness of the initial image grid. | 0-100 (Default 0). Higher values produce more diverse and unexpected results. |
No (--no) | Excludes specific objects or concepts. | Example: --no people tries to remove people from the scene. |
Tile (--tile) | Creates seamless, repeating patterns. | Useful for textures, wallpapers, and fabric designs. |
Understanding these parameters is what separates casual users from those who can truly direct the AI to produce professional-grade work.
Essential Workflow Commands
After Midjourney generates your first grid of four images, your work is just getting started. You’ll see a set of "U" and "V" buttons underneath.
The "U" buttons (Upscale) take one of the four images you like and render it at a higher resolution, adding much finer detail. The "V" buttons (Vary) create four new variations based on the style and composition of the image you selected.
For even more precision, you should absolutely enable Remix Mode in your settings (just type /settings and click the button). With Remix Mode on, clicking a "V" button will pop up your original prompt, allowing you to edit it before generating the new variations. This is a game-changer. For example, you could change a red car to a blue car and keep the rest of the composition, lighting, and style exactly the same. Mastering these tools is fundamental to an efficient, professional workflow.
When your free trial wraps up, you’ll need a subscription to keep the creative juices flowing. Picking the right plan can feel like a big decision, but it really just boils down to how you see yourself using Midjourney. The main things that set the plans apart are "Fast" GPU time, access to "Relax Mode," and whether you can use your images commercially.
This is a crossroads every new user hits pretty quickly. Midjourney is incredibly good at showing its value—a whopping 21.5% of people who try it end up paying for a subscription. And about 80% of those who upgrade do it within the first week. It’s a testament to how addictive the platform can be once you see what it’s capable of. You can dive deeper into the Midjourney user statistics to see the full picture.
Finding the Best Fit for You
To make the right call, just think honestly about your workflow. Each plan is built for a different kind of creator, from someone just messing around to a professional churning out visuals daily.
-
For the Casual Hobbyist: The Basic Plan is the perfect entry point. You get a monthly allowance of "Fast" GPU time, which is good for about 200 generations. If you're just exploring, making art for personal projects, or still getting the hang of prompting, this is all you need.
-
For the Small Business Owner or Freelancer: The Standard Plan is the sweet spot for most people. It gives you more Fast GPU time, but the real game-changer is "Relax Mode." This lets you generate an unlimited number of images at a slower speed after your fast hours run out, so you never hit a hard wall. It’s ideal for building out a portfolio of marketing assets or client mockups without stress.
-
For the Power User or Agency: The Pro Plan is designed for serious, high-volume work. You get a ton of Fast GPU time and, critically, "Stealth Mode." This feature keeps your generations private and out of the public Midjourney gallery, which is non-negotiable for confidential client projects.
My Two Cents: The biggest leap in value is from the Basic to the Standard plan. Why? Unlimited Relax Mode. If you think you'll be creating more than a few images a day, the Standard plan is the only sustainable option for uninterrupted creativity.
How to Subscribe and Manage Your Plan
Getting subscribed is dead simple. Just head into any Discord channel with the Midjourney Bot and type /subscribe.
The bot will generate a unique, private link that takes you straight to your personal subscription page. No fuss.
From there, you can pick your plan and pop in your payment info. This same page is your central hub for managing everything—you can check how much GPU time you have left, upgrade or downgrade your plan, or cancel anytime. It puts you in complete control of your account.
If you've gotten the hang of writing basic text prompts, you're ready to move into some truly powerful techniques. This is where you graduate from simply making images to actually directing the AI, giving you a level of control that separates the pros from the casual users.
Let's start with one of the most powerful (and surprisingly underused) features: the Image Prompt. Instead of just describing what you want with words, you can upload your own images to serve as a direct visual guide. Midjourney then cleverly blends the concepts from your image with your text prompt, creating a unique hybrid.
Imagine you're on a marketing team. You could upload your company's logo as an image prompt and pair it with a text prompt like futuristic circuit board, neon blue and silver, detailed microchips. The AI would then generate a whole set of branded visuals that weave your logo's colors and shapes into this new, high-tech aesthetic. It’s a brilliant shortcut for creating campaign assets that feel both fresh and on-brand.
Gaining Surgical Control with Multi-Prompting
Sometimes, a single sentence just doesn't cut it. You need to tell Midjourney, "Hey, this part is really important, and this other part is just a detail." That's exactly what Multi-Prompting is for. Using a simple double colon (::), you can break your idea into distinct parts and even assign them different levels of importance.
Let's say you want a "space dog." A standard prompt might give you a dog floating in a spacesuit, or maybe a dog-shaped nebula. But what if you specifically want the clear shape of a dog, just with a cosmic texture?
A multi-prompt is the perfect tool here: a golden retriever:: space nebula texture::2.
Here's how the AI reads that command:
a golden retrieveris the core subject.space nebula textureis the stylistic element you want to apply.- The
::2at the end gives the "space nebula texture" twice the weight of the retriever.
This forces the AI to heavily prioritize the texture while making sure it still wraps around the distinct form of a golden retriever. It’s an incredible way to fine-tune the final output.
This technique fundamentally changes how you think about prompting. Instead of one long sentence, you’re providing a list of ingredients and telling the AI precisely how to mix them.
Rapid Ideation with Permutation Prompts
For anyone who needs to generate lots of variations, the Permutation Prompt is an absolute game-changer. It’s built for brainstorming and testing different ideas in bulk. By using curly braces {} with commas to separate your options, you can kick off multiple jobs with a single command.
Say you're designing a character but can't decide on the artistic style. Instead of running four different prompts one by one, you could use a single permutation:
a fantasy warrior, {oil painting, watercolor sketch, 3D render, comic book art} style
Midjourney will automatically fire up four separate jobs, one for each style you listed. This is a massive time-saver for testing things like color palettes, outfits, or camera angles without the tedious work of typing and submitting every single variation. To see how these concepts are applied in more advanced tools, you can check out a dedicated AI art generator that often builds on these very principles.
Frequently Asked Midjourney Questions
As you start getting the hang of creating images, you'll inevitably bump into some real-world questions. It's one thing to learn the commands, but it’s another to master the workflow for actual projects. Let’s tackle some of the most common things people ask.
Can I Use My Midjourney Images Commercially?
Yes, but there’s a catch: you need a paid subscription. Every paid plan—whether it's Basic, Standard, Pro, or Mega—comes with general commercial terms. This means you’re free to use the images you create for your business, freelance projects, or anything else that makes you money.
If you’re still on the free trial, however, your images fall under a Creative Commons Noncommercial license (CC BY-NC 4.0). In plain English, you cannot use them for any commercial purpose at all. To use your creations for business, you absolutely have to upgrade to at least the Basic plan.
How Do I Find My Old Midjourney Creations?
The single best way is through your personal web gallery on the Midjourney website. Just log in with the same Discord account you use for generating images, and you’ll find a beautifully organized history of every single image you’ve ever made.
Honestly, this gallery is a lifesaver. It’s searchable and lets you filter by prompt keywords, which is way more efficient than trying to scroll back through a month's worth of Discord chatter. You can even group images into collections for specific projects and download high-res versions straight from the site.
Key Takeaway: Your web gallery is your personal, organized archive. Make it your first stop for finding past work. It saves an incredible amount of time and frustration.
What Happens When I Run Out of Fast GPU Hours?
Running out of your monthly "Fast" GPU hours doesn't bring your creativity to a halt. If you're on a Standard, Pro, or Mega plan, you can just switch over to Relax Mode.
In Relax Mode, your generations are placed in a queue and processed as GPUs become available. It’s definitely slower than Fast Mode, but the trade-off is that it’s completely unlimited and doesn’t cost you anything extra. This is perfect for when you're just experimenting or working on projects that aren't time-sensitive. Of course, if you need images right away, you can always buy more Fast hours.
If you're looking for some inspiration on what to create with those hours, check out our guide on the 25 best prompt ideas for an AI image generator.
Ready to stop prompting one image at a time? With Bulk Image Generation, you can generate up to 100 professional-quality visuals in under 20 seconds. Describe your goal, and let our AI handle the rest. Accelerate your design workflow today.