
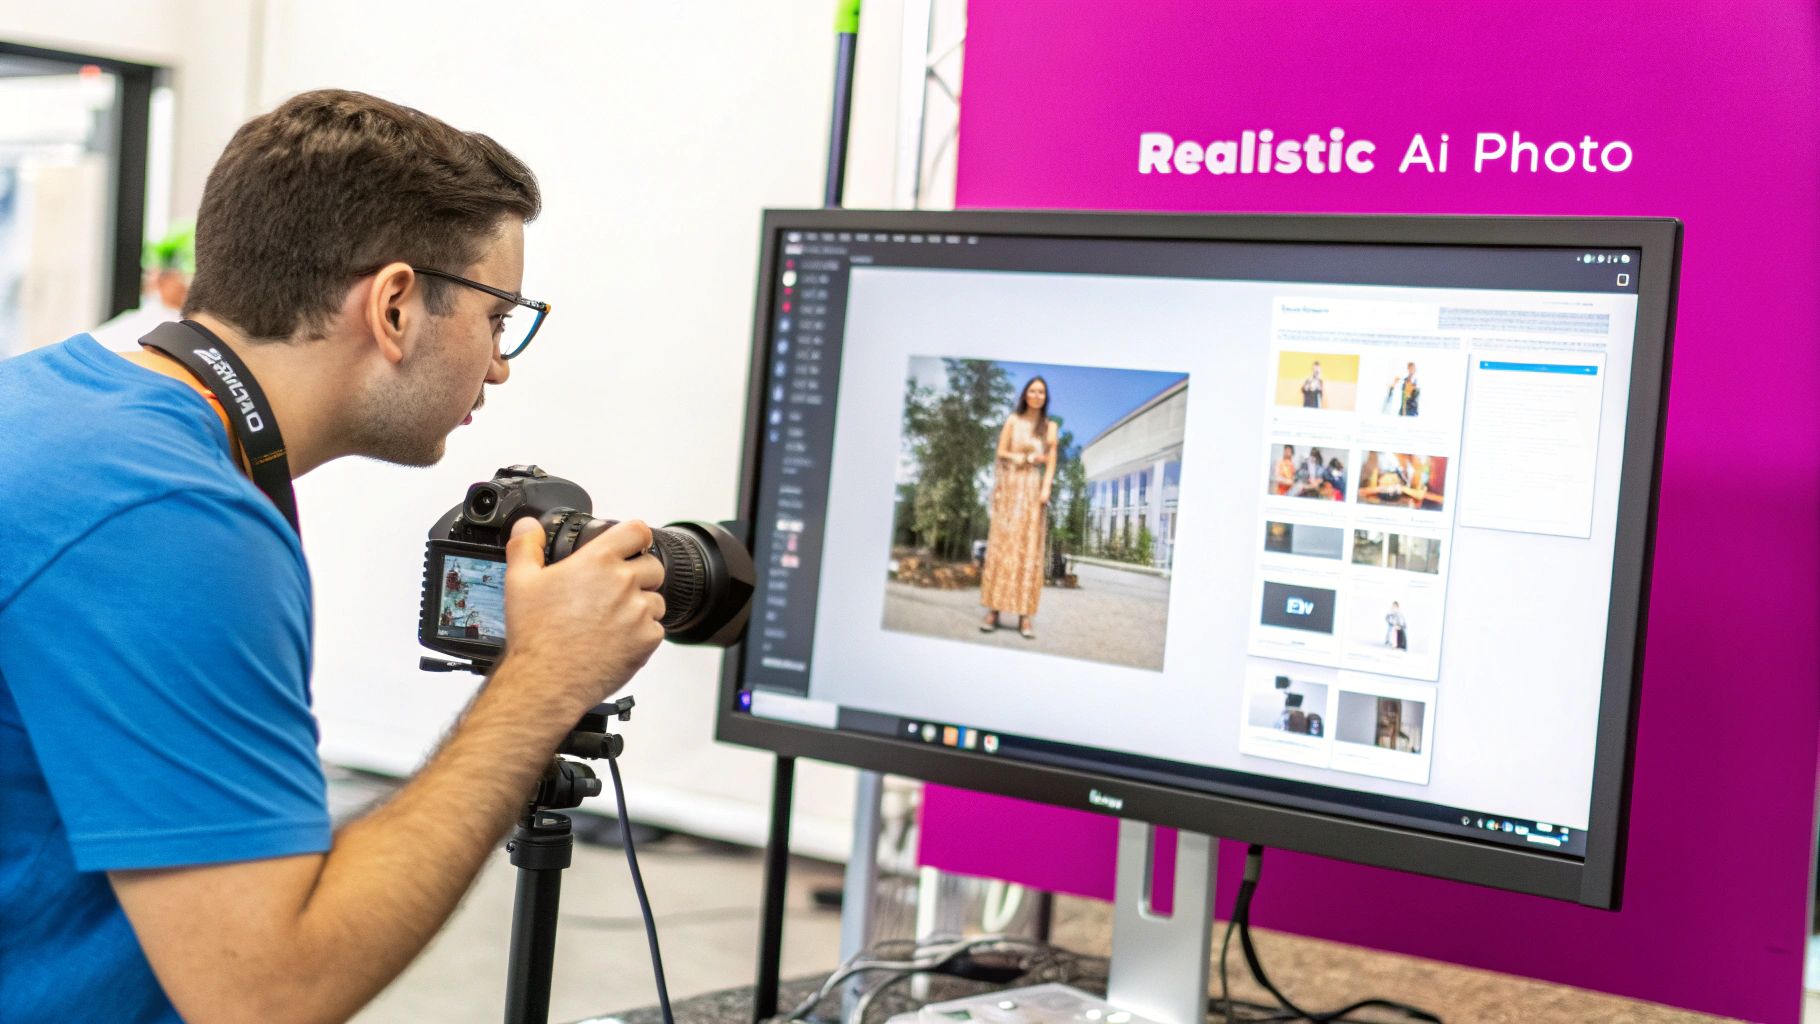
Creating a Realistic AI Photo That Wows

Aarav Mehta • September 27, 2025
Learn how to create a realistic AI photo with our guide. We cover advanced prompts, style settings, and post-processing to get photorealistic results.
The secret to a truly realistic AI photo isn't about complex commands. It’s about a simple change in perspective: you need to think less like a programmer and more like a photographer.
It's not just what you tell the AI to create, but how you instruct it to "capture" the image through a virtual camera lens. This mindset shift is what gives you artistic control and unlocks genuinely lifelike results.
Thinking Like a Photographer to Get Lifelike Results
The best AI images aren't born from a magical algorithm; they're grounded in the timeless principles of photography. Before you even type a single word, take a moment. Picture the scene as if you were on location, setting up a real photoshoot.
This small step is what separates a flat, obviously digital picture from a photo that feels authentic and pulls the viewer in. To get there, it helps to understand and use powerful visual storytelling techniques, just as a professional photographer would. It’s all about the details that build the final shot’s mood and realism.
Directing Your Virtual Photoshoot
Don’t just give the AI a subject, like "a woman in a cafe." Start directing the scene.
Ask yourself: Where is the light coming from? Is it the harsh, flat fluorescent light of a diner, or the soft, warm glow from a window during golden hour? These specifics completely change the final image.
Try to guide the AI with these core photographic elements:
- Lighting: Get specific about the light source and its quality. Using terms like "soft window light," "dramatic side lighting," or "backlit by the morning sun" provides clear, actionable instructions.
- Composition: Tell the AI's virtual camera where to be. Phrases like "rule of thirds composition," "leading lines," or "symmetrical framing" will help structure the scene like a pro.
- Depth of Field: Create a sense of space by telling the AI what to focus on. Adding "shallow depth of field" or "bokeh background" immediately makes an image look like it was shot with a real camera lens, pulling focus right to your subject.
Pro Tip: Your prompt isn't just a description; it's a director's brief for a virtual photographer. The more specific you are about light, composition, and camera settings, the more believable your final image will be.
Specifying Your Camera and Lens
A professional photographer is deliberate about their gear, and you should be too. Mentioning camera and lens settings in your prompt gives the AI a precise blueprint for the look you're after.
For instance, a prompt that includes "shot on a 35mm lens, f/1.8" will generate a wildly different image than one that says "telephoto lens, f/8."
The first setup gives you that classic portrait look with a soft, blurry background. The second keeps everything in sharp focus, which is perfect for sprawling landscapes. This level of detail is especially important for more specialized work, which we cover more in our guide to https://bulkimagegeneration.com/blog/en/tutorials/ai-product-photography.
When you start adding these technical terms, you're essentially speaking the AI's native language. You’re guiding it to replicate the subtle nuances of real-world photography to produce a stunning, believable AI photo.
Crafting Prompts for Flawless Photorealism
When it comes to creating realistic AI photos, your prompt is everything. It's the single most important factor. To get results that look real, you have to move beyond simple phrases like "a man smiling." True photorealism happens when you start layering in specific, concrete details that the AI can grab onto.
Think of yourself as a director, not just an operator. A basic prompt gives the AI its subject, but the advanced details—the camera settings, the texture of the fabric, the specific lighting—are what make the final image believable. You're providing the brushstrokes, not just the canvas.
This is more important than ever. The AI image generator market is exploding, hitting USD 418.5 million in 2024 and on track to reach a staggering USD 2.63 billion by 2035, according to a recent market analysis from MetaTech Insights. This growth is all about the models getting better at understanding—and executing—incredibly specific instructions.
Layering Photographic and Sensory Details
The real trick is to start thinking like a photographer. When you feed the AI the kind of language a photographer would use on a professional shoot, you give it tangible parameters to build from. This is how you escape that generic, overly-polished "AI look."
Try incorporating these elements into your next prompt:
- Camera and Lens Specifics: Don't just ask for a photo. Ask for a "close-up portrait, shot on a Canon 5D Mark IV with an 85mm f/1.8 lens." This simple addition tells the AI about focal length and aperture, which immediately creates a much more natural depth of field.
- Lighting Descriptors: "Daytime" is too vague. Get specific. Is it an "overcast day with soft, diffused light"? Or maybe "the warm glow of the late afternoon golden hour"? You could even request "dramatic Rembrandt lighting coming from a single key light" to create a specific mood.
- Material Textures: Details you can almost feel make a huge difference. Instead of "a sweater," describe it as a "thick, coarse wool sweater" or a "soft, pilled cashmere cardigan." This works for surfaces, too. Try something like a "polished marble countertop with subtle grey veining."
If you're finding it tough to come up with these kinds of details on the fly, a specialized tool can give you a major leg up. You can play around with our free AI image prompt generator to see how small tweaks can have a massive impact on the final image.
From Vague Ideas to Vivid Reality
Let's look at how this all comes together. The jump from a basic prompt to a photorealistic one is night and day.
The core idea is to remove as much guesswork for the AI as you can. By handing it precise photographic, textural, and even emotional cues, you're steering the whole process toward a specific, believable result.
To show you what I mean, I've put together a table that breaks down how a simple idea can be built up into a prompt that produces a stunningly realistic photo.
Prompt Evolution From Basic to Photorealistic
This table shows the transformation from a simple concept to a detailed, photorealistic prompt. Notice how each new layer of detail adds depth and directs the AI toward a more specific, artistic vision.
| Element | Basic Prompt Example | Advanced Photorealistic Prompt |
|---|---|---|
| Subject | A woman drinking coffee | A contemplative woman in her late 30s, faint smile, with a fleeting, melancholic gaze, holding a ceramic mug |
| Setting | In a kitchen | Seated at a rustic wooden kitchen table, morning light streaming through a window just out of frame |
| Clothing | Wearing a sweater | Wearing a slightly oversized, chunky-knit cream sweater, soft fabric texture visible |
| Camera/Style | Photo | Photorealistic, shot on a Sony A7III, 85mm f/1.8 lens, shallow depth of field, subtle film grain, cinematic color grade |
The basic prompt will probably get you something that looks like a generic stock photo. The advanced prompt, on the other hand, directs an entire scene, giving you an image that feels authentic and tells a story.
There’s a lot happening behind the scenes to make this work, from the initial data collection and model training to the final image refinement.
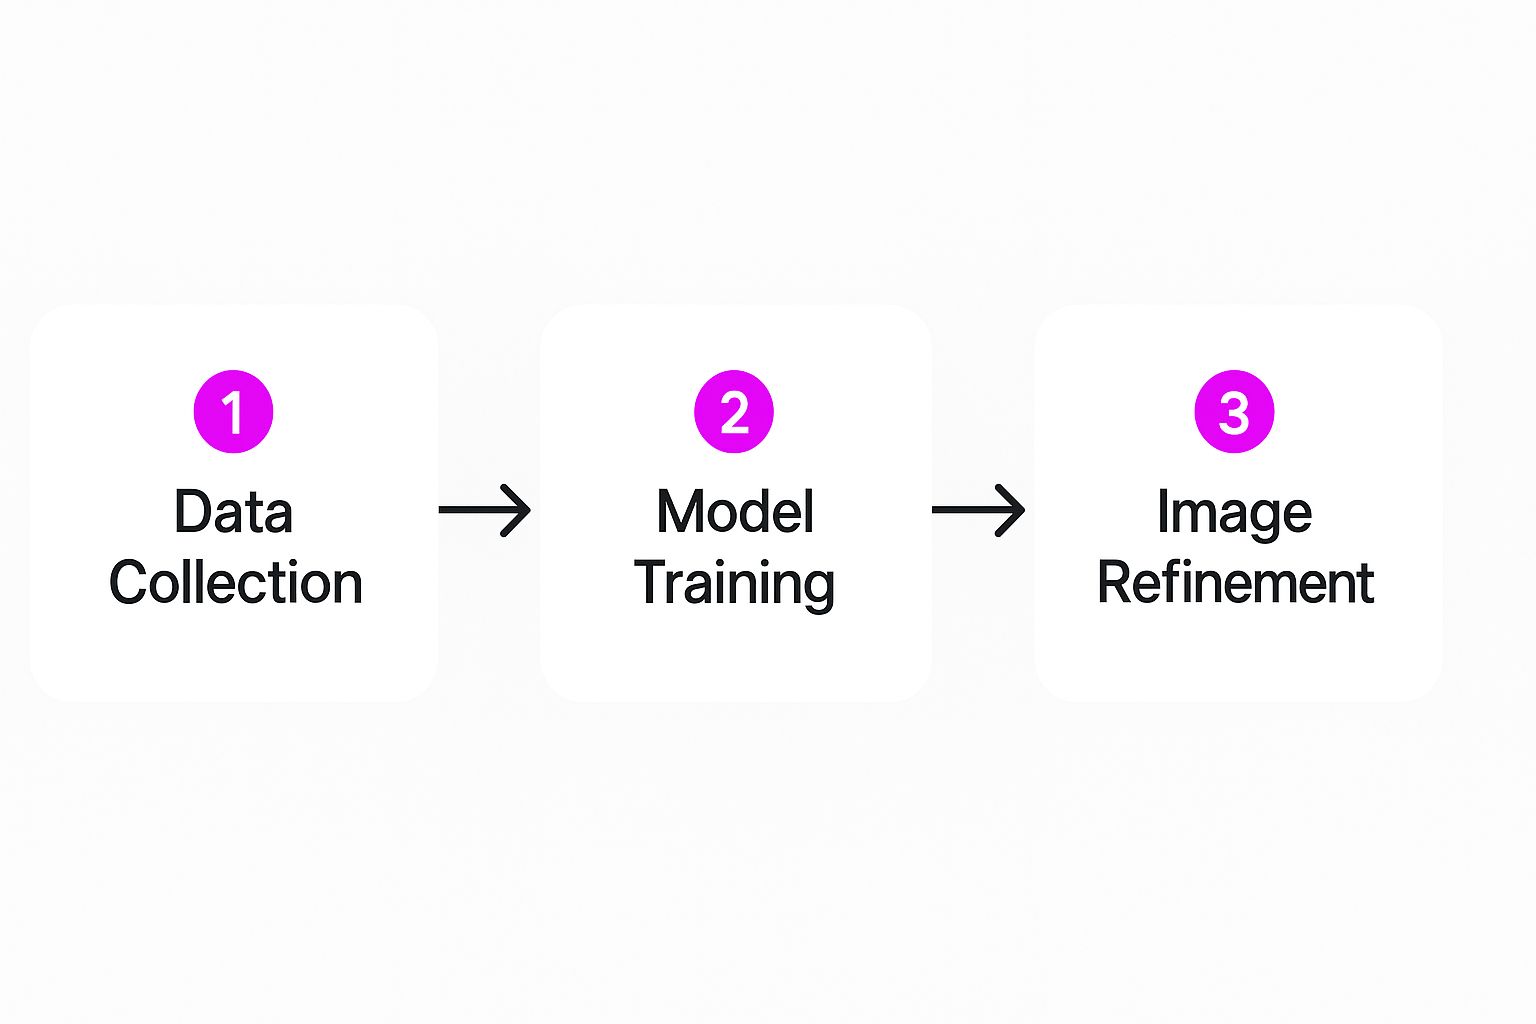
This workflow shows how an AI takes your detailed instructions and turns them into a polished, realistic image. The more effort you put into your prompt, the more control you have over that final "Image Refinement" stage, which is where the magic really happens.
Dialing in Your AI Model and Settings
A good prompt is your starting point, but the settings are where the magic really happens. Think of your prompt as the script and the settings as your camera, lighting, and lens choice. You need both working together to get a truly realistic AI photo. Getting a handle on these parameters is what separates a decent image from a stunning one.
Two of the most important dials you can turn are guidance scale and stylization. The guidance scale is basically a leash on the AI—it controls how closely the model sticks to your prompt. A lower number gives it more creative freedom, while a higher number makes it follow your instructions to the letter.
Finding that sweet spot is the goal. If your image feels a bit generic or is veering off-course, cranking up the guidance can pull it back in line. On the flip side, if the output seems too rigid and literal, lowering the scale can introduce some much-needed nuance and artistic flair.
Unleash the Power of Negative Prompts
Here's a pro tip that can completely change your results: use negative prompts. This is where you tell the AI exactly what you don't want to see. It’s an incredibly effective way to steer the model away from the classic digital artifacts and weird quirks that give away an image as AI-generated.
By explicitly telling the AI what to avoid, you can clean up your images in a huge way. A well-crafted negative prompt is often the secret sauce that takes an image from "pretty good" to "wow, that looks real."
Here are some of my go-to terms for a solid negative prompt:
- Artistic Styles to Avoid:
cgi, render, illustration, cartoon, anime, 3d - Common Quality Problems:
blurry, low resolution, noise, jpeg artifacts, watermark, signature - Weird Anatomy Fixes:
deformed hands, extra fingers, mutated, disfigured, poorly drawn face - General Unwanted Stuff:
ugly, duplicate, morbid, out of frame, cropped
A negative prompt isn't just about damage control; it's about refining the AI's creative process. You're essentially closing off all the wrong paths, which forces the AI to put all its energy into generating a clean, believable, and high-quality photo.
Choosing the Right Model Makes All the Difference
Don't assume all AI models are the same—they aren't. Most platforms offer a selection of different "models" or "checkpoints." These are just specialized versions of the AI that have been trained on different datasets, and your choice here will dramatically affect the final look.
Some models are absolute masters at creating photorealistic portraits, nailing every detail from skin texture to the light in someone's eyes. Others are built for epic landscapes, clean architectural shots, or even specific artistic movements. For something highly specialized, like e-commerce shots, you might look into a purpose-built AI product photo generator that's trained specifically for that job.
Before you hit "generate," always see what models are available. Starting with a model trained for photorealism gives you a massive advantage over a general-purpose one. I always recommend playing around with a few different models, as you’ll quickly discover which ones have the specific "look" you're going for.
How to Nail Consistency When Generating Images in Bulk
It’s one thing to create a single, breathtakingly realistic AI photo. But the real magic happens when you can churn out a whole series of them that all feel like they belong together. Whether you're building a marketing campaign, mocking up product shots, or just filling out a portfolio, consistency is what separates amateur work from a professional, polished project. This is where you need to move beyond single prompts and develop a real workflow.
The trick is to stop thinking one-off and start thinking in templates. You need to establish a solid foundation that defines the core look and feel, but still gives you the flexibility to introduce new elements. This approach not only saves an unbelievable amount of time but also guarantees every image feels like part of a cohesive collection.
Build a Flexible Base Prompt
First things first, you need to write a detailed base prompt that acts as the blueprint for your entire image set. Think of it as your project's brand guide—it should contain all the non-negotiable elements that will show up in every single image.
Your base prompt should get really specific about things like:
- The Vibe:
cinematic, moody, high-contrast - The Gear:
shot on Sony a7 IV, 50mm f/1.4 lens - The Light:
soft morning light from a side window - The Colors:
warm tones, desaturated blues, deep shadows
Nailing this down means you’ve already done 80% of the heavy lifting for the whole series. From here on out, creating a new image is just a minor tweak, not a full-blown effort from scratch. This is the exact principle that powers tools designed for high-volume creation, like a bulk social media image generator.
Use Variables for Creative Control
With your base prompt set, it’s time to introduce variables. This is how you tell the AI to change specific parts of the image without messing up the carefully crafted style you just defined.
Let's say you're doing a product photoshoot. Your base prompt handles the aesthetic, and your variables handle the specifics:
- Angle:
[front view],[top-down shot],[45-degree angle] - Setting:
[on a marble surface],[with a blurred office background] - Product State:
[product in box],[product unboxed]
This systematic approach is precisely why AI image generation has exploded. The market was valued at a whopping USD 349.6 million in 2023 and is on track to hit USD 1.08 billion by 2030, according to data from Grand View Research. This growth is driven by the insane demand for high-quality visuals, with an estimated 34 million AI images being created every single day.
Pro Tip: Don't Forget the Seed Number
If you want ultimate consistency, the 'seed' number is your best friend. A seed is just a number that tells the AI where to start when generating the image. By using the same seed across different prompts, you can lock in the core composition—even the subject's face—while changing other things like their expression, clothing, or the background.
This is an absolute game-changer for creating a consistent character across a story or series. Fixing the seed tells the AI to use the same starting point, giving you a set of visuals so cohesive it feels like you directed the same actor in different scenes.
Adding the Final Polish with Post-Processing
Getting a great image straight from the generator is a good start, but it's rarely the finish line. If you want true photorealism, the kind that makes people do a double-take, the real magic happens in the final touches. This post-processing stage is where you transform a solid AI-generated image into something indistinguishable from a pro photograph.
It really starts with developing an eye for the little tells—those subtle imperfections that scream "this was made by a computer." Even the most advanced models can slip up on things like weird skin textures, fingers that bend in unnatural ways, or funky reflections in glass or water. Spotting these artifacts is half the battle.
Correcting Small Flaws with AI Tools
The good news is you don't need to be a Photoshop wizard to clean up these minor issues. So many editing programs now have AI tools baked right in, designed specifically for this kind of work.
The go-to tool for this is inpainting. It’s a lifesaver. You can just draw a mask over a problem area—say, a hand with six fingers or a strange object in the background—and tell the AI to regenerate only that little piece. A simple prompt like "realistic human hand" is often all it takes for the AI to fix the mistake seamlessly.
Then there's outpainting, sometimes called an image extender. This feature is fantastic for when you need to change the dimensions of your image without awkward cropping. The AI intelligently builds out the scene around your original picture, perfectly matching the style, lighting, and composition. It's a game-changer if you need to turn a square image into a wide banner for a website, for example.
The demand for these tools is exploding. The AI image extender market was valued at around $2 billion in 2025 and is expected to rocket to nearly $10 billion by 2033. You can dig into the specifics of this growth and what it means for different industries in this market analysis on Data Insights Market.
A truly realistic AI photo is often a collaboration between the initial generation and the final refinement. Think of it like this: you use AI to create the raw image, then lean on other AI-powered tools to perfect the details the first pass missed.
Applying Classic Photo Editing Principles
Once you've fixed the obvious AI glitches, it's time to think like a photographer. Applying classic photo editing techniques is what adds that final layer of authenticity and makes the image feel like it was captured through a real lens.
You can start with just a few fundamental adjustments:
- Color Grading: This is all about mood. Nudging the colors toward warmer tones can make a scene feel inviting, while cooler tones can give it a more serious or sleek vibe.
- Contrast and Exposure: Play with the brightness and contrast to make your subject stand out. A simple S-curve adjustment is an old-school trick that adds incredible depth and makes the image less flat.
- Sharpening: A little bit of sharpening can really bring out the fine details in textures like clothing, hair, or stone. The key is subtlety—go too far, and it'll look crunchy and fake.
These small tweaks are what close the gap between an image that's just technically accurate and one that feels genuinely compelling and alive. It's the final polish that makes all the difference.
Common Questions About Realistic AI Photos
Even when you've got your process down, creating a truly realistic AI photo can sometimes feel like chasing a moving target. You might hit a few common hurdles that leave your images looking just a bit... off.
Let's walk through some of the most frequent questions I hear. Think of this as a troubleshooting guide to get you past those sticking points and back to creating stunning, believable images. It’s less about just tweaking prompts and more about understanding why these issues happen in the first place.
Why Do My AI Photos Look Fake or Uncanny?
Ah, the "uncanny valley." This is that frustrating place where an image is almost perfect but has a strange, unsettling quality you can't quite put your finger on. It's a classic problem, and it usually boils down to generic prompts.
When an AI doesn't have enough specific detail to work with, it defaults to a kind of "idealized" version of reality. You end up with overly smooth skin, perfectly symmetrical features, and an overall artificial look. Hands and eyes are notorious for tripping up the AI.
To pull your images out of the uncanny valley, you need to get hyper-specific.
- Embrace Imperfection: Real life is messy. Try adding phrases like "faint wrinkles around the eyes," "subtle skin pores," or "a few stray hairs." These tiny details make a world of difference.
- Master the Light: Don't just say "daylight." Describe it. Is it "soft, overcast window light from the left"? Or "harsh afternoon sun creating long shadows"? Specific lighting adds depth and realism.
- Lean on Negative Prompts: Tell the AI what you don't want. I always add terms like
perfect skin, flawless, render, 3d, cartoon, airbrushedto my negative prompt to steer clear of that plastic, fake look.
It's also worth remembering that the model itself plays a huge role. Some AI models are simply better at photorealism than others. If you're consistently getting uncanny results, try switching to a different model or version specifically trained for it.
How Can I Create a Realistic AI Photo of a Specific Person?
This is a big one, and it dives straight into a major ethical and legal gray area. Generating an image of a real person without their explicit permission is a hornet's nest you don't want to poke.
Because of the potential for misuse (like "deepfakes"), most major AI platforms have strict rules against creating likenesses of individuals, especially public figures. They just won't do it.
The best and most ethical way forward is to create consistent fictional characters. You can achieve this by using a detailed character description combined with a fixed "seed" number. This tells the AI to generate new images of the same character concept across different scenes.
For those who need more control, you can get into more advanced techniques. Using a tool like Stable Diffusion, you can train a custom LoRA (Low-Rank Adaptation) model. This basically means you "teach" the AI a new concept—like your brand mascot or a story character—using a set of source images you own. It's more work, but it gives you incredible power without crossing any ethical lines.
What Are the Best AI Tools for Realistic Photos?
There's no single "best" tool—it really comes down to what you're trying to do and how much control you want. Each of the big players has its own personality and strengths.
- Midjourney: This is often the go-to for stunning, artistic, and highly photorealistic images. It's famous for producing incredible quality from relatively simple, natural-language prompts.
- Stable Diffusion: If you want to get under the hood and tweak everything, this is your platform. It offers unparalleled control with custom models, LoRAs, and a dizzying array of settings. It’s the top choice for power users.
- DALL-E 3: The secret weapon here is its integration with ChatGPT. It excels at understanding incredibly complex, conversational prompts with a level of accuracy that can feel like magic.
- Leonardo.Ai or Playground AI: These platforms are fantastic all-rounders. They strike a great balance between a user-friendly interface and powerful, advanced features, making them perfect for both beginners and experienced creators.
My best advice? Play around with them. Spend a little time with each, and you'll quickly get a feel for which one clicks with your creative style.
Ready to stop prompting one by one and start creating at scale? With Bulk Image Generation, you can generate up to 100 high-quality, consistent images in seconds. Describe your vision, and let our advanced AI handle the rest. Try it now and accelerate your creative workflow.