Master Photo Editing With AI in Bulk

Aarav Mehta • October 10, 2025
Transform your workflow with our guide to photo editing with AI. Learn how to use bulk processing for consistent, professional results and save hours of work.
AI-powered photo editing isn't just about speeding things up; it's about reclaiming your creative time by letting smart algorithms handle the grunt work. Think of it as an assistant that takes care of tedious tasks like color correction or object removal across huge batches of photos, ensuring every single image comes out looking consistent and professional. This isn't just faster—it’s a fundamentally smarter way to work.
How AI Is Redefining the Editing Process
Let's be honest, the old way of editing photos was a grind. For years, tasks that required deep technical know-how and hours of manual labor were the norm. But AI has completely flipped the script. Features that were once complex—like auto-cropping, perfect color correction, object removal, and background segmentation—are now automated, making professional-level editing accessible to everyone, not just the experts.
This means photographers and designers can finally break free from the cycle of repetitive, mind-numbing adjustments. Instead of spending an entire afternoon on one set of images, you can focus on what actually matters: the creative vision.
From Manual Tweaks to Intelligent Automation
Remember the days of painstakingly tracing objects with a pen tool or endlessly fiddling with clone stamps? Photo editing with AI makes that feel ancient. The entire dynamic has shifted. Now, instead of clicking through a dozen menus, you can often just describe what you want, and the system makes it happen almost instantly.
A perfect example is removing an unwanted object from a photo. It used to be a delicate, time-consuming process of selecting, cloning, and patching to make the background look seamless. Now, a good AI editor can spot the object, remove it, and rebuild the background with a single click. It just works.
The real magic of AI in photo editing isn't just the speed. It's the ability to lock in a level of consistency across hundreds, or even thousands, of images that would be nearly impossible for a human to achieve manually. For anyone working on brand campaigns or e-commerce catalogs, this is an absolute game-changer.
Expanding Creative Boundaries
Beyond just fixing things, AI is unlocking entirely new creative possibilities. We're seeing this change ripple through other industries, too. For instance, in real estate and interior design, tools for virtual staging AI are becoming commonplace. These platforms can digitally furnish an empty room in minutes, a job that used to require specialized and expensive 3D modeling skills.
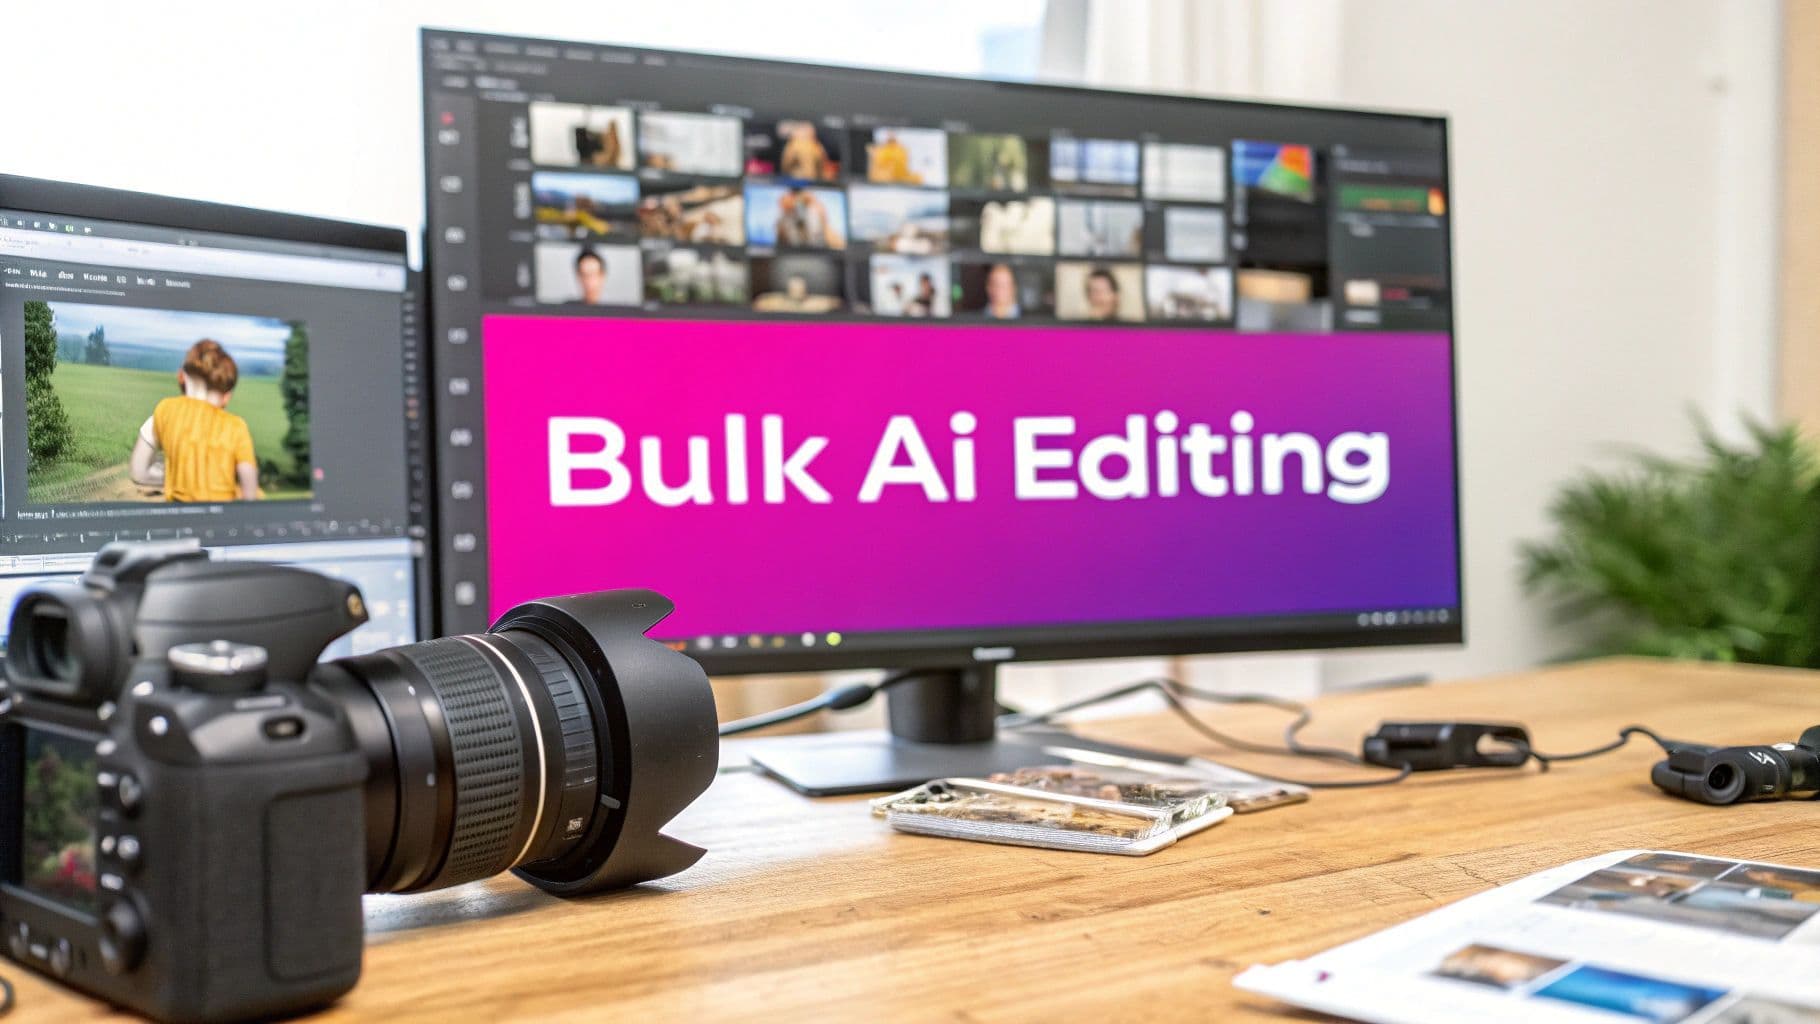
This is the kind of power we're talking about—making complex edits feel effortless. Just look at a typical AI-powered dashboard.
Notice how powerful features like "Auto Enhance," "Background Removal," and "Color Grade" are presented as simple toggles? That’s the whole point. It takes the technical barriers down so you can just focus on the final look.
To better understand how these features translate into real-world benefits, let's break down some of the most impactful AI tools.
Key AI Editing Features and Their Impact
| AI Feature | Workflow Impact | Estimated Time Saved |
|---|---|---|
| Batch Processing | Applies edits to hundreds of images at once, ensuring brand consistency. | 90-95% on repetitive edits |
| Object Removal | Instantly cleans up photos by removing unwanted distractions. | 5-15 minutes per image |
| Background Removal | Creates clean, transparent backgrounds for product shots with one click. | 3-10 minutes per image |
| Auto Enhance | Intelligently corrects exposure, color balance, and sharpness. | 1-5 minutes per image |
| Color Grading | Applies consistent, professional color styles across entire photo sets. | 80-90% on color work |
This table illustrates just how much time you get back in your day. It’s not about incremental improvements; it’s about a complete workflow overhaul.
The core advantages of weaving AI into your editing process are crystal clear:
- Massive time savings: Tasks that took hours are now done in seconds.
- Improved consistency: Every image gets the same high-quality, on-brand treatment.
- Greater accessibility: You no longer need to be a Photoshop wizard to get stunning, professional results.
How AI Actually "Sees" Your Photos
It’s easy to think of AI photo editing as some kind of magic, but what’s happening under the hood is much more grounded. To get the best results, it helps to understand that an AI doesn't see a photograph the way we do. We see a sunset and feel the warmth; an AI sees a massive grid of data—pixels, patterns, and mathematical relationships.

The AI model has been trained on millions, if not billions, of labeled images. Through this process, it learns what makes a "sky" look like a sky or how to tell the difference between a product and its background. This training is what allows it to recognize and isolate specific elements in your own photos with incredible precision, from the subtle tones in someone's skin to the intricate weave of a fabric.
This data-first approach is exactly why bulk processing is so powerful. Once the AI knows the rules, it can apply them consistently across thousands of images, making sure every single edit follows the same parameters.
From Pixels to Prompts
At its core, the AI is a translator. It takes your instructions and turns them into mathematical operations. When you tell it to "make the sky more dramatic," it isn't picturing a stormy afternoon. It’s identifying the cluster of pixels it recognizes as "sky" and tweaking values like saturation, contrast, and brightness based on patterns it learned from thousands of other photos labeled "dramatic sky."
This all comes down to a few key ideas:
- Object Recognition: This is the basic step where the AI identifies distinct things in the frame, like a person, a car, or a tree.
- Semantic Segmentation: It then goes deeper, assigning a label to every single pixel. It doesn’t just see a "face"; it sees "skin," "eyes," "lips," and "hair," which allows for hyper-specific adjustments that would take forever to do manually.
- Style Transfer: This is where the magic really happens. The model can analyze the artistic style of one image—its colors, tones, and textures—and apply it to another. It’s how smart presets can adapt to your unique photos over time.
This ability to break an image down into its fundamental parts is what separates modern AI editing from the simple filters of the past. It’s performing complex, context-aware adjustments that truly understand the content of your photo.
The Power of Just Asking
The biggest shift we're seeing in photo editing is the move toward using natural language. Instead of fiddling with sliders and curves, you can just describe the look you want. For this to work, the AI has to first understand what’s in your image. If you're curious, you can play around with an image to text converter to see a simplified version of this in action.
This conversational approach is becoming the new standard. You can make multiple requests in a single prompt, like, "Remove the reflections from the window and fix the washed-out colors." The AI just gets it done.
When you understand that the AI is working with data and patterns, not emotions, you can write much more effective prompts. This is the key to moving beyond generic edits and creating results that genuinely reflect your creative vision.
There’s a reason the global AI image editor market is absolutely exploding. It’s projected to leap from around USD 0.23 billion in 2024 to a staggering USD 48.74 billion by 2035. That kind of growth tells you everything you need to know about where the industry is heading. You can dig into the numbers in this in-depth market analysis.
Setting Up Your Bulk Editing Environment
A powerful AI photo editing workflow doesn't start with the AI—it starts with a well-organized workspace. Before you can automatically process thousands of images, you need to lay the right groundwork. This means getting your account ready, organizing your files in a logical way, and tweaking a few smart defaults right from the start.
Think of this as prepping your digital studio. A little effort now saves you from massive headaches later, ensuring your first big run delivers polished, ready-to-use images instead of just creating more cleanup work for you down the line.
Let's get your workspace primed for efficiency.
Account and API Key Configuration
First things first: you'll need a Bulk Image Generation account. Once you're signed in, the next critical step is grabbing your API key. This key is the secure bridge between your image library and our AI platform, making sure every request to edit a photo is actually coming from you.
You can find your API key in the "Developer" or "API Settings" section of your dashboard. Treat these keys like passwords—never, ever share them publicly. Copy your unique key and pop it into a secure password manager for easy access. This is the foundation for all your automated photo editing with AI.
Smart Folder Organization
How you arrange your photos before you upload them is way more important than most people realize. Trust me, a chaotic mess of files is one of the most common reasons batch jobs fail or produce weird results. Over the years, I’ve found that a dead-simple, clear system always works best.
I recommend creating one main project folder, then putting two subfolders inside it:
_source: This is where you'll keep all your original, unedited images. Keeping your source files completely untouched is a non-negotiable best practice. You always want a way to get back to the original._edited: This is where the AI will save all the processed images. This clean separation prevents you from accidentally overwriting your originals and keeps the whole project tidy.
This simple structure makes it a breeze to manage huge numbers of files and see at a glance what's been processed and what hasn't.
A well-organized file system is the unsung hero of bulk photo editing. It ensures the AI processes the correct images, saves them to the right location, and helps you avoid the dreaded "file not found" errors that can halt a large batch run.
While platforms like ours are making advanced editing more accessible, established tools still hold significant ground. It's expected that by 2025, Adobe Photoshop will maintain its leadership position, holding roughly 33% of the global user base. This just goes to show how the industry is blending traditional software with these new AI-driven solutions.
Configuring Default Settings
Finally, let's lock in a few default settings to guarantee quality from your very first batch. Inside the Bulk Image Generation platform, head over to your project settings. This is where you can define baseline parameters that will apply to every single image in a batch, unless you decide to override them for a specific job.
I'd suggest setting these defaults to start:
- Default Output Format: Choose JPEG for most web uses, or go with PNG if you're working with images that need transparency.
- Default Resolution: Set a standard, like 1920px on the longest side, to keep everything consistent. Our bulk image resizer can handle this for you automatically.
- Default Enhancement Level: I find that starting with a "Medium" AI enhancement level is a great baseline. You can always crank it up or down for specific batches later.
Setting these defaults gives you a solid, consistent starting point for every job, taking the guesswork out of the process.
Building Your Automated Editing Workflow
Alright, once you've got the basics down, it's time for the really cool part. We're moving beyond single, one-off edits and into building a repeatable system that does the heavy lifting for you. This is the heart of effective photo editing with AI—turning what could be a chaotic mess into a smooth, scalable operation.
The objective here isn't just about moving faster. It’s about building a reliable pipeline that pumps out consistent, high-quality images every single time, whether you're working with a batch of 10 photos or 10,000. Let’s dive into how to construct a workflow that truly works.
First, Curate Your Source Images
The quality of your final AI-edited images is completely dependent on the quality of your starting files. I can't stress this enough: the old saying "garbage in, garbage out" has never been more relevant. Before you kick off a big batch job, take a few moments to properly curate your source images.
For an e-commerce shoot, this means picking photos that are sharp, well-lit, and show the product from its best angles. For a social media campaign, you'd want to select images that pack an emotional punch or have a dynamic composition. The AI is a powerful tool, but it needs a solid foundation to build upon.
This infographic gives you a bird's-eye view of how the core components of the workflow fit together.
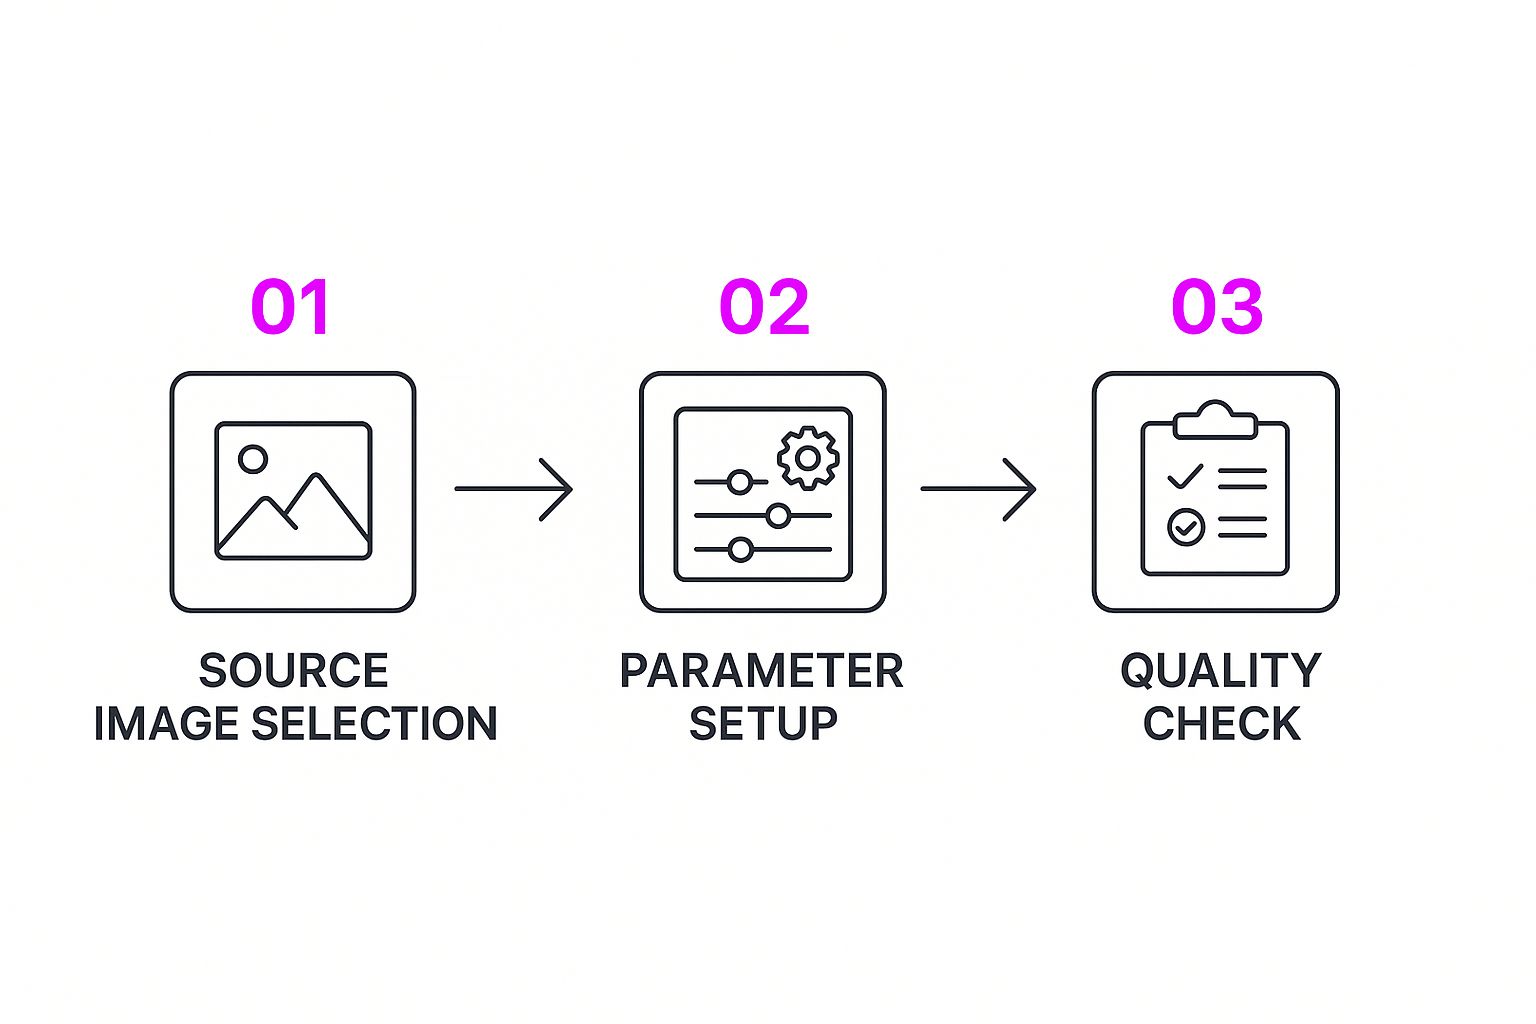
As you can see, it's a logical flow: you select your images, define the edits, and then review the output. It’s a simple loop you can run over and over.
Next, Define Your Editing Parameters
This is where you give the AI its marching orders. Instead of fiddling with sliders for every single photo, you define a set of rules and instructions that the platform will apply to your entire batch. It could be something straightforward like, "remove the background and make the colors pop," or a more nuanced recipe for a specific aesthetic.
The key here is to think in terms of prompts. A solid prompt might be something like: "Apply a warm, vintage film look, give the contrast a slight boost, and crop everything to a 4:5 aspect ratio for social media."
Honestly, writing good prompts is a skill in itself. If you're just starting out, using a good free AI image prompt generator can give you a fantastic jumping-off point. The more specific your instructions, the more predictable your results will be. To really get the most out of this, understanding the basics of content creation automation will help you scale your efforts dramatically.
Your workflow is a living document, not something you set in stone. It should evolve as you figure out what works best for your images. Don't hesitate to create separate workflows for different projects—one for product shots, another for portraits, and maybe a third for your lifestyle content.
While Bulk Image Generation is built for high-volume, professional workflows, it's helpful to see how it stacks up against other tools. Here's a quick comparison of some leading platforms.
Comparing Leading AI Editing Platforms
| Platform | Batch Capacity | Customization Level | Pricing Tier |
|---|---|---|---|
| Bulk Image Generation | Up to 100 images per run | High (prompt-based recipes) | Subscription-based |
| Canva | 50 images (Pro) | Medium (preset filters & templates) | Freemium/Subscription |
| Luminar Neo | Varies by extension | High (AI presets & manual tools) | One-time/Subscription |
| Fotor | 50 images | Medium (AI tools & presets) | Freemium/Subscription |
As the table shows, the right tool really depends on your needs. For true bulk processing and highly specific, repeatable edits, a platform designed for that purpose will always have the edge.
Finally, Implement Quality Checks
Automation is powerful, but it doesn't mean you can just "set it and forget it." The last piece of the puzzle—and it's a critical one—is a quick quality check. After a batch has been processed, take a minute to scan through the results.
Are the colors looking right? Were the backgrounds removed cleanly on all the images? Did the crop work as intended?
This feedback loop is what helps you fine-tune the system. If you notice the AI is consistently crushing the shadows a bit too much, you can go back and tweak your prompt for the next run. This cycle of editing, reviewing, and refining is how you dial in a truly professional, automated workflow that gets better with every batch you process.
Fine-Tuning Your AI Workflow for Pro Results
Okay, so you’ve got a solid automated workflow humming along, and you’re already saving a ton of time. That’s huge. But now it’s time to go from just "getting it done" to creating images that look truly professional—the kind of results that feel intentional and custom-made.
This is where we move past the basic commands. Forget just asking for a simple background removal. The real power comes from using custom reference images to steer the AI's stylistic decisions. This is an absolute game-changer for keeping your brand visuals consistent.
Imagine this: you upload a single reference photo that perfectly nails your brand’s moody, low-contrast vibe. The AI then uses that image as a style bible, applying a similar look and feel across a whole new batch of product shots. That’s how you get consistency at scale.
Writing Prompts That Actually Work
The better your prompt, the better your final image. It’s that simple. The AI understands nuance, so don’t be afraid to get specific. A generic prompt like "make this photo look better" is a recipe for a generic, uninspired result.
Instead, try something with more direction: "Lift the shadows in the foreground to bring out detail, but don't blow out the highlights in the sky. Add a touch of warmth and a soft vignette to draw the eye inward." See the difference? You're giving the AI clear, actionable steps, which makes a massive difference in the final quality.
I’ll be honest, the biggest leap in my own work came when I stopped treating the AI like a dumb tool and started thinking of it as a creative partner. I bring the detailed vision, and it handles the heavy lifting. That's the secret to effective photo editing with AI.
This more conversational approach is quickly becoming the norm. Platforms are getting smarter, using advanced models that can understand complex, multi-step requests in a single go. You can just say something like, "remove the reflections from the window and fix the washed-out colors," and it gets it. This makes the whole editing process feel much more natural and intuitive.
Chaining AI Models for Complex Edits
For the really tricky jobs, a single AI model might not cut it. This is where you can get clever with chaining—running your images through a sequence of specialized AI actions. Think of it as a digital assembly line where each station perfects one specific part of the photo.
Here’s a practical example of an AI chain you could build right inside Bulk Image Generation:
- First Pass: The Cleanup Crew. Start by running the images through an AI model built specifically for removing dust, scratches, and other minor blemishes.
- Second Pass: Color and Tone. Next, the cleaned-up images get sent to a second model that focuses entirely on color grading, applying your brand’s specific color palette.
- Final Pass: The Finishing Touch. Lastly, a third model comes in to intelligently sharpen key details and apply a consistent final crop for the web.
This modular approach is brilliant because it lets each AI do what it does best. It prevents that over-processed, "too-perfect" look you sometimes get when one tool tries to do everything at once. This is exactly how you can tackle tough issues like artifact removal while making sure your color integrity stays perfect across thousands of images.
Troubleshooting Common AI Editing Issues
Even the smartest AI can get it wrong sometimes. We’ve all been there—you write what you think is a perfect prompt, hit generate, and the result is... not quite right. Maybe the colors are completely off, the processing is taking forever, or the output is just plain bizarre.
When your AI photo edit goes sideways, it’s rarely a massive system meltdown. More often than not, it's a simple miscommunication between you and the model. This could be anything from an overloaded API during a big batch job to using a funky file format the AI just doesn't like. The trick is to figure out what's wrong without getting frustrated.
Finding the Real Problem
Before you go nuclear and start rewriting all your prompts or re-uploading hundreds of images, just take a breath and run through a quick mental checklist. You can usually nail down the culprit in under a minute.
Ask yourself a few quick questions:
- Is my file format weird? Most AI platforms are perfectly happy with JPEGs and PNGs. But if you’re uploading something more niche like a TIFF or RAW file, you might be asking for trouble.
- Was my prompt too vague? An instruction like "make it look better" is a recipe for disaster. It leaves way too much up to interpretation. Be direct and specific.
- Am I starting with a bad image? You can't make a masterpiece from a mess. A blurry, low-resolution source photo is almost guaranteed to give you a disappointing result.
Fixing these is usually pretty simple. Converting that tricky file to a standard JPEG or adding more descriptive language to your prompt can make all the difference in the world.
When an AI edit goes wrong, my first move is always to check the prompt. Nine times out of ten, just adding a few specific details—like "preserve the natural skin tones" or "avoid oversaturation"—is all it takes to get things back on track.
Knowing When to Go Back to Basics
Sometimes, the fix isn't about small tweaks. If you’re trying out a new, super-complex prompt and it keeps failing, it might be smarter to just revert to an older, reliable preset that you know works. This keeps your project moving forward while you figure out the new prompt on the side.
On the other hand, if the AI constantly messes up a specific type of image that’s core to your brand—say, a certain product angle or lighting setup—that's a signal. It’s probably time to use features that let you provide style references. By feeding the AI examples of what you actually want, you're basically training it on your unique look. It’s a bit of work upfront, but it ensures the model learns your aesthetic, which cuts down on future mistakes and saves you a ton of time.
A Few Common Questions
When you start editing hundreds of photos with AI, a few questions always seem to come up. Getting these sorted out early on can be the difference between a frustrating afternoon and a workflow that just… flows. Let's tackle some of the ones we hear the most.
First up, file formats. This one's a classic hurdle. For the smoothest, fastest processing, stick with high-quality JPEGs or PNGs. It's not that our system can't handle other types, but these two are the universal language of AI models. Using them drastically cuts the risk of weird color shifts or other glitches when you're running a big batch.
How Do I Keep My Brand Style Consistent?
This is a big one. When you're processing a huge batch of images, keeping everything on-brand is non-negotiable. The secret? Use a reference image.
Seriously, it’s that simple. Just upload one photo that perfectly nails your brand's look—the exact color grade, the contrast, the whole vibe. The AI then uses that image as its style guide, making sure every single photo it touches matches that aesthetic.
This is so much more reliable than trying to describe your style in a text prompt. A visual target gives the AI a clear, unambiguous goal to hit every time.
A common mistake I see is people throwing generic prompts at the AI and just hoping for the best. A better way is to build a small library of go-to prompts for different shoots—one for clean product shots, another for lifestyle campaigns. This little bit of prep work ensures your results are predictable and consistently high-quality.
What Prompts Work for Specific Industries?
Crafting the right prompt is part art, part science, and it definitely changes depending on your niche. What works for a real estate agent won't get the job done for a fashion brand.
Here are a couple of starting points from my own experience:
- Real Estate: "Enhance the natural light and brighten up the shadows. Make the sky a vibrant blue but don't oversaturate the grass. Keep the windows clear, not blown out."
- Fashion E-commerce: "Isolate the product on a pure white background. Make sure you preserve the natural skin tones and the texture of the fabric. Sharpen the details on the clothing itself."
The goal is always to be descriptive. Give the AI clear, specific instructions, and it’ll give you back exactly what you need.
Ready to stop editing photos one by one and get professional results in a fraction of the time? With Bulk Image Generation, you can process hundreds of images at once, lock in your brand consistency, and get back to the creative work you love.
Start your free trial today at https://bulkimagegeneration.com