A Practical Guide to Midjourney Image Generation

Ryan Bennett • December 26, 2025
A practical guide to Midjourney image generation. Go from basic prompts to advanced workflows and create stunning AI visuals with confidence.
Midjourney is an AI model that creates unique visuals from simple text prompts. The whole thing runs through the Discord chat app, where you type commands to tell the AI what you want. It's become a favorite for artists and creators because the results have a distinct, artistic feel that's hard to replicate.
Your First Steps into Midjourney
Jumping into Midjourney feels a bit like stepping into a new creative dimension. Because it all happens on Discord, a community chat platform, the setup can feel a little strange if you're used to web-based tools. But trust me, it's pretty simple to get the hang of.
First things first, you'll need a verified Discord account. Once that's sorted, you just need to join the official Midjourney server. This is where all the action is. Inside, you'll find channels made for newcomers, usually named something obvious like #newbies or #general.
Choosing Your Plan
Midjourney is a subscription service, so you’ll have to pick a plan before you can start creating. The plans are mostly based on how many images you can generate and how much "fast" GPU time you get.
Most people start with the Basic Plan. It gives you around 200 image generations a month, which is plenty to learn the ropes without a big commitment.
Using the Imagine Command
To actually create an image, you'll use one simple command: /imagine. When you type this in a newbie channel, a prompt box pops up. This is where you describe the image you want to see.
Key Takeaway: The quality of your Midjourney images comes down to how clear and detailed your text prompts are. Think of yourself as a director giving very specific instructions to an artist.
For example, a basic prompt might be /imagine prompt: a cute red panda wearing a tiny wizard hat. Once you hit enter, the Midjourney Bot starts working and, in about a minute, will spit out a grid of four initial options based on your description. To get a better sense of how this all works, it helps to understand the basics of Artificial Intelligence.
This first grid of four is your creative starting point. From here, you can pick one image to upscale (enhance) or ask for variations, which is how you'll dive deeper into the creative process.
Of course, if you need to create a lot of images quickly for a project, this one-by-one process can be slow. For those moments, you might want to explore a specialized image generator for bulk tasks that's built for speed and scale.
Crafting Prompts That Actually Work
Here’s the secret to getting incredible images from Midjourney: it's all in the prompt. A vague idea will always give you a vague, uninspired image. If you want results that look professional and deliberate, you have to feed the AI a clear, detailed vision of what's in your head.
Think of yourself as an art director giving a brief. Just asking for "a castle" is leaving way too much to chance. A much stronger approach is something like, "ancient moss-covered castle ruins on a misty Scottish cliffside, volumetric morning light, wide-angle shot, photorealistic." That level of detail is what separates generic AI art from a compelling visual story.
Every single word you add is another layer of direction, steering the AI closer to the exact image you want.
Building Blocks of a Powerful Prompt
Every truly great prompt is made from a few core ingredients. Once you get the hang of combining them, the quality of your images will skyrocket. It’s all about building a complete picture for the AI to work from.
- Subject: This is the "what." Get descriptive. Don't just say "dog"; try "fluffy golden retriever puppy."
- Style: This sets the whole artistic vibe. Are you going for an "impressionist painting," something "cyberpunk," a "vintage photograph," or maybe "minimalist line art"? This is a crucial piece of guidance.
- Setting: Where is your subject? "On a neon-lit Tokyo street at night" creates a completely different world than "in a sun-drenched meadow."
- Lighting: This is your mood control. Terms like "dramatic backlighting," "soft afternoon sun," or "eerie moonlight" can completely transform the feeling of an image.
- Composition: How is the scene framed? Use photography terms like "close-up portrait," "wide-angle shot," or "macro detail" to tell the AI where to point the "camera."
By layering these elements, you're essentially writing a detailed creative brief. For instance, a weak prompt like "a robot" can be totally transformed into something amazing: "a polished chrome robot (subject) standing in a rainy, futuristic city (setting), illuminated by glowing neon signs (lighting), anime art style (style), dynamic angle shot (composition)."
A well-crafted prompt is like a recipe. The more precise your ingredients and instructions are, the better the final result will be. If you leave out key details, you're leaving the outcome up to random chance.
Real-World Prompt Examples
Let’s put this into practice. The goal is to evolve from a simple concept to a rich prompt that generates a visually stunning image. You'll see how adding just a few layers of detail makes a world of difference.
Simple Idea: A forest scene. Improved Prompt: Lush, magical forest with glowing mushrooms and ancient, mossy trees, ethereal mist on the ground, fantasy art style, cinematic lighting.
Simple Idea: A portrait of a woman. Improved Prompt: Portrait of a woman with freckles and long, flowing red hair, wearing ornate silver jewelry, Pre-Raphaelite painting style, soft natural light.
This methodical approach to Midjourney image generation puts you in the driver's seat. If you're ever stuck for ideas, checking out a curated list of the best prompt ideas for AI image generators is a great way to get inspired and see what's really possible.
Gaining Control with Parameters and Seeds
Once you've got a handle on writing descriptive prompts, it's time to level up. The real magic in Midjourney comes from using specific commands called parameters. Think of them as the technical settings on a professional camera—they give you direct, precise control over the final image.
Adding a parameter is simple. Just type a double hyphen (--) followed by the command and its value at the very end of your prompt. This small tweak can completely reshape your image, letting you move from just hoping for a good result to intentionally directing the AI.
Mastering Aspect Ratios and Styles
Two of the most useful parameters you'll use constantly are --ar (aspect ratio) and --style. The aspect ratio command is your tool for framing the shot perfectly for its final destination, whether that’s a vertical Instagram story or a wide banner for a website.
For example, if you know you need a vertical image for social media, just add --ar 9:16 to your prompt. Need a classic landscape? Use --ar 16:9. This gets the dimensions right from the start, so you don’t have to deal with awkward cropping later.
The --style parameter, on the other hand, lets you fine-tune the overall aesthetic. You can use it to tap into different versions of the Midjourney model or even try out more experimental looks. For instance, adding --style raw often gives you more photorealistic and less "opinionated" images—perfect for when you want a result that feels less obviously AI-generated.
Pro Tip: Combining parameters is where the real power kicks in. A prompt for a brand's social media post could look something like this:
/imagine prompt: minimalist product shot of a ceramic coffee mug on a marble countertop, soft morning light --ar 9:16 --style raw.
This combo ensures the final image is not only styled correctly but also perfectly formatted for where it's going. This level of control is a big reason why Midjourney has scaled so massively. The system has already processed an estimated 300 million image generation tasks, running at about 40 tasks per second. That's how it keeps queues moving, even when people are generating huge volumes of visuals. You can dive deeper into Midjourney’s impressive growth statistics if you're curious.
Creating Consistency with Seeds
Ever create a character you absolutely loved, only to find you couldn't get them to show up again in a different scene? The --seed parameter is your fix. Every image grid Midjourney generates starts from a random number, or "seed." By specifying that seed number yourself, you can force the AI to start from the exact same point every single time.
This is a total game-changer for creating a cohesive set of images. To find the seed of an image you like, just react to the finished grid with the envelope emoji (✉️). Midjourney will slide into your DMs with the job details, including the precious seed number.
Now you can use that number to keep things consistent.
/imagine prompt: a cute cartoon fox character --seed 12345/imagine prompt: a cute cartoon fox character wearing a pirate hat --seed 12345
Using the same seed tells Midjourney to apply the new prompt to the same foundational noise pattern. The result? A character that looks remarkably similar across different images. This technique is invaluable for any project that needs visual continuity, like branding, storyboarding, or character design.
Essential Midjourney Parameter Cheatsheet
To help you get started, I've put together a quick-reference table with the most common and powerful parameters. Think of this as your go-to cheatsheet for controlling your image outputs.
| Parameter | Function | Example Usage |
|---|---|---|
--ar | Sets the aspect ratio (width-to-height). | --ar 16:9 (widescreen), --ar 1:1 (square), --ar 9:16 (vertical) |
--style | Switches between different aesthetic models. | --style raw (photorealistic), --style cute (MJ Niji model) |
--seed | Forces a specific starting point for consistency. | --seed 12345 |
--chaos | Increases randomness and variation (0-100). | --chaos 50 |
--no | Excludes specific elements from the image. | --no text, people |
--stylize | Adjusts how strongly Midjourney's artistic style is applied (0-1000). | --stylize 750 |
--tile | Creates seamlessly repeating patterns. | --tile |
Bookmark this table or keep it handy. Mastering these simple commands will give you an incredible amount of creative control and help you produce exactly what you envision, every time.
How to Refine and Perfect Your Images
That first grid of four images Midjourney gives you? That’s just the opening act. The real magic happens now, in the refinement stage, where you take a promising concept and polish it into something spectacular. This is the process that separates the casual dabblers from people who produce genuinely jaw-dropping visuals.
Think of it as your creative workflow. First, scan the grid and pick the image with the most potential. You're looking for the one with the best composition, color, or overall vibe that clicks with what you had in mind. Once you’ve picked your champion, you have two main ways to go: upscale it for more detail or create variations to explore different angles.
Upscaling (using the U buttons) takes your chosen image and renders it at a higher resolution, pulling out all the fine details and making it much sharper. Variations (the V buttons), on the other hand, spin up a new grid of four images based on the style and composition of the one you selected. It’s the perfect way to explore slightly different creative paths without having to start over from scratch.
Strategic Variations and Upscaling
Deciding between a subtle or strong variation really comes down to what you're trying to achieve. If you’re already in love with an image but just want to fix a minor flaw—like a weird-looking hand or a distracting background element—then Vary (Subtle) is your go-to. It makes small, targeted tweaks while keeping the soul of the original image intact.
But if the composition is solid but the overall energy just isn't quite right, Vary (Strong) will shake things up more dramatically. This can alter character expressions, change the lighting, or even shift the artistic style, giving you a totally fresh take on your initial idea.
Key Insight: A classic rookie mistake is upscaling way too early. My advice? Use the variation tools to tweak and iterate until you are at least 90% happy with the composition and subject. Then, and only then, should you commit to an upscale to lock in those final details.
This iterative loop is at the heart of the Midjourney image generation experience. The platform’s incredible growth since it launched back in July 2022 has been built on this powerful and intuitive workflow. It caught the eye of creators everywhere, pulling in an impressive $50 million in its first year and quadrupling that to $200 million in 2023, all from organic buzz. You can read more about Midjourney’s explosive market impact and how it got here.
Expanding Your Creative Canvas
Once you've upscaled an image, you unlock a new set of tools for expanding the scene. Midjourney doesn’t just stop at a single frame; it lets you build out the world around your subject.
- Pan Arrows: These buttons let you extend the image horizontally or vertically, revealing what’s just beyond the original frame. It's a fantastic way to turn a tight portrait into a sprawling landscape.
- Zoom Out: This feature pulls the virtual "camera" back, showing more of the environment surrounding your subject. You can zoom out by 1.5x or 2x, or even use a custom zoom to get the framing exactly how you want it.
By combining these tools, you can strategically guide your initial idea toward a perfect final image. Start with a solid prompt, iterate with variations to nail the composition, and then use the upscaling and canvas tools to put the finishing touches on your masterpiece.
Hitting a Wall with Midjourney? Here's How to Fix It.
Every Midjourney user, whether you're just starting out or have been at it for months, eventually gets a result that makes them scratch their head. You know the ones: images with bizarrely mangled hands, text that looks like a forgotten alien language, or prompts where the AI seems to have completely ignored your main idea.
Don't worry, this isn't a sign of failure. It’s just part of learning the language.
Think of it as trying to communicate with a brilliant but extremely literal artist. When things go wrong, it's usually just a simple communication breakdown. The trick is knowing how to spot the problem and rephrase your instructions. Most frustrations can be fixed with a few simple techniques that will save you time and, more importantly, your precious GPU minutes.
Got Unwanted Stuff in Your Image? Use Negative Prompts.
One of the most powerful tools in your arsenal is the negative prompt parameter: --no. This little command tells Midjourney exactly what not to include in your final image. It's your "do not draw" list, and it's incredibly effective for cleaning up common weirdness.
Seeing strange, garbled text or signatures popping up? Just add --no text, words, signature to the end of your prompt. Is the AI giving your subjects extra fingers or distorted hands? Try adding --no extra limbs, deformed hands.
Here are a few real-world scenarios where it's a lifesaver:
- The Problem: Your photorealistic portraits have that "uncanny valley" vibe with overly smooth, plastic-looking skin.
- The Fix: Add
--no unrealistic, plastic skin, uglyto push the AI toward a more natural, textured result. - The Problem: You're trying to generate a serene, empty landscape, but Midjourney keeps adding distracting people or animals.
- The Fix: Use
--no people, animalsto keep your landscape pristine and untouched.
Key Takeaway: Negative prompting isn’t about telling the AI it’s wrong. It’s about giving it clearer boundaries. By telling Midjourney what to leave out, you help it focus on exactly what you want to see.
When Midjourney Ignores Your Main Idea
Sometimes, it feels like the AI fixates on a minor detail in your prompt and completely misses the main point. This usually happens when a prompt gets too complicated or packs in too many conflicting ideas. The solution here is to simplify and clarify.
Instead of trying to do everything at once, break your ambitious prompt into smaller, more focused pieces. A prompt like "a knight fighting a dragon in a crystal cave during a meteor shower" is a lot for the AI to juggle.
Start with the core concept: "a knight in a crystal cave." Get that looking right first.
Once you have a solid base image you’re happy with, you can use Midjourney's variation or pan and zoom features to introduce new elements like the dragon or the meteor shower. This step-by-step approach gives you way more control and is how the pros get those really polished, professional-grade results.
Developing an Efficient Creative Workflow
Nailing that one perfect image feels great, but let's be honest—for most creators, the real challenge is producing amazing visuals at scale. This is where you need to shift from one-off generations to a smart, repeatable workflow. Having a system not only saves a ton of time but also gives you far more consistent results across any project.
A game-changing feature for this is Permutations. It's a massive time-saver that lets you test multiple prompt variations with a single command. Instead of manually typing ten different prompts to see which color looks best, you can do it all in one shot.
Just wrap a comma-separated list of options in curly braces {}. For instance, /imagine prompt: a cute robot holding a {red, blue, green} flower. Midjourney queues up three separate jobs, one for each color. You get to see the results side-by-side without the mind-numbing repetition.
Systematizing Your Creative Process
A solid workflow isn't just about speed; it's about making your success repeatable. When you find a prompt formula that just works, save it. I keep a simple text file (some people use Notion or other apps) to build a personal library of my go-to prompt structures, style codes, and parameter combos.
This kind of organization is gold, especially for projects that need a cohesive feel, like a social media campaign or a full set of brand illustrations. To get a better sense of how AI can fit into your broader content strategy, check out this excellent Guide to AI Powered Content Creation. Building your own system is what turns Midjourney from a fun toy into a professional powerhouse.
Key Insight: Don't reinvent the wheel every time you generate. Your best prompts are reusable assets. By building a personal library, you can quickly adapt proven formulas for new projects, guaranteeing both quality and consistency.
Sometimes, though, things just don't turn out right. The infographic below outlines a simple, three-step process I use to fix common issues and keep my workflow from grinding to a halt.
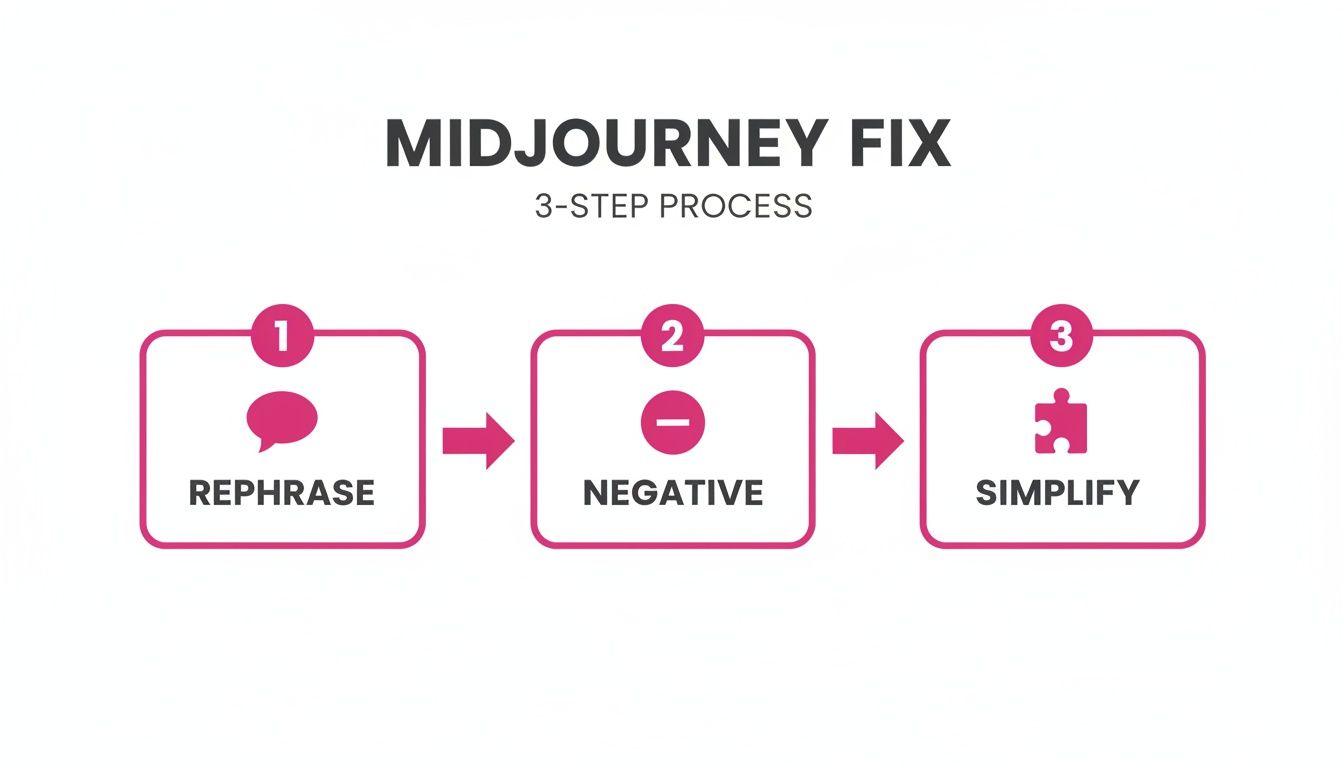
This little troubleshooting loop—rephrasing for clarity, using negative prompts to kill unwanted elements, and simplifying when I've gotten too complex—is the core of efficient image generation.
Scaling Up Your Production
Midjourney is fantastic for artistic exploration, but its one-by-one generation process becomes a serious bottleneck when you're facing big projects. If you need to crank out dozens or hundreds of visuals for an e-commerce catalog or a marketing blitz, the manual effort becomes completely impractical. This is where you need to look at more specialized tools.
For those moments when you need to go from a handful of images to a massive batch, a bulk social media image generator can automate the entire process. Tools like this can turn what would have been a multi-day slog into a task that takes just a few minutes, letting you maintain high-volume output without dropping your standards.
