How to Create a Watermark for Photography a Complete Guide

Aarav Mehta • January 29, 2026
Learn how to create a watermark for photography that protects and brands your images. This guide covers design, software, and batch application.
Learning how to create a watermark for your photos is about more than just slapping some text on an image. It's about crafting a professional, transparent PNG file that protects your work and, just as importantly, reinforces your brand.
Think of it as your digital signature. It acts as a clear deterrent to theft while doubling as an effortless marketing tool, turning every single share into a chance for new eyes to find you.
Why Your Photos Need a Professional Watermark

In a digital world that's absolutely overflowing with images, protecting your creative work isn't just a good idea—it's essential. A professional watermark serves as your digital signature, transforming your photographs from anonymous content into branded assets. It's less about theft prevention and more about a core part of your business strategy.
Here’s the reality: every time someone shares your watermarked photo, they’re also sharing your name or your brand. This subtle mark acts as a silent ambassador, guiding potential clients right back to your portfolio or website. Without it, your work can be easily orphaned online, its value and origin lost as it's endlessly reposted.
This has never been more critical. The photography services market is huge, valued at USD 39.21 billion and still growing. Remember when Instagram launched? It led to a 500% explosion in user-generated visual content, and the need for clear attribution skyrocketed right alongside it. It's no surprise that today, a majority of photographers—54% according to one poll—watermark at least some of their images before posting them online.
Build Credibility and Protect Your Brand
A well-designed watermark instantly signals professionalism. It tells the world you value your work and operate a serious business, which builds trust with potential clients before they even think about contacting you.
Imagine an e-commerce brand that invests a ton of money in high-quality product photography. If a competitor steals those images, it not only dilutes their brand but can directly hit their sales.
A watermark is your first line of defense. It makes your images a less attractive target for casual theft and ensures that even if they are used without permission, your brand remains attached.
While watermarks are a great deterrent, it's also smart to know your legal options. Understanding what is a DMCA (Digital Millennium Copyright Act) takedown notice is and how it works gives you a powerful tool for recourse when you find your photos being used without permission.
The Real Benefits of a Strategic Watermark
A thoughtfully applied watermark offers several key advantages that go far beyond just basic protection. When you make it a standard part of your workflow, you:
- Establish Ownership: It’s an immediate, visible claim on your intellectual property. No questions asked.
- Boost Brand Recognition: Using the same watermark consistently across all platforms drills your brand identity into people’s minds.
- Drive Traffic: A watermark with your website URL can directly lead curious viewers straight to your portfolio.
- Discourage Misuse: It simply complicates things for content thieves looking for an easy grab. Most will just move on.
Ultimately, creating and using a watermark is an essential step for any photographer looking to build a sustainable career. It’s a small action that pays off in a big way through brand equity and asset protection.
Designing a Watermark That Enhances Your Images
The best watermark is one you barely notice, yet it does its job perfectly. It’s a delicate balance—you need to protect your work without disrupting the art itself. This is where we get practical and focus on creating a watermark that feels like a natural part of your photograph, not some clunky, tacked-on afterthought. The goal is a signature that's both effective and elegant.
You’re basically heading down one of two paths: text-based or logo-based. Each has its own vibe, and the right choice usually comes down to your personal brand and the kind of photography you do.
Crafting a Text-Based Watermark
A text watermark is the most straightforward way to put your name on your work. It's clean, simple, and tells people exactly who took the shot. But don't mistake simple for thoughtless—the font you choose says a lot about your brand.
For example, a classic serif font like Garamond can give off a sense of elegance and tradition, which is a fantastic fit for fine art or wedding photography. On the flip side, a modern sans-serif font like Helvetica or Montserrat feels clean and contemporary, making it ideal for commercial, architectural, or product shots. The trick is to find a font that stays readable even when it’s small and actually complements your photos.
When it comes to the information you include, less is almost always more. Stick to the essentials:
- Your Name or Brand Name: This is the most direct option.
- Your Website URL: This instantly turns your watermark into a marketing tool, sending people right back to your portfolio.
- The Copyright Symbol (©): Tacking on "© [Year] [Your Name]" adds a professional touch and makes your copyright claim crystal clear.
Designing a Logo-Based Watermark
If you've already got an established brand, using your logo is a powerful way to reinforce that identity. A good logo is visually distinct and often sticks in people's minds better than a line of text. The biggest hurdle here is making sure it works at different sizes.
A complex, detailed logo might look incredible on your website header, but shrink it down for a photo, and it can quickly become an unreadable smudge. Because of this, the best logo watermarks are simple and iconic—think monograms, unique symbols, or a stylized version of your initials. If you're just starting out and don't have a logo, you could even play around with an AI logo generator to quickly brainstorm some ideas.
Here's the ultimate test for any logo watermark: scalability. Before you commit, shrink your design down to about 100 pixels wide. If it's still clear and you can tell what it is, you're on the right track.
Creating the Essential Transparent PNG File
Whether you go with text or a logo, your final watermark file absolutely must have a transparent background. This part is non-negotiable. A watermark stuck in a solid white or black box just screams amateur and will ruin the look of your images. The industry-standard file format for this is PNG (Portable Network Graphics).
It's really important to understand why file types matter here. JPEGs are fantastic for photos because they keep file sizes small, but they don't support transparency at all. Taking a moment to learn about the PNG format vs JPEG will make it obvious why PNG is the only real choice for a versatile watermark.
Here’s a quick rundown of how to create your transparent file in most photo editors:
- Create a New Document: Start with a canvas that's way bigger than you think you'll need, something like 2000x1000 pixels. This high resolution ensures your watermark stays crisp, even if you need to scale it up a bit.
- Ensure a Transparent Background: Make sure your background layer is transparent, not filled with a color. In most software, this looks like a gray-and-white checkerboard pattern.
- Add Your Design: Now, type your text or place your logo onto the canvas. A good pro-tip is to design it in pure black or white. This gives you maximum versatility, as you can easily change the color or lower the opacity later when applying it to an image.
- Export as a PNG: Head to
File > Export(orSave As) and choose PNG as the file type. This is critical: make sure the "Transparency" option is checked before you save.
And that's it. You now have a high-resolution, reusable watermark file ready to be placed over any photograph without that ugly background box. This one file is a cornerstone of a professional and efficient photography workflow.
A Photographer's Guide to Watermarking Software
Okay, you've got a solid design concept in mind. Now it's time to actually make the thing—to create the transparent PNG file that will become your go-to asset for every photo you share. We're going to walk through the exact steps in a few of the most popular tools photographers use, covering options for every budget and skill level.
Whether you're an Adobe pro or just starting out with free software, the goal is always the same: a crisp, versatile, and transparent watermark file. The trick is to create a high-resolution master file first. That way, you can easily resize and apply it down the road without it ever looking blurry or pixelated.
This whole process really boils down to three simple stages.
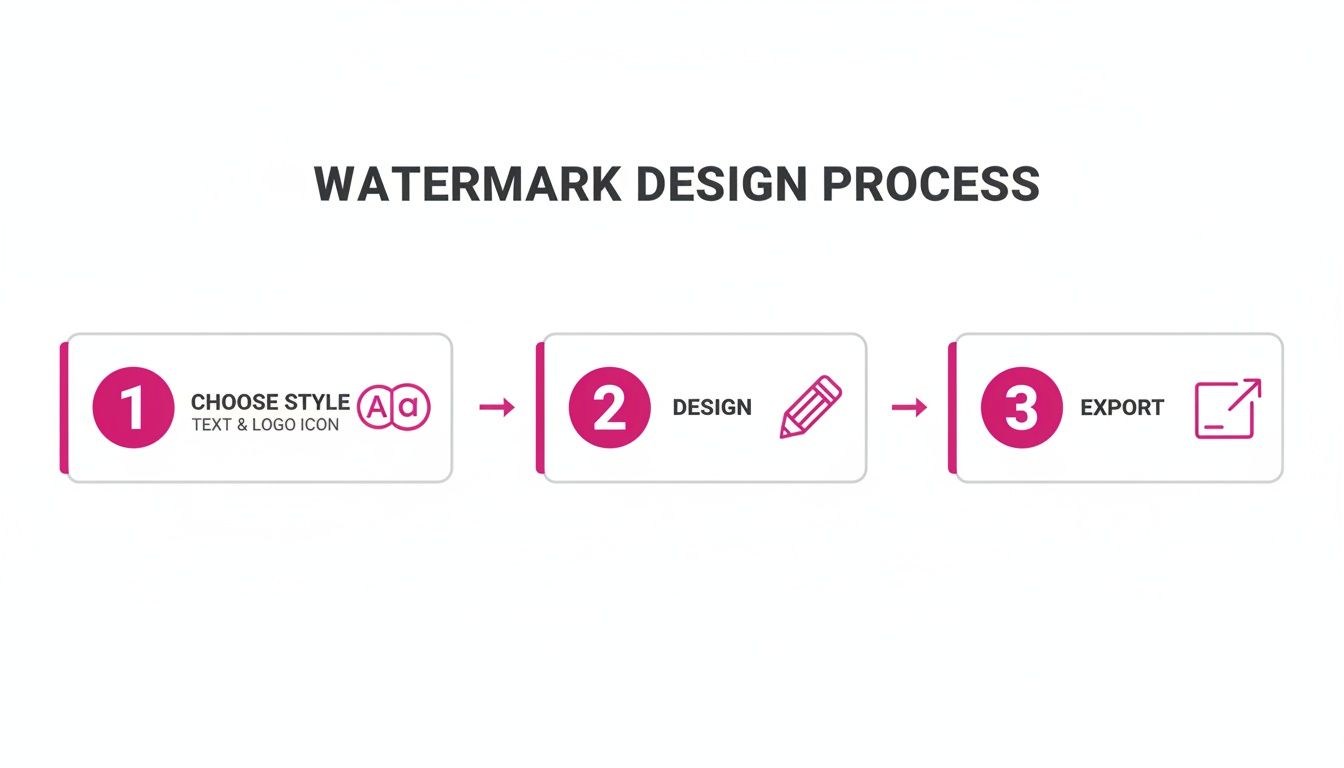
No matter which software you pick, you'll follow this same fundamental workflow: choose your style, design the element, and export it correctly.
Creating Your Watermark with Adobe Photoshop
For most professional photographers, Photoshop is the undisputed king of image editing, and making a watermark is one of its most basic tasks. Its real strength is the precise control you have over layers, text, and export settings.
First, fire up Photoshop and create a new document (File > New). My advice? Make the canvas way bigger than you think you'll need—something like 2500 pixels wide by 1000 pixels high is a great starting point. This ensures your final PNG is high-res and won't fall apart on a large print.
In the setup window, make sure you set the Background Contents to Transparent. This is the most important step. You'll know you did it right when you see that classic gray and white checkerboard pattern.
- For a text watermark: Grab the Type Tool (T), pick your font, and type out your name or business. I recommend designing it in pure black or white for maximum flexibility later.
- For a logo watermark: Just drag and drop your existing logo file right onto the transparent canvas.
Once it’s centered and looks good, you're ready to save. Go to File > Export > Quick Export as PNG. Photoshop is already set up to save these with transparency intact. Save this file somewhere safe—this is your master watermark.
Your Free and Powerful Option: GIMP
If a monthly Adobe subscription isn't in the cards, GIMP (GNU Image Manipulation Program) is an incredibly capable and totally free alternative. It has every feature you need to create a professional-grade watermark. The interface might feel a little different, but the core principles are identical.
Start by opening GIMP and creating a new file (File > New). Just like in Photoshop, start with large dimensions. You’ll need to look in the "Advanced Options" section for the Fill with dropdown and select Transparency. This gives you that essential checkerboard background.
From there, the process is nearly the same. Use the Text Tool to add your info or import your logo file onto the canvas. Tweak the size and placement until you’re happy with it.
When you're ready to save, the command is a bit different: go to File > Export As.... In the dialog box that pops up, name your file with a .png extension (e.g., MyWatermark.png) and click Export. A final options window will appear, but the default settings are usually perfect, so just click Export again.
A surprising number of photographers—around 46% according to one poll—still skip watermarking, a major risk when 95% of images are digital. With free tools like GIMP, which has over 25 million users, there’s no barrier to entry. A simple watermark can reduce unauthorized image use significantly, a fact supported by e-commerce tests showing a 70% drop in reuse. Learn more about the digital watermark technology market on verifiedmarketresearch.com.
Using Online Watermark Generators Like Canva
For anyone who values speed and simplicity above all else, online design tools like Canva are a fantastic choice. You don't need to download any software, and the template-driven approach can give you a great-looking result in just a few minutes. You might sacrifice some of the fine-tuned control of Photoshop or GIMP, but for busy photographers, the convenience is often a worthy trade-off.
To get started, log in to Canva, click "Create a design," and choose "Custom size." Enter your dimensions, like 2500 x 1000 pixels. Once your blank canvas is open, use the Text tool in the sidebar to add your content. You can browse through hundreds of fonts and easily adjust the color and size.
Now, here’s the one catch with most free online tools: downloading with a transparent background is often a premium feature. On Canva, you'll need a Pro account for this. If you have one, just click Share, then Download. Under "File type," select PNG, and—most importantly—check the box that says Transparent background.
This limitation is the primary trade-off. While online tools are incredibly user-friendly for the design phase, exporting the professional-grade transparent file you actually need might require a paid plan. Still, for photographers already using a tool like Canva for their social media graphics, this can be a fast and efficient part of an existing workflow.
Strategic Watermark Placement for Maximum Protection

So you've created the perfect watermark file. That's a great start, but its real power comes down to one thing: where you put it. Bad placement can either make your watermark completely useless or just wreck a beautiful photograph.
The goal is to find that sweet spot. You want it visible enough to make someone think twice about stealing your work, but subtle enough that it doesn't scream at the viewer and distract from your art.
Think of watermark placement as a crucial final touch, not an afterthought. You have to consider the photo's composition, where it's going to live (Instagram is a different beast than a client proof), and just how much protection you really need. A one-size-fits-all approach is a recipe for frustration.
For instance, a delicate, fine-art landscape print probably just needs a discreet signature in the corner. But if you're sending a gallery of event photos to a client, you’ll want a much more assertive mark to stop them from screenshotting and sharing proofs they haven't paid for.
Finding the Right Location on Your Image
The classic move is to stick the watermark in one of the four corners, usually the bottom right. There's a reason it's so common—it’s out of the way and feels natural since we tend to scan images and text in a similar pattern. But here's the catch: it's also the easiest place for a thief to just crop out.
A much smarter method is to nudge your watermark slightly inward, away from the edges. Try placing it over a part of the image with some texture or detail—think foliage, a patterned dress, or the texture of a brick wall. This makes it a real headache for someone trying to remove it with automated tools or a quick clone stamp job.
A watermark slapped onto a simple, clean background like a clear blue sky is practically begging to be removed. The more complex the area under your mark, the safer your image is.
Adapting Placement for Different Platforms
Where your photo is going to be seen should absolutely change your placement strategy. Every platform has its own little quirks, and you can use them to your advantage.
- Your Portfolio Website: This is your home turf, so the goal is branding and professionalism. A small, elegant watermark in a consistent spot on every image reinforces your brand without getting in the way of your best work.
- Social Media Feeds: Think about Instagram's interface—it has likes, comments, and usernames that often cover the corners. Placing your mark a bit more centrally ensures it's actually visible when people are scrolling through their feeds. If you're creating a lot of social content, you can streamline the whole process with tools like a bulk social media image generator.
- Client Proof Galleries: For proofs, protection is everything. This is where you can be aggressive. Use a larger, semi-transparent watermark right over the main subject. You could even use a tiled pattern of your logo across the entire image. It makes the photo unusable for printing or posting, but the client can still see everything they need to make their selections.
Balancing Opacity and Size
The final piece of the puzzle is tweaking the size and transparency (or opacity) of your watermark. These two settings are a balancing act that determines how much your mark stands out. I can't give you magic numbers here, because it really is all about context.
A good starting point for opacity is usually somewhere between 20% and 50%. For a subtle brand mark on your portfolio, 20-30% is often perfect. If you need more serious protection, bumping it up to 40-50% will do the trick.
As for size, your watermark should be big enough to be legible but not so huge that it overpowers the photo. Here's a quick test I use: look at your image as a tiny thumbnail. If the watermark is the first thing you see, it's too big. If you can't see it at all, it's too small to do its job. Always check your final settings on a very dark image and a very light one to make sure your watermark works well in any scenario.
How to Batch Watermark Photos and Save Hours of Work
If you're a working photographer, digital marketer, or really anyone creating content, your workflow is your lifeline. Applying that watermark you so carefully designed to every single photo, one… by one… by one? It's a soul-crushing and frankly, terrible use of your time. This is where batch processing comes in to save the day—and it's probably the single biggest thing you can do to reclaim hours of your life.
Batch watermarking is exactly what it sounds like: applying your custom watermark to hundreds or even thousands of images all at once. Instead of the tedious open, place, resize, and save routine for each photo, you set up a process that does all the heavy lifting for you. This is a massive problem-solver for anyone handling a large volume of images, whether it's from a wedding shoot, an e-commerce catalog, or a month's worth of social media content.
Using Lightroom for Effortless Batch Watermarking
There's a reason Adobe Lightroom is a favorite among photographers, and its powerful, built-in batch processing is a big part of it. The whole program is built to manage huge photo libraries, making it the perfect tool for this job. You can create a reusable watermark preset and apply it automatically during export.
Here’s the basic flow in Lightroom Classic:
- First, you'll create your watermark preset. Head to
Edit > Edit Watermarks(orLightroom Classic > Edit Watermarkson a Mac). This pulls up the Watermark Editor, where you can either type in text or, much better, upload your transparent PNG logo file. - Next, tweak the settings. You’ll see options to adjust the opacity, size, placement, and how far it sits from the edges. A pro tip is to set the size to "Proportional." This ensures the watermark scales correctly with every photo, whether it's a sprawling landscape or a tight portrait.
- Finally, save your preset. Once you're happy with how it looks, save it with a clear name like "Portfolio Logo - Bottom Right." You can create a whole library of these for different uses—maybe a subtle one for your portfolio and a more obvious one for client proofs.
Now, anytime you select a group of photos to export, just check the "Watermarking" box in the export dialog and pick your preset from the dropdown. One click, and Lightroom churns through the entire batch, applying that same consistent watermark to every single image.
Exploring Other Batch Processing Tools
While Lightroom is fantastic, it’s certainly not the only game in town. Plenty of other tools offer robust batch watermarking to streamline your post-production work.
- Adobe Photoshop Actions: You can record an "Action" in Photoshop that includes every step: opening a file, placing your watermark PNG, positioning it, and saving. Once you've recorded it, you can unleash that action on an entire folder of images using the Batch command (
File > Automate > Batch). - Dedicated Batch Editors: Sometimes you need a tool built for one purpose. Specialized software and online editors are designed specifically for bulk tasks. For photographers managing huge libraries, a bulk image resizer or a similar batch tool can be a lifesaver, often letting you watermark, resize, and rename all in one go.
The real secret is finding a method that slots neatly into the workflow you already have. The goal isn't just to add a watermark; it's to do it in a way that's repeatable, consistent, and requires almost zero thought after you've set it up once.
The Future: Invisible and AI-Driven Watermarking
Visible watermarks are the standard right now, but the tech for protecting images is moving fast. The next frontier is invisible and AI-driven watermarking, which embeds data right into the image file itself without cluttering up the view.
This is becoming more critical as AI image generators flood the internet. AI watermarking is already a big business, valued at USD 579.8 million and projected to hit USD 3.1 billion by 2034. Invisible watermarks hold the largest market share at 61.2% for a simple reason: they let creators prove ownership without ruining the viewer's experience.
According to these trends in the AI watermarking market on gminsights.com, this technology embeds a non-reversible digital signature that can survive compression and editing, giving you a much more robust way to track and verify your images online. For photographers, this points to a future where your work is protected by default, without you ever having to choose between security and aesthetics.
Common Questions About Photo Watermarking
Jumping into watermarking always brings up a ton of questions. I get it. You're worried about image quality, legal stuff, and whether it's even worth the effort. It's easy to get tangled up in the details.
Let’s clear the air and tackle the most common things photographers ask about protecting their work. Getting these basics right is the key to a strategy that actually works without ruining the look of your photos.
Can Someone Just Remove My Watermark?
The short answer? Yes, a determined person with the right software can probably remove a watermark. But here’s the thing: your goal isn't to make it impossible to remove. It's to make it so annoying and time-consuming that it’s not worth the effort.
Most image thieves are looking for a quick, easy grab. They’ll skip the hard targets.
That's where strategic placement comes in. Always place your semi-transparent watermark over a part of the photo with lots of detail or texture—think grassy fields, a person's hair, or the fabric of a dress. These areas are a nightmare to clone or patch convincingly. Avoid flat, simple spots like a clear blue sky or a plain studio backdrop, because those are ridiculously easy to edit.
Will a Watermark Lower My Image Quality?
Nope. When done correctly, adding a watermark won't degrade your original photo at all. The watermark is just an extra layer placed on top of your image data.
Any quality loss you might see almost always comes from your export settings—specifically, heavy compression. For instance, saving a photo as a low-quality JPEG for the web will make it look worse, but that happens with or without a watermark.
A crucial rule I live by: Always keep your original, high-resolution, un-watermarked files stored safely. Only apply watermarks to the copies you share online or send to clients for proofing. This keeps your master files pristine.
Is a Watermark the Same as a Copyright?
This is a big one. A watermark is NOT a substitute for a legal copyright.
Think of a watermark as a “No Trespassing” sign. It's a visual deterrent that clearly states, "Hey, this is mine." It's a claim of ownership.
Official copyright registration with your country’s copyright office is what gives you the legal firepower to sue for damages if your work gets stolen. Your watermark acts as powerful supporting evidence in that case, but it's the formal registration that gives you true legal protection.
What Is the Best Opacity for a Watermark?
There’s no single magic number here, but a great starting point is between 20% and 50% opacity. The perfect setting really hinges on the photo itself and where it’s going.
- For your portfolio or website: You want subtlety. An opacity around 20-30% is usually just right—it brands your work without screaming over the top of it.
- For client proofs: Time to be a bit more assertive. A bolder 40-50% opacity is much better at discouraging people from taking a quick screenshot and running.
Here's a pro tip: test your final watermark design on both a very light photo and a very dark one. This will help you find that perfect sweet spot where it’s visible enough to do its job but doesn't hijack the viewer's attention.
Ready to streamline your entire creative workflow? With the powerful batch editor from Bulk Image Generation, you can do more than just watermark. Effortlessly resize, enhance, and prepare entire sets of images for any platform in a fraction of the time. Learn more at https://bulkimagegeneration.com.