How to Change Aspect Ratio of a Photo: Quick Tips for Any Image

Aarav Mehta • January 9, 2026
Learn how to change aspect ratio of a photo quickly for social, web, and print. Simple steps with desktop, mobile, and AI tools.
To change the aspect ratio of a photo, you really only have three moves: you can crop it, resize it, or pad it with a border. You'll find yourself doing this with desktop software, quick online tools, or even mobile apps.
Cropping is easily the most common method. It’s perfect for trimming a photo to fit a specific frame, like turning a landscape shot into a 1:1 square for an Instagram post or a 16:9 banner for your website header.
Why Aspect Ratio Matters for Your Photos
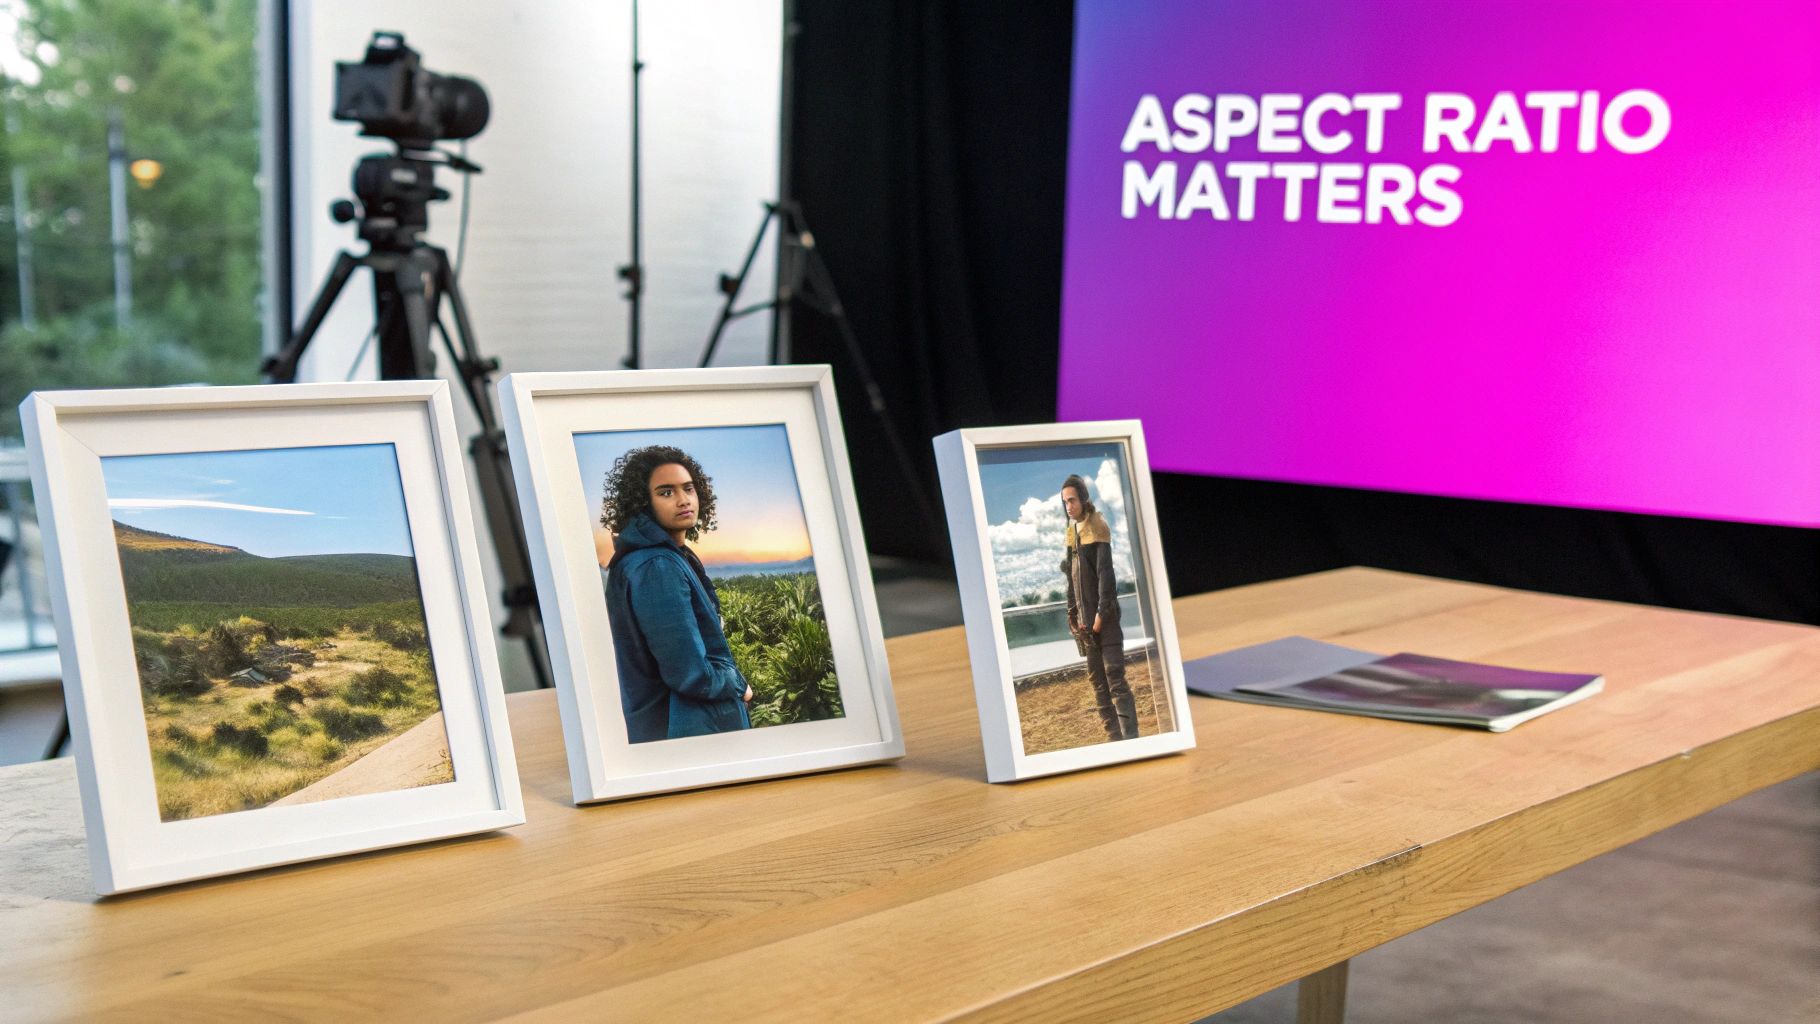
Before we jump into the how, we need to nail down the why. Simply put, an aspect ratio is just the relationship between a photo's width and its height. Getting this right is what separates a polished, professional-looking image from one that just feels… off.
When a photo's ratio doesn't match the platform where you’re posting it, bad things happen. You might get ugly black bars on the sides, or worse, the platform might automatically crop your image, cutting your main subject right out of the frame.
Think of it like this: You wouldn't try to fit a widescreen movie onto an old square TV without some adjustments. The same principle applies to your photos. Every platform, from an Instagram feed to a YouTube thumbnail, has its own "screen" with its own dimensional rules.
Meeting Platform-Specific Requirements
Every social media site, blog, and online marketplace has its own preferred image dimensions. A photo that looks amazing as a wide 16:9 website banner will get butchered when you try to post it as a vertical 9:16 Instagram Story.
Understanding these little rules is the key to making sure your visuals look exactly how you intended.
Here are a few real-world examples you'll run into all the time:
- Social Media Feeds: The classic 1:1 square is always a safe bet. But for Instagram, a 4:5 vertical portrait is often better because it takes up more precious screen real estate.
- Video Thumbnails and Banners: For YouTube, Vimeo, and most website hero images, 16:9 is the undisputed king.
- Mobile-First Content: If you're creating for TikTok, Instagram Reels, or Stories, you absolutely need a 9:16 vertical ratio for that full-screen, immersive feel.
- App Store Visuals: For developers, following strict guidelines like the required App Store screenshot dimensions is non-negotiable for a professional-looking app page.
I've put together a quick reference table to make this even clearer. It covers the most common ratios you'll encounter and where they fit best.
Common Aspect Ratios and Their Primary Uses
| Aspect Ratio | Common Use Cases | Best For |
|---|---|---|
| 1:1 | Instagram & Facebook feeds, profile pictures | Creating a balanced, centered composition. |
| 3:2 | Standard for DSLRs, most print photography | High-quality prints and traditional photo frames. |
| 4:3 | Smartphone cameras, older monitors | General digital photos and presentations. |
| 4:5 | Instagram portrait posts, Pinterest pins | Maximizing vertical screen space on mobile feeds. |
| 16:9 | YouTube thumbnails, website banners, TV | Widescreen digital displays and video content. |
| 9:16 | Instagram Stories, TikTok, Reels, mobile ads | Full-screen vertical video and mobile content. |
This isn't an exhaustive list, but it covers the ratios you'll be dealing with 99% of the time. Knowing these will save you a ton of headaches down the road.
The Three Core Methods at Your Disposal
When you need to change a photo’s shape, you have three main techniques. Each one works differently, and the best choice really depends on what you're trying to accomplish.
- Cropping: This is your go-to method. It involves trimming away parts of the image to make it fit the new proportions. This works beautifully when you have some extra background that you don't mind losing.
- Stretching: This distorts the image by pulling or squishing it to fit new dimensions. Honestly, you should almost never do this. It warps your subject and makes the photo look unprofessional and low-quality. Avoid it.
- Padding: This technique adds borders around your image to fill the space of a new aspect ratio. You might see this called "letterboxing" (for horizontal bars) or "pillarboxing" (for vertical bars). It's the perfect solution when you absolutely cannot afford to crop any part of your original composition.
Changing Aspect Ratios with Desktop Software

When you need absolute, pixel-perfect precision, nothing beats dedicated desktop software. Tools like Adobe Photoshop, Lightroom, or the fantastic free option GIMP give you a level of control that most web tools just can't touch.
This is where you graduate from simple presets to taking full command of your image. You can define any custom ratio you dream up, reframe with surgical accuracy, and use more advanced features to make sure your photo looks exactly how you want it to.
It's funny to think that this whole issue stems from the history of cameras themselves. For decades, most photos were shot in 4:3 or 3:2 because that's what film and early digital sensors were built for. The classic 35mm film frame? That's a perfect 3:2 ratio that defined photography for a generation. Then the global shift to 16:9 HDTVs came along and flipped the script on how we display everything. If you're curious about the deep history, timothypbrown.com has a great write-up on the evolution of aspect ratios.
Locking the Crop Tool to a Specific Ratio
The most straightforward way to change an aspect ratio on the desktop is with the Crop Tool. But the key is to not just freehand it—that’s how you end up with inconsistent results. The real power is in locking the tool to a specific proportion.
In Photoshop or GIMP, grab the Crop Tool and look at the options bar at the top of the screen. You'll find a dropdown menu with common presets like 1:1 (Square) or 16:9. More importantly, you can type in your own custom ratio, like 4:5 for that perfect vertical Instagram post.
Once you’ve set it, the crop box is locked into that shape, no matter how you drag the corners. It's a simple trick that guarantees your final image has the exact proportions you need.
Pro Tip: After locking the ratio, don't just accept the default crop. Click and drag the image inside the crop box. This is how you reframe like a pro. Instead of just centering everything, you can slide the image around to apply the rule of thirds or make sure your subject is perfectly placed.
Adding Borders with the Canvas Size Tool
But what happens when cropping means cutting out something important? Maybe you need to fit a wide landscape shot into a square frame without losing the edges. The answer is padding—adding borders instead of removing pixels.
This is where the Canvas Size feature comes in handy (it's usually under the "Image" menu). It lets you expand the workspace around your photo without touching the original image.
Here’s a classic scenario:
- You have a beautiful 3:2 landscape photo that's 6000 pixels wide by 4000 pixels tall.
- You need to make it a 1:1 square for a profile picture.
- Cropping would ruin the composition. Instead, open Canvas Size.
- Make sure the anchor point is set to the center.
- Change both the width and height to the larger of the two dimensions. In this case, you’d set both to 6000 pixels.
- Pick a color for the new canvas space—black or white usually looks best.
Just like that, your original photo is perfectly centered within a new square canvas, with clean, even borders at the top and bottom. You've successfully changed the aspect ratio without sacrificing a single pixel of your original shot.
Using Online Tools and Mobile Apps for Quick Adjustments
Desktop software gives you incredible control, but let's be honest—it's not always the right tool for the job. Sometimes you just need to change an aspect ratio fast.
That's where web-based editors and mobile apps come in. They're built for speed and simplicity, making them absolute lifesavers when you need to reformat an image on the fly. You don’t need a beast of a machine or an expensive subscription; just a browser or a phone is enough to get it done. It’s a game-changer for social media managers firing off a last-minute post or an entrepreneur tweaking marketing assets from a coffee shop.
The Power of Presets in Web-Based Editors
Online platforms like Canva and Adobe Express have absolutely nailed the preset workflow. Instead of forcing you to memorize pixel dimensions for every platform, they just give you a library of templates.
You upload your photo, pick where it's going, and you're pretty much done. Need a Facebook cover photo? There's a preset for that. An Instagram Story? Just one click.
- Canva: This is a powerhouse for social media. Its "Magic Switch" feature is brilliant. You can create one design and instantly resize it for everything from a Pinterest pin to a LinkedIn banner.
- Adobe Express: Offers a similar, super-clean experience. It’s packed with presets for social posts, ads, and YouTube thumbnails, making it incredibly easy to crop and reframe your image perfectly.
Mobile Apps for Editing on the Go
The ability to change an aspect ratio right from your phone can't be overstated. You can shoot, edit, and post all from one device, completely streamlining your workflow.
Snapseed, a free and surprisingly powerful editor from Google, is a standout. Its crop tool is super intuitive and comes loaded with common ratios like 1:1, 3:2, and 16:9. You can also just drag the crop box freely to recompose your shot right on the screen, getting it perfect before you hit publish.
And if you're working on a custom project and need to figure out the right dimensions, a good aspect ratio calculator will save you a ton of guesswork.
The real magic of these tools is their focus on the final destination. They’re designed around where your image will live, stripping away the technical nonsense so you can just focus on making it look good.
Ultimately, these tools make photo editing accessible to everyone. They prove you don't need a complicated setup to learn how to change aspect ratio of a photo. With presets and intuitive mobile apps, you can adapt any image for any platform in seconds and keep your visuals looking sharp and consistent everywhere you post.
How to Bulk Change Aspect Ratios with AI
Manually adjusting photos one by one is a bottleneck no creative professional can afford. It's a soul-crushing task. When you're staring down a library of hundreds or even thousands of images, the idea of cropping each one for different platforms is just plain daunting.
This is exactly where AI-powered bulk processing tools step in. They turn what could be a multi-day chore into a task that takes just a few minutes.
Imagine you're an e-commerce manager prepping a new product launch. You have 500 product shots. Every single one needs to be perfectly formatted for your website banner (16:9), Instagram feed (1:1), Pinterest pins (4:5), and Stories (9:16). Doing this by hand isn't just tedious; it's a monumental waste of time that could be spent on strategy or creative work.
AI-driven batch editors completely flip this workflow on its head. Instead of opening each file individually, you upload your entire photo library at once, define all the aspect ratios you need, and let an intelligent algorithm handle the rest.
The Power of Intelligent Cropping
What makes this process so effective is the "intelligent" part of the equation. A basic batch cropper might just hack a center-crop out of every photo, which often leads to awkwardly framed subjects. An AI, on the other hand, actually analyzes the content of each image to identify the focal point—whether that’s a person's face, a specific product, or a key detail in the background.
It then reframes each shot to make sure the subject remains perfectly composed across every single aspect ratio you need. Think of it as automated art direction, ensuring your brand stays consistent and visually appealing without you having to touch a single crop handle. If you're curious about the tech behind this, exploring various AI image editing models offers a great look into how these advanced tools work.
This diagram breaks down the simplified three-step process you’ll find in most modern editing tools.
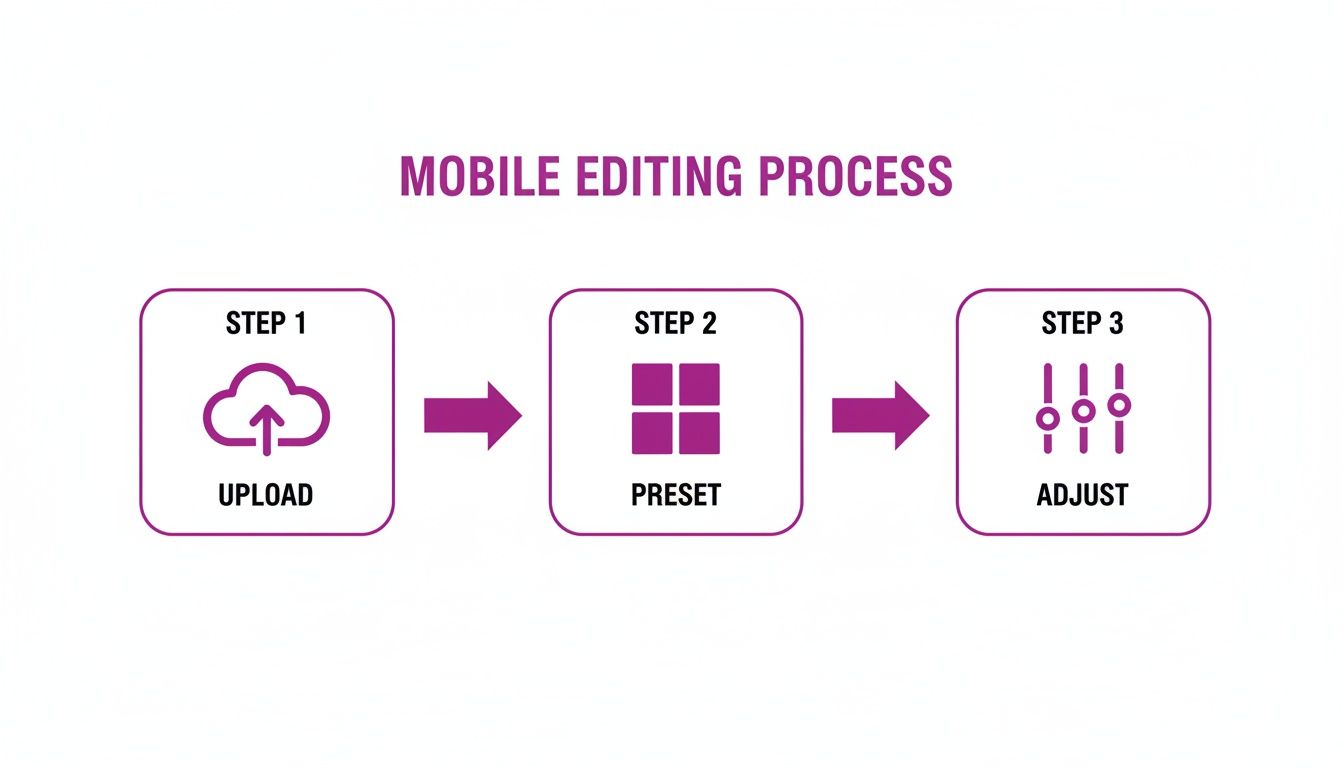
The takeaway here is that the entire workflow—upload, pick a preset, and make minor tweaks—is built for pure speed and efficiency.
For marketing agencies, this has become an essential part of campaign management. I’ve seen teams managing massive libraries of 10,000–100,000 brand assets that need to be converted into multiple variants. Cropping a single image might take up to 60 seconds; at 10,000 images, that’s over 160 hours of mind-numbing labor. AI-assisted batch editors can slash that time dramatically, reclaiming dozens of hours for more strategic work.
Manual vs. AI-Powered Bulk Resizing
The difference between tackling a large batch of images by hand versus using an AI tool is night and day. Let's say you have 100 photos to prep for social media—here’s a realistic breakdown of how that plays out.
| Metric | Manual Process (e.g., Photoshop) | AI Bulk Tool (e.g., Bulk Image Generation) |
|---|---|---|
| Time Investment | 3-5 hours, depending on complexity. | Under 5 minutes, including upload and download. |
| Effort Required | High. Involves opening, cropping, saving, and repeating for each image. | Low. A few clicks to upload, select presets, and start the process. |
| Composition Quality | Variable. Depends on the skill and attention of the editor for each crop. | Consistent. AI identifies and centers the focal point automatically. |
| Scalability | Poor. Time increases linearly with the number of images. | Excellent. Processing 1,000 images takes only slightly longer than 100. |
As you can see, the AI approach isn’t just faster—it delivers more consistent, high-quality results with a fraction of the effort. It’s about working smarter, not harder.
Putting It Into Practice
The best part is how simple the workflow is. It's designed to remove nearly all the friction from the process.
- Upload Your Entire Folder: Just drag and drop or select all the images you need to process in one go.
- Define Your Outputs: Pick your desired aspect ratios from a list of common presets (like for Instagram or Facebook) or punch in your own custom dimensions. You can select multiple formats at the same time.
- Let the AI Work: This is where the magic happens. The tool processes the entire batch, intelligently cropping and reframing each photo for every ratio you selected.
- Download Everything: You get back neatly organized folders with all your freshly formatted images, ready to be deployed immediately.
This shift from manual, one-by-one editing to a bulk, AI-driven approach isn’t just a small improvement—it’s a fundamental change in how visual content is prepared at scale.
For any business that needs to maintain a high volume of visual content across multiple channels, a dedicated tool like this is practically a necessity. If you're looking for an efficient way to handle this, our bulk image resizer is built to automate exactly these kinds of large-scale tasks.
Ultimately, learning how to change the aspect ratio of a photo with AI is about reclaiming your time and ensuring professional, consistent results everywhere your images appear.
Tips for Keeping Your Photos Sharp and Well-Composed
Changing a photo's aspect ratio is simple enough, but doing it well—without butchering the quality or composition—takes a bit more thought. A quick, sloppy crop can easily turn a fantastic shot into a pixelated, awkwardly framed mess.
Let's walk through a few practical tips to make sure you get it right every time.
Your best defense against a low-quality result is a high-quality starting point. Always, always start with the highest-resolution version of the photo you have. Cropping is literally throwing away pixels, so the more you have to begin with, the more freedom you have to reframe without seeing a major drop in sharpness.
I see this all the time: someone grabs a small, compressed image from Instagram and tries to crop it for a big website banner. You're starting with one hand tied behind your back. Go back to the original camera file whenever possible.
Reframe with an Artist's Eye
Once you lock your crop tool to a new aspect ratio, don't just drag a box over the middle and call it a day. This is your chance to actively recompose the shot within the new frame and maybe even improve it.
Think about the rule of thirds. Imagine your frame is split into a 3x3 grid. Instead of placing your subject smack in the center, try aligning it with one of the lines or, even better, at one of the four intersection points. It's a simple trick, but it instantly makes an image feel more balanced and dynamic.
For example, if you're cropping a 3:2 landscape into a wide 16:9, slide the crop box up or down. Don't let the horizon slice the photo perfectly in half. Placing it along the top or bottom third line almost always looks more professional and pleasing to the eye.
Know When to Pad Instead of Crop
Sometimes, cropping just isn't the right move. If every single element in your photo is crucial to the story you're telling, cutting anything out will just ruin it. This is where padding comes in.
Padding means adding borders—usually black, white, or a complementary color—to the sides or the top and bottom of your image to make it fit the new dimensions. This keeps your original photo completely intact.
Think about fitting a vertical portrait into a square frame for a social media profile. If you crop it, you might have to chop off the top of their head or the bottom of their chin. Padding it with white or black bars on the sides preserves the entire portrait. This technique is also a lifesaver in product photography, where you absolutely must show the entire item. For a deeper dive on this, our guide on AI product photography covers more advanced techniques for presenting products without compromise.
And one last thing: always practice non-destructive editing. This means you should either work on a copy of your photo or use software that saves your changes as adjustable layers (like in Photoshop). This way, you can always undo your changes or go back to the original if you decide you don't like the result. No regrets.
Got Questions About Aspect Ratios? We’ve Got Answers.
Even with the best tools, you’re bound to hit a few snags when you start changing a photo's aspect ratio. Let's tackle the most common questions that pop up so you have clear, straightforward answers.
What’s the Difference Between Changing Aspect Ratio and Resizing?
It’s easy to get these two mixed up, but they do completely different things.
Changing the aspect ratio fundamentally alters a photo's shape—the proportion of its width to its height. Think of it like this: cropping a wide 16:9 photo into a perfect 1:1 square is a change in aspect ratio. You've changed its dimensions relative to each other.
Resizing, on the other hand, just changes the image's overall size while keeping its shape identical. If you take a 1000x1000 pixel image (a 1:1 ratio) and shrink it to 500x500 pixels (still 1:1), that’s resizing. Often, you’ll do both: first, crop to the right ratio, then resize the result for its final destination.
Will Changing the Aspect Ratio Ruin My Photo Quality?
It definitely can, and this is a big one to watch out for. Cropping physically throws away pixels from your image. If you start with a low-resolution photo and crop in tight, the part you have left will probably look blurry or pixelated when you try to blow it up.
Stretching or squashing an image to force it into a new ratio is even worse—it will always distort the photo and degrade its quality. This is precisely why it's so important to start with the highest resolution file you have. It gives you the most creative freedom.
The golden rule is simple: give your editor as much data to work with as possible. A high-resolution original is your best defense against a blurry, low-quality final image.
How Do I Figure Out the Pixel Dimensions for a Specific Aspect Ratio?
Good news: you don't need to break out a calculator and wrestle with the math. Most photo editors have this functionality baked right in.
When you grab a crop tool, you can usually just type in a ratio like "4:5" or "16:9," and the crop box will automatically lock to that shape. As you drag it around, it will show you the exact new pixel dimensions.
For times when you need more precision or are planning a project, an online aspect ratio calculator is your best friend. Just plug in your current dimensions and the ratio you want, and it’ll spit out the exact pixel dimensions you need, no guesswork involved.
What if Cropping Chops Off an Important Part of My Photo?
This is a classic problem, but you’ve got a couple of great ways to handle it.
-
Add Padding: Instead of cutting parts of your image away, you can add borders to the sides or the top and bottom. This technique, also known as letterboxing (for horizontal padding) or pillarboxing (for vertical padding), makes the final image fit the new ratio while keeping your entire original photo perfectly intact.
-
Use Generative Fill: A more advanced and frankly incredible option is to use an AI tool with "generative fill" or "outpainting." These features can intelligently create new background to extend your photo, seamlessly filling in the empty space needed for the new aspect ratio. It’s a lifesaver when you need a wider or taller image but can’t afford to lose a single pixel of the original shot.
Ready to stop resizing images one by one? At Bulk Image Generation, our AI-powered tools let you resize, reframe, and reformat entire photo libraries in just a few clicks, saving you hours of tedious work. Explore our suite of free AI tools and start creating smarter, not harder.