how do i blend two pictures together: quick step-by-step

Ryan Bennett • November 14, 2025
how do i blend two pictures together: discover a simple, beginner-friendly method to blend images seamlessly and quickly.
Wondering how you can blend two pictures together?You've really got two main paths you can take: either let an AI tool do the heavy lifting for you, or roll up your sleeves and get hands-on with software like Photoshop. Honestly, the "best" choice just comes down to what you need for your project and how much you want to micromanage the final look.
Your Quick Guide to Merging Two Images
Staring at two separate photos and trying to imagine them as one can feel a bit intimidating. The good news? It's easier than ever to pull off. Whether you're making a piece of surreal art, a composite for social media, or just messing around, figuring out your options is the first step.
Two Paths to a Perfect Blend
The route you take really boils down to what you value more: getting it done fast or getting it done with absolute precision.
-
The AI Approach: Modern AI platforms are pretty incredible. They analyze everything—lighting, color, texture—and merge images with a realism that can be surprising. This is the perfect method if you need a great-looking result without sinking hours into manual edits.
-
The Manual Method: For creators who want total control over every single pixel, programs like Photoshop or the open-source GIMP are still king. Using layers, masks, and blend modes gives you the power to fine-tune every little detail of how your images come together.
Key Takeaway: It’s not about which technique is "better," but which one is right for your goal. AI blending is a lifesaver when you're short on time, while manual editing gives you unmatched creative freedom.
Before you jump in, make sure your images are prepped and ready to go. Sometimes, they won't fit together quite right without a quick resize or crop. For bigger projects, getting comfortable with a bulk image resizer is a huge time-saver and a crucial first step.
From Scissors and Glue to AI Algorithms
Long before anyone typed a prompt, the urge to blend two pictures into one was already a powerful creative force. It didn't start with software; it started with physical art. The whole idea grew out of a technique called photomontage, where artists literally cut and pasted photographs to build entirely new worlds and tell new stories.
This wasn't just a quirky craft project. Back in 1916, artists like John Heartfield and George Grosz were pioneering this method, slicing up photos and rearranging them to create some seriously provocative visuals. They were, in a way, the original image blenders, merging different realities into a single, powerful frame. Their work shows how photomontage became a massive tool for both artistic expression and sharp political commentary.
The Digital Darkroom Changes Everything
Then, of course, digital editing tools crashed the party. Software like Adobe Photoshop completely rewrote the rules with a few core concepts we now take for granted:
- Layers: This was the big one. Suddenly, you could stack images on top of each other without making permanent changes.
- Masks: Instead of being stuck with a hard cut, you could now selectively hide or reveal parts of an image, making transitions look seamless.
- Blend Modes: This was the real magic—using math to control exactly how pixels from one layer would react to the pixels underneath, creating everything from subtle overlays to intense, dramatic effects.
This leap gave creators a level of control that was just a dream with scissors and glue. You could hit "undo," experiment with dozens of ideas in minutes, and tweak every little detail until it was just right.
A True Creative Shift: Moving from physical cutouts to digital layers wasn't just about making things easier. It put professional-grade tools into the hands of anyone with a computer, breaking down the walls that once kept this kind of art exclusive to darkroom wizards.
And that brings us to today, where AI is shaking things up all over again. Modern AI models don't just stack pixels; they analyze the content, lighting, and context of each photo to merge them in ways that can be shockingly realistic. This whole journey—from physical craft to digital precision and now to AI-powered creation—gives you a real appreciation for the incredible tools at our fingertips.
Blending Pictures Effortlessly with AI
If you've ever tried to blend two pictures together, you know the pain. Hours spent fiddling with layers, masks, and color correction. Thankfully, AI throws that steep learning curve right out the window. It swaps all that manual tweaking for a few smart instructions, letting you focus on the creative idea, not the tedious technical stuff.
Let's say you want to merge a powerful portrait with a moody cityscape—a classic combo. With the right AI tool, this isn't a complex chore anymore. It's about describing what you want.
The magic is all in the prompt. You're not just telling the AI to smash two images together; you're giving it artistic direction. For our portrait and cityscape, you could try something like: "Blend this portrait into the cityscape. The person should look like they're watching the city at dusk. Match the warm light from the streetlights on their face and clothes." A prompt like that gives the AI everything it needs to do the heavy lifting for you.
The AI Advantage in Image Blending
Modern AI tools are fantastic at handling the stuff that used to require a professional's eye. They automatically analyze both images and make intelligent adjustments so the final picture looks like it was shot that way.
- Color and Tone Matching: The AI harmonizes the color palettes, so the cool blues of a skyscraper don't clash with the warm skin tones in a portrait. It just works.
- Lighting and Shadow Consistency: It actually identifies where the light is coming from in each photo and casts realistic shadows. This is key to making a subject feel like they truly belong in the new scene.
- Perspective and Scale Alignment: The system is smart enough to resize and angle your subject to fit the background's perspective, avoiding that awkward, "pasted-on" look we all dread.
This kind of automation has come a long way. Image blending was completely transformed by generative AI. Around 2020, AI synthesis tools really took off, letting users merge photos while the AI seamlessly adjusted textures and lighting on its own. It's a shift that’s changing everything from advertising to digital art.
The image below gives you a glimpse into how AI models see and create visuals from text—the same core function that powers AI blending.
It’s not just looking at pixels. The AI understands concepts like "style" and "object," which is what makes a great blend possible.
Refining Your AI-Generated Blend
Even with a powerful AI, sometimes you need a final touch. After the first blend, you can easily iterate. Try a follow-up prompt like, "Now, add a subtle lens flare from the top right corner." This back-and-forth process lets you polish the image until it's perfect. For anyone serious about diving deeper, finding the best AI for image creation is a solid next step to build out your creative arsenal.
Pro Tip: Think of your images as ingredients and your prompt as the recipe. The better the recipe, the better the final dish. Using a dedicated AI image generator gives you the control you need to get professional results every single time.
Getting Your Hands Dirty: The Manual Photo Blending Method
Sometimes, you just need total control. When an AI-generated blend doesn't quite capture your vision, it's time to roll up your sleeves with software like Adobe Photoshop. This old-school approach trades the instant gratification of AI for pixel-perfect precision, letting you get into the nitty-gritty of your composition. It all boils down to a couple of core ideas that have been the bedrock of digital art for decades.
Layers Are Everything
The magic of manual blending starts with layers. Think of it as working with a stack of transparent sheets. Each image gets its own sheet, so you can move them, resize them, and tweak them independently without messing up the original photos. It’s a non-destructive way of working that makes complex edits not just possible, but manageable.
You can see the difference pretty clearly when you compare it to a typical AI workflow.
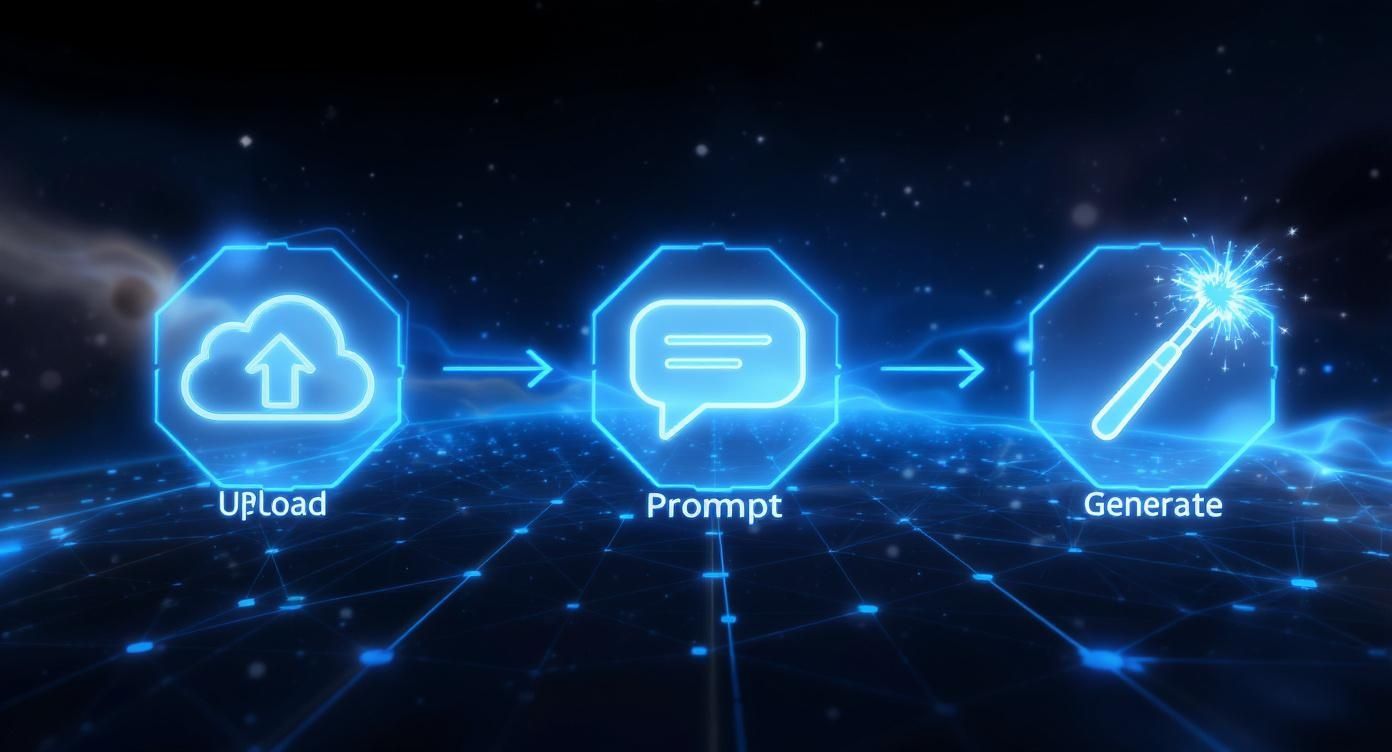
While AI handles the heavy lifting of uploading, prompting, and generating, the manual method requires you to be the architect, building the final image piece by piece.
Wielding Layer Masks and Blend Modes
Once you've got your images stacked, your new best friends are layer masks. A mask is basically a stencil you can attach to a layer. When you paint on the mask with black, you hide parts of that layer; painting with white brings them back. This is the technique for creating those soft, seamless transitions that make two separate pictures look like they belong together.
Then you have blend modes. These are powerful settings that tell the pixels on one layer how to interact with the pixels on the layer directly beneath it. A mode like ‘Overlay’ can punch up the contrast, while ‘Multiply’ is great for creating dramatic, shadowy effects. It’s all about experimenting to see what works for your specific images.
My Go-To Workflow: I always start by putting my main image on the bottom layer. The second image—maybe a texture or another subject—goes on top. From there, I add a layer mask to that top layer and grab a soft, black brush to gently paint away the parts I don't want, letting the image below show through. It’s the fastest way to get a clean blend.
These tools completely changed the game. When Photoshop first came out back in 1990, it gave artists unprecedented control with layers and masks. By the early 2000s, it had captured over 90% of the professional market, cementing these manual techniques as the industry standard. You can dive deeper into the fascinating history of digital photo manipulation to see just how far we've come.
Let's say you want to give a modern portrait a gritty, vintage feel by adding a paper texture. You'd simply place the texture layer on top of the portrait, switch its blend mode to something like ‘Multiply’ or ‘Overlay,’ and see what looks best. If the texture is too strong on the person's face, you just use a layer mask to dial it back in that specific area. Easy.
Before you even open your editing software, it's a good idea to make sure your images are sized correctly for your project. Using a simple aspect ratio calculator can save you a lot of headaches later on.
Little Details That Make a Huge Difference
The gap between a quick, amateur-looking blend and a professional composite is all in the details. Honestly, it’s less about the software you use and more about training your eye to spot inconsistencies. When you master these little things, you can blend two pictures together so they look like they were always part of the same world.
The absolute biggest giveaway is mismatched light and shadow. It’s the first thing the human eye notices. If one of your photos was shot in the harsh midday sun and the other has that soft, golden-hour glow, the final image is going to feel completely off. You have to play detective: identify the main light source in both images and make sure the shadows fall in the same direction, with a similar sharpness.
Getting Your Scene in Harmony
Next up, you need to harmonize the colors and tones. A photo with warm, almost sepia hues just won't mix naturally with another that's full of cool, blue undertones. This is where your tool's color correction features come in. Play with the temperature, tint, and saturation sliders until the images feel like they were shot with the same camera, on the same day.
Pro Tip: Perspective is the silent killer of realism. I’ve seen so many otherwise great composites fall apart here. Pay close attention to the horizon lines and vanishing points. If you drop a person from one photo into a landscape from another, their eye level and scale must align with the new environment.
One of my favorite tricks for seating a subject in a new scene is skillfully blurring backgrounds to create a believable depth of field. It immediately helps the subject feel like they belong there.
And a final, crucial point: always, always start with the highest resolution images you can get your hands on. Nothing screams "fake" faster than a pixelated, low-quality finish when the rest of the image is sharp. Nail these details, and your visuals will go from just okay to truly convincing.
Got Questions About Blending Pictures?
When you first start figuring out how to blend two pictures, a few questions always seem to pop up. It doesn't matter if you're aiming for a quick, AI-powered composite or getting your hands dirty with manual editing—getting the right answers early can save you a ton of frustration.
What’s the Absolute Easiest Way to Start?
For anyone just dipping their toes in, an AI image blending tool is, without a doubt, the simplest route. These platforms are built to handle the tricky stuff for you, like getting the colors and lighting to match up.
You just upload your photos, type a quick description of what you want, and the AI does the heavy lifting. It’s perfect when you need something that looks good, fast.
Can I Actually Do This on My Phone?
Absolutely. You’d be surprised how powerful mobile apps have become.
Some, like Photoleap, bring AI-driven tools right to your fingertips, making the whole process incredibly simple. Others, like Adobe Photoshop Express, give you more of that classic, desktop-style control with layers and blend modes. It’s a game-changer for editing on the go.
The Secret to a Natural Blend: A believable final image really boils down to three things: consistent lighting, harmonious color, and the right perspective. Make sure the light source seems to hit every object in the same way, and don’t be afraid to tweak the colors until everything feels like it belongs together. Pro tip: using a soft-edged brush on a layer mask is my go-to for creating a much smoother, more realistic transition between the two images.
Keep these fundamentals in mind, and you'll be creating more convincing and professional-looking blends in no time.
Ready to create stunning visuals in seconds? With Bulk Image Generation, you can generate up to 100 unique, high-quality images from a single prompt, streamlining your entire creative workflow. Try it today at bulkimagegeneration.com.
