
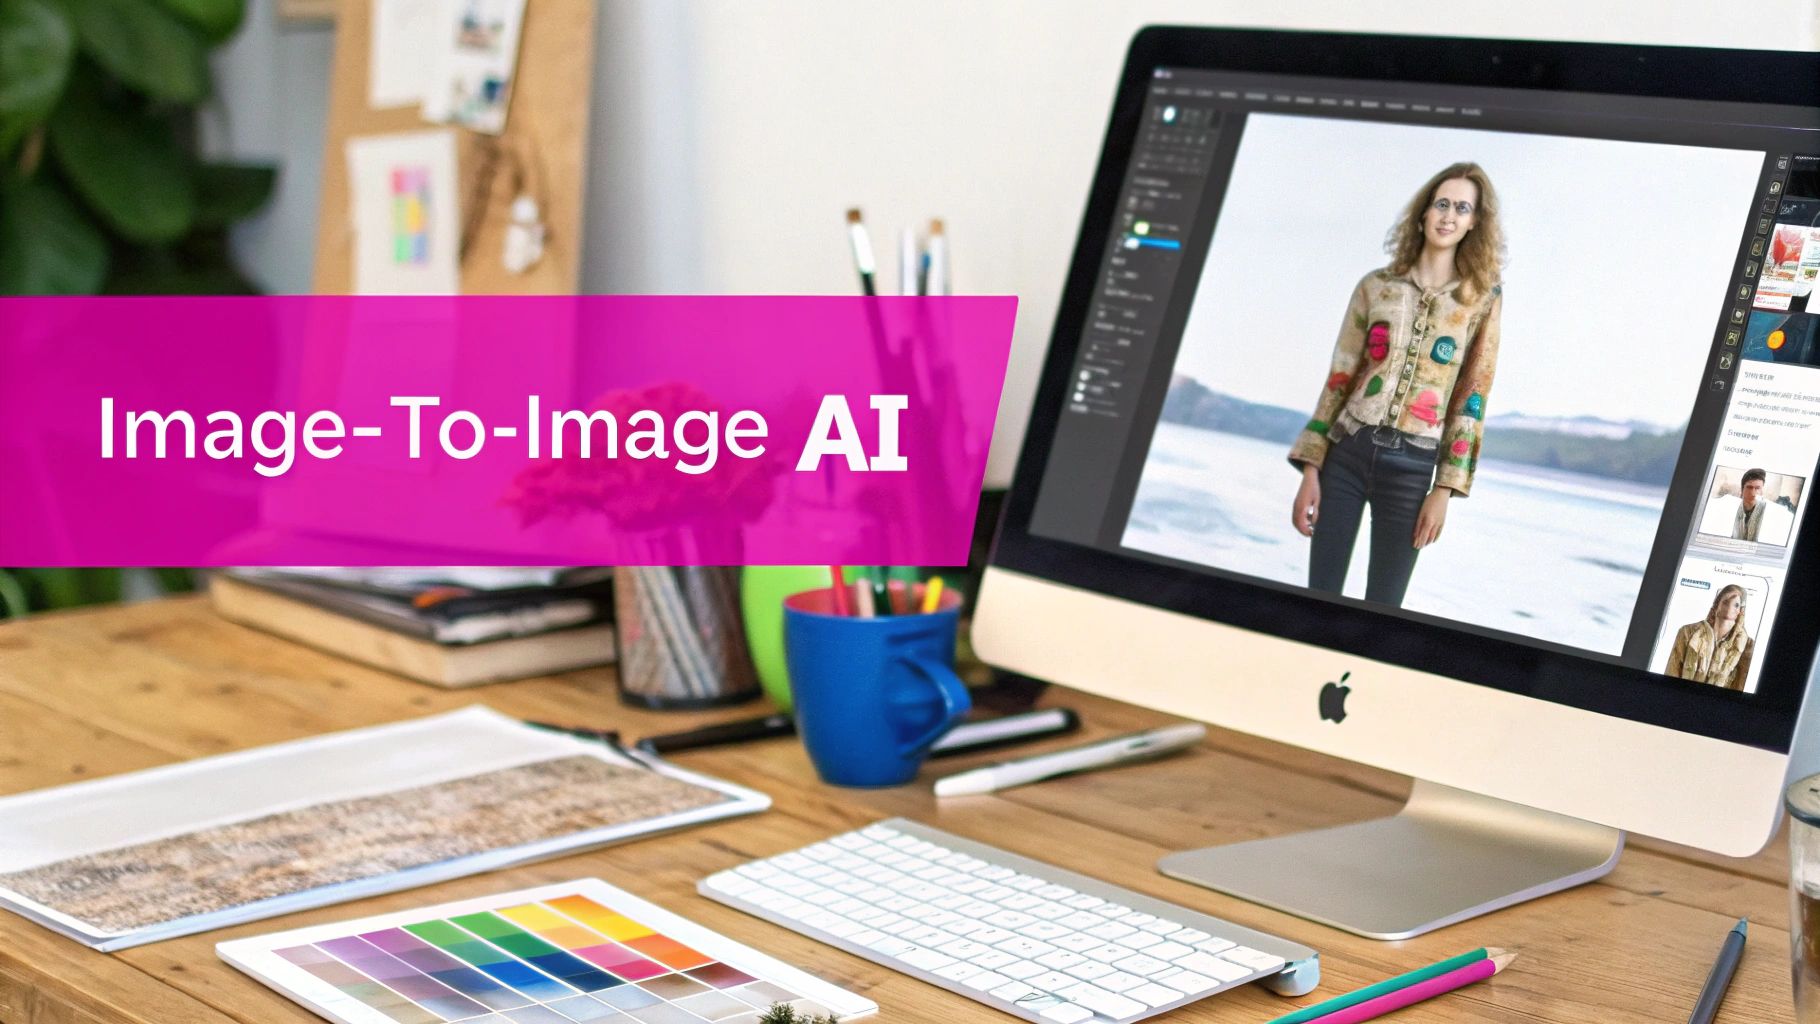
A Guide to Stable Diffusion Image to Image

Aarav Mehta • September 23, 2025
Master Stable Diffusion image to image workflows. This guide covers how to transform sketches, photos, and renders into AI-generated art with real examples.
Ever had a rough sketch you wished you could magically turn into a photorealistic masterpiece? Or maybe you have a basic 3D render that needs a touch of artistic flair. This is precisely where Stable Diffusion image to image (img2img) comes in, and it's a game-changer.
Instead of starting from a blank canvas with only a text prompt, img2img uses an image you provide as a powerful guide for the AI.
The Creative Power of Image-Guided AI Art
Standard text-to-image generation literally starts from digital noise, trying its best to interpret your words. The image-to-image workflow, however, uses an existing picture as its foundation. This one difference gives you an incredible amount of control over the final result.
The AI isn't just taking a wild guess; it’s actively building on your image's composition, colors, and overall structure. It’s an approach that feels much more like a collaboration, perfect for refining ideas and speeding up the creative process.
This method was a huge step forward in making generative art truly useful for creators. When Stable Diffusion first dropped in 2022, it was the open-source model that could actually run on consumer-grade hardware. That accessibility was a key reason it was adopted so quickly by artists and developers everywhere. You can read more about its massive impact on AI image creation over at AISTratagems.com.
Understanding the Core Differences
To really get why img2img is so powerful, it helps to see how it stacks up against its purely text-based cousin. Your choice between them boils down to one simple question: are you looking for something brand new, or do you need to refine something you already have?
The key takeaway is control. Text-to-image is for discovering new ideas from scratch, while image-to-image is for iterating and transforming existing concepts with precision.
Let's quickly break down the main distinctions. This should help you figure out which workflow is the right fit for your next project.
Image to Image vs Text to Image Generation
Here’s a quick look at the fundamental differences between these two primary Stable Diffusion workflows.
| Feature | Image to Image (img2img) | Text to Image (txt2img) |
|---|---|---|
| Starting Point | An existing image and a text prompt | A text prompt only |
| Control Level | High: Preserves composition, color, and shapes from the source | Low: Relies solely on prompt interpretation |
| Primary Use Case | Refining sketches, changing styles, upscaling, inpainting | Brainstorming, generating entirely new concepts |
| Creative Process | An iterative and evolutionary process | A discovery and exploration process |
As you can see, Stable Diffusion image to image isn't just another option; it’s a specialized tool for anyone who already has a visual starting point.
Whether you're an artist who wants to quickly color a line drawing, a designer looking to visualize product variations, or a photographer hoping to add an artistic spin to your shots, this workflow offers a direct and intuitive path to getting exactly what you envision.
Setting Up Your Creative AI Workspace
A smooth creative flow starts long before you generate your first image. Getting your workspace set up properly—whether it's on your own machine or in the cloud—means your tools are ready the moment inspiration strikes. This prep work is what makes the stable diffusion image to image process feel less like a technical chore and more like an intuitive creative session.
For a lot of folks, the AUTOMATIC1111 Web UI is the undisputed king for running Stable Diffusion. It’s powerful, incredibly flexible, and has a massive community behind it. The catch? Running complex models locally can chew through your VRAM, which is a real roadblock for many. If you find your hardware is holding you back, you might want to look into dedicated image generation servers to just bypass those limitations and get straight to creating.
Choosing the Right Foundation Model
The foundation model you choose, often called a "checkpoint," is the single biggest factor in determining the core aesthetic of your images. I like to think of it like choosing a specific type of film for a camera; each one has its own distinct character and feel. You wouldn't shoot a gritty noir film on the same stock you'd use for a vibrant nature documentary, right?
It's the same idea here. Models are trained to excel at specific styles. Some of the big ones you'll run into are:
- SDXL (Stable Diffusion XL): This is a fantastic, versatile base model. It's known for its high coherence and ability to understand really complex prompts, making it a great all-rounder.
- Photorealistic Models: These have been fine-tuned to create images that look like they were snapped with a real camera. They're amazing at rendering details like skin texture and natural lighting.
- Anime or Stylized Models: If you're creating illustrations, concept art, or anything non-photorealistic, these models are your best friend. They're trained specifically on certain art styles to nail that look.
You can find thousands of these specialized models on community hubs like Civitai. It’s worth spending some time browsing to find the perfect artistic foundation for your project.
The Importance of a Strong Source Image
This is a big one: the quality of your output is directly tied to the quality of your input. The old saying "garbage in, garbage out" has never been more true than in an image-to-image workflow. A strong source image gives the AI a clear set of instructions on composition, form, and color.
A well-chosen source image isn't just a starting point; it's the architectural blueprint for your final creation. Small adjustments to the input can lead to dramatically different and better outcomes.
So, what makes an image "strong"? It needs a clear subject, good lighting, and a well-defined composition. If you feed the AI a blurry, poorly lit photo, it’s going to get confused and give you a muddled, messy result. On the other hand, a clean sketch with defined lines gives the model a solid structure to build upon, making it far more likely the final generation will respect your original vision. This careful prep work is what sets you up for successful experiments and predictable, high-quality results down the line.
Mastering Your First Image Transformation
Alright, with your workspace set up, it's time to get to the good stuff—the core of the stable diffusion image to image process. This is where you’ll start seeing your ideas come to life, transforming a basic concept into something polished and impressive. The magic begins the second you upload your source image.
The first step couldn't be simpler: just load your chosen image into the img2img interface. Once it's there, your main tools for guiding the AI are the text prompt and a few really important sliders. A classic beginner mistake is to write a prompt as if you're starting from scratch (text-to-image), but that just creates a tug-of-war between your words and the visual information the AI is already seeing.
Your prompt needs to be a collaborator with your image, not an opponent. If you upload a quick sketch of a forest, don't just type "a forest." That doesn't help. Instead, guide the AI by adding the details and style you want to see.
Think more along the lines of, "enchanted forest, mystical glowing mushrooms, ancient mossy trees, volumetric lighting, fantasy art." A prompt like this builds on the structure you provided, layering in style and specific elements without trying to throw out your original idea. If you're hitting a creative wall, a dedicated tool can be a huge help. You can get some great ideas from our free AI image prompt generator.
The diagram below breaks down this simple but powerful workflow.
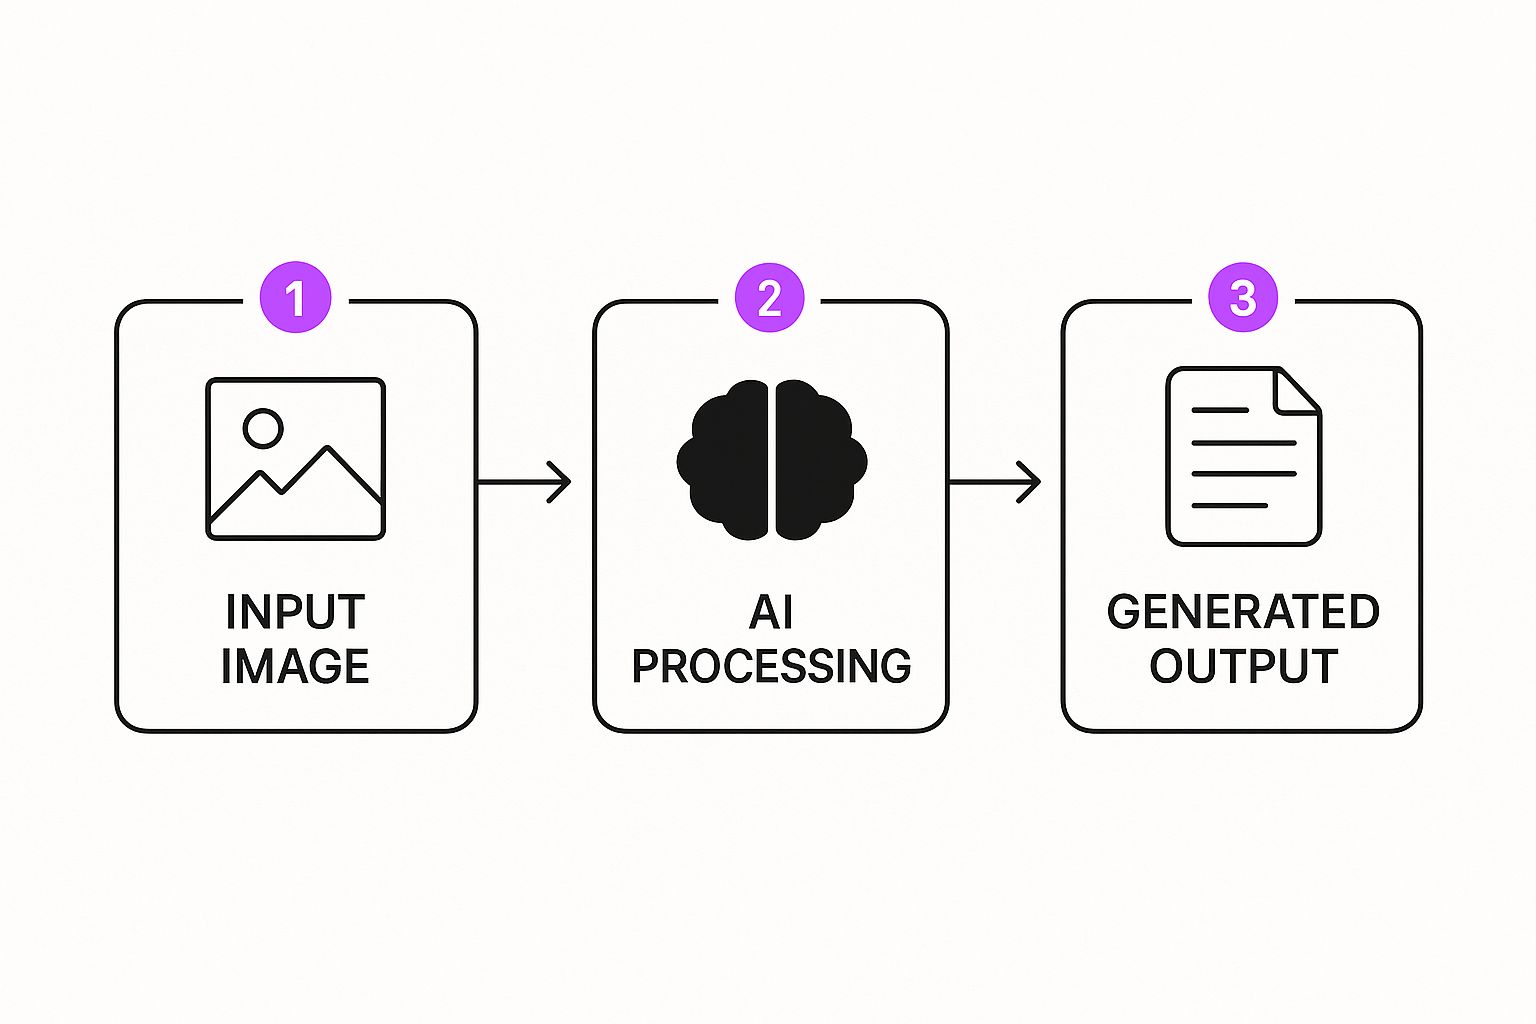
As you can see, your input directly influences how the AI processes the image. The final output is a true collaboration between your vision and the model's interpretation.
The Denoising Strength Slider Is Key
Out of all the settings you can tweak, one is far more important than the rest for controlling your final image: Denoising Strength. This one slider, which goes from 0.0 to 1.0, determines the balance of power between your original image and your text prompt.
Think of it as a "creativity" dial. A low value tells the AI, "Hey, stick very close to the original image's structure, colors, and composition." A high value gives it a license to get experimental and completely transform your image based on the prompt, sometimes creating something brand new.
Learning how to use Denoising Strength is the single most important skill in the image-to-image workflow. It's the difference between making subtle tweaks and performing a complete artistic overhaul.
Let's break down how this works in real-world situations.
- Low Denoising Strength (0.1 - 0.4): This range is your go-to when you need to preserve the soul of the original image. It’s perfect for upscaling a low-resolution photo, adding small details, or applying a light stylistic filter. The changes are minimal, but the core image is unmistakable.
- Medium Denoising Strength (0.4 - 0.7): This is the sweet spot for most creative projects. Here, the AI has enough freedom to change the style and inject significant new details from your prompt, but it still honors the overall composition of your source image. Turning a daytime photo into a nighttime scene or transforming a pencil sketch into a full-color painting works beautifully here.
- High Denoising Strength (0.7 - 1.0): You'll want to crank it up this high when you're looking for a radical transformation. In this range, the AI leans heavily on your text prompt, using your source image more as a loose compositional suggestion than a strict blueprint. This is fantastic for generating abstract art from a simple photo or completely reimagining a character's design.
Fine-Tuning With Other Essential Settings
While Denoising Strength might be the star of the show, two other settings are crucial for dialing in the quality of your final image: CFG Scale and Sampling Steps.
CFG Scale (Classifier-Free Guidance Scale) basically tells the AI how strictly it needs to follow your text prompt. A lower value, around 5-7, gives the AI more creative leeway, which often results in more artistic or unexpected images. Pushing it higher to 8-12 forces the AI to stick to your prompt much more literally. This can give you a more "correct" result, but sometimes the image can look a bit stiff or "over-baked."
Sampling Steps is all about how many times the AI refines the image before it's done. More steps generally mean more detail and higher quality, but you quickly hit a point of diminishing returns. For most modern samplers, 20-30 steps is plenty to get a fantastic result. Going up to 50 or 100 rarely makes a noticeable difference and just makes you wait longer.
By balancing these three key settings—Denoising Strength, CFG Scale, and Sampling Steps—you get incredibly precise control over the final output, letting you transform any image with skill and intention.
Advanced Control with Inpainting and ControlNet
Basic image-to-image is a fantastic starting point, but what happens when you need surgical precision? This is where you move beyond broad stylistic changes and into the realm of pixel-level control. Two of the most critical tools for this are Inpainting and ControlNet.
These aren't just fancy features; they're what separate simple edits from professional-grade manipulations in any stable diffusion image to image workflow. Think of them as the tools that help you solve those frustrating creative problems that standard settings just can't touch, taking your work from pretty good to absolutely perfect.
Precise Fixes with Inpainting
Have you ever generated an almost perfect image, only to have it ruined by a character with six fingers or a bizarre object in the background? Inpainting is built to solve exactly that. It lets you draw a mask over a specific part of your image and tell the AI to regenerate only that area.
It's essentially a smart eraser that fills in the blank space with whatever your new prompt describes. The applications are incredibly practical.
- Correcting Mistakes: This is the most common use. You can easily fix AI-generated weirdness like distorted hands, misplaced limbs, or strange artifacts without starting over.
- Adding New Elements: Want to add a bird to an empty sky or place a book on a table? Just mask the area and prompt for it.
- Changing Details: Inpainting is perfect for altering a character’s shirt, changing their hair color, or swapping one object for another without touching the rest of the scene.
By 2025, the generative AI field is packed with incredible open-source models pushing quality forward. Models like Stable Diffusion 3.5 Large, SDXL, and FLUX.1 show just how far these diffusion-based architectures have come, making precise edits more powerful than ever.
Directing Composition with ControlNet
If inpainting is your scalpel, then ControlNet is your architectural blueprint. It’s a game-changing method that analyzes your source image to extract structural information—like poses, depth maps, or outlines—and uses that data to guide the AI’s composition with incredible accuracy.
This gives you a level of control that feels almost like magic. Instead of just hoping the AI follows your image's general layout, you can force it to.
ControlNet bridges the gap between your creative intention and the AI’s interpretation. It ensures that the fundamental structure of your image remains intact, no matter how much you change the style or subject.
Here are a few of the most popular ControlNet models and what they're great for:
- OpenPose: Extracts a stick-figure skeleton from people in your source image. This guarantees the generated character will match the exact pose.
- Canny: Creates a clean, black-and-white edge map from your image. The AI uses these hard lines as a guide, making it perfect for preserving detailed shapes and outlines.
- Depth: Generates a depth map, which tells the AI how far away objects are from the "camera." This is fantastic for maintaining the 3D structure and perspective of a scene.
Combining these tools opens up a ton of creative freedom. For highly specialized tasks, like changing a specific product in an advertisement while keeping the background and lighting identical, you can explore advanced workflows for subject replacement.
These same control methods are also amazing for generating unique materials. You could inpaint new patterns onto a fabric swatch or use ControlNet to guide the creation of a perfectly seamless texture. For a deeper dive, check out our guide on using an AI texture generator for things like game development or 3D modeling.
Scaling Your Workflow with Batch Processing
Making images one by one is a great way to learn the ropes, but when a real project lands on your desk, that approach just doesn't cut it. You need to move from individual creations to a systematic production line. This is where stable diffusion image to image truly shines—letting you apply a consistent style across a whole batch of assets without mind-numbing manual repetition.
Think about it. Maybe a client needs an entire photo collection stylized, or you're creating dozens of game assets that all need to share the same visual DNA. Batch processing is your best friend here. In AUTOMATIC1111, you can just point the tool to a folder of images, write a single guiding prompt, and let it churn through the entire set on autopilot.
Honestly, this is a massive time-saver for anyone tackling large-scale projects. It also guarantees every single image gets the exact same treatment, which is key for a professional, cohesive final product.
Automating Your Experiments with X/Y/Z Plots
Trying to find that perfect combo of settings can feel like you’re just guessing and checking over and over. What if you could run all those tests at once? That's exactly what X/Y/Z plots are built for. This slick scripting feature lets you see how different settings play off each other, all in one generation.
Instead of manually tweaking the Denoising Strength, generating an image, then nudging the CFG Scale and trying again, you set up a grid experiment. For instance:
- X-axis: Denoising Strength (try values like 0.4, 0.6, 0.8)
- Y-axis: CFG Scale (set values like 5, 7, 9)
When you run this, you'll get back a grid of nine images, showing you every possible combination of those settings. This gives you an instant visual map of how even tiny changes affect the output, helping you find the perfect "recipe" for your desired look without any of the guesswork.
X/Y/Z plots are the secret to unlocking serious efficiency. They swap hours of manual adjustments for a single, automated test, letting you zero in on the best settings in a fraction of the time.
This systematic approach is invaluable for refining your style. Of course, before you kick off a big batch run, you need to make sure all your source images are the right size for consistent results. If you've got a folder of images that need prepping, a good bulk image resizer can get that done for you in a flash.
By combining folder-based batch processing for production with X/Y/Z plots for experimentation, you build a workflow that’s both fast and creatively effective. You'll find yourself spending way less time clicking buttons and more time making the important artistic calls. That shift from manual labor to strategic direction is what really lets you scale your creative output.
Common Questions on Image to Image Workflows
Even when you feel like you've got the hang of stable diffusion image to image workflows, it's normal to run into a few roadblocks. Let's walk through some of the questions I see pop up all the time, so you can get back to creating instead of troubleshooting.
What Is the Most Important Setting in Image to Image?
Without a doubt, it’s Denoising Strength. If you only master one setting, make it this one.
This single slider, which runs from 0.0 to 1.0, is the master control for how much creative freedom you give the AI. It tells Stable Diffusion how much to stick to your original image versus how much to listen to your text prompt.
- Low values (0.2-0.4) are perfect for subtle touch-ups. Think upscaling a slightly blurry photo or adding a gentle artistic filter without losing the original's soul.
- High values (0.7-0.9) basically hand the keys over to the AI. This is where you go for a total transformation, turning a simple sketch into a photorealistic scene.
- The sweet spot for most creative work is between 0.5 and 0.75. This range strikes a beautiful balance, respecting your source image while injecting fresh ideas from your prompt.
Getting a feel for this slider is the real key to unlocking the results you're picturing in your head, whether that's a tiny fix or a complete artistic overhaul.
Why Do My Generated Images Look Blurry or Distorted?
It's incredibly frustrating when your results come out looking like a blurry, distorted mess. Before you scrap the whole idea, it's usually one of a few common culprits.
First, check your source image. A low-resolution input will almost always give you a low-quality output. Garbage in, garbage out, as they say. Another thing to look at is your VAE (Variational Autoencoder)—sometimes the one you're using just doesn't play well with your chosen model. You might also have your sampling steps set too low. While 20-30 steps is a solid baseline, more complex prompts can require a bit more processing power to render cleanly.
A very high CFG Scale (anything above 12) is another classic cause of distortion. It essentially makes the AI try too hard, resulting in over-baked, harsh images. Drop it down to around 7 and see if that smooths things out.
Can I Use ControlNet with Batch Image to Image?
Yes, absolutely—and this is where things get really powerful for creating consistent visuals at scale.
When you bring a ControlNet model into your batch workflow, you're giving the AI a strict set of rules to follow for every single image. For example, using 'Canny' preserves the exact edges from each source image, while 'OpenPose' locks in the human figure's pose.
This is a game-changer for professional work. Imagine generating character sheets where every single pose is identical across different outfits. Or maybe you're applying a consistent architectural style to a dozen different building photos while keeping their unique structures perfectly intact. It turns what would be a tedious manual task into a fast, automated process.
Ready to stop generating images one by one? Bulk Image Generation lets you create hundreds of professional-quality visuals in seconds, turning a simple goal into a full-fledged campaign with our advanced AI. Start creating faster today at https://bulkimagegeneration.com.