
A Practical Guide to Sketch to Image AI Art Generation

Aarav Mehta • December 16, 2025
Discover how to use sketch to image AI to transform your simple drawings into professional-quality art. Learn the best techniques and workflows.
Ever sketched a brilliant idea on a napkin, wishing you could just snap your fingers and turn it into a polished, professional image? That's the magic of Sketch to Image AI. This isn't just a tool; it's a bridge that transforms your simplest doodles and line art into stunningly detailed visuals. It finally gives everyone—regardless of artistic skill—a direct line from their imagination to a high-quality final picture.
Where Sketch to Image Came From (and Where It's Going)
The idea of teaching a machine to draw isn't exactly new. The whole journey kicked off way back in the late 1960s when an artist named Harold Cohen developed AARON, one of the first AI systems that could generate drawings from a set of rules. It was a monumental first step.
Fast forward to today, and that early innovation has exploded into a massive industry. We're now looking at projections for the AI art market to smash $10 billion by 2027 in North America and Asia alone. The tools have gone from clunky academic projects to powerful, accessible platforms anyone can use.
This guide isn't about the abstract history, though. It's about giving you practical, actionable workflows you can start using right now. We'll dive into how these systems actually see your drawings and translate them into something amazing.
Putting Creativity in Everyone's Hands
What makes this tech so incredible is how it levels the creative playing field. You no longer need to spend years mastering complex design software to get your ideas out there. The real-world benefits are huge.
- Speed Up Your Prototypes: Designers can now visualize product concepts in minutes, not hours.
- Empower the "Non-Artists": Marketers, teachers, and entrepreneurs can create custom graphics without ever hiring a designer.
- Unlock New Creative Paths: Artists can experiment with styles and compositions at a speed that was unthinkable a few years ago.
If you're looking for a perfect example of this in action, you can easily create custom coloring pages from your sketches with AI. It’s a fun, practical way to see the technology work its magic.
The real power of sketch to image AI is how it acts as a collaborator. It takes your rough idea, your initial vision, and helps you build on it to create something you couldn't have made alone.
With that in mind, this guide will walk you through everything you need to know, starting with the most critical first step: getting your sketch ready for the AI.
Preparing Your Sketch for Optimal AI Results
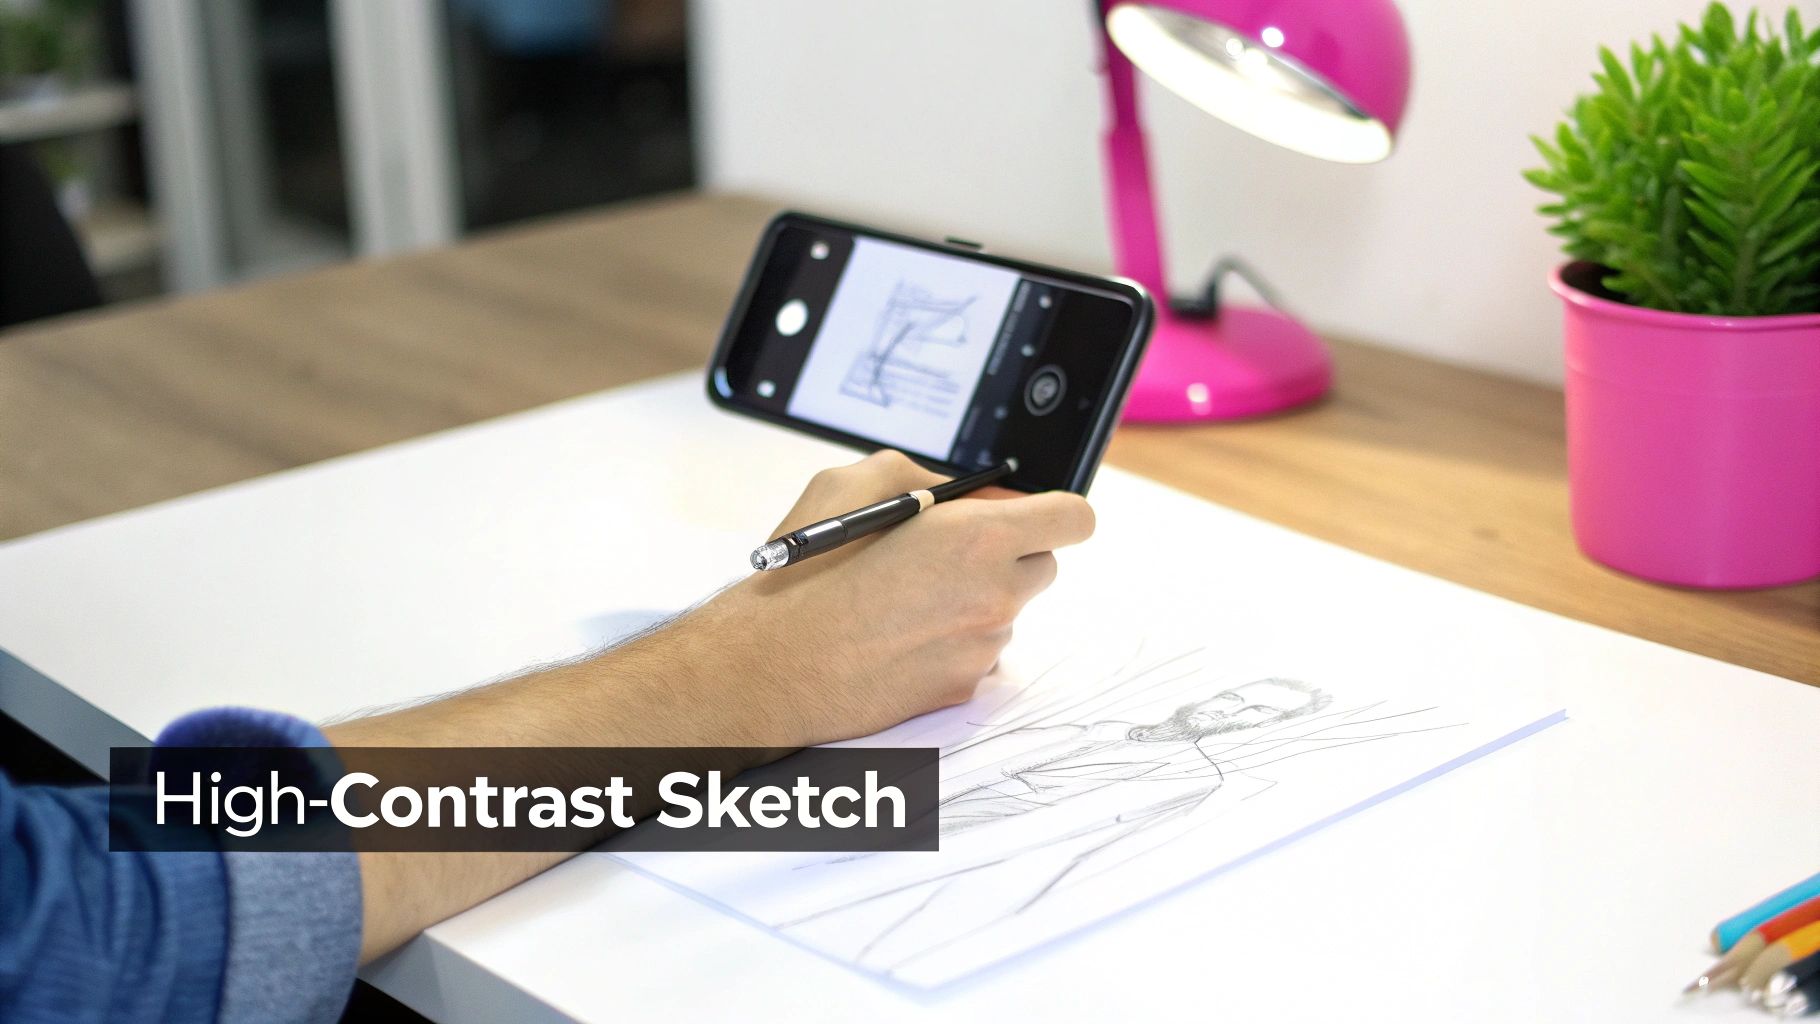
The journey from a simple sketch to a professional AI image starts with a single, foundational principle: clear communication. Think of your sketch as the blueprint you’re handing over to the AI. If that blueprint is messy, faint, or vague, the AI has to guess—and that often leads to results you never intended.
A clean, well-defined sketch is the most direct way to guide the AI toward your vision. Your main goal here is to create high contrast. The models that turn sketches into images are trained to recognize and interpret clear lines and shapes. Faint pencil marks on off-white paper can easily get lost in translation, resulting in a muddled or weak final image.
Digital Sketching vs. Physical Paper
You have two main paths to create your source sketch: drawing digitally or drawing on paper and then digitizing it.
Going digital from the start, using an app like Procreate or even a basic notes app on your phone, often gives you a head start. It’s far easier to create crisp, uniform lines and a perfectly clean background, which the AI absolutely loves. Plus, you can erase mistakes without leaving behind any smudges.
If you prefer the classic feel of pen on paper, that’s perfectly fine, too. You just need to be a bit more mindful of how you digitize it. A quick photo from your smartphone can work, but you have to pay attention to lighting and shadows.
- Find bright, indirect light. You want to avoid casting your own shadow over the paper. Natural light from a window is usually your best bet.
- Use a scanner app. Apps like Adobe Scan or even your phone's built-in document scanner can automatically eliminate shadows and boost contrast for you.
- Keep it simple. A bold black marker on clean white paper is the gold standard for a reason. It just works.
One of the most common mistakes I see is including too much detail, especially shading. While shading adds depth for a human viewer, it often reads as confusing noise to an AI. Stick to clear outlines and solid shapes. You can let the AI handle the lighting and shadows based on your text prompt later on.
Best Practices for Your Sketch
Whether you’re working digitally or on paper, your sketch needs to be prepared correctly. At this stage, you need to prioritize clarity over artistic flair to make it easy for the machine to interpret.
To make it even clearer, here’s a quick rundown of what works and what doesn't.
Sketch Preparation Best Practices
| Technique | Do This (For Best Results) | Avoid This (Common Mistakes) |
|---|---|---|
| Line Work | Use bold, solid lines with high contrast (e.g., black on white). | Faint pencil marks, sketchy lines, or low-contrast colors. |
| Shading | Leave interiors of shapes clean or use minimal, clean cross-hatching. | Complex shading, gradients, and smudging. |
| Background | Ensure a clean, uniform background with no shadows or textures. | A cluttered background, shadows from lighting, or textured paper. |
| Composition | Clearly define the main subject and its basic form. | Ambiguous shapes or overlapping elements that blend together. |
Following these guidelines ensures your visual instructions are unmistakable.
One last tip: think about your final output from the very beginning. Planning the dimensions is crucial. We have a handy aspect ratio calculator you can use to make sure your sketch aligns perfectly with your intended final image size, whether it's for a social media post or a print project.
Crafting Prompts That Bring Your Sketch to Life
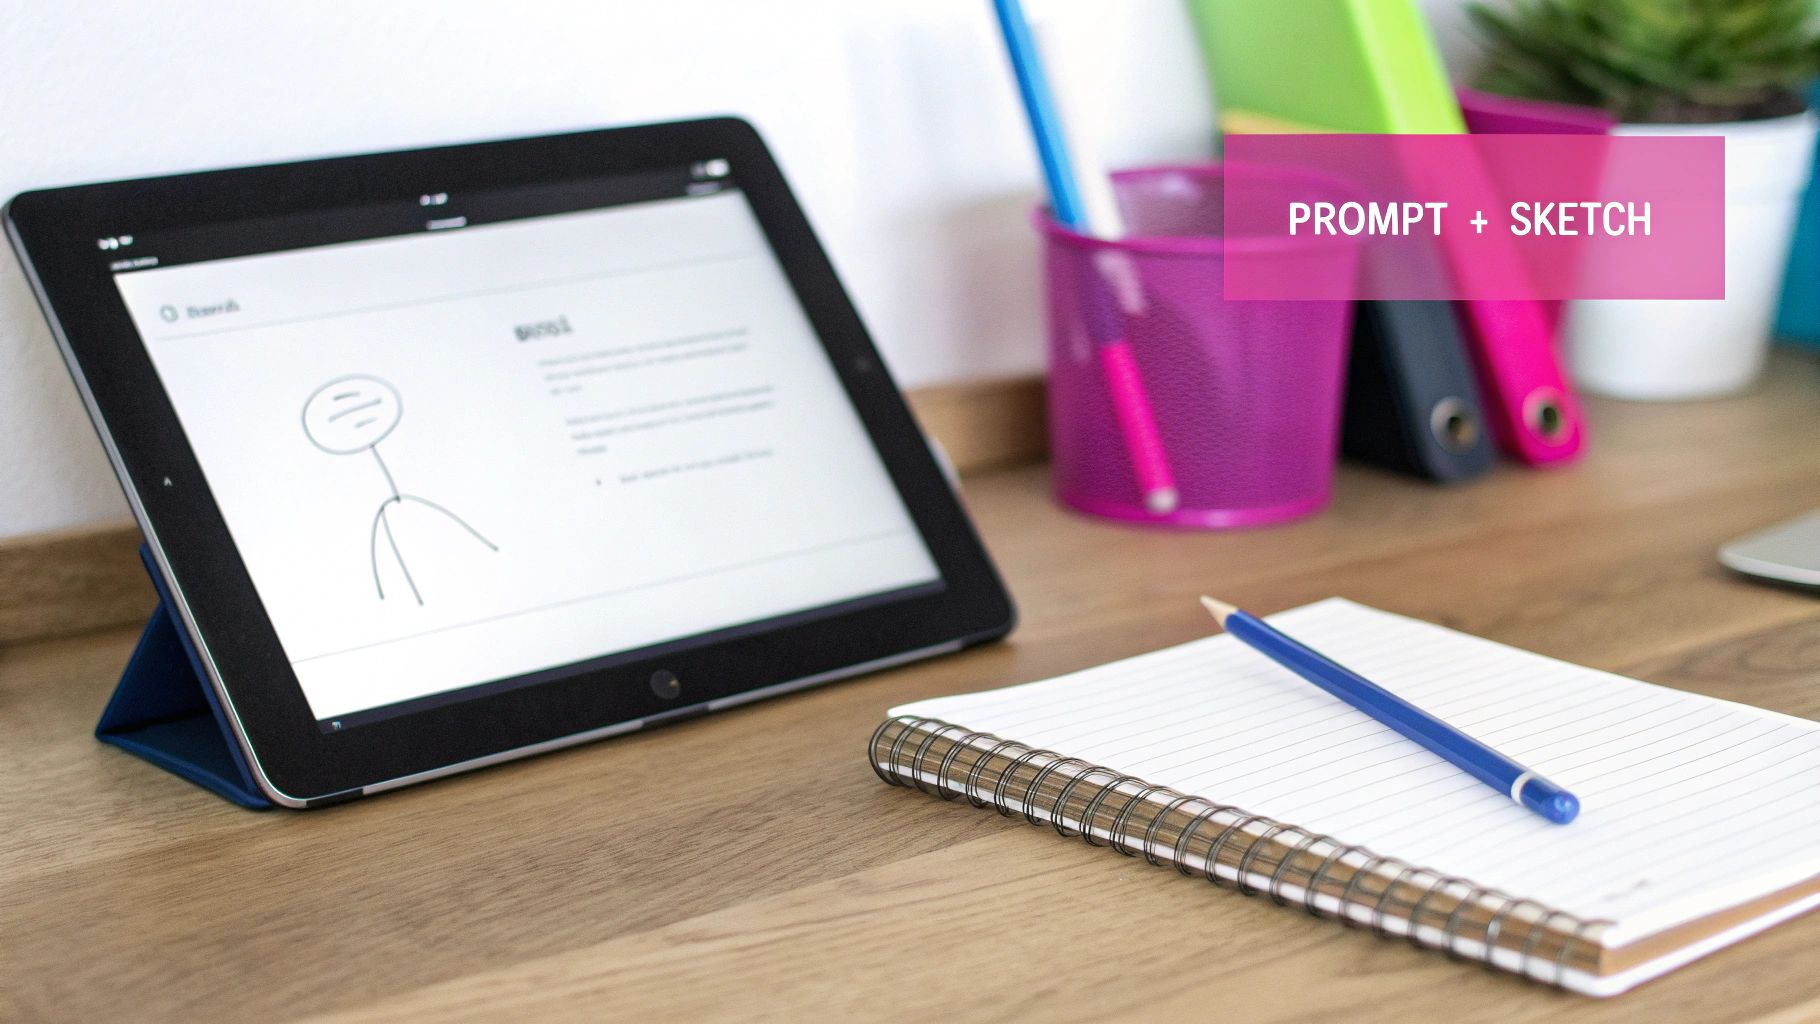
Think of your sketch as the blueprint for your image—it provides the structure, the basic composition, the what. But the text prompt? That’s the magic ingredient. It’s the art director, the lighting technician, and the set designer all rolled into one, telling the AI how to transform those lines into a finished piece.
A great prompt works with your drawing, not against it. It’s the difference between a simple sketch-to-image conversion and a truly stunning, detailed masterpiece.
For instance, your sketch might show a figure holding a sword. That’s a solid start. But your prompt is what decides if that figure is a “cyberpunk street samurai in a neon-lit alley” or a “valiant knight in shining armor on a misty battlefield.” The AI blends these two inputs, using your sketch for the layout and your words for the artistic vision.
The Anatomy of a Powerful Prompt
You don't need to write a novel, but a strong prompt usually weaves together a few key elements. The more control you want, the more specific you should be.
Here are the core components I always consider:
- Subject: State the obvious. Even if your sketch is clear, explicitly naming the core subject helps anchor the AI's focus.
- Style: This is where you set the artistic direction. Are you going for "photorealistic," "ghibli anime style," "impressionist oil painting," or maybe something like "vintage cartoon"?
- Lighting: Lighting is everything for mood. Try terms like "dramatic cinematic lighting," "soft morning glow," or "eerie volumetric mist" to see how it transforms the scene.
- Color Palette: Don’t leave color to chance. Guide the AI with phrases like "vibrant pastel colors," "monochromatic blue tones," or a "warm and earthy palette."
Stuck for the right words? It happens to everyone. When I'm drawing a blank, I'll often play around with tools built for inspiration. Our free AI image prompt generator is perfect for discovering new descriptive terms and crafting more complex prompts.
This whole field really took off after the invention of Generative Adversarial Networks (GANs) back in 2014. That’s when AI went from just interpreting images to actually generating hyper-realistic visuals from simple inputs. Today, these tools have boosted productivity for some graphic designers by as much as 300%, fueling a market now valued at over $5.2 billion.
Finding the Balance: Sketch vs. Prompt
One of the most critical settings you'll encounter is sketch influence, though you might also see it called "image weight" or "ControlNet strength." This slider is your secret weapon for controlling the creative process. It determines how much the AI sticks to your drawing versus how much it improvises based on your text prompt.
Crank the sketch influence up high, and the AI will follow your lines with pinpoint precision. This is your go-to for things that need to be exact, like a product mockup or an architectural rendering where the composition is non-negotiable.
On the other hand, dialing the influence down gives the AI more creative freedom. This is where the fun really begins. It’s perfect when your sketch is more of a suggestion—a loose concept you want the AI to expand on.
Say you have a very basic doodle of a person. If you want to turn it into a detailed fantasy warrior, you’ll need a lower influence setting. The AI needs that wiggle room to add armor, textures, a dynamic background, and all the details that simply weren’t in your simple drawing. The key is to experiment. Tweak that slider until you find the sweet spot for your project.
Real-World Workflows From Sketch to Final Image
Alright, let's move from theory to practice. Seeing this whole sketch-to-image process in action is where the magic really clicks. It shows just how useful this is for the kind of creative and business tasks we all face daily. I'll walk you through three different scenarios, breaking down the starting sketch, the exact prompt I used, and the final image that came out the other end.
Think of these workflows as repeatable blueprints. Whether you're a marketer who's tired of cheesy stock photos or a designer trying to visualize a new product, you can borrow these methods and make them your own. The goal here is to show just how versatile this is for turning a simple thought into a polished, professional asset.
Workflow 1: Creating Social Media Graphics
Let's say you need a quick, eye-catching graphic for a blog post about remote work productivity. We all know a custom image crushes a generic stock photo every single time. You start with a super basic sketch of the layout—nothing fancy, just a guide for the composition.
The Sketch: A simple drawing showing a person at a desk, with a window and a plant. The focus is purely on arranging the elements, not on artistic skill.
The Prompt: “Minimalist lofi illustration of a person working at a desk with a laptop, cozy vibes, window with rain outside, potted plant on the desk, pastel color palette, clean lines, vector art style.”
The prompt here isn't just describing the scene; it’s setting the entire mood and artistic direction. Words like "minimalist lofi," "cozy vibes," and "pastel color palette" are absolutely essential. They tell the AI to go beyond the sketch's basic structure and nail a specific aesthetic. The final result is a professional-looking graphic, ready for Instagram or a blog header, and it took just a few minutes to create.
Workflow 2: Generating Product Concepts
Next up, a more commercial use case: product design. An industrial designer has a rough idea for a new, retro-inspired handheld gaming device. The sketch is quick and to the point, focusing on the form and key features like button placement and screen size.
The Sketch: A simple line drawing of a handheld console, showing its overall shape, a D-pad, action buttons, and a screen.
The Prompt: “Photorealistic product photo of a retro handheld gaming console, 1990s style, matte white plastic, purple and teal buttons, high-resolution screen, studio lighting, on a clean white background, 8k, hyper-detailed.”
In this scenario, the prompt’s job is to inject realism and specific material details that the simple line drawing completely lacks. Phrases like "photorealistic product photo," "matte white plastic," and "studio lighting" are commands that tell the AI to render the object as if it were a real product in a professional photoshoot. This is an incredibly powerful way to rapidly prototype, letting designers see their concepts come to life without needing expensive 3D modeling.
The whole idea of turning rough ideas into detailed images has a pretty cool history. Back in 2015, Google's DeepDream was one of the first to use neural networks to find and amplify patterns in images, creating wild, psychedelic visuals. Fast forward to today, and these sketch-to-image tools have fueled a 45% growth in AI art software sales, with big ad agencies using them for rapid prototyping to slash costs.
Workflow 3: Designing a Childrens Book Character
Finally, let's look at a purely creative project. An author wants to bring a character from their story to life—a whimsical, friendly fox. Their initial sketch is just a quick doodle, meant to capture the character's personality and basic shape.
The Sketch: A cartoonish doodle of a fox wearing a small backpack, looking friendly and approachable.
The Prompt: “Charming childrens book illustration of a friendly cartoon fox character, wearing a little brown backpack, whimsical storybook art style, soft watercolor textures, warm and inviting colors, isolated on a white background.”
For this one, the style is everything. The prompt uses phrases like "charming childrens book illustration" and "soft watercolor textures" to define the exact artistic feel. The AI uses the sketch as a guide for the fox's pose and general form but applies the delicate, storybook aesthetic that the prompt called for. This workflow lets illustrators and writers establish a consistent visual style for characters and scenes with unbelievable speed.
And once your AI has brought your sketch to life, you might even want to explore how to transfer your AI-generated art to physical products like t-shirts or other merchandise.
Refining and Polishing Your AI-Generated Art
Getting that first image back from your sketch is a fantastic feeling, but it’s almost never the last step. The real creative magic happens in post-production, where you take a promising AI output and turn it into something truly polished and professional. This is where you step back in and take full control, shifting from generator to artist.
The first pass from a sketch-to-image tool might have some little quirks—maybe a hand looks slightly off, a texture feels weird, or a color is just not quite right. Don't worry, these imperfections are totally normal and usually pretty easy to fix. This refinement stage is all about getting your image ready for whatever you have planned, whether it’s for a client, a social media blitz, or just your own portfolio.
This diagram breaks down the simple journey from a basic sketch to a finished, prompt-driven image.
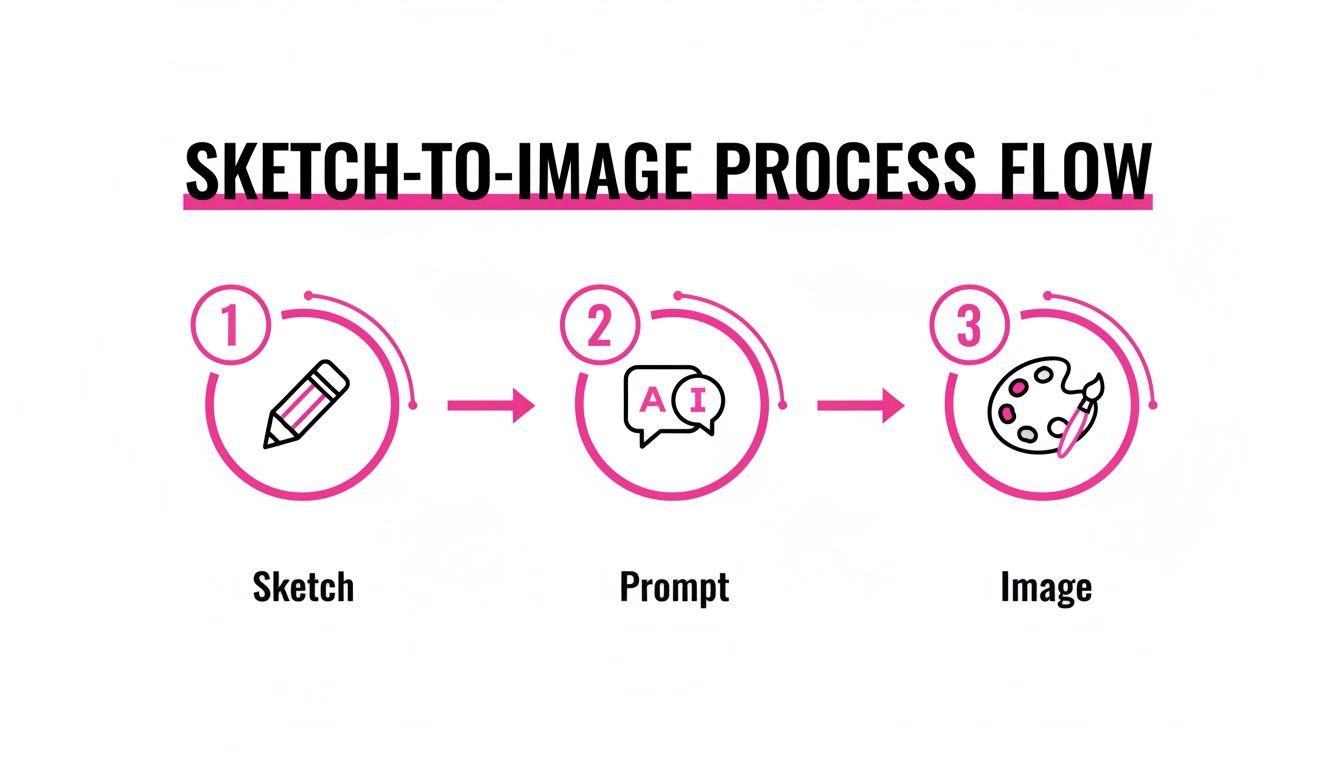
Each part of the process builds on the last, taking a simple line drawing and fleshing it out into a complete concept with the help of your descriptive prompt.
AI-Powered Retouching and Fixing
Many of the best AI platforms now come with some seriously powerful post-production tools that feel like cheating. The two you’ll use most are inpainting and upscaling.
Inpainting is your secret weapon for fixing specific problem spots. Let's say the AI gave you a portrait with six fingers (a classic!) or a product shot with a bizarre, melted-looking spot. Instead of ditching it and starting over, you just mask the messed-up area and give it a simple text prompt like "a realistic human hand" or "clean plastic surface." The AI zaps that one little section and regenerates it, blending it perfectly with the rest of the image.
Upscaling, on the other hand, is all about resolution. An AI image might look incredible on your monitor, but then turn into a pixelated mess when you try to print it. AI upscalers use machine learning to intelligently blow up the image’s resolution—often by 2x or 4x—without making it blurry or soft. This is a must for creating print-ready art or any kind of high-definition digital asset.
Think of post-production as the final 10% of the work that makes 90% of the difference. Small tweaks like color correction, cleaning up artifacts, and targeted fixes are what elevate a cool AI image into a truly professional visual.
Manual Touch-Ups for That Perfect Finish
Sometimes, an image just needs a human touch to get it over the finish line. You don't need to shell out for expensive software like Photoshop for this, either. Free, browser-based tools like Canva or Photopea are more than powerful enough for the job.
I use these tools all the time for small but critical adjustments:
- Color and Contrast: A subtle boost in saturation can make your colors sing, or you can tweak the brightness and contrast to really lock in the mood you're going for.
- Artifact Removal: Every now and then, AI might leave behind tiny, weird visual glitches. A quick pass with a spot-healing or clone tool can make them disappear in seconds.
- Adding Textures: For certain looks, you might want to add a subtle texture overlay, like a fine paper grain or a bit of film noise. If you want to get really creative, you can even explore an AI texture generator to create custom patterns for your projects.
When you combine these automated AI fixes with a little manual fine-tuning, you get the best of both worlds. You're harnessing the insane speed and creative power of AI generation while keeping the precision and artistic control you need for a flawless final image.
Answering Your Sketch to Image Questions
Jumping into sketch to image AI is a blast, but it's not uncommon to hit a few snags. Getting a handle on the usual problems will help you troubleshoot way faster and get back to what matters: bringing your ideas to life.
Let's clear up some of the most common questions I hear.
Why Doesn't My Generated Image Look Like My Sketch?
This is easily the number one issue people run into, and it almost always comes down to one of three things.
First, check your 'sketch influence' setting. This slider, sometimes called 'image weight,' tells the AI how seriously to take your drawing. If it's set too low, the AI treats your sketch like a vague suggestion and leans heavily on your text prompt instead. You need to tell it that your sketch is the boss.
Next up is the quality of your sketch itself. Think clean, clear, and high-contrast. If your lines are messy, the drawing is faint, or there's a lot of shading, you're basically asking the AI to guess what you want. It gets confused. Stick to well-defined shapes and bold lines for the most reliable results.
Finally, you have to make sure your prompt and your sketch are telling the same story. If you upload a simple stick figure but your prompt is "hyper-detailed, photorealistic astronaut on Mars," the AI is going to listen to the complex text prompt. Your sketch and your prompt need to be on the same page in terms of complexity.
Can I Use These Images for Commercial Projects?
The short answer is yes, most of the time. But this is where you absolutely have to do your homework. The only thing that matters here are the terms of service for the AI tool you're using.
Most of the big AI platforms give you full commercial rights to the images you generate, especially if you have a paid plan. Still, you have to read the fine print. Policies can and do vary.
And remember, the AI tool's terms don't exist in a legal vacuum. If you draw a sketch of Mickey Mouse and generate an image from it, you could still get into hot water for copyright infringement. The AI tool won't protect you from that.
What's the Best AI Tool for Sketch to Image?
There's no single "best" tool—it really boils down to what you're trying to accomplish. Different platforms have different strengths.
- For Artistic & Stylized Results: Midjourney is a fan favorite for a reason. It excels at creating beautiful, artistic images with a distinct aesthetic.
- For Maximum Control: Anything running on Stable Diffusion (like Leonardo.Ai or a local setup) is fantastic for precision. Features like ControlNet are specifically designed to make the AI follow your source image very closely.
- For a User-Friendly Experience: If you're just starting out, tools like PromeAI or Fotor are much more approachable. Their interfaces are built to be intuitive, making the whole process less intimidating.
My best advice? Try a few out. See which one clicks with your creative style and workflow.
Ready to turn your sketches into stunning visuals without the hassle? Bulk Image Generation uses advanced AI to generate hundreds of images from a single idea, handling the prompts and styles for you. Start creating faster today at bulkimagegeneration.com.