How to Create a Scene with AI: A Complete Guide

Aarav Mehta • June 4, 2026
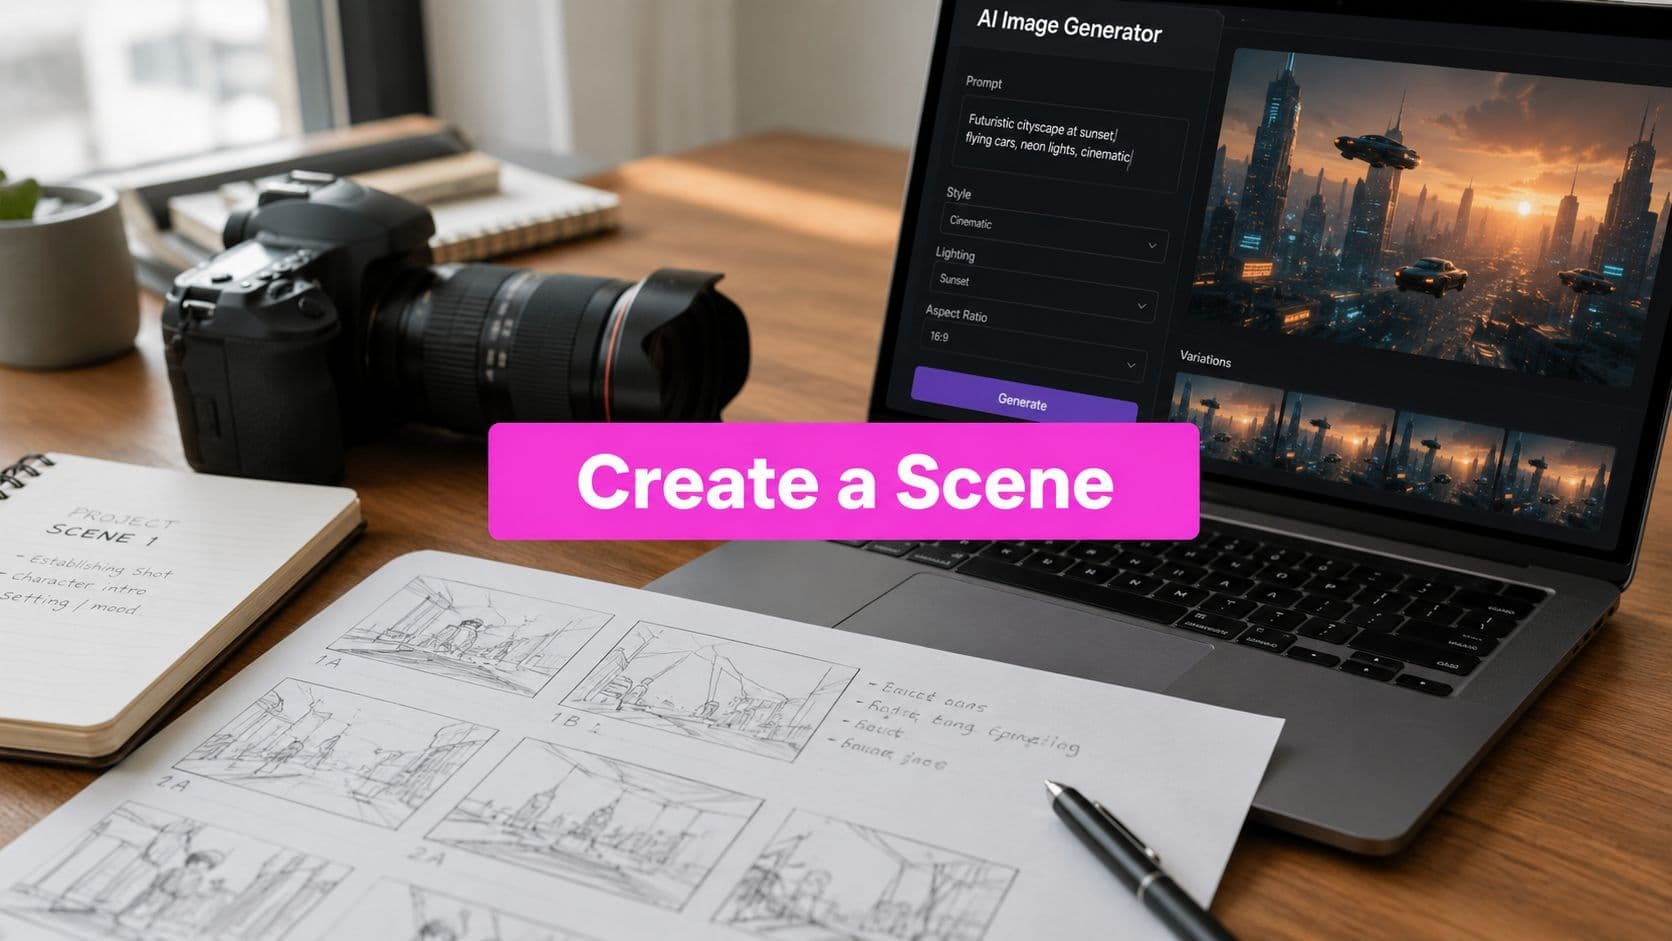
Learn how to create a scene from start to finish with Bulk Image Generation. This guide covers planning, prompting, bulk creation, and batch editing.
You've probably already hit the wall that turns AI image generation from fun into work. You get one excellent frame, then the next image changes the face, the wardrobe, the lens feel, or the background logic. What looked like a campaign, a storyboard, or a scene sequence becomes a folder full of unrelated wins.
That's the difference between generating an image and learning to create a scene. One is a prompt. The other is direction, sequencing, and cleanup across a whole batch. If you want a fantasy tavern that holds together across wide shots, portraits, prop inserts, and social crops, you need a workflow that treats the set like one visual system instead of isolated requests.
Beyond a Single Image The Art of the Scene
Single-image prompting rewards luck. Scene building rewards control.
A lot of creators start with the hero shot because that's where AI feels strongest. You type “cinematic neon alley, lone detective, rain, dramatic lighting,” and the result looks polished. Then you ask for a close-up, a reverse angle, and a street-level detail frame. Suddenly the detective's coat changes, the alley loses its signage language, and the lighting no longer feels like the same night.
That inconsistency isn't a minor flaw. It breaks narrative trust.
Why scenes feel believable
Human perception doesn't read images as a bag of separate objects. Research in vision science shows that high-level scene context speeds object recognition, because people interpret the relationships among elements in a scene rather than identifying everything in isolation, as discussed in the Frontiers in Psychology paper on scene context. That matters for AI art because viewers notice when the world logic is coherent, even before they can explain why.
If the market stall belongs in the alley, the reflections match the weather, and the character scale fits the camera height, the scene reads as intentional. If those relationships drift, the whole set feels synthetic.
Scenes work when the environment supports the subject, not when the subject is pasted into a vague backdrop.
What changes in a bulk workflow
When I build image sets for campaigns, lesson materials, or storyboards, I stop thinking in prompts and start thinking in shot systems. That means defining recurring elements before generating anything:
- Core subject identity: clothing, silhouette, age cues, key accessories
- Environment anchors: architecture, materials, time of day, weather
- Visual language: palette, rendering style, lens feel, framing habits
- Narrative progression: what changes from image to image, and what must not
That's why bulk generation is the right environment for scene work. Instead of improvising every frame, you prepare a family of related prompts, generate them together, compare them as a set, and then fix the whole batch in one editing pass.
The practical shift
The goal isn't to produce one perfect image. The goal is to produce a cohesive contact sheet from which the final scene set can be selected and polished.
That shift changes everything. You write shorter variation prompts. You repeat the stable descriptors. You treat camera angle as a variable, not the character. You edit for consistency, not just quality. And you stop judging images alone. You judge them by whether they belong together.
Laying the Groundwork Planning Your AI Scene
Strong scene sets are designed before the first generation run. If you skip planning, the tool has to invent structure for you, and it usually invents a different structure every time.

Start with the peak image
A reliable planning method is to draft the Peak first, then work backward to the context and fallout. The VidLit scene workflow recommends identifying the key action first, then backfilling the trigger, result, and setup in order, which is why it adapts well to visual planning for AI image sets in the VidLit guide on vibrant scene structure.
If the peak frame is “wizard opens a forbidden archive as blue dust rises from the shelves,” everything else gets easier. You can derive the establishing shot, the close-up on the hand, the hallway lead-in, and the aftermath without guessing what the set is about.
Build a scene brief, not just a prompt
Before opening any generator, write a short production brief. Mine usually includes these fields:
- Story sentence: one line that describes the scene's dramatic purpose
- Primary subject: the character or object the viewer should remember
- Non-negotiable identifiers: wardrobe, props, hair, markings, symbols
- World rules: era, architecture, technology level, weather, time of day
- Color direction: dominant tones and what should stay muted
- Output needs: horizontal, portrait, square, or mixed crops
This is the step that is commonly skipped, then they wonder why the batch looks like it came from five different projects.
Plan the shot list like a director
A simple shot list usually works better than a giant master paragraph. For one scene, I'll often map:
| Shot type | Purpose | What should stay fixed |
|---|---|---|
| Establishing | Show world and scale | Environment, lighting, palette |
| Medium action | Carry the narrative beat | Character design, prop logic |
| Close-up | Sell emotion or detail | Face, hands, costume accents |
| Insert | Reinforce story clue | Key object, texture, symbols |
That structure also helps if you're preparing content for different channels. A blog header might need the establishing frame. Social posts may need portraits and inserts. Teams handling content calendars often benefit from planning visual assets the same way they plan copy, which is one reason broader workflow resources like Scheduler.social's AI marketing guide can be useful when you're coordinating scenes across campaigns.
Planning rule: if you can't describe what changes from one frame to the next in one sentence, your shot list is still too vague.
Lock the anchors early
The hardest elements to keep consistent are usually the obvious ones. Faces, costume details, emblem placement, and environment materials drift fast. Write those into every variation prompt from the start. Don't rely on memory, and don't assume the model will “remember” your previous image unless your workflow explicitly supports that.
When you create a scene, pre-production does most of the heavy lifting. The prompt is only the execution layer.
Composing Prompts for Camera Style and Story
Most weak scene prompts fail in one of two ways. They're too vague to control the output, or they're so overloaded that the model can't tell what matters most. The fix is to write prompts in layers, with stable elements repeated and camera instructions treated as deliberate direction.

Use a prompt skeleton that separates constants from variables
For scene work, I use a structure like this:
- Subject identity
- Environment
- Action
- Camera position
- Lighting
- Style lock
- Quality or fidelity cues
That order helps because the model gets the core identity first, then the world, then the cinematic framing.
A usable base prompt might look like this in plain language:
- Subject identity: female archivist, dark braided hair, brass spectacles, long charcoal coat, leather satchel
- Environment: ancient library carved into stone, towering shelves, suspended dust, glowing blue catalog lights
- Action: reaching toward an illuminated forbidden book
- Camera position: eye-level medium shot, slight three-quarter angle
- Lighting: cold ambient blue light with warm candle accents
- Style lock: cinematic fantasy film still
- Fidelity cues: coherent perspective, detailed textures, atmospheric depth
Then the variations only change the camera and action emphasis.
Camera instructions do more than add flavor
A common weakness in art instruction is that it explains perspective rules but doesn't explain where to place vanishing points or how camera height, via the horizon line, controls scale. The perspective tutorial at this YouTube lesson on vanishing points and camera height frames the horizon line as the camera height, which is a practical way to think when prompting scenes with people at different distances.
That's why prompts like “dramatic fantasy library” feel loose, while prompts like these produce more coherent sets:
- Low camera height, wide shot: makes shelves feel monumental and the figure smaller
- Eye-level portrait: keeps character proportions natural and readable
- High angle overview: clarifies floor layout and spatial relationships
- Long hallway perspective: reinforces directional depth and repetition
If you want believable depth, specify the viewpoint instead of hoping the model invents one that matches your previous image.
Define the camera before you decorate the frame. Composition errors are harder to fix than missing props.
Keep the style lock identical across the batch
Style drift usually comes from accidental rewriting. If one prompt says “cinematic fantasy film still,” another says “storybook realism,” and a third says “high detail concept art,” you've told the model to change visual language.
Use one style phrase and repeat it. Keep your rendering terms stable across all variants. Change only what serves the shot.
A simple prompt matrix helps:
| Stable across every prompt | Allowed to vary |
|---|---|
| Character description | Shot type |
| Setting description | Camera angle |
| Palette cues | Distance to subject |
| Style phrase | Action beat |
| Time of day | Crop or aspect ratio |
Generate smarter variations
A lot of prompt writers manually reinvent every frame. That wastes time and introduces inconsistency. A better method is to keep one base prompt and fork it into controlled variants.
For readers who want a broader framework for writing cleaner instructions, this breakdown of mastering AI prompts is a useful companion. If you want a faster starting point before refining your own scene matrix, an AI image prompt generator can help surface workable phrasing that you then tighten manually.
What works and what fails
What works
- Repeat without variation: same coat, same eyewear, same prop wording
- Name the lens feel: wide shot, close-up, overhead, eye-level
- Use environmental specificity: stone floor, brass fixtures, blue dust, carved shelves
- Limit style vocabulary: one visual direction, repeated exactly
What fails
- Synonym swapping for variety: it often creates design drift, not richness
- Overstuffed prompts: too many focal points flatten hierarchy
- No camera language: the model improvises framing every time
- Mood without structure: “epic” and “beautiful” don't place objects in space
When you create a scene, prompt writing is less about poetry and more about shot control.
Executing the Vision with Bulk Generation
Once the plan and prompt set are ready, execution becomes a production task. You're no longer hunting for a miracle image. You're running a batch designed to give you a usable spread of scene-consistent options.

Feed the whole shot list, not isolated prompts
For this kind of task, a bulk workflow proves its worth. Instead of generating one frame at a time, load the scene family together so you can compare results side by side. That makes it easier to spot style drift, proportion issues, and continuity errors before they spread into later edits.
One practical option for campaign and content teams is Bulk Image Generation, which supports bulk image runs from natural language or prepared prompt variants. For scene work, that matters because the value isn't just speed. It's the ability to review a batch as a visual set.
Use narrative progression to create prompt families
A classic scene pattern uses Goal → Conflict → Disaster, described in the Advanced Fiction Writing guide to scene structure. That pattern translates cleanly into bulk image generation because it gives you a sequence instead of disconnected requests.
For example, if the scene is a knight at a castle:
- Goal: knight approaches castle gates at dawn
- Conflict: knight confronts dragon at the entrance
- Disaster: castle burns in the background after the battle
The important part isn't fantasy. It's progression. You can use the same logic for product visuals, educational sequences, or social storytelling.
Match aspect ratio to shot purpose
Don't generate every image in the same crop by habit. The frame should match the job.
- 16:9 works well for environment-heavy establishing shots
- 9:16 suits character portraits and mobile-first posts
- 1:1 is useful for inserts, object details, and feed layouts
If the batch mixes these intentionally, you'll leave the generation stage with assets that are already close to publishable formats.
Review the first batch like a contact sheet, not a gallery. You're selecting for continuity, not just isolated beauty.
What to check before the second run
After the first pass, I usually mark each image against a short checklist:
- Identity consistency: same person, outfit, prop language
- Spatial logic: backgrounds feel like the same world
- Camera variety: enough range without breaking style
- Narrative clarity: each frame contributes a distinct beat
If one area keeps failing, don't rewrite everything. Change the smallest possible variable. Scene workflows get messy when every bad output triggers a full prompt redesign.
Polishing Your Scene with the Batch Editor
Raw generations rarely become the final set untouched. The scene usually appears during selection and editing, when you remove the outliers and force the survivors into one visual language.

The first cut matters more than the final tweak
When a batch finishes, don't edit everything. Cull first.
I usually split the outputs into three groups. Keepers, maybes, and discards. Keepers already match the scene logic. Maybes have one fixable issue, such as a weak crop or color mismatch. Discards break identity, anatomy, or environment consistency badly enough that repair would take longer than a regeneration.
That sorting step protects you from polishing the wrong frames.
Batch edits should solve consistency, not invent it
The most useful batch edits are the ones that standardize the set:
- Resize and crop: align outputs to the delivery format
- Color and lighting cleanup: reduce frame-to-frame drift
- Background removal: isolate assets for composites or layered layouts
- Face consistency tools: repair likeness mismatches across a sequence
If you're preparing multiple outputs for web or social placement, a bulk image resizer is helpful because it keeps the whole set aligned without manually rebuilding each crop.
A practical editing pass
A typical polish sequence looks like this:
| Editing pass | What I'm checking | Why it matters |
|---|---|---|
| Selection | Which frames belong together | Avoids wasting time on off-style images |
| Crop | Headroom, focal hierarchy, social-safe framing | Makes the batch usable in real placements |
| Color | Exposure balance, warmth or coolness, contrast feel | Unifies images from different prompt outcomes |
| Cleanup | Background isolation, face fixes, minor corrections | Removes the last obvious continuity breaks |
A real trade-off most people learn late
Face consistency tools can save a set, but they can also flatten expression if used too aggressively. If every frame gets forced into the exact same neutral likeness, the sequence loses emotional range. The fix is simple. Use consistency tools to preserve identity, then keep the original frames where expression is stronger and the mismatch is minor enough to be acceptable.
The same is true for enhancement. Sharpening and contrast can pull a set together, but they can also make soft atmospheric scenes feel harsh. Batch editing works best when you know what should remain imperfect.
Post-production rule: edit the batch toward one mood, not one identical file.
The workflow shortcut that actually saves time
The big time saver isn't a single feature. It's keeping generation and cleanup in the same workflow so you can move from contact sheet to edited set without bouncing files across multiple tools.
For scene creation, that's the practical edge of batch editing. You don't want to make fifty isolated corrections. You want to apply a few deliberate adjustments across the images that made the cut, then export a set that looks like it was art-directed together.
That's how you create a scene that feels authored, even when the raw material came from AI.
Troubleshooting Common Scene Generation Issues
Most scene problems are fixable. What wastes time is treating every failure as random.
When characters won't stay consistent
If the character drifts, the prompt usually drifted first. Reuse the exact same identity language in every variation. Keep clothing, hair, accessories, and age cues fixed. Don't alternate between “young mage,” “female sorcerer,” and “arcane librarian” if you mean the same person.
If you already have a strong batch with a face mismatch in only a few frames, repair those in editing instead of restarting the whole scene.
When the background turns generic
“Forest,” “city street,” and “castle hall” are placeholders, not environments. The model fills vague spaces with generic texture soup. Replace broad nouns with materials, atmosphere, and structure. Moss-covered stones, redwood trunks, wet cobblestones, brass market lamps, peeling painted shutters. That's what gives the scene memory.
When dramatic camera angles look wrong
Creative advice often praises low-angle shots because they make subjects feel powerful. The production trade-off is that dramatic low angles can introduce distortion if the implied lens and stabilization aren't handled carefully, which the Sirui low-angle guide addresses from a practical shooting perspective. In prompts, the lesson is the same. If you ask for extreme perspective, also guide the output with lens feel, subject distance, and composition so the result doesn't collapse into warped anatomy.
When anatomy keeps failing
Hands and limb positions still break more often in complex scenes than in simpler portraits. You can solve that a few ways:
- Change the framing: crop above the hands if they aren't story-critical
- Simplify the action: holding one object is easier than juggling many gestures
- Generate more variants: selection is often faster than repair
- Use inserts: show the prop in a separate close-up instead of forcing it into the main frame
The point is not to fight every weakness head-on. It's to design around failure modes when they don't matter to the story.
When the set still feels disconnected
At that point, stop tweaking individual prompts and inspect the system. Usually one of these is missing:
- A stable style phrase
- A repeatable character description
- Clear camera logic
- Shared lighting conditions
- A defined sequence of beats
Once those anchors are in place, scene generation gets much less frustrating and much more predictable.
If you want a faster way to move from concept to a cohesive batch of finished visuals, Bulk Image Generation can handle bulk AI image creation and batch editing in one workflow. It's a practical fit when you need multiple scene-consistent assets instead of one-off images.