How to Create an ID Card From Scratch Your Complete Guide

Aarav Mehta • November 4, 2025
Learn how to create an ID card with our complete guide. Discover how to design, format data, and use bulk tools to produce professional ID cards efficiently.
Gone are the days of clunky software and tedious manual data entry for creating ID cards. Today, modern tools let you design one solid template, hook it up to a data source like a CSV file, and spit out hundreds of unique cards in minutes. This approach automates everything, from swapping out photos to updating job titles, saving a massive amount of time while keeping everything looking sharp and professional.
Why Your ID Card Process Needs an Upgrade

For any organization that cares about security and efficiency, a slow ID creation process is a serious bottleneck. It doesn't matter if you're a growing company onboarding new hires, a university managing thousands of student IDs, or an event organizer needing badges on the fly—old-school methods just can't keep up.
The manual approach is almost always riddled with problems. Just think about the time wasted. An admin might spend hours resizing photos, correcting typos, and printing cards one by one. This isn't just inefficient; it's a huge drain on resources that could be put to much better use.
The Real Cost of Inconsistency and Insecurity
Beyond the time sink, manual processes open the door to some pretty critical risks. Brand consistency takes a major hit when different people create cards using slightly different templates, fonts, or logos. This fractured look can make your organization appear unprofessional and disorganized.
But security is an even bigger worry. A haphazard system makes it way too easy for unauthorized cards to be created or for outdated credentials to stay in circulation. A modern, centralized platform solves these problems by creating a single source of truth for all identification.
A streamlined ID system is more than just a tool; it's a strategic asset. It reinforces your brand, strengthens security protocols, and frees up valuable administrative hours for more impactful work.
Keeping Up With Modern Demands
The demand for reliable identification is only getting bigger. The global ID card and badge printer market was valued at $601.4 million in 2021 and is projected to hit $730.5 million by 2025. This shows a clear trend toward more sophisticated, reliable systems.
A dedicated platform directly tackles the most common pain points:
- Brand Inconsistency: Every single card follows strict brand guidelines. No exceptions.
- Security Vulnerabilities: Centralized creation slams the door on unauthorized duplicates.
- Administrative Waste: Automation handles the soul-crushing data entry and image placement.
To get a better sense of the benefits, it helps to see how you can create employee ID cards that are both secure and professional. The same principles of automated design aren't just for IDs, either. You can see similar logic at work in a bulk social media image generator, which streamlines marketing content creation in a similar way.
Getting Your Design and Data Ready for Generation

Look at the image above. On the left, you have the visual ID template. On the right, you have the simple spreadsheet data that brings it to life. This is the core of bulk generation: connecting each column, like "FirstName" or "PhotoURL," to a specific spot on the card.
Solid prep work is the secret to a painless ID card project. Before you even touch the "generate" button, you need two things perfectly aligned: your design template and your data file. Nail this foundation, and the whole process shifts from a manual headache to a smooth, automated flow.
First up, let's get that design sorted.
Designing a Professional ID Card Template
Your ID card is a tiny, portable ambassador for your brand. It's carried around by employees, event attendees, or members, so it needs to look professional, feel secure, and be instantly recognizable. The goal is a design that’s clean, clear, and perfectly in sync with your organization's look.
Here are the key pieces to get right:
- Logo Placement: Your logo needs to be visible but not obnoxious. Sticking it in the top-left or top-right corner is a classic move for a reason—it just works. If you're stuck without a quality logo, an AI logo generator can get you something sharp in minutes.
- Color Scheme: This is an easy one. Use your official brand colors. A consistent palette reinforces who you are and makes the card look official.
- Photo Area: Carve out a dedicated, uniformly sized space for the photo. A clean headshot on a neutral background is always the gold standard for clarity.
- Typography: Less is more. Pick one or two fonts that are easy to read. Use different weights (like bold for names and regular for titles) to build a simple visual hierarchy.
The best ID designs always prioritize clarity over complexity. Anyone should be able to glance at the card and instantly find the person's name, photo, and ID number.
Once your design concept feels solid, the next big step is organizing the data that will fill out each unique card.
Structuring Your Data for a Smooth Import
This is where the real automation magic happens. The Bulk Image Generation platform pulls all its information from a spreadsheet, so getting that file structured correctly is non-negotiable. A standard CSV or Excel file is all you need.
Think of it this way: each row in your spreadsheet is a new person, and each column is a piece of their information that will land on the ID card.
For instance, a simple data file for a corporate ID would look something like this table:
| FirstName | LastName | EmployeeID | JobTitle | Department | PhotoURL |
|---|---|---|---|---|---|
| Jane | Doe | 98765 | Project Manager | Marketing | https://.../jane_doe_photo.jpg |
| John | Smith | 12345 | Lead Developer | Engineering | https://.../john_smith_photo.jpg |
Here are a few pro tips I've learned from experience to make this part foolproof:
- Use Clear Headers: Name your columns something obvious (e.g.,
FirstName,EmployeeID). This makes mapping them to your design template later a total breeze. - Host Images Online: For photos, the easiest route by far is to upload them to a service like Google Drive or Dropbox and use the public URLs in your spreadsheet. Trust me, it beats uploading hundreds of individual image files.
- Check for Consistency: A quick scan for consistency saves a lot of trouble. Make sure all ID numbers are in the same format and that names are capitalized the way you want them.
Getting both the design and data prep right is the most critical part of learning how to create an ID card at scale. When your template is polished and your data is clean, the actual generation step becomes a simple, one-click affair.
Building Your Master ID Card Template
Alright, this is where the magic happens. We're about to merge your design ideas with your data to create the master template—a single, reusable blueprint for every ID card you need. Think of it like a professional stencil; once you perfect it, you can crank out hundreds of unique IDs with just a few clicks.
To make this real, let's walk through a classic scenario: creating a standard corporate employee ID. I'll show you how to set up the static background, place your company logo, and then define the "dynamic" layers that will automatically update for each person.
Laying Down the Foundational Elements
First things first, every great design needs a solid base. You'll start by uploading a background image to the platform. This could be anything from a clean design using your company's colors to a more complex graphic with built-in security features like watermarks. Once that's in place, you'll add your company logo as a separate image layer.
Positioning is everything. Drag your logo to a prominent spot—the top-right corner is a classic for a reason—and resize it so it’s visible but not screaming for attention. These two pieces, the background and the logo, are your static elements. They’ll be the same on every single card.
Before you go any further, it's a good idea to have a clear plan for what information needs to be on the card. A quick checklist can save you a ton of headaches later.
Here's a simple reference table I use to make sure all the essential elements are covered for any professional ID card project.
ID Card Element Checklist
| Element Type | Purpose | Best Practice Example |
|---|---|---|
| Employee Photo | Visual identification and security. | A clear, professional headshot against a neutral background. |
| Full Name | Primary identifier for the individual. | John A. Smith - Clear, legible font. |
| Job Title/Department | Defines the employee's role and team. | Marketing Manager or IT Department. |
| Employee ID Number | Unique identifier for internal systems. | EMP-001234 - Include a prefix for easy recognition. |
| Company Logo | Reinforces brand identity and legitimacy. | High-resolution logo placed in a corner. |
| Barcode/QR Code | Access control, time tracking, or data lookup. | A scannable QR code linked to the employee's profile. |
| Issue/Expiry Date | Manages card validity and security. | Issued: 01/2025, Expires: 01/2027. |
| Contact Information | Instructions for a lost or found card. | "If found, please return to [Company Address] or call [Phone Number]." |
Having this checklist handy ensures you don't miss any critical information, keeping your IDs professional, secure, and useful.
Bringing Your Data to Life with Dynamic Layers
With your static foundation set, it’s time to bring in the personalized parts. This is the core of learning how to create an ID card at scale. You're going to add layers that pull information directly from the columns in your spreadsheet.
Here's how it breaks down:
- Text Layers: Add individual text layers for the employee’s name, their job title, and ID number. For each one, you can tweak the font, size, and color to perfectly match your brand guidelines.
- Dynamic Image Layer: This is the most important one. Add an image placeholder where the employee's photo will appear. This layer is special because instead of holding one static picture, it's designed to automatically pull the correct image from your ‘PhotoURL’ column for each person.
What you're really doing is teaching the system where everything goes. You’re telling it, "Put the first name from the spreadsheet here, the job title there, and the matching photo right here."
The real power of a master template is its reusability. By setting up these dynamic fields just once, you completely eliminate the tedious work of manually editing hundreds of individual cards. It saves an incredible amount of time and guarantees every card is perfectly consistent.
This level of personalization is becoming a huge deal for security and tech. The market for ID card personalization systems is already valued at around $2.5 billion globally and is only expected to grow. This surge is driven by the need for secure, hard-to-fake identification in sectors like finance, healthcare, and corporate security—all of which depend on the advanced personalization techniques you're using right now. You can dive deeper into this trend by checking out the full report on ID card personalization systems on archivemarketresearch.com.
Getting these layers just right is what separates an amateur ID from a professional one. It’s not just about dumping data onto a card; it's about presenting it clearly and attractively, making sure every card is both functional and a true reflection of your organization.
Running the Bulk Generation Process
Alright, you've done the heavy lifting. You’ve got a polished master template and your data is neatly organized in a spreadsheet. Now comes the fun part—actually generating all those ID cards at once. This is where all that careful prep work really shines, turning what used to be a mind-numbingly tedious task into a simple, automated process.
The concept here is pretty straightforward. You're about to connect your data file directly to the design template you just built. The platform will then systematically go through each row of your spreadsheet, plugging that information into the dynamic fields to create a unique ID card for every single person on your list.
Connecting Your Data to the Template
First things first, you'll need to upload your CSV file to the Bulk Image Generation platform. As soon as it's uploaded, the system intelligently reads your file and shows you the column headers—things like 'FirstName', 'EmployeeID', and 'PhotoURL'. It displays these right alongside the dynamic layers you set up in your template, like the 'Name' text field or the 'ProfilePhoto' image layer.
Your job is simply to map them together. You’re just telling the platform which piece of data goes into which design element. It’s as easy as:
- Matching the 'FirstName' column to the 'Name' text layer.
- Connecting the 'JobTitle' column to the 'Title' text layer.
- Linking the 'PhotoURL' column to the 'ProfilePhoto' image layer.
This mapping step is the crucial instruction that tells the software exactly how to assemble each individual card. Think of it as creating a set of rules that the system will follow for every single row in your data file. The whole process follows a logical flow, starting with your base design and layering the unique data on top.
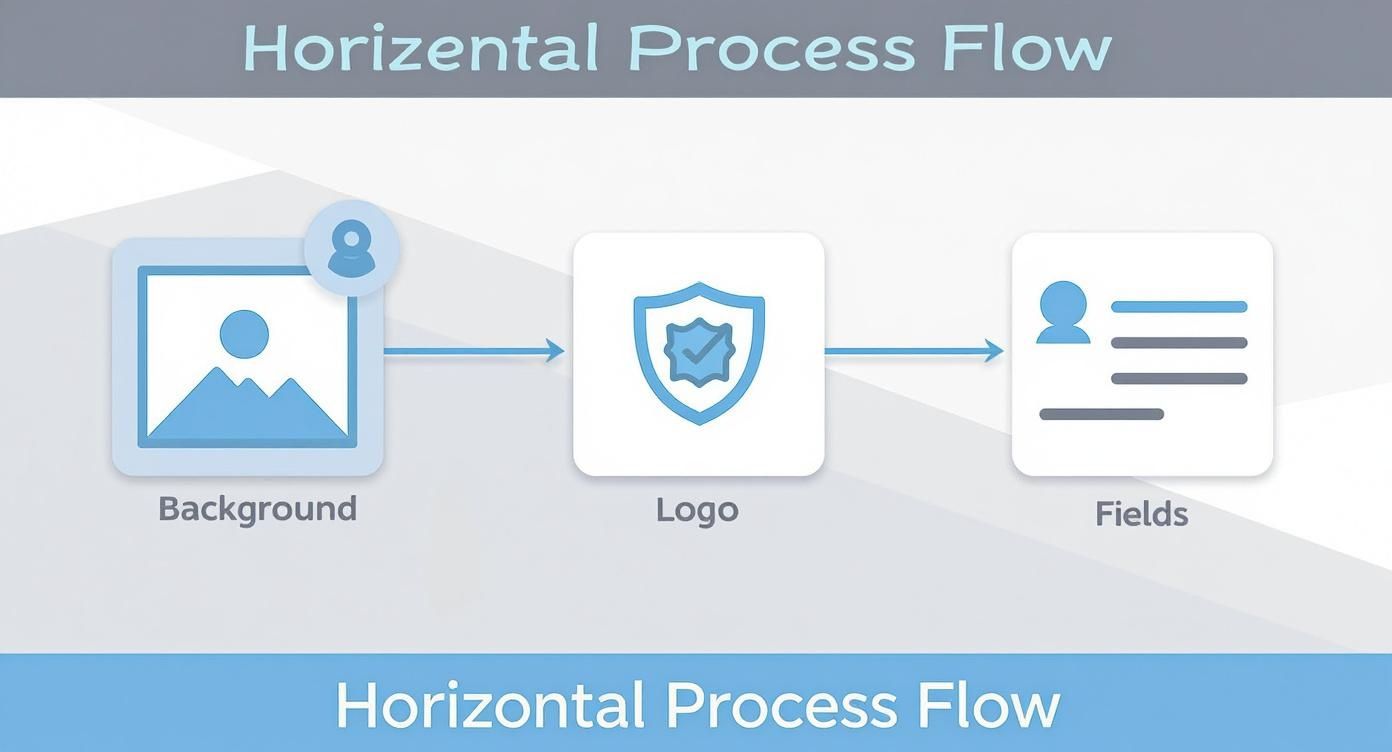
As you can see, getting the static elements like the background and logo locked in first provides a solid foundation. Then, you bring in the dynamic fields that will be populated by your data.
Once your data is mapped and you hit "generate," the real magic begins. The platform gets to work, cycling through every entry in your spreadsheet. It reads a row, populates the template, saves the finished card as a new image, and immediately moves on to the next one.
The Automation at Work
This automated workflow is an absolute game-changer. A job that would take a graphic designer hours—or even days—of repetitive, manual work is knocked out in just a few minutes.
Imagine you're onboarding a new department of 150 new hires or printing IDs for an incoming class of 500 university students. The system handles all of it flawlessly, without a single typo or misplaced photo.
The final output is a complete set of personalized ID cards, each one perfectly formatted according to your master template. The speed and consistency you get here are just impossible to achieve by hand. It’s not just about saving a massive amount of time; it’s about guaranteeing a professional, error-free result every single time.
While you're generating the main ID cards, you might find you need other images too. For instance, maybe you need all the employee profile pictures resized for the company's internal directory. For extra tasks like that, using a companion tool like a bulk image resizer can make your entire workflow even more efficient. This way, all your visual assets—not just the IDs—are consistent and ready to go.
Getting Your Professional ID Cards Ready for Print
Alright, you've done the heavy lifting. You've taken raw data, designed a sharp-looking ID card, and generated a whole batch of them. Now for the final, crucial step: turning those digital files into physical cards you can actually hold. This is where we bridge the gap from screen to reality, covering how to export your files and prep them for a perfect print run.
The Bulk Image Generation platform gives you a couple of ways to get your finished cards out. The right choice really just depends on how you plan to print them.
- Individual JPG/PNG Files: This is your go-to if you need to email a single ID card or upload it to another system. It's also perfect if you're just printing a few cards at a time on a standard office printer using pre-cut sheets.
- A Single, Multi-Page PDF: For professional printing, this is the gold standard. It bundles all your ID cards into one neat, organized file, making it a breeze to send off to a print shop. The PDF format locks in the quality and layout, so what you see on screen is exactly what you'll get.
If you need a bit more guidance on managing the printing process directly, learning how to Print Passes and Badges from the Dashboard can be a huge time-saver.
Choosing Your Printing Path
When it comes to printing, you've got two main routes: do it yourself in-house or hand it off to a professional service. For small batches, a high-quality office printer can get the job done. But if you need volume and durability, investing in a dedicated ID card printer is the way to go.
These printers are built specifically for plastic card stock, giving you a tough, long-lasting finish that holds up to daily wear and tear. In this space, direct-to-card printers are a big deal, and they're projected to command a 47.3% market share by 2025. They're popular because they churn out high-quality, durable cards quickly—a must-have for any organization issuing IDs in bulk.
Pro Tip: Always, always export your files at a high resolution. The industry standard for print is 300 DPI (dots per inch). This ensures your photos, logos, and text look crisp and professional, not like a blurry, pixelated mess.
The Final Pre-Print Checklist
Before you hit "print" on hundreds of cards, do a small test run. Seriously. Print just a single page or a handful of cards to spot-check for any issues with color, alignment, or text clarity. It's a simple step that can save you a massive headache later.
Also, pay attention to the color profile. Your screen displays colors in RGB, but most professional printers use a CMYK model. A quick look at your printer settings can ensure the colors on the physical card match what you designed. This final quality check is the last hurdle in mastering how to create an ID card from start to finish.
Common Questions About Creating ID Cards
When you first start making ID cards with a bulk tool, a few questions always seem to pop up. It's a big shift, moving from a slow one-by-one process to an automated workflow, so it's totally normal to wonder about the specifics. Let's clear up some of the most frequent ones I hear.
Can I Add QR Codes or Barcodes?
Absolutely. This is honestly one of the most powerful features you'll find in modern ID card creation. Most platforms are built to handle dynamic QR codes and barcodes without breaking a sweat.
All you need is a column in your spreadsheet with the unique data for each code. This could be anything—an employee number that links to internal systems, a vCard for quick contact sharing, or even a unique URL to a personal profile. The generator then creates a unique, scannable code for every single ID card. This makes them perfect for things like access control, event check-ins, or time tracking.
What Is the Best Format for Employee Photos?
For the sharpest, most professional results, stick with high-resolution JPG or PNG files. Nothing makes a well-designed card look amateurish faster than a blurry, pixelated headshot.
Here’s a huge time-saving tip: host all your images online. You can use a service like Google Drive, Dropbox, or your own web server. Just make sure the links are public, then drop the direct URLs into your spreadsheet. This lets the generator pull each photo automatically, saving you from the mind-numbing task of uploading hundreds of files one by one.
The most efficient way to handle errors isn't by editing individual images. Instead, correct the source of truth—your spreadsheet. This keeps your master data list accurate for any future projects or re-prints.
How Do I Fix a Mistake After Generating Cards?
Don't panic if you spot a typo or an incorrect photo after you've already generated the cards. The fix is simpler and way faster than you might think. Just go back to your source CSV file and correct the mistake right there.
Once you've updated the data, re-upload the spreadsheet and run the generation again. Trust me, this approach is far more efficient than trying to manually edit individual card images. Plus, it ensures your master data list stays clean and accurate for the next time you need it.
What if Different Departments Need Different Designs?
This is a classic scenario, especially in larger organizations. You have a couple of smart ways to handle it.
The most straightforward method is to create a separate master template for each department—one for Marketing, one for Sales, you get the idea.
For a more advanced approach, you can use a single template with conditional logic. Just add a 'Department' column to your spreadsheet. Some tools can then automatically change design elements like colors or secondary logos based on the information in that column for each person.
Ready to stop wasting time and start creating professional ID cards in minutes? With Bulk Image Generation, you can turn a simple spreadsheet into hundreds of unique, high-quality IDs with just a few clicks. Get started with Bulk Image Generation today!