
How to Blend 2 Photos Together Like a Pro

Aarav Mehta • December 17, 2025
Discover how to blend 2 photos together seamlessly. Our guide covers pro-level Photoshop techniques, user-friendly mobile apps, and powerful AI tools.
Blending two photos is one of those foundational skills that opens up a whole new world of creativity. It's about taking elements from different images and weaving them into a single, cohesive picture. This can be as simple as swapping out a boring background or as complex as creating an artistic double exposure, but it almost always comes down to mastering a few core techniques: layering, masking, and adjusting blend modes in your editing software of choice.
It’s a must-have skill for digital artists, photographers, and marketers alike.
More Than Just a Technical Trick
Before we get into the nuts and bolts, let's talk about why this is such a powerful tool in your creative arsenal. At its heart, blending photos is about storytelling. It lets you mix reality with imagination, creating visuals that would be impossible to capture in a single click of the shutter. Think of it as a form of digital alchemy—turning ordinary images into something special.
For example, a portrait photographer might blend a striking close-up of their subject with a sprawling cityscape. This creates a surreal double exposure that hints at the person's connection to the city. Or, on a more practical level, a real estate agent could easily replace a gloomy, overcast sky with a bright, sunny one to make a property listing far more appealing. These aren't just parlor tricks; they're everyday techniques used to solve real-world problems.
Why Blending Matters in a Visual World
The applications go way beyond personal art projects. In the commercial world, knowing how to blend two photos together is absolutely essential for creating visuals that stop people from scrolling.
- Marketing and Advertising: Brands constantly blend product shots into dynamic lifestyle scenes. This makes their ads feel more authentic and helps customers imagine the product in their own lives.
- Social Media Content: Creators merge images to produce eye-catching graphics, memes, and artistic posts that stand out in a ridiculously crowded feed.
- Photography Composites: This is a lifesaver for event photographers. They often combine multiple group shots to create that one perfect photo where everyone is looking at the camera with their eyes open.
Photo blending has come a long way from a tricky darkroom technique. It's now an accessible and essential part of modern visual communication, unlocking endless creative possibilities.
The demand for these skills isn't slowing down, either. The global photo editing software market is expected to grow by USD 606.1 million by 2029, and 55% of that growth is driven by commercial sectors like advertising. It’s no surprise when you hear that blended images have been shown to boost engagement by up to 32% on social platforms. It just works.
To see where this is all heading, it's worth exploring the emerging AI image generation trends for 2025 and how they're changing the game.
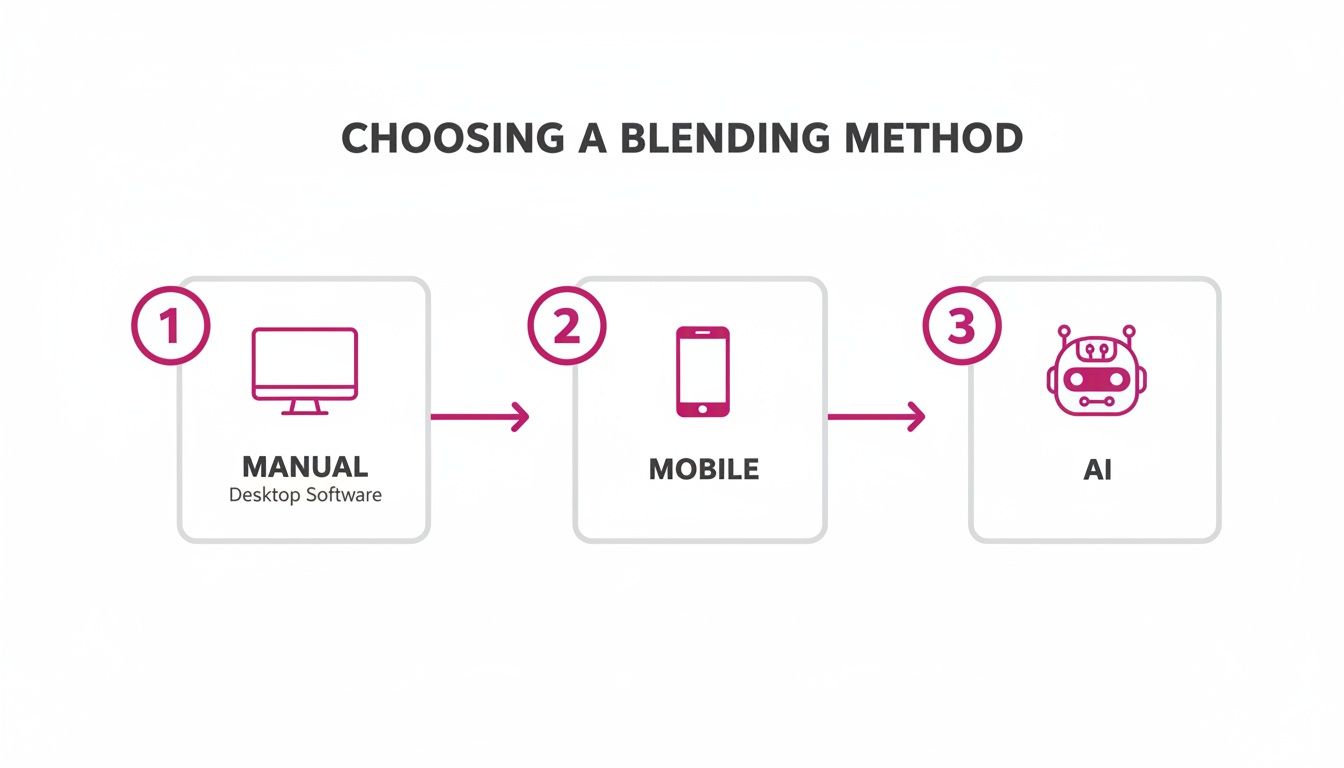
Choosing Your Photo Blending Method
With so many tools and techniques out there, it can be tough to know where to start. This quick table breaks down the main approaches to blending photos, helping you decide which method is the right fit for your project, skill level, and how much time you have.
| Method | Best For | Skill Level | Key Feature |
|---|---|---|---|
| Manual Editing (Photoshop/GIMP) | Precision control, artistic composites, professional results | Intermediate to Advanced | Layers, masks, and blend modes for detailed work |
| Mobile Apps & Web Tools | Quick edits, social media posts, simple collages | Beginner | User-friendly interfaces with filters and templates |
| Automated AI Tools | Bulk processing, background replacement, consistent edits | Beginner to Intermediate | One-click solutions and batch processing capabilities |
Ultimately, the best method depends on what you're trying to achieve. For a quick social media post, a mobile app is perfect. For a high-stakes commercial project, you'll want the fine-tuned control of a program like Photoshop. And for processing hundreds of images efficiently, AI tools are the clear winner.
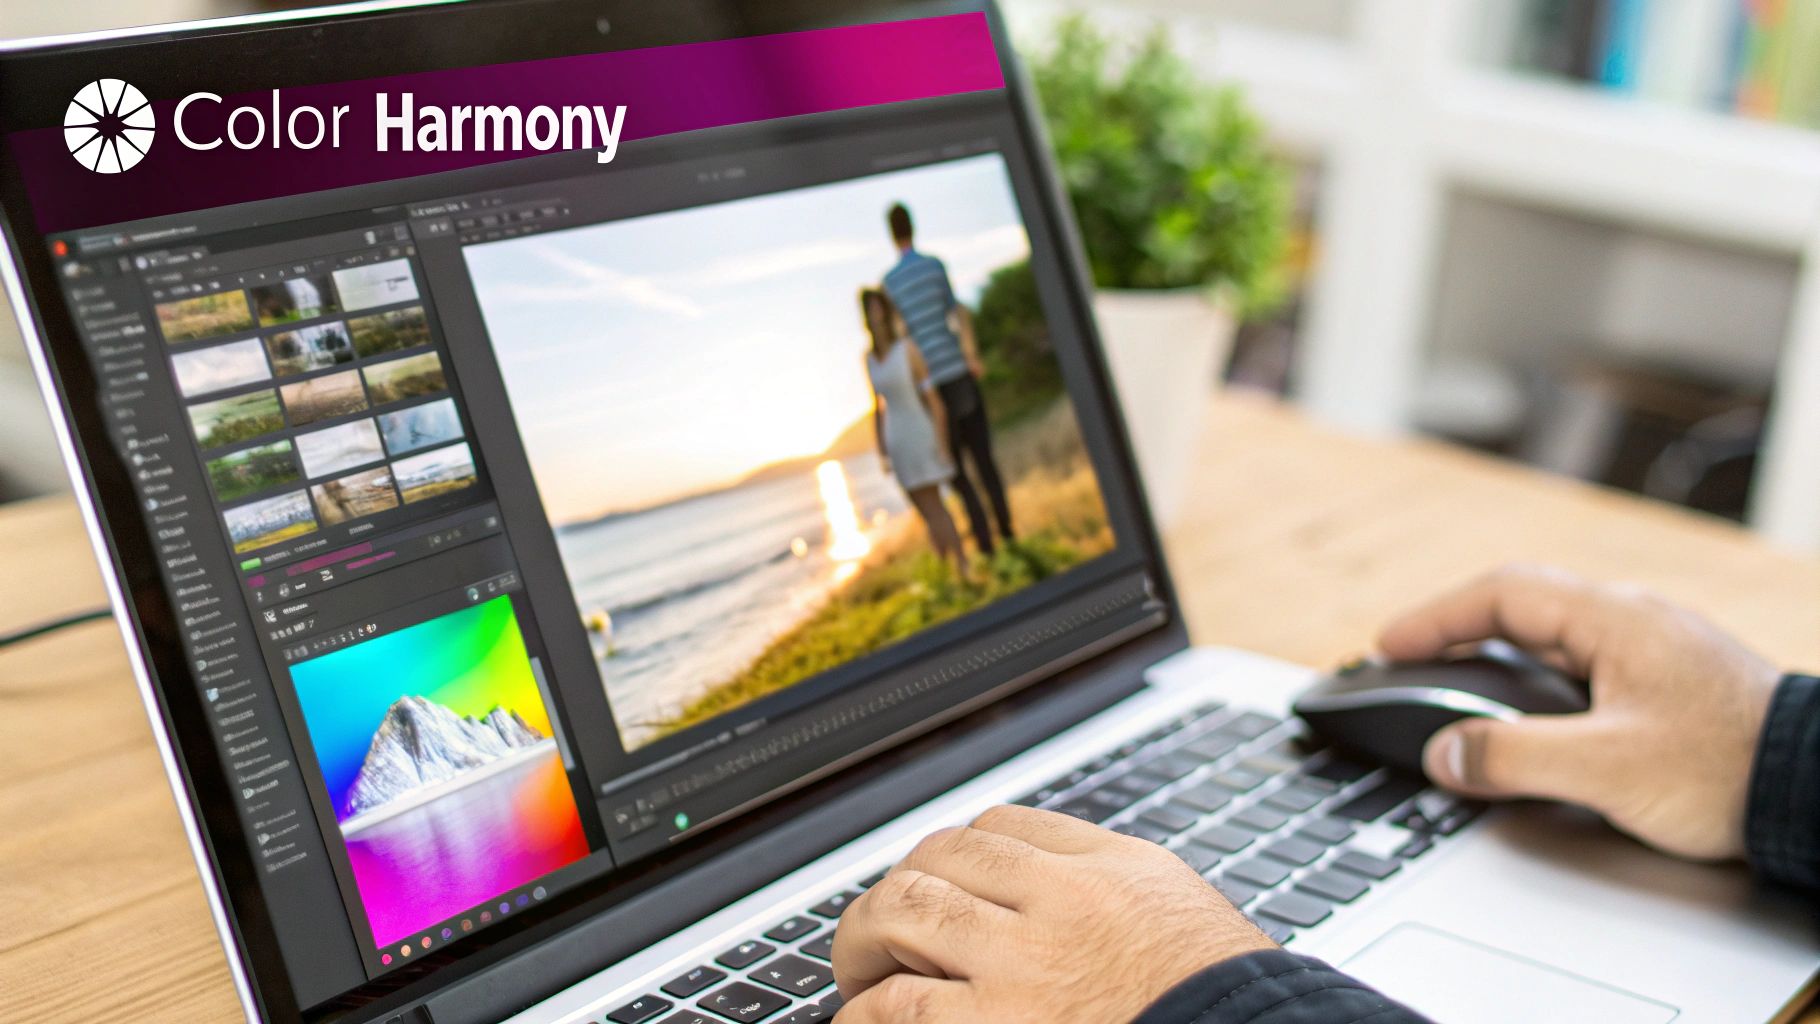
Getting Your Hands Dirty: Manual Blending in Photoshop and GIMP
For those of us who want absolute creative control, there's no substitute for rolling up our sleeves and blending images manually. Desktop software like Adobe Photoshop or its powerful free alternative, GIMP, offers a level of precision that one-click apps just can't touch. This is where you can craft truly seamless, artistic compositions. The whole process hinges on three core tools: layers, masks, and blend modes.
The first move in any manual blend is setting up your workspace. You'll want to open your main image first, then bring in the second image on a new layer right on top. This is a non-destructive workflow, and it’s non-negotiable for a reason—it keeps your original photos safe and sound, letting you experiment without fear of permanently messing things up.
This layer-based approach isn't just a good idea; it's the professional standard. In fact, over 70% of users kick off their blending projects by importing images into separate layers. And the key to it all, the Layer Mask, has been a cornerstone of this workflow since it was introduced way back in Photoshop 4.0 in 1996. You can find more details on how these editing techniques have evolved in reports like this one on the photo editing software market.
The Magic of Layer Masks
Think of a Layer Mask as a smart piece of digital tracing paper you lay over your top image. Where the mask is white, that top layer shows through completely. But where you paint with black, the top layer becomes transparent, revealing the image underneath. This is the secret to creating a gradual, believable transition between two photos.
Unlike the Eraser tool, which permanently destroys pixels (a cardinal sin in photo editing!), masks are completely reversible. Made a mistake? Just paint with white to bring that part of the image right back. This gives you unlimited flexibility to get the blend just right.
To add one, just select your top layer and click the "Add Layer Mask" icon at the bottom of the Layers panel—it looks like a rectangle with a circle inside. A white thumbnail will pop up next to your layer, ready for you to start painting.
Painting Your Transition with Brushes and Gradients
With your Layer Mask selected, it's time to start melting the two photos together. Your main tools for this are the Brush and the Gradient.
- The Brush Tool: Grab a soft-edged, round brush and set your foreground color to black. Now, you can start painting over the parts of the top image you want to hide. Here’s a little tip from experience: drop the brush's Opacity to around 20-30%. This lets you build up the blending effect slowly, giving you a much smoother, more controlled result.
- The Gradient Tool: This is your best friend for creating a clean, linear transition across a wide area—perfect for blending a new sky into a landscape, for instance. With the mask active, choose the Gradient tool, select the standard "Black to White" gradient, and just drag it across your image to create a seamless fade.
Pro Tip: Before you even touch a mask, try dropping the top layer’s opacity to about 50%. This lets you see both images at once, making it way easier to line them up and figure out exactly where the blend should happen.
Deciding which route to take—manual, mobile, or AI—really depends on what you're trying to achieve.
This flowchart breaks down the main paths. You can go for total control on the desktop, a quick fix on your phone, or let an AI do the heavy lifting. Each method has its place, but learning the manual approach gives you a rock-solid foundation for understanding them all.
Unlocking Creative Effects with Blend Modes
Once you've got a decent transition going with your mask, Blend Modes are where the real fun begins. You'll find them in a dropdown menu at the top of the Layers panel, which is usually set to "Normal" by default. These settings fundamentally change how the pixels on your top layer interact with the pixels on the layer below.
There are a ton of options, but you'll probably find yourself returning to a few key players over and over:
- Overlay: A classic. This mode combines multiply and screen, making light areas lighter and dark areas darker. It’s fantastic for adding textures, like laying a photo of cracked concrete over a portrait to give it a gritty, urban feel.
- Soft Light: Think of this as Overlay’s gentler sibling. It produces a much more subtle effect, making it perfect for adding a soft atmospheric glow or a slight color tint without overwhelming the original image.
- Screen: This mode is all about lightening things up. It's the go-to for blending things like stars, sparks, or lens flares into a darker background. Anything black on the top layer will become invisible.
- Multiply: The polar opposite of Screen, this mode darkens everything. It’s incredibly useful for creating realistic shadows or adding a sense of depth to your composition.
The best advice here is just to play around. Click through the different blend modes and see what they do. You’ll often find that the perfect combination of a well-painted mask and the right blend mode is what takes your image from looking okay to looking absolutely awesome.
Making the Blend Invisible: Color and Lighting Adjustments
A good blend isn't just about soft edges. The real magic happens when you make two completely different photos look like they were captured in the same place, at the same time. Once you’ve nailed your layer mask, this is the final, crucial step that sells the entire illusion.
This is where we harmonize the colors, lighting, and overall tone across both images. Think of it like a music producer mixing a song—every instrument needs to be balanced perfectly to create one cohesive track. The best part? We'll use Adjustment Layers, which are completely non-destructive, so your original photos stay safe and untouched.
Harmonizing Light and Color
First, play detective. Look closely at the light source in both of your photos. Are the shadows sharp and defined, or are they soft and diffused? Is the light warm and golden like a sunset, or is it cool and blue like an overcast morning? The more you understand the light, the better the final image will be. If you start with great source photos, your job is ten times easier, so mastering essential lighting techniques for photography is a massive advantage.
Once you know what you’re aiming for, these adjustment layers will be your best friends:
- Curves: This is your powerhouse tool for tweaking brightness and contrast. By adding points to the curve and making tiny adjustments, you can brighten highlights or deepen shadows with incredible precision. It’s far more powerful than the simple Brightness/Contrast slider.
- Color Balance: This is perfect for fixing color casts. If one of your photos has a yellow-ish tint and the other is more blue, use this tool to add a bit of blue to the warm photo's shadows or some yellow to its highlights until they match up.
A rookie mistake is to only adjust one of the layers. To make a composite truly believable, you need to match the individual layers first, and then apply a final, unifying color grade over the entire image. This one last step is what pulls everything together.
Adding a Unifying Color Grade
With the core lighting and colors matched, a final color grade acts like a fresh coat of paint, tying the whole composition together with a consistent mood. A Photo Filter adjustment layer can add a subtle warm or cool tint, while a Gradient Map can completely recolor your image based on its light and dark values for a more stylized, artistic look.
This level of control is where a professional workflow really shines. When you work with RAW files, you can leverage adjustment layers with 16-bit precision, which can boost the dynamic range by up to 300% compared to standard JPEGs. It's no wonder Photoshop holds a market share of roughly 33%; its powerful features like Content-Aware Fill are essential in 85% of complex blending projects.
This is especially critical for product shots, like placing an object into a completely new background. If you're diving into that world, our guide on AI product photography has some great pointers.
As a final touch, create a new, empty layer and use the Clone Stamp or Healing Brush tools to clean up any tiny imperfections or distracting elements. This is the last bit of polish that elevates your work from a simple combination to a professional-quality, believable image.
Blending Photos on the Go with Mobile Apps
You don’t always need a beast of a desktop machine and expensive software to blend photos. Some of the most creative composites I've seen were made in just a few minutes on a smartphone.
If you're a social media creator or just want impressive results without the headache, mobile apps are your best friend. They take the core concepts of layering and blending and pack them into simple, tap-friendly interfaces.
These apps do the heavy lifting for you, so you can focus on the creative side of things. Forget about painstakingly painting layer masks by hand. Tools like the "Double Exposure" feature found in many apps give you a similar effect with just a couple of taps.
Snapseed: A Pocket Powerhouse
Google’s Snapseed is a fantastic free option that packs a surprising punch. Its Double Exposure tool is incredibly intuitive, giving you plenty of control without being a total nightmare to figure out. It’s a go-to for a reason.
Here’s the quick and dirty way to use it:
- First, open your base image in Snapseed.
- Head over to Tools and select Double Exposure.
- Tap the "Add Image" icon (it looks like a photo with a plus sign) and pick your second photo to lay on top.
- You'll see icons for different blend modes at the bottom—just tap through them to see what looks cool.
- Use the Opacity slider to dial in the transparency of the top layer until it feels right.
This whole process lets you create those dreamy, artistic blends in under a minute. It's perfect for when you need a unique post for Instagram, and the simple controls make it fun to just mess around and see what you can come up with.
Bazaart: For More Creative Control
If you're craving a bit more design flexibility, an app like Bazaart is a killer choice. It's known for its collage and design features, but its photo blending tools are top-notch and feel much closer to a desktop experience with a proper layer-based approach.
What’s great about Bazaart is how easily you can remove backgrounds. This one feature opens up a completely new world for creative blending. You can lift a person or object from one photo and drop them seamlessly into an entirely new scene.
The real magic of mobile apps is speed and accessibility. They put powerful creative tools that once required expensive software and a steep learning curve right into everyone's pocket. It just goes to show you don't need a full studio setup to tell compelling visual stories.
Tips for Better Mobile Blends
Even with simple tools, a few ground rules will seriously level up your mobile edits. Keep these pointers in mind:
- Start with High-Contrast Images: For those classic double exposures, a photo with a clean silhouette or strong light and dark areas makes the best base. Think a portrait against a plain background.
- Think Texture vs. Subject: A classic and highly effective technique is blending a clear subject (like a person's profile) with a detailed texture (like a forest canopy, a city skyline, or even a galaxy).
- Don't Be Afraid to Experiment: The best part about mobile editing is how fast you can scrap an idea and try another. Seriously, cycle through every single blend mode and drag that opacity slider back and forth. Sometimes the most unexpected combination creates the most stunning result.
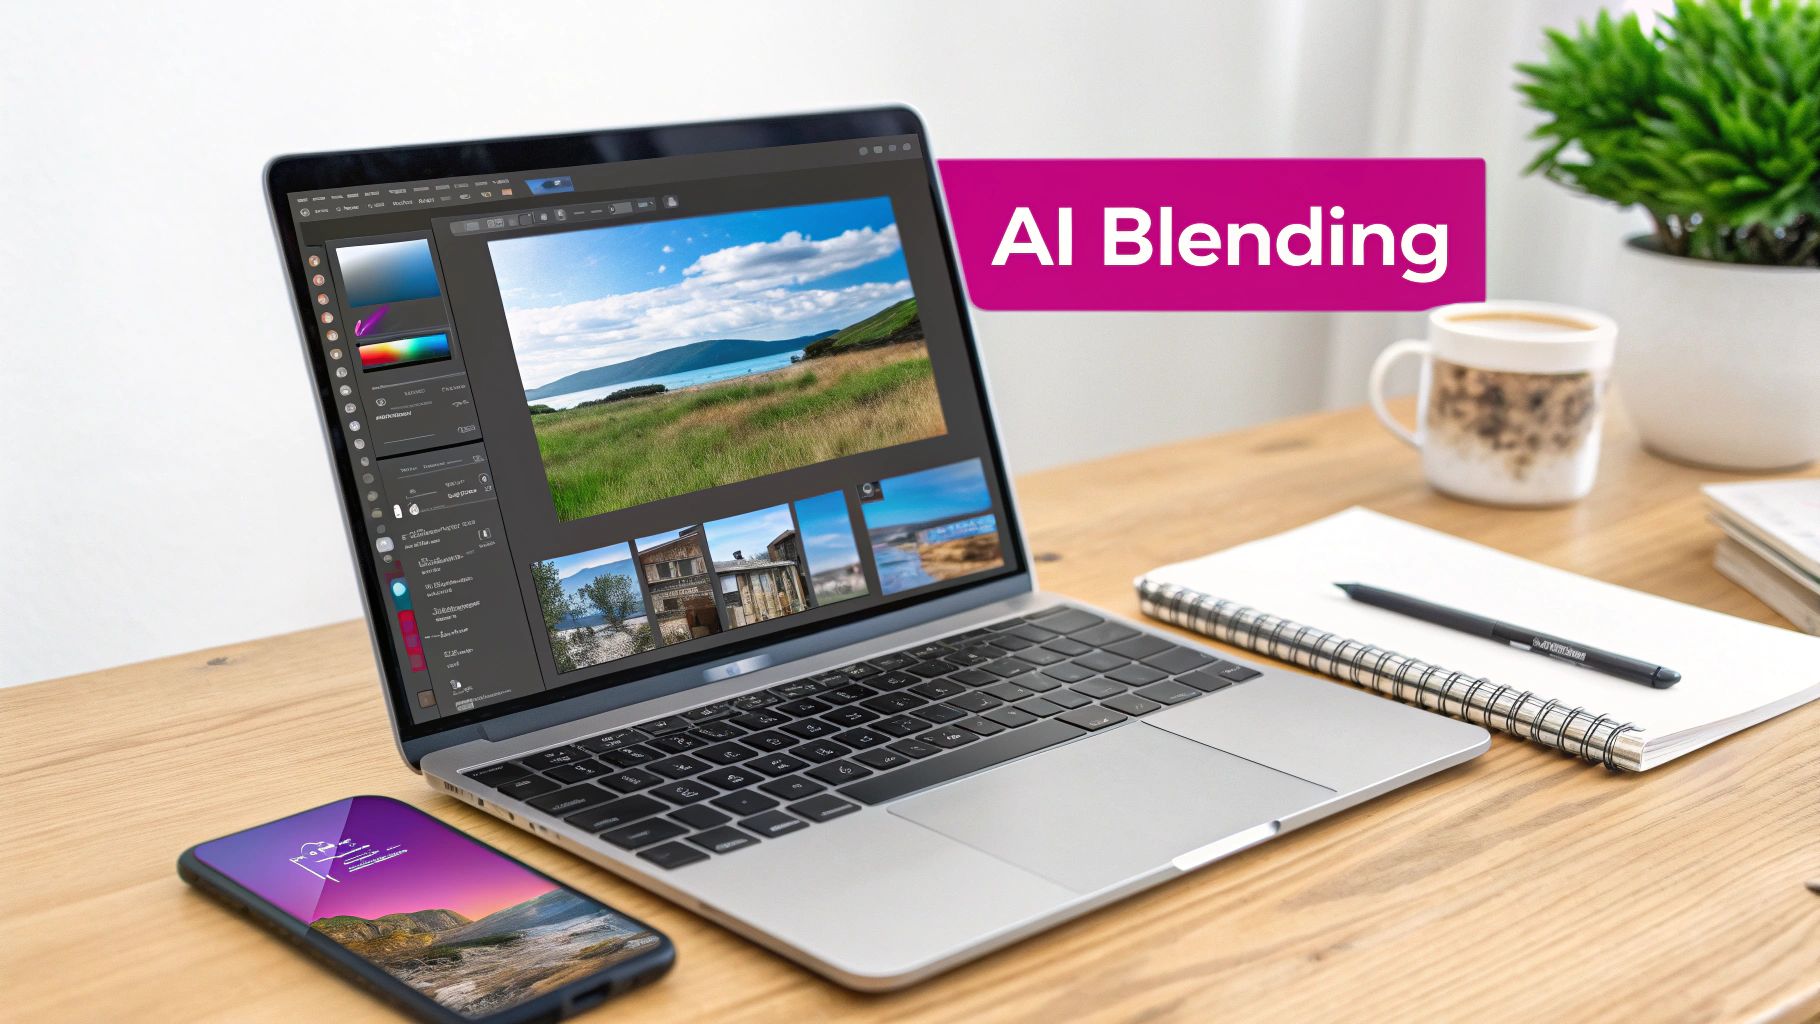
The Future Is Now: Automated Blending with AI Tools
The whole world of photo editing is shifting, and AI is in the driver's seat. If you're trying to figure out how to blend two photos, you'll find that AI tools are turning complex, multi-step headaches into simple one-click solutions.
This change is most obvious in features that were once famously difficult. I'm talking about tasks like perfectly masking a subject's hair or swapping out a boring sky. These jobs could take a skilled editor a good chunk of time, but now AI can nail them in seconds. The software just looks at the image, figures out what's what, and creates a seamless blend all on its own.
Beyond Single Edits to Bulk Creation
But the real game-changer here is bulk processing. Just imagine an e-commerce brand that needs to drop a new product into thousands of different lifestyle scenes for a targeted ad campaign. Doing that by hand would be a monumental task, demanding a huge team and an even bigger budget.
AI-powered platforms can now automate that entire workflow. For anyone looking to automate parts of the blending process or even generate brand-new elements, exploring AI image generators is a great next step.
The process is surprisingly straightforward:
- Upload a product image: The AI instantly strips the background and isolates your product.
- Define scenes with text: You can describe hundreds of scenarios—anything from a "modern kitchen countertop at sunrise" to a "rustic wooden table in a cafe."
- Generate blended images: The AI gets to work, creating photorealistic composites for every single scenario, perfectly matching the lighting and perspective.
If your business needs to churn out high volumes of visual content, you can see this tech in action and learn how to generate professional-quality images in bulk.
AI isn't here to replace creative professionals; it's becoming their most powerful assistant. By taking over the tedious, repetitive work, these tools free up editors to focus on high-level creative direction, strategy, and storytelling.
Ultimately, this shift completely redefines the role of an editor. Instead of spending hours on manual labor, you become more of a creative director, guiding the AI to produce the exact outcome you envision. This makes advanced photo blending accessible and efficient for everyone, from individual artists to large-scale marketing teams. A once-specialized skill is now open to all.
Your Photo Blending Questions Answered
Even with the best tools, you'll probably hit a few snags when you first start blending photos. Let's walk through some of the most common questions that come up once you move from theory to actually doing the work.
What Types of Photos Work Best for Blending?
The magic combination is usually a clear subject paired with a detailed texture. For a classic double exposure, you can't go wrong with a high-contrast silhouette as your base image and an intricate overlay—think a dense forest, a starry galaxy, or a sprawling cityscape. That strong contrast is what gives the final image its defined shape.
If you're merging two landscapes, try to find photos where the perspective and light source line up. If the sun is hitting from the left in one shot and the right in the other, the final blend will always feel a little… off. A good rule of thumb is to avoid mashing two "busy" photos together; you'll just end up with a cluttered, confusing mess.
How Do I Make the Edges Look Natural?
The secret to seamless edges is the Layer Mask. Once you've added one, just grab a soft-edged brush, drop its opacity down to around 20-30%, and start painting with black to gently fade the transition between your images. A light touch is everything here.
For really tricky edges like wisps of hair or fluffy fur, it’s worth diving into Photoshop's "Select and Mask" workspace. Its Refine Edge Brush tool was built specifically for creating clean, natural selections around complex shapes. Patience is key—build up the effect gradually for a look that feels professional.
The most believable blends come from mastering the subtle transition. Don't think of it as erasing one image, but rather as feathering it into the other. A soft brush at low opacity is almost always the right tool for the job.
Can I Blend More Than Two Photos?
Absolutely. The process is exactly the same, you just need to be a bit more organized. Just place each new image on its own separate layer in your editing software.
From there, you can apply a unique Layer Mask to each one. This gives you the freedom to tweak its blend mode and opacity individually, offering pinpoint control over how it interacts with all the layers sitting below it. It's a go-to technique for creating complex digital art and composites. Just do yourself a favor and name your layers clearly to keep things from getting chaotic.
What Are the Best Export Settings for a Blended Image?
Your export settings depend entirely on where the final image is headed. There's no single "best" setting, but these are the most common scenarios you'll run into:
- For Web and Social Media: Go with a JPEG at 72 DPI. In Photoshop, the old "Save for Web (Legacy)" feature is great because it lets you preview the quality vs. file size. Aim for a quality setting of 70-80 to strike a good balance.
- For Printing: You need to hang on to as much detail as possible. For top-notch prints, export your work as a TIFF file at 300 DPI, or a maximum-quality JPEG if you have to.
Ready to skip the manual adjustments and let AI do the heavy lifting? With Bulk Image Generation, you can create thousands of perfectly blended product photos and lifestyle scenes in seconds. Just describe your vision, and our AI will generate professional-quality composites, matching the lighting and perspective automatically.
Try Bulk Image Generation Today and Transform Your Visual Content Workflow