
How to Remove Blur from Photo A Practical Guide

Aarav Mehta • August 29, 2025
Learn how to remove blur from photo with AI tools and manual editing. Our guide offers practical techniques and pro tips to rescue your blurry images.
Got a blurry photo? Don't toss it just yet. The fastest fix is usually an AI-powered photo enhancer that automatically figures out what's wrong and sharpens it up for you. But if you're the type who likes to have more control, diving into manual software like Photoshop gives you access to some seriously advanced sharpening tools.
Ultimately, the right method comes down to why the photo is blurry in the first place. Was it a shaky hand, a missed focus point, or just a low-resolution file?
Your Quick Guide to Fixing Blurry Photos
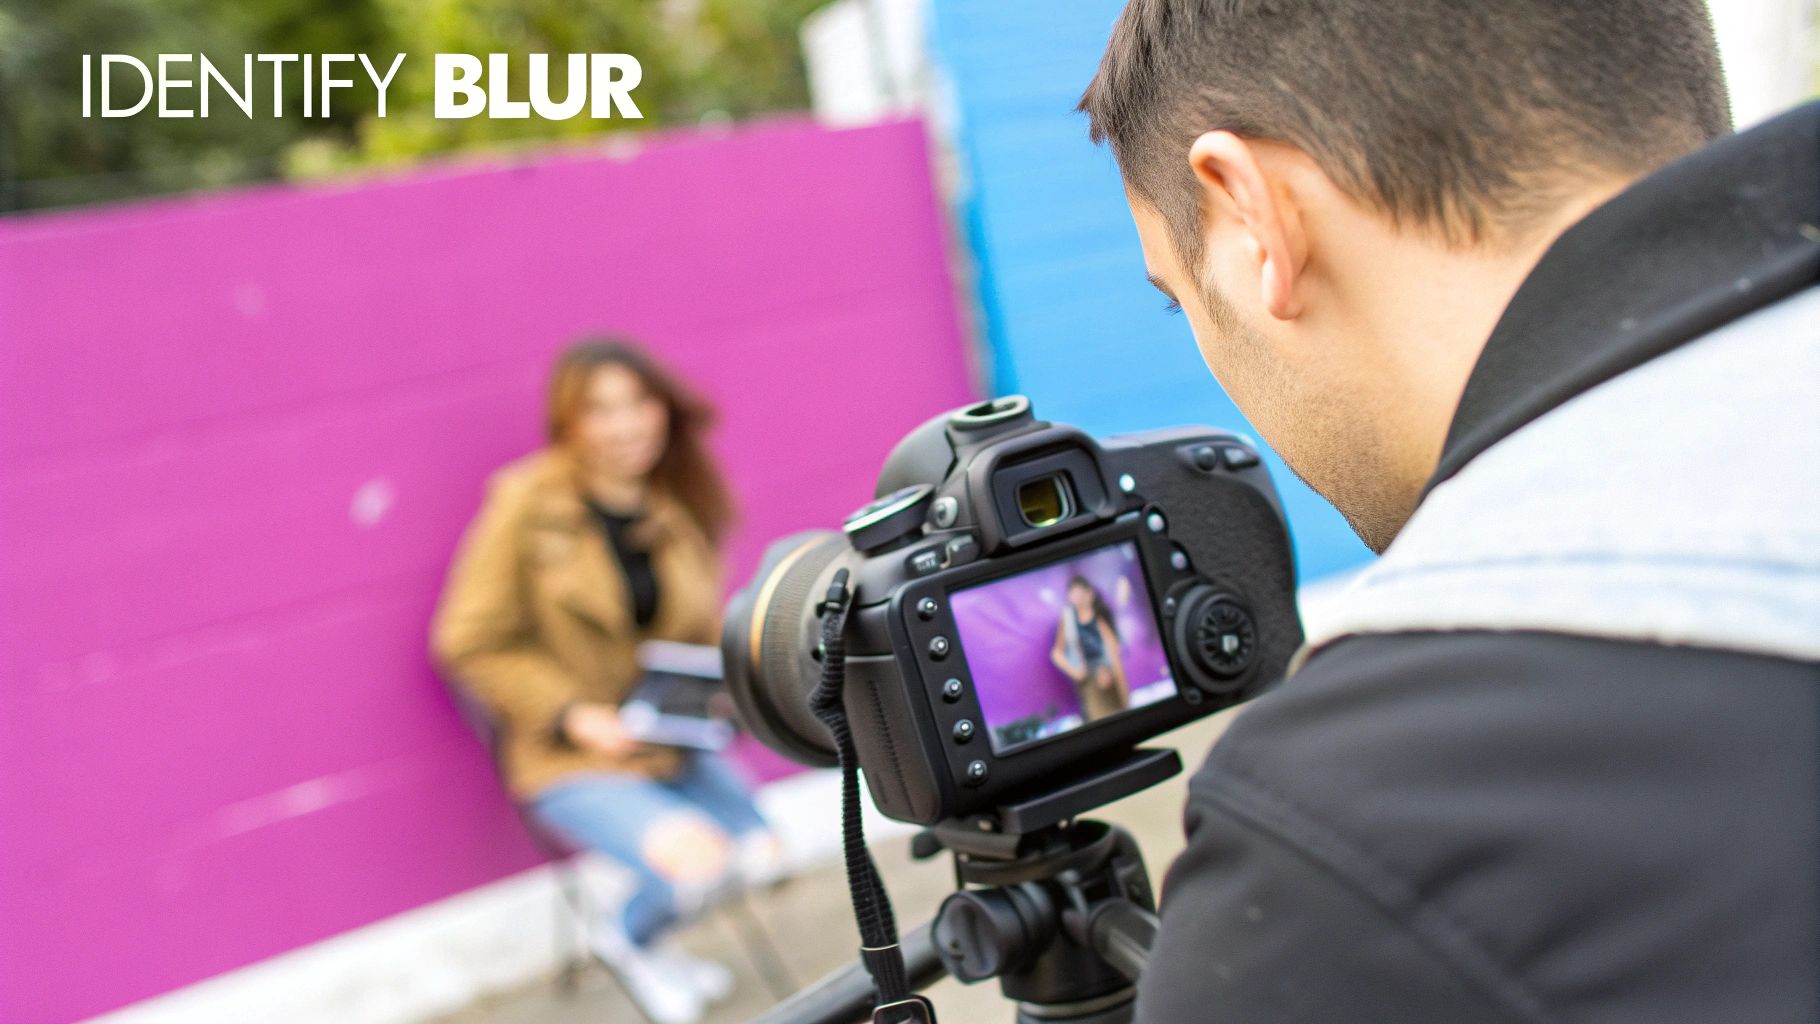
It’s a classic moment of frustration. You think you've captured a perfect, once-in-a-lifetime shot, but when you look closer, it's just a little bit soft. Maybe the subject moved, your hand wasn't quite steady, or the camera just decided to focus on the background instead. A blurry photo can feel like a missed opportunity.
But here's the good news: you don’t have to hit delete. Technology has come a long way, giving us some powerful options to bring those soft edges back into crisp focus.
Knowing how to deblur a photo is a game-changer for everyone, whether you're just snapping pics on your phone or you're a seasoned photographer. And thankfully, the tools available today range from simple one-click AI fixes to incredibly detailed manual adjustments.
Choosing Your Deblurring Path
The first move is picking the right tool for the job. Your options generally fall into two camps, and knowing the difference is the key to getting great results without pulling your hair out.
- AI-Powered Enhancers: These tools are all about speed and simplicity. You just upload your photo, and a smart algorithm gets to work, analyzing the blur and intelligently sharpening the details. They're perfect for quick fixes, especially if you're not a technical editing wizard.
- Manual Editing Software: Programs like Adobe Photoshop or GIMP put you in the driver's seat. Using filters like the Unsharp Mask or Smart Sharpen, you can meticulously fine-tune every aspect of the sharpening process. This route demands more know-how and a hands-on approach, but the control is unmatched.
A huge mistake people make is just cranking up a generic "sharpen" slider. The real secret to a natural-looking fix is to understand the type of blur you're dealing with. Motion blur from a speeding car needs a totally different touch than the soft focus on a portrait.
Common Blur Types and How to Fix Them
Before you start, it helps to play detective and figure out what actually went wrong with your photo. Different problems respond best to different solutions. This quick table breaks down the usual suspects and points you toward the most effective fix for each.
| Type of Blur | What It Looks Like | Best Solution |
|---|---|---|
| Motion Blur | Streaky or ghost-like effects, usually from a slow shutter speed or a fast-moving subject. | AI tools with motion deblur features are fantastic. Photoshop’s Smart Sharpen tool can also effectively reduce directional blur. |
| Focus Blur | The main subject is soft, but other parts of the image (like the background) might be sharp. Happens when the camera locks onto the wrong spot. | AI enhancers are great at reconstructing facial details or key subject elements. Manual sharpening can also help redefine edges. |
| Camera Shake | A general, all-over softness that isn't directional. It’s caused by holding the camera with an unsteady hand. | AI image stabilizers are designed for this. Photoshop also has a Shake Reduction filter that specifically targets this issue. |
| Low Resolution | The image looks pixelated or "blocky," especially when you zoom in. This often comes from using digital zoom or cropping too aggressively. | AI upscalers are your best bet here. They intelligently add new pixel data to increase detail and bring back clarity. |
Once you've identified the culprit, you're in a much better position to choose the right tool and bring that photo back to life.
Understanding Why Your Photos Are Blurry

Before you can fix a blurry photo, you have to play detective. Figuring out why it's blurry is the first and most crucial step. A blurry image isn't just one problem; it’s a symptom of several different issues, and each one needs its own unique fix.
Knowing the root cause doesn’t just help you pick the right editing tool. It also helps you stop making the same mistakes in the future. Once you can spot the difference between motion blur, a missed focus, or a soft lens, you're already on your way to taking sharper photos from the get-go.
The Problem of Motion and Movement
One of the most frequent culprits behind a blurry photo is motion blur. This happens when your subject zips by too fast or when the camera itself moves during the shot. The end result? That tell-tale streaky or ghostly effect trailing across the image.
Ever tried to snap a picture of your dog catching a frisbee? If your shutter speed is too slow, your pup ends up looking more like a furry comet. That's a classic case of subject motion blur.
On the flip side, you have camera shake. This happens when you’re shooting in low light without a tripod, and even the slightest tremor in your hands creates a general, all-over softness. Nothing in the frame looks truly sharp. A good rule of thumb to avoid this is to use a shutter speed that's at least the reciprocal of your lens's focal length (so, for a 50mm lens, shoot at 1/50s or faster).
Understanding the cause is more than just academic—it's practical. The algorithms used to fix directional motion blur are completely different from those designed to correct the random, multi-directional blur from camera shake.
When Your Focus Is Off Target
Have you ever taken a portrait where the background is perfectly crisp, but your friend's face is frustratingly soft? That’s focus blur. It happens when your camera's autofocus decides to lock onto the wrong thing in the scene. It’s a subtle but maddening error.
This is especially common when you’re shooting with a shallow depth of field, where only a very narrow sliver of the scene is in focus. Picture this: you're photographing a flower, but the camera focuses on a leaf just behind it. The flower itself will be soft. This isn't an issue of movement, but of precision.
Of course, sometimes the blur is intentional. A particular website theme or a designer might add a blur effect to an image on purpose, often to make text captions stand out against a busy background. This is usually handled with CSS and isn't a flaw in the original photo.
Limitations of Your Camera Gear
Hey, it's not always your fault. Sometimes, your own equipment is the bottleneck. Lens softness is a real thing, especially with the kit lenses that come with many cameras or when you're shooting at the widest aperture (the lowest f-stop number). Most lenses aren't at their sharpest wide open; stopping them down an f-stop or two can make a world of difference.
Also, low resolution is often mistaken for blur. If you crop a photo heavily or rely on digital zoom, you’re basically just stretching the pixels you have, making the image look blocky and soft. This isn't true blur, but a loss of data. While AI upscalers can perform miracles, there’s no replacement for getting your shot right in the camera.
The quest for sharpness is as old as photography itself. Early cameras with slow shutter speeds and basic lenses made blur a constant battle. The introduction of shutter speed control in 1880 was a huge leap forward, giving photographers the power to freeze motion. The digital tools we have today are just the latest chapter in a century-long effort to solve this problem.
With these concepts in mind, you're better equipped to not only fix blur but also to create sharper images from scratch. You can even explore new visual ideas with our free AI image prompt generator to help you generate stunningly clear images right from the start.
Effortless Blur Removal with AI Tools
AI-powered photo enhancers have completely changed the game for fixing blurry images. What used to demand serious technical skills and pricey software is now often just a one-click fix. This means anyone can rescue a cherished but slightly soft memory.
These tools aren't just slapping on a simple sharpening filter, either. They use sophisticated algorithms to figure out why your image is blurry in the first place—whether it's motion, a missed focus, or a shaky hand—and intelligently reconstruct the lost details.
It’s almost like having a digital detective for your photos. The AI analyzes the pixels, identifies the problem, and then works backward to predict what the original, sharp image should have looked like. This whole process turns a once-impossible task into something that takes just a few seconds.
The best part is how accessible this technology has become. Forget messing with confusing sliders for radius, threshold, or amount. Now, you just upload the image and let the AI do the heavy lifting. The results can feel like pure magic.
How AI Unblurring Actually Works
At its heart, an AI photo enhancer is powered by a trained neural network. This network has "seen" millions of pairs of blurry and sharp images, allowing it to learn the subtle patterns that separate a crisp photo from a soft one. When you upload your picture, it applies that massive library of knowledge to rebuild faces, sharpen text, and define edges with incredible precision.
This is fundamentally different from old-school sharpening, which just boosts the contrast along edges. AI goes much deeper. It actually generates new, contextually appropriate pixel information to fill in the gaps, effectively "unblurring" the photo instead of just masking the problem.
For example, if a portrait is slightly out of focus, the AI can recognize facial features like eyes and hair and reconstruct them with stunning clarity. It understands what those features are supposed to look like and adds the detail back in.
The image below gives you a sense of the fine-tuned adjustments that modern tools, both manual and AI-powered, can make to bring an image back into focus.
It’s a great visual for the level of control we have now, where automated processes and manual sliders can work together to restore an image's sharpness.
Choosing the Right AI Tool for Your Needs
Not all AI enhancers are built the same. Some are geared for quick, simple fixes, while others pack more specialized features. When you're picking a tool, think about what you're trying to achieve.
- For Casual Users: Simple web-based tools or mobile apps are perfect for fixing everyday snaps from your phone. They’re all about ease of use and deliver quick, impressive results for common problems.
- For Professionals: Photographers and designers might need something that offers batch processing. This feature is a massive time-saver, letting you fix an entire album of blurry event photos all at once.
- For Damaged Photos: Some AI tools specialize in restoring old, low-resolution, or severely degraded images. These models are trained to handle more extreme cases of blur and digital noise.
The real power of AI is its ability to handle complex scenarios automatically. A photo with both motion blur on a moving car and slight focus blur on the background can be corrected in a single pass—a task that would be incredibly challenging to do manually.
The impact of this technology has been huge. What was once a service only professional photographers could offer is now in everyone’s hands. The introduction of software like Adobe Photoshop in 1990 started this shift, but modern AI has put it into overdrive. A 2023 survey estimated that over 70% of smartphone users perform some kind of photo correction, including blur removal, showing just how essential these tools have become.
Getting the Best Results from AI Enhancers
While AI tools are largely automated, you can still influence the outcome. To get the clearest results, always start with the highest-quality version of your image. Compressing a photo over and over can introduce digital artifacts that even the smartest AI can't fix.
Also, don't be afraid to try a couple of different services. Each tool uses a unique algorithm, and one might produce a more natural-looking result for your specific photo than another. For those exploring different options, a deeper look into various AI Image Models can reveal powerful solutions for image enhancement. Experimentation is key to discovering which tool works best for your style and needs.
Taking Control with Manual Editing Software
AI tools are fantastic for speed, but sometimes you need the kind of precision that only comes from rolling up your sleeves and taking the wheel yourself. This is where manual editing software like Adobe Photoshop or the open-source powerhouse, GIMP, really comes into its own. For photographers who want to fine-tune every last pixel, these programs offer a depth of control that a one-click fix just can't match.
The real key to professional results is moving beyond a basic, one-size-fits-all sharpen filter. Instead of taking a sledgehammer to your image and sharpening everything equally, manual software lets you be a sculptor. You can carefully enhance the details that matter while leaving smooth areas untouched. It takes a bit more patience, sure, but the final image looks crisp and natural, not like it's screaming "I've been over-edited!"
This hands-on approach puts you back in the director's chair, making artistic decisions that align with your creative vision. For a deeper look at the software options out there, this Beginner's Guide to Wedding Photo Editing Software is a great resource, with principles that apply to any kind of photography.
Before we dive into the specific tools, it's worth understanding the core differences between the automated and manual approaches.
AI Unblur Tools vs Manual Software
This table breaks down the key differences between automated AI tools and traditional editing software for removing blur, helping you decide which is best for your workflow.
| Feature | AI-Powered Tools | Manual Editing Software |
|---|---|---|
| Speed & Efficiency | Extremely fast, often one-click solutions. Ideal for batch processing. | Slower, requires individual adjustments for each image. |
| Ease of Use | Very user-friendly, minimal learning curve. | Steeper learning curve, requires understanding of technical settings. |
| Control & Precision | Limited control over the sharpening process. The AI makes most decisions. | Full, granular control over every parameter (amount, radius, etc.). |
| Best For | Quickly fixing large batches of photos, social media content, users without technical skills. | Professional photographers, detailed-oriented work, achieving a specific artistic look. |
| Potential Downsides | Can sometimes produce unnatural-looking artifacts or over-sharpen images. | Time-consuming, and incorrect settings can easily ruin an image. |
While AI offers undeniable convenience, manual software provides the power and precision needed for high-stakes, professional work. Let's look at the tools you'll be using.
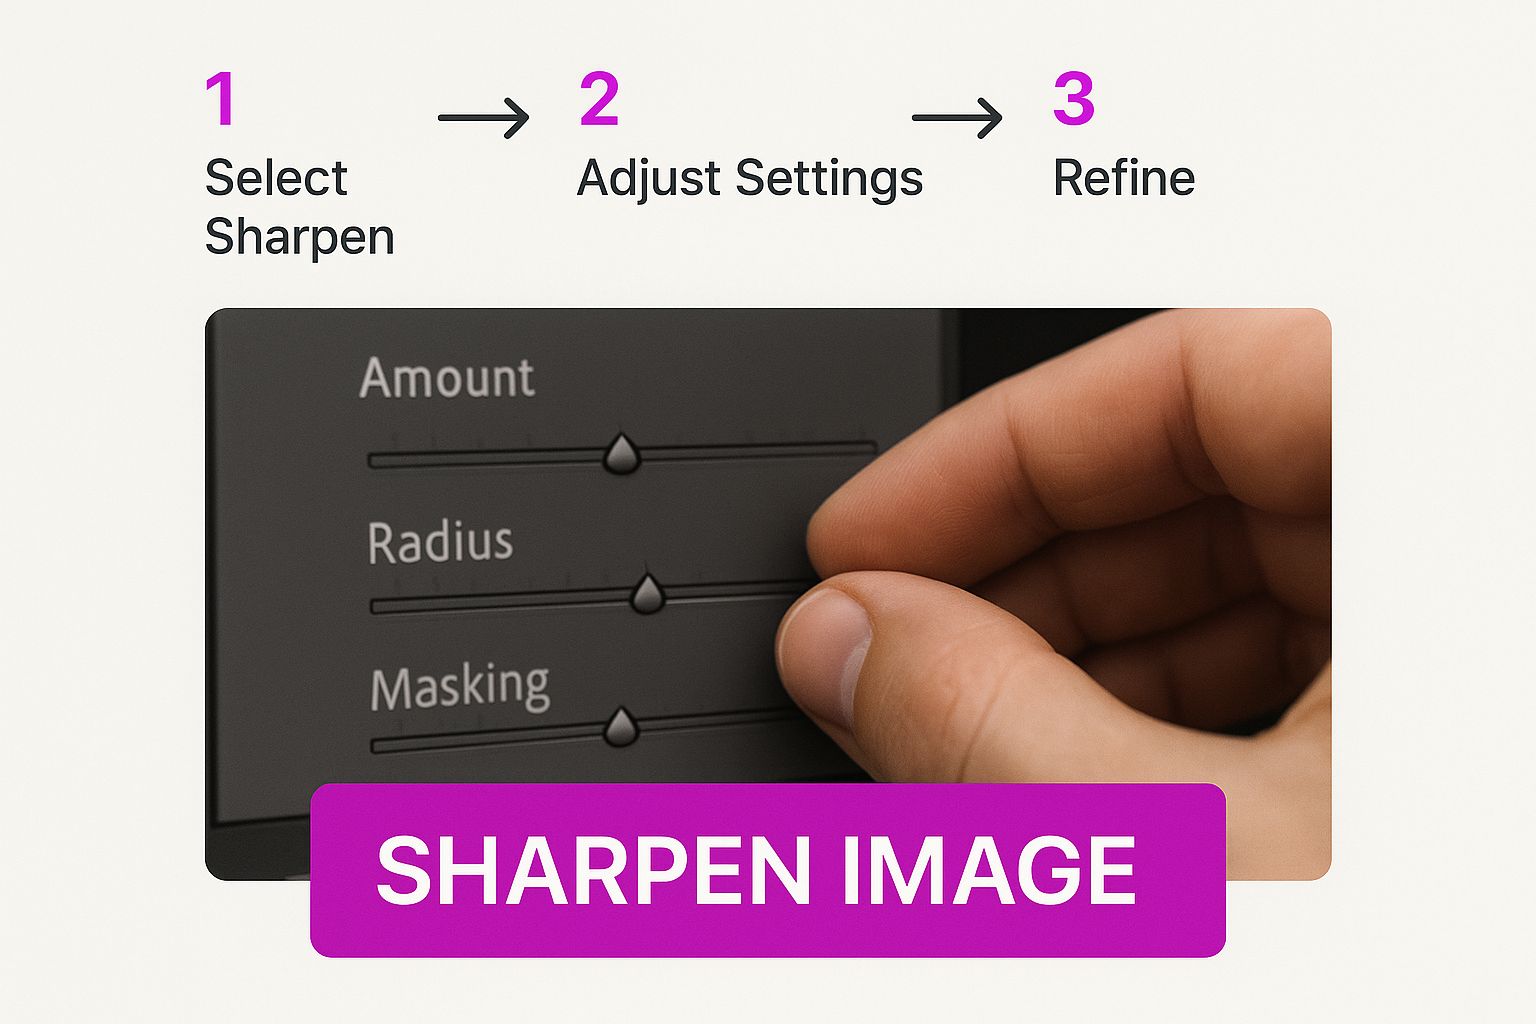
Mastering the Unsharp Mask Filter
One of the oldest and most powerful tools in the sharpening arsenal is the Unsharp Mask filter. The name sounds backward, I know, but it absolutely sharpens your photo. It works by identifying the edges in your image and punching up the contrast along those lines, creating the illusion of a much sharper, more defined picture.
To use it well, you have to find the sweet spot between its three main sliders:
- Amount: This is your intensity knob. It controls how much sharpening is applied. For a photo that's just a bit soft, a value between 100% and 150% is usually a good place to start.
- Radius: This slider determines the size of the area around the edges that gets sharpened. For images with fine, intricate details, you'll want a small radius—think 0.5 to 1.5 pixels—to keep the effect tight and precise.
- Threshold: This tells the filter what to ignore. It sets a limit on how different two pixels need to be for the software to see them as an "edge." A higher threshold is great for preventing the filter from sharpening unwanted noise or smooth areas like a clear sky.
The secret to the Unsharp Mask is to be subtle. You want to enhance detail, not create weird glowing halos around objects or amplify distracting grain. Always, always zoom in to 100% to get an accurate look at what your adjustments are doing.
Getting Specific with Smart Sharpen
For even more fine-grained control, Photoshop’s Smart Sharpen tool is a massive step up. It's the evolution of Unsharp Mask, giving you specialized algorithms built to fix specific types of blur. This is where you can actually tell the software why your photo is blurry, which leads to a much smarter correction.
Inside the Smart Sharpen tool, you'll find options to remove:
- Lens Blur: This is your go-to for images that are just generally soft, maybe from a lens that's not tack-sharp or a slightly missed focus point.
- Motion Blur: If your subject moved or you shot with a shutter speed that was a tad too slow, this setting can work wonders to counteract that directional streaking. You can even set the angle of the motion for a more accurate fix.
- Gaussian Blur: This is a general-purpose algorithm that behaves a lot like the Unsharp Mask, making it a solid choice for a wide range of soft images.
Smart Sharpen also gives you advanced controls for shadows and highlights. This is a huge deal because it lets you pull out detail in the mid-tones without blowing out your highlights or crushing your blacks. The result? A far more balanced and natural-looking image.
Using Layers and Masks for Selective Sharpening
Probably the biggest mistake I see people make is applying sharpening across the entire photograph. This is a recipe for disaster. It makes areas that are already in focus look crunchy and harsh, and it brings out noise in smooth areas like skies, backgrounds, or skin.
The professional approach is selective sharpening using layers and masks. It’s a game-changer.
Here's the workflow I use:
- First, always duplicate your image layer. This is non-destructive editing 101—your original photo stays safe and untouched underneath.
- Next, apply your sharpening filter (Unsharp Mask or Smart Sharpen) to the new layer. Go ahead and push it a little further than you think you should; we're going to dial it back.
- Now, add a layer mask to this sharpened layer and fill it with black. This hides the entire sharpening effect, and your image will look soft again.
- Finally, take a soft, white brush and simply paint over the areas you want to be sharp. Think eyes in a portrait, the texture of a brick wall, or the key details on your main subject.
This technique gives you ultimate control, letting you guide the viewer's eye by enhancing only the most important parts of the photo. Once your image is perfectly sharp, you might need to resize it for different uses. A bulk image resizer can be a huge time-saver here, helping you efficiently prep your final files for web or print.
Pro Tips for Achieving the Clearest Results
Knowing the tools is one thing; using them like a seasoned pro is another. Just cranking up a sharpening filter is the fastest way to get an over-edited, crunchy-looking photo. If you really want to master removing blur, you need to be more deliberate.
These are the insider tips I've picked up over the years that will help you skip the common mistakes and get results that look genuinely great, not just "fixed."
First things first, and this is non-negotiable: never, ever work on your original file. Always duplicate the image before you start tweaking anything. Think of this as your safety net. It frees you up to experiment and even mess up, knowing your original photo is always safe and untouched.
Layer and Stack Your Sharpening Effects
Instead of slamming your photo with one heavy-handed sharpening adjustment, a much better approach is to stack multiple, gentler layers. It’s a more nuanced technique that yields far more natural results.
For example, you could start with a subtle Unsharp Mask to improve the overall edge definition. Then, follow it up with a more targeted adjustment, like a Smart Sharpen layer, to specifically tackle a bit of motion blur.
This layering method prevents the harsh halos and digital artifacts you get from pushing a single filter too far. Each layer just adds a little bit to the final clarity. It's like a painter adding thin glazes of paint instead of one thick, gloppy coat—the final result is richer and more detailed.
A classic mistake is treating sharpening as a one-size-fits-all fix. The reality is, different parts of an image need different treatment. A person's eye should be tack-sharp, but their skin needs to remain soft and natural.
Recognizing the Signs of Over-Sharpening
Knowing when to stop is just as important as knowing where to start. Over-sharpening is a tell-tale rookie move that can honestly make your photo look worse than when it was blurry. You need to train your eye to spot the warning signs.
Be on the lookout for these red flags:
- Harsh Halos: These are the noticeable bright or dark lines that appear along high-contrast edges. They make objects look like they have a weird, unnatural outline or glow.
- Increased Noise: Sharpening amplifies everything, including the digital grain in your photo. Smooth areas like a clear sky or deep shadows can suddenly look gritty and textured.
- Unnatural Textures: Details start to look "crunchy" and artificial. Skin can take on a leathery appearance, and fabrics might look overly coarse and fake.
If you spot any of these, it's a clear signal to pull back on your settings. The goal is to enhance detail, not create a distracting, heavily processed image.
Know When a Photo Cannot Be Saved
As incredible as today's technology is, it's not magic. Sometimes, a photo is just too far gone to be salvaged. If an image is severely out of focus or suffers from extreme motion blur, no software in the world can realistically piece back together the information that was never captured.
Trying to "fix" a hopelessly blurry photo usually ends in a mess of digital artifacts that looks even worse than the original. Part of being a good editor is knowing the limits of your tools and recognizing when it's time to let an image go. A crystal-clear product shot, for example, is non-negotiable for e-commerce, and sometimes your best move is to create a new one from scratch.
For those moments, you can learn more about creating flawless images with our guide to AI product photography. It's much better to focus your energy on images that have a real shot at recovery.
Got Questions About Fixing Blurry Photos?
Diving into photo editing can bring up a lot of questions, especially when you're trying to rescue a blurry shot. It’s easy to hit a wall when you’re not sure why your photo is blurry or which tool is the right one for the job. Let’s clear up some of the most common questions I hear all the time.
"Can You Really Fix Any Blurry Photo?"
The short and honest answer? No.
Even the most advanced technology has its limits. If a photo is completely out of focus or suffers from extreme motion blur, there’s just not enough visual data left for an AI to work with. It's like trying to put together a puzzle with half the pieces missing.
While AI can pull off some incredible saves on shots with mild to moderate blur, it can't invent details that were never captured. Pushing a hopelessly blurry image too far usually leaves you with a weird, "over-processed" or painterly effect that looks even worse than the original.
Why Do My Photos Suddenly Look Blurry After I Upload Them?
This one is incredibly common. You have a perfectly sharp image on your computer, but the second you upload it to Instagram or your website, it looks soft and blurry. What gives?
The culprit is almost always image compression.
Platforms like Facebook and Instagram automatically shrink your images to save server space and make sure they load quickly for everyone. If your file is too big, their compression algorithms can be pretty aggressive, stripping away detail and leaving your photo looking fuzzy.
The best way to fight this is to take control. Before uploading, resize and export your images to meet the specific platform's recommended dimensions and file size. That way, you’re in charge of the quality, not them.
But sometimes, the blur isn't your fault at all. The website itself can be the problem. For instance, I've seen WordPress themes that automatically apply a CSS blur effect to images with captions, thinking it will make the text more readable. You end up with a sharp photo that’s suddenly blurry on your blog post. The fix here isn't in a photo editor but in the website's code, usually a quick CSS tweak to kill that unwanted filter.
The big takeaway here is that blur can sneak in at any point—from the moment you click the shutter to the final upload. Figuring out where the blur happened is the first step to choosing the right fix.
What's the Best Software to Unblur a Picture?
The "best" tool really boils down to what you need and how much time you have. There's no single magic wand, but you've got two great options depending on your goal.
- For pure speed and simplicity, you can't beat AI. AI-powered tools are fantastic for getting impressive results with a single click. They’re perfect for beginners or anyone who needs to fix photos in a hurry. They excel at correcting common problems like minor camera shake and soft focus.
- For ultimate precision and control, you need traditional editing software. Pros stick with tools like Adobe Photoshop or GIMP for a reason. Features like the Unsharp Mask and Smart Sharpen give you granular control over every tiny detail of the sharpening process, which is essential for nuanced, selective adjustments.
In my experience, the best workflow is often a mix of both. I might run an image through an AI tool for a quick-and-dirty fix and then pull it into Photoshop to fine-tune the details. The best advice is to experiment and find the tools that work for you and your photos.
Ready to see what AI can do for your blurry images? Bulk Image Generation has a whole suite of tools to enhance, resize, and perfect your photos in seconds. Stop letting blurry shots slow you down and check out a smarter editing workflow at https://bulkimagegeneration.com.