
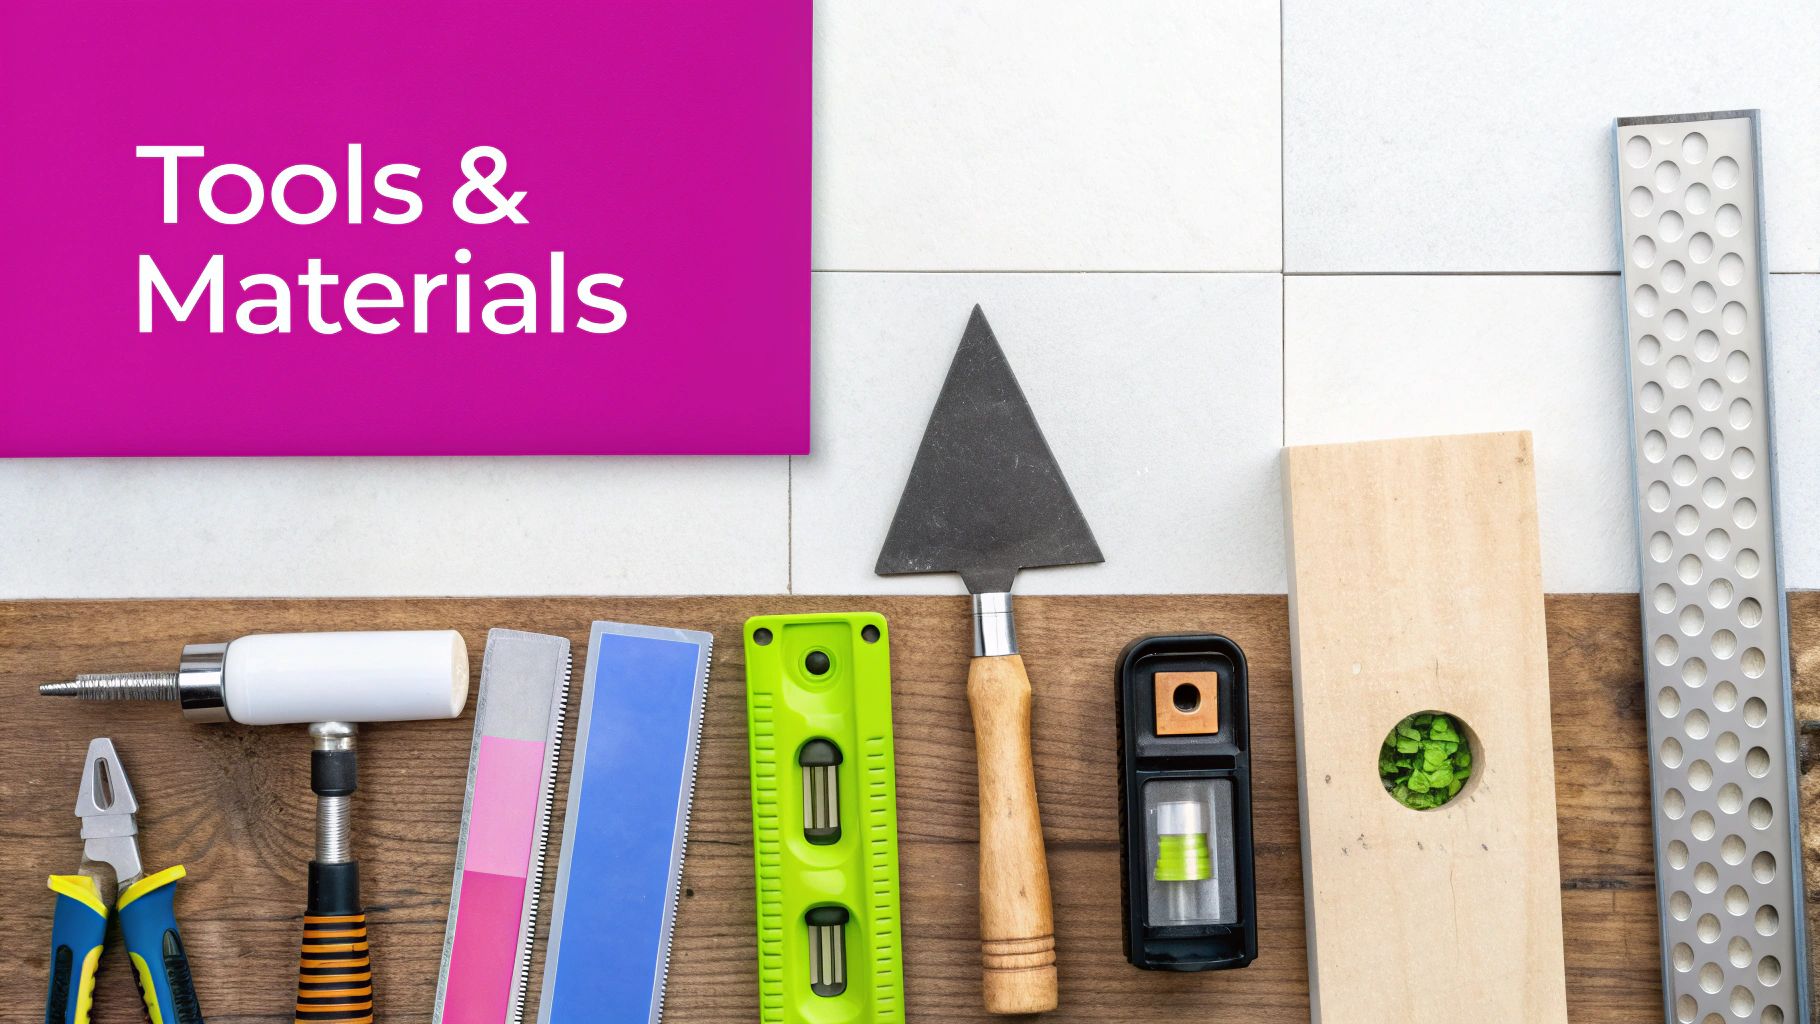
How to Create Tiles With AI Like a Pro

Aarav Mehta • August 26, 2025
Learn how to create tiles that are perfectly seamless using AI. This guide provides actionable steps for generating and refining tileable patterns.
Learning how to create seamless tiles is one of those design skills that’s part art, part technical wizardry. It’s the secret sauce behind everything from game textures and website backgrounds to custom fabric prints. The whole idea is to make an image where the edges—top, bottom, left, and right—match up so perfectly that it can repeat forever without any visible seams.
Now, with AI in the picture, you can dream up the creative concepts first and then let the tools handle the heavy lifting of turning them into flawless, repeating patterns.
A Whole New Ballgame for Seamless Pattern Design
Not too long ago, creating seamless tiles was a painstaking, manual job. It was reserved for seasoned designers who really knew their way around pattern theory and complex editing software. I remember spending hours slicing images, offsetting them, and then meticulously painting over the edges by hand just to hide the seams.
Today, AI has completely changed the game. What was once a highly technical, often frustrating task has become a much more creative and accessible workflow.
This isn't just a big deal for digital artists, either. Industries like ceramic tile manufacturing are seeing huge shifts, where digital printing allows for incredibly intricate and customized designs that were previously impossible. This has even opened up new markets for specialized products like anti-slip tiles for healthcare facilities.
AI Workflow vs Traditional Method
To really appreciate the shift, let's break down how the AI-powered approach stacks up against the old-school manual method. The differences in speed, complexity, and even creative freedom are pretty stark.
| Aspect | Traditional Method | AI-Powered Method |
|---|---|---|
| Speed | Slow and methodical. Can take hours for a single complex pattern. | Exceptionally fast. Initial concepts can be generated in seconds. |
| Complexity | High. Requires deep knowledge of software tools and pattern theory. | Low. AI handles the technical heavy lifting of making edges seamless. |
| Creative Process | Often limited by technical skill. The focus is on fixing seams. | Frees you to focus on the artistic vision and explore wild ideas. |
| Iteration | Tedious. Each change requires manually re-checking all seams. | Effortless. You can generate hundreds of variations quickly. |
| Skill Barrier | High. Reserved for experienced graphic designers. | Low. Accessible to beginners and non-designers. |
The takeaway is clear: while the traditional method required you to be a technician first and an artist second, the AI workflow flips that script entirely.
Why Seamless Patterns Are a Big Deal
So, why all the fuss? Seamless patterns are the foundation of visual consistency. Whether it's for a website background, a 3D model's texture, or a roll of wallpaper, a well-made tile creates an uninterrupted surface that just looks right. A broken, obvious pattern, on the other hand, is jarring and instantly cheapens the overall design.
Here’s why mastering this is so valuable for any modern creator:
- Infinite Scalability: A single tile can cover any surface area, no matter how big or small, without any distortion or weird breaks.
- Design Efficiency: Instead of designing a massive, one-of-a-kind background, you create one small, repeatable asset that does the job perfectly.
- Creative Versatility: Your patterns can be used for digital products like social media templates or physical goods like textiles and packaging.
The core principle is simple: when you place tiles side-by-side, the pattern should flow so naturally that you can't tell where one ends and the next begins.
By embracing an AI-assisted workflow, you get to spend more time on the fun part—developing your unique style and exploring complex ideas—while letting the tech handle the repetitive, technical work. This guide will walk you through exactly how to do it.
Crafting Prompts for Flawless Patterns
The secret to a great AI-generated tile isn't some complex technical trick—it's all in the prompt. A vague request gets you a generic, often unusable image. But a well-crafted prompt? That's your blueprint, telling the AI not just what to make, but how to make it fit together perfectly. This is where you shift from just using a tool to actually directing the creative process.
Your very first move should be to state your goal clearly. You absolutely have to include keywords like seamless, tileable, or repeating pattern right in your prompt. Think of these as direct commands that tell the AI engine to pay special attention to the edges so they align flawlessly. Skip this, and you’ll get a nice picture, but you won't get a functional pattern.
Detailing the Visuals
Once you've locked in the technical requirement for a repeating pattern, it's time for the fun part: the artistic direction. The best prompts layer details one by one, building a complete picture for the AI to work from. I like to think about it in a few key components:
- Subject: What’s the star of the show? Is it "delicate watercolor flowers," "geometric Moroccan shapes," or maybe "pixel art spaceships"? Be specific.
- Style: What vibe are you going for? You could ask for "Art Deco," "vintage botanical illustration," "photorealistic," or something clean like a "flat vector icon."
- Color Palette: How should the colors feel? Try descriptive terms like "pastel color palette," "monochromatic blue tones," or "warm earthy colors."
A prompt like "floral pattern" is just too broad and will give you something forgettable. A much stronger approach would be: "Seamless pattern of vintage floral chintz, delicate roses and peonies, pastel pink and sage green color palette, detailed illustration style." See the difference? Now the AI has specific, actionable instructions.
Prompt Examples for Different Tile Types
The level of detail in your prompt makes a world of difference. Let's look at a couple of distinct concepts to see how the prompt structure changes to nail a specific outcome.
Example 1: Organic Fabric Pattern
Seamless repeating pattern, whimsical forest animals, watercolor style, soft autumn color palette, for kids textile design
Example 2: Hard Surface Texture
Photorealistic gray marble texture, intricate dark veins, polished surface, seamless tile, 4K detail
The key takeaway here is that every word you use has a job. It either defines the technical function (seamless), the subject (marble), the style (photorealistic), or the mood (polished). Nothing is wasted.
If you ever feel stuck or need a creative spark, our free AI prompt generator is a great way to explore different combinations of styles and subjects. And to keep your ideas fresh for the long haul, an extensive ultimate drawing prompts list can be an incredible resource. Honestly, mastering prompt creation is the single most important skill you can develop for making amazing AI tiles.
From Generation to a Perfect Seamless Tile
Alright, you've done the hard work of crafting your prompts. Now for the fun part: bringing those ideas to life. But here's something you learn pretty quickly—your first AI-generated images are almost never the final product. Think of this stage less as a finish line and more as a creative jam session with your AI. You're going to generate a bunch of options and see what sticks.
Using a tool like our own image generator is perfect for this because you can churn out multiple candidates fast. Run your prompt, look at what comes back, and don't hesitate to go back and tweak it. Maybe that "vintage" vibe came on a little too strong, or the "pastel" colors just aren't popping. Small changes to your prompt can make a world of difference.
Once you have a few solid options on the screen, pick the one with the strongest composition and the best details. This image is your raw clay. Now, we get to the really critical part: post-editing, where the magic of creating a truly seamless tile happens.
Uncovering and Fixing the Seams
No matter how sophisticated the AI is, you always need to check if your image actually tiles perfectly. The quickest, most foolproof way to do this is with the "Offset" filter, which is a standard feature in programs like Adobe Photoshop or GIMP. What this filter does is split your image down the middle and wrap it around, forcing the edges into the center. Any awkward lines or mismatched elements will stick out like a sore thumb.
The process is a lot like preparing a physical tile—you have to measure, cut, and refine to get a perfect fit. This infographic breaks down those core manual steps, which have a surprisingly direct parallel in the digital world.
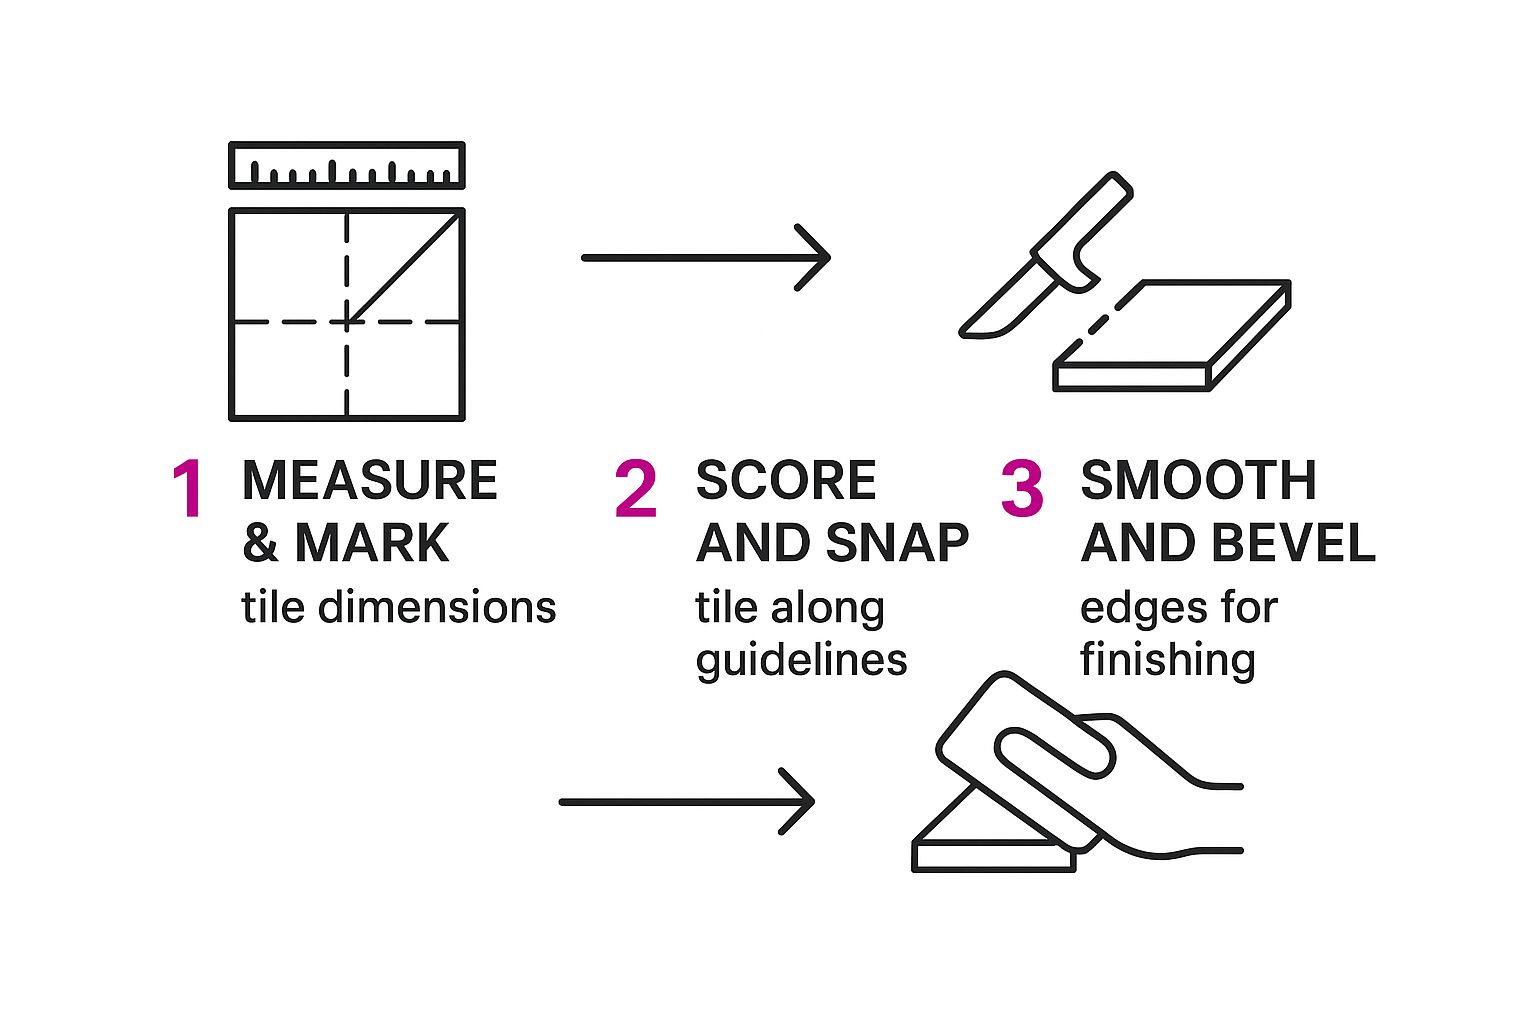
Just as you'd sand down the edges of a real tile, you're about to digitally blend the seams of your image so it repeats without a single flaw.
The Offset filter is your moment of truth. It's the single most effective way to diagnose exactly where your pattern breaks down before you spend time fixing it.
Once the seams are exposed, you've got a few go-to tools for making them disappear:
- Healing Brush: This tool is incredible for organic patterns like stone, wood, or leaves. It samples textures and colors from a nearby area to paint right over the imperfections, blending them naturally.
- Clone Stamp: When you need more precision, the clone stamp is your best friend. It copies pixels directly from one spot to another, making it perfect for duplicating specific details to cover up a seam.
- Content-Aware Fill: This is a seriously powerful feature. You just select the gap, and the software intelligently analyzes the surrounding area to fill it in. It often works like magic on more complex textures.
This hands-on editing is what elevates a great AI image into a professional, production-ready asset. If you're looking to dive deeper into the world of AI-driven visuals, this guide on how to generate images with AI for your WordPress site is packed with more great insights.
Scaling Your Tile Production Workflow
Making one perfect tile is a great start. But making a hundred? That's when you've built a real system. This is the leap from being a designer to becoming a production powerhouse. The real magic isn't just generating a single image faster; it's about creating entire collections of cohesive, high-quality patterns without having to multiply your effort each time.
This production mindset is more important than ever. Think about the massive demand for unique patterns, both digital and physical. The global ceramic tile market, for instance, is projected to hit $89.2 billion by 2025, thanks to a worldwide construction boom. While you might be focused on digital assets, that number points to a huge appetite for the exact kind of surface designs you can create. You can dive deeper into the numbers with this market forecast from wkinformation.com.
Automating Your Creative Process
The only way to scale effectively is to build a workflow you can repeat. Once you’ve dialed in a prompt that delivers a style you absolutely love, don’t just stop there. The next move is to generate variations automatically. This is what saves you countless hours of manual tweaking.
This is where batch generation comes in. Instead of running one prompt at a time, you can set up your tools to churn out an entire series based on that core idea you perfected. For example, imagine generating a floral pattern in ten different color palettes, or a whole set of wood textures with varying grain intensity, all from a single command.
Here’s a simple way to think about structuring it:
- Create a "Master Prompt": This is your champion—the tested and proven prompt that nails the core style and subject.
- Pinpoint Your Variables: Figure out what you want to change. It could be
color,season,material, or any other element. - Automate the Variations: Use a tool that can swap these variables automatically, creating dozens of unique tiles from your one foundational concept.
It’s all about working smarter. You do the heavy creative lifting once by perfecting the prompt. Then, you let automation handle the grunt work of generating the entire collection.
Keeping Quality High When You Scale Up
As you start producing more, quality control becomes non-negotiable. It's way too easy for small errors to slip through when you're dealing with hundreds of images. A batch editor is a lifesaver here. It lets you apply consistent post-processing edits—like sharpening, color correction, or even background removal—across your entire set in one go.
I recommend creating a simple quality control checklist for yourself. A crucial step is to always test a few random tiles from each batch for seamlessness using the Offset filter in your photo editor. A quick spot-check can save you the headache of finding a critical flaw after you’ve already delivered the assets. This kind of systematic approach ensures every single tile in your collection meets the same high standard you started with.
Taking Your Tiles From Good to Great
Once you've got the basics of a seamless grid down, it's time to make your patterns feel less... well, grid-like. A standard repeating tile gets the job done, but professional patterns have an organic flow that hides the repetition. The secret? Moving beyond a simple grid.
Think about using a half-drop or half-brick repeat. This just means shifting each new row of tiles down by half its height. It’s a surprisingly simple tweak that completely breaks up the rigid, blocky look, making the repeat far less obvious to the eye. Suddenly, your design flows across the surface instead of just stamping itself over and over.
Another pro move is learning to love negative space. It’s tempting to fill every pixel with detail, but crowded patterns can feel chaotic. By deliberately leaving some areas open, you give the design room to breathe. This breathing room isn't empty; it's an active part of your composition that guides the viewer's eye and makes your main design elements pop. You shift from just filling a canvas to artfully arranging it.
Put Your Pattern to the Test
A tile that looks perfect in your editor might fall apart in the real world. A technically seamless tile is one thing, but making sure it actually looks good when used is something else entirely. The only way to know for sure is to see it in action.
Don't just look for the seams—get a feel for how the pattern behaves on a larger surface.
- For 3D and Game Assets: Slap your texture onto a simple 3D model, like a sphere or cube. This is the fastest way to see how the pattern wraps around corners and reacts to different lighting.
- For Website Backgrounds: Pop your tile into a quick HTML file and set it as a repeating background. You'll immediately see if any elements repeat too obviously or if weird visual artifacts show up on a big screen.
- For Print or Fabrics: Drop the tile into a mockup template for wallpaper or a t-shirt. This is crucial for judging scale and visual impact before you even think about printing.
I can't stress this enough: a pattern that looks flawless as a small square can reveal subtle, jarring flaws when you see it tiled a hundred times. Always, always test your work.
This testing phase is where you'll catch the little things—an element that repeats too noticeably, colors that don't blend as well as you thought, or a scale that just feels off. It’s this hands-on troubleshooting that separates amateur work from polished, professional results. For more inspiration on creating visually stunning concepts, check out our guide to the 25 best prompt ideas for AI image generators.
And this isn't just about aesthetics; there's real money in high-quality design. The global ceramic tile market, for instance, is projected to hit an incredible $224.5 billion by 2035, largely driven by the demand for sophisticated and beautiful patterns. You can dig into the numbers in the full market report from futuremarketinsights.com.
Common Questions About AI Tile Creation
As you start making your own patterns with AI, you’ll probably run into some of the same questions everyone else does. Getting these sorted out early on can save you a ton of headaches and help you nail down a solid workflow. Let's dig into a few of the most common ones.
Right off the bat, people want to know which AI tool is the best for the job. While it's true some platforms like Midjourney have a handy --tile parameter built right in, you're definitely not stuck with just one option. Any quality image generator can give you a great starting point. From there, you just use the post-editing tricks we've covered to make it perfect.
Making Patterns Less Repetitive
Another big hurdle is avoiding that tell-tale, cookie-cutter look. How do you stop your seamless tiles from looking like a cheap, repeating stamp?
The trick is to create a pattern with a natural visual flow, where no single element is so loud that it keeps grabbing your attention.
- Go Big: A larger base tile, say 2048x2048 pixels, is going to look way less repetitive on a large surface than a small 512x512 one will.
- Mix Up the Repeats: Get into your editing software and play around with half-drop or half-brick repeats. This simple shift breaks up that rigid, boring grid.
The real goal is to make the pattern feel like one continuous, organic piece. A bigger and more complex base image is your best friend when you’re trying to avoid a design that looks lazy when scaled up.
Understanding Commercial Rights and Resolution
Finally, a couple of practical issues always come up: Can you actually sell what you make, and what resolution should you be using?
When it comes to commercial rights, it 100% depends on the terms of service of the AI platform you're using. Many of the paid plans give you full ownership, but you absolutely have to read the licensing agreement before you start selling anything.
As for resolution, it all comes down to what you're using it for. If it’s for a digital background on a website, 72 DPI is perfectly fine. But for anything that’s going to be printed—like fabric, wallpaper, or paper—you have to shoot for at least 300 DPI to get a sharp, professional finish. If you want to see how this fits into the bigger design picture, it's interesting to see how AI interior design software is changing the game.
Ready to stop creating one tile at a time and start producing entire collections? With Bulk Image Generation, you can generate hundreds of unique, high-quality patterns from a single idea in seconds. Skip the manual work and scale your creativity today.